Front Fuel Leak 1993 Ranger 4.0 XLT Auto


What kind of fittings are they? Could you find a shop that makes Hydraulic lines to make you a new one? I'm not sure how that works...

This is one of my questions.
 
I hate to beat this to death. In what I am currently reading with a Google search and Ai. The high pressure line under the hood area more than likely needs to be replaced as this line is usually the culprit, and it seems like it is. Dorman has a kit that has the female fuel rail connector on it that's factory, the other end doesn't have any connection that I have to make up myself with a fitting. Does this sound correct @Curious Hound ?
 
Last edited:
I hate to beat this to death, in what I am currently reading with a Google search and Ai. The high pressure line under the hood area more than likely needs to be replaced as this line is usually the culprit, and it seems like it is. Dorman has a kit that has the female fuel rail connector on it that's factory, the other end doesn't have any connection that I have to make up myself with a fitting. Does this sound correct @Curious Hound ?
That sounds very reasonable. And, as others have mentioned, if one is old enough to start leaking, the other is sure to follow soon.
 
Last edited:
That sounds very reasonable. And, as others have mentioned, if one is old enough to start leaking, the other is sure to follow soon.

No doubt, I will assess the rest of the fuel lines as well, appreciate all the input.
 
If I may, This is the recap of the Google search I had utilized, I'll be using this for my own notes. Maybe it can help another forum member or guest with a similiar issue as mine

Here’s a clean recap of what we worked through for your 1993 Ford Ranger 4.0 fuel line repair, pulling together the key points so you don’t have to dig back through everything:

🔧 Problem Overview
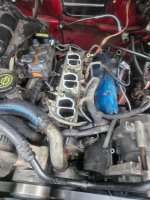
You had a fuel leak under the hood, near the power steering pump area
Noticed two lines running together near the front of the engine
Concern about how they connect and whether it’s one assembly or separate lines
🛢️ Fuel Line Layout (Front of Engine)
Your truck uses two main fuel lines:
Supply line (high pressure)
Runs from the fuel tank → fuel rail
This is the line that feeds the engine
Return line (low pressure)
Runs from the fuel rail → back to tank
👉 These lines run along the frame and come up into the engine bay, where they connect near the rail with quick-disconnect fittings.
⚠️ Key Insight (Important)
The section you’re seeing near the power steering pump is typically:
A connection point between hard line (frame) and flex line (engine)
It can look like one line splitting, but it's actually:
Two separate lines (supply + return) running side-by-side
🔥 Pressure Difference
Supply line = HIGH pressure (this is the dangerous one if leaking)
Return line = LOW pressure
So if you saw spraying or strong leakage → it’s almost certainly the supply line
📏 Length / Routing Insight
There isn’t one simple “total length” spec because:
It’s broken into sections (tank → frame → engine bay → rail)
The front section (engine bay) is relatively short and often serviced separately

🧰 Replacement Approach (What I Asked)
✔️ Yes — you can replace everything with new fittings, BUT:
Option A (Best / Cleanest)
Buy a pre-formed replacement line assembly
Often available from Dorman
Comes with correct quick-connect ends
Option B (Budget / DIY)
Cut out the bad section and use:
High-pressure fuel hose
Fuel injection clamps (NOT worm clamps)
Only do this on accessible sections, not near extreme heat

⚠️ Do NOT reuse old brittle quick-connect fittings—they’re a common failure point
🧩 Common Failure Spots on Your Truck
Plastic clips cracking
Rusted steel line transitions
O-rings inside quick connects
Flex line near engine.

👍 Recommended Next Step
If you want, I can:
�⁠Identify the exact Dorman part number for your engine bay lines
�⁠Show a clear labeled diagram of supply vs return
�⁠Walk you through step-by-step removal (no broken clips)
Just tell me 👍
 
Last edited:
Not every vehicle has pre-made kits.

Dorman does sell a tool and coil of tubing plus connectors to make your own factory style line.

I plumbed my green Ranger with one 20’ coil of -6AN, but mine has the return off the filter, not the rail. I used less than one coil to plumb my Choptop which does have a return off the rail, but I also spliced to a few feet of 3/8” aluminum for the long run of the return line and just used the PTFE on the ends. Since I’ve started using AN stuff for a bunch of plumbing on vehicles, I usually have a coil or so on hand at any given time and don’t worry about measuring exactly. Same as brake line, if I only have one whole coil and a piece on hand, I’m running low on stock.
 
@Curious Hound @lil_Blue_Ford Through some further research. I'm learning it's much easier to remove the intake plenum to access those two fuel lines on the fuel rail, your thoughts? Is that plenum hard to remove for an intermediate mechanic?
 
Not every vehicle has pre-made kits.

Dorman does sell a tool and coil of tubing plus connectors to make your own factory style line.

I plumbed my green Ranger with one 20’ coil of -6AN, but mine has the return off the filter, not the rail. I used less than one coil to plumb my Choptop which does have a return off the rail, but I also spliced to a few feet of 3/8” aluminum for the long run of the return line and just used the PTFE on the ends. Since I’ve started using AN stuff for a bunch of plumbing on vehicles, I usually have a coil or so on hand at any given time and don’t worry about measuring exactly. Same as brake line, if I only have one whole coil and a piece on hand, I’m running low on stock.
Did you remove your intake plenum to do this repair?
 
You're own personal evaluation of that would be best. Do what will give you the easiest access. The intake is in 2 pieces, an upper half and a lower half. Removing the upper portion will most likely make things easier. It's probably just 6 screws. You can leave the throttle body, TPS and IAC attached. Just detach the intake tube from the throttle body and unplug any wires. Cover the lower intake with rags or cardboard to prevent dirt, debris or parts like nuts and bolts from falling down into the lower portion. Take care not to damage the gasket, although that gasket should be inexpensive.
 
You're own personal evaluation of that would be best. Do what will give you the easiest access. The intake is in 2 pieces, an upper half and a lower half. Removing the upper portion will most likely make things easier. It's probably just 6 screws. You can leave the throttle body, TPS and IAC attached. Just detach the intake tube from the throttle body and unplug any wires. Cover the lower intake with rags or cardboard to prevent dirt, debris or parts like nuts and bolts from falling down into the lower portion. Take care not to damage the gasket, although that gasket should be inexpensive.

Thanks for that awesome info. Whew, I thought I had to disconnect/remove way more things, definitely caught a break finally. I was just looking at this video and it seemed like a job for an experienced mechanic. Regardless it's still a great video to watch to give me guidance when I do it.


Sponsored Ad

TRS Events & Gatherings

Latest posts

Featured Rangers

Want to see your truck here? Share your photos and details in the forum.

TRS Latest Video

Official TRS Merchandise

Follow TRS On Instagram

TRS Ranger Sponsors


Product Suggestions

Back
Top