• Welcome Visitor! Please take a few seconds and Register for our forum. Even if you don't want to post, you can still 'Like' and react to posts.

What did you do to your Ranger today? (Part Deux!)


Well it's all done. All the bolts are tight, the brakes are bled , with the axle at full drop the brake line just starts to pull tight, after some gentle massaging of the bracket, I ended up reusing some old u joints, on the drive line but the smaller one is a greasable spicer that has less than 5000 miles on it. And the large one was ok? I'm fully expecting some noticeable vibration from my questionable driveline manufacturing skills. I intend to find a single piece driveline at some point but I just needed to get here first. I also went ahead and fixed the wire running issue that was preventing me from plugging the coolant temp sensor and oil pressure sensors in the line to the oil level sensor is still broke but i looked its full :unsure: :rolleyes::ROFLMAO:
20230823_154726.jpg
20230823_154732.jpg
20230823_154735.jpg
20230823_154745.jpg
20230823_154755.jpg
20230823_154726.jpg
 
Last edited:
If your ears are so sensitive that you hear cigarette ashes falling into the ash tray, you might be a good candidate for being a sonar tech in the Navy.

Pull out the compartment, put a bolt in the ashtray, and drive down a dirt road. I promise you its the loudest noise you have ever heard. o_O

My hearing is toast already. I think I'll have to stick with radar.
 
Pull out the compartment, put a bolt in the ashtray, and drive down a dirt road. I promise you its the loudest noise you have ever heard. o_O

My hearing is toast already. I think I'll have to stick with radar.

I’m confused. Instead of re-designing the ashtray, why don’t you put the bolt in your pocket, or better, why don’t you screw it into wherever it belongs?
 
Well it's all done. All the bolts are tight, the brakes are bled , with the axle at full drop the brake line just starts to pull tight, after some gentle massaging of the bracket, I ended up reusing some old u joints, on the drive line but the smaller one is a greasable spicer that has less than 5000 miles on it. And the large one was ok? I'm fully expecting some noticeable vibration from my questionable driveline manufacturing skills. I intend to find a single piece driveline at some point but I just needed to get here first. I also went ahead and fixed the wire running issue that was preventing me from plugging the coolant temp sensor and oil pressure sensors in the line to the oil level sensor is still broke but i looked its full :unsure: :rolleyes::ROFLMAO:View attachment 97415View attachment 97416View attachment 97417View attachment 97418View attachment 97419View attachment 97415

WOW, that’s a lot of work! It looks great! And the satisfaction of a job well done, while removing all the flesh from your knuckles! Kudos

My one thought is don’t wait too long if that driveshaft is vibrating. That level of vibration can damage both your transmission and your rear end pretty quickly.

(and if you have a bolt in your ashtray, you’ll go deaf!)
 
WOW, that’s a lot of work! It looks great! And the satisfaction of a job well done, while removing all the flesh from your knuckles! Kudos

My one thought is don’t wait too long if that driveshaft is vibrating. That level of vibration can damage both your 8transmission and your rear end pretty quickly.

(and if you have a bolt in your ashtray, you’ll go deaf!)
Just got back from a test drive, definitely is some new vibration, but it's not as bad as I expected. definitely not gonna put many miles on it. Thing drives like a new beast, ls won't let it make a one tire fire anymore, probably would ride better if it didn't have mismatched partially deflated tires and worn out shocks, but all in good time, driveline first then new shocks, then tires. It'll give me time to get all 4 rims together and painted.sad to see that one bullet hole rim go to the junk yard but i tried everything i can that lug nut aint going anywhere without oxy acetylene,
and then i wouldnt trust it wouldnt ruin the aloy. Also I found out I need to rework the parking brake splice in the factory spot behind the door on the frame. It failed, line Is too long. Thinking of doing a hand brake swap the stock peddle
mechanism isnt perfect, and i dont want to replace another one.
20230823_194328.jpg
20230823_194332.jpg
 
Last edited:
I'll have to wait for my back to no longer be painful. Then maybe I can help you screw things up a bit.
I’ll be over your way this weekend for a concert, so rest up, lol.

BTW, if anyone else is able to come help for a day or couple days after this weekend and before the trail ride, please let me know. I’m getting really worried about getting this done in time…
 
Just got back from a test drive, definitely is some new vibration, but it's not as bad as I expected. definitely not gonna put many miles on it. Thing drives like a new beast, ls won't let it make a one tire fire anymore, probably would ride better if it didn't have mismatched partially deflated tires and worn out shocks, but all in good time, driveline first then new shocks, then tires. It'll give me time to get all 4 rims together and painted.sad to see that one bullet hole rim go to the junk yard but i tried everything i can that lug nut aint going anywhere without oxy acetylene,
and then i wouldnt trust it wouldnt ruin the aloy. Also I found out I need to rework the parking brake splice in the factory spot behind the door on the frame. It failed, line Is too long. Thinking of doing a hand brake swap the stock peddle
mechanism isnt perfect, and i dont want to replace another one. View attachment 97434View attachment 97435

Red stripe over black stripe? It is black? I don’t trust the color on my phone.
 
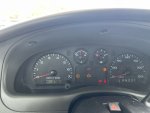
Broke my record for longest tank. 270.6 Miles @ 16.4 mpg. 11.2 hours runtime. Sucks it only lasted me 1 week lol.
 

Attachments

  • 8D880E09-6E87-4076-85E3-64CCC625B897.jpeg
    8D880E09-6E87-4076-85E3-64CCC625B897.jpeg
    109.4 KB · Views: 64
Well I've been on the struggle bus for a while now trying to figure out the drive line for the 89 8.8 swap hitting one roadblock after another. Not only that but I don't have a covered area to work and it's been raining off and on the last half of the day. Still haven't figured how to do this without drilling new holes in the axle flange. Guy at the driveline shop had my hopes up, the other day when I spoke to him but I got there and he says oh that won't work. So imagine sit here and drink this monster and maybe an idea will form. Otherwise I'll be under the truck with my giant hand held drill from the 80s I do believe this is the way its gonna goView attachment 97364

EDIT: I apparently hit the send button at the same time you sent me that the pin stripe was gray. My opinion remains the same, but every place I said, black, change it to the same color, gray. And to be specific, keep the silver/aluminum, the same as I stated. the color difference is enough to offset.

Also, it sounds like a lot of work, but it’s easier on the back, and it’s only a few minutes each day after the paint dries. You can usually do two or three things in one day.

A few more thoughts:

Is that a 92 truck? I googled Ford two-tone, 92 ranger images. To me, to just have the two-tone on the bottom like that I thought was unusual, but apparently it’s something they did in different colors with different two-tone pinstripes above it.

Question. The truck looks pretty nice. Are you planning on re-painting it? Or are you just going to keep it the way it is? Is it a work truck, or are you trying to make it super nice? Nothing wrong with a nice work truck.

Assuming it’s a work truck, but you still want it nice, without spending a lot of money, here are some thoughts

On the cross wheels, I would paint the outside ring Silver/Aluminum, from the edge of the tire all the way inside. I would paint the Cross white to start. I would paint the little surrounds around the trapezoid holes red. Then I would outline the red trapezoids with a thin, black painted stripe, semi gloss black. I’d paint the raised center hub around the center cap silver. I might put a black center pinstripe on that hump as well, but first I’d see how it looks. Chrome trim rings. And I would use the black center caps, and highlight the 4 Wheel Dr., actuator, red, and the outer edge red, and then I would mimic that on the back axle hubs. Something like this:

IMG_0120.jpeg

IMG_0117.jpeg


In my drawing, I have the wheel silver, but I would only paint the outside ring silver, and I would leave the cross white.

I would sand the wheel flares to get rid of any loose clearcoat or such. I joke about an 80 grit finish, but if you paint them with Rustoleum, it is so thick it takes into the grooves, and you won’t see the scratches from the sandpaper. I would put a fresh coat of red on those wheel flares.

Then, as stated before, I would put a fresh coat of semi gloss black on the rack. And then I would put a red pinstripe either down the center of the two horizontal sections, at least down the center of the lower one,

The reason I mention the two-tone is because I’m having a hard time visualizing how you would put a pin stripe down the side, or on the rain gutter, or anywhere that would look good. And then I had this thought.

You can buy 3M reflective pinstripe in different colors, including white. I would put a white reflective pinstripe in the groove along the body by the door handle from front to back. I would also put a whita reflective pinstripe on the outer edge of the black stripe on the bottom. Then I would cover the red pinstripe on the bottom with a reflective red pinstripe. It would look almost the same during the daytime, but it would really pop at night.

Finally, I might put a red pin stripe down the side of the truck at the level of the rearview mirror to run just over the explorer emblem on the back. Maybe red and white.

BTW, I would make the white pinstripe down the body line below the door handle a wide stripe like 1/2”

The 3M reflective pinstripe will crack if you try to bend it around corners and such. I would use a quarter inch or less, and maybe heated up with the heat gun a little bit wherever you’re going to go around the corner or curve. If it cracks, I just overlap it and then use a razor blade for anything that might be sticking out so it’s all the same with.

Finally, on painting these little details, it doesn’t have to be perfect. It has to be 10 footer quality. All of mine were done with artist brushes, and believe me, I’m no artist, with a rag damp with mineral spirits in the other hand.

IMG_0112.jpeg
IMG_0114.jpeg
IMG_0115.jpeg
IMG_0117.jpeg


When you’re done, unlike me, you might actually want to wash it once in a while…

EDIT EDIT: and if you don’t like it, you can just paint over it after a couple days. If you don’t like it immediately, as you do it, you can wipe it off with mineral spirits.

And final thing to clarify, I’m talking about all quarts of “brush on” paint, no rattle cans. Rattle cans are for making posters. The brush on stuff wears like iron.
 
Last edited:
EDIT: I apparently hit the send button at the same time you sent me that the pin stripe was gray. My opinion remains the same, but every place I said, black, change it to the same color, gray. And to be specific, keep the silver/aluminum, the same as I stated. the color difference is enough to offset.

Also, it sounds like a lot of work, but it’s easier on the back, and it’s only a few minutes each day after the paint dries. You can usually do two or three things in one day.

A few more thoughts:

Is that a 92 truck? I googled Ford two-tone, 92 ranger images. To me, to just have the two-tone on the bottom like that I thought was unusual, but apparently it’s something they did in different colors with different two-tone pinstripes above it.

Question. The truck looks pretty nice. Are you planning on re-painting it? Or are you just going to keep it the way it is? Is it a work truck, or are you trying to make it super nice? Nothing wrong with a nice work truck.

Assuming it’s a work truck, but you still want it nice, without spending a lot of money, here are some thoughts

On the cross wheels, I would paint the outside ring Silver/Aluminum, from the edge of the tire all the way inside. I would paint the Cross white to start. I would paint the little surrounds around the trapezoid holes red. Then I would outline the red trapezoids with a thin, black painted stripe, semi gloss black. I’d paint the raised center hub around the center cap silver. I might put a black center pinstripe on that hump as well, but first I’d see how it looks. Chrome trim rings. And I would use the black center caps, and highlight the 4 Wheel Dr., actuator, red, and the outer edge red, and then I would mimic that on the back axle hubs. Something like this:

View attachment 97455
View attachment 97465

In my drawing, I have the wheel silver, but I would only paint the outside ring silver, and I would leave the cross white.

I would sand the wheel flares to get rid of any loose clearcoat or such. I joke about an 80 grit finish, but if you paint them with Rustoleum, it is so thick it takes into the grooves, and you won’t see the scratches from the sandpaper. I would put a fresh coat of red on those wheel flares.

Then, as stated before, I would put a fresh coat of semi gloss black on the rack. And then I would put a red pinstripe either down the center of the two horizontal sections, at least down the center of the lower one,

The reason I mention the two-tone is because I’m having a hard time visualizing how you would put a pin stripe down the side, or on the rain gutter, or anywhere that would look good. And then I had this thought.

You can buy 3M reflective pinstripe in different colors, including white. I would put a white reflective pinstripe in the groove along the body by the door handle from front to back. I would also put a whita reflective pinstripe on the outer edge of the black stripe on the bottom. Then I would cover the red pinstripe on the bottom with a reflective red pinstripe. It would look almost the same during the daytime, but it would really pop at night.

Finally, I might put a red pin stripe down the side of the truck at the level of the rearview mirror to run just over the explorer emblem on the back. Maybe red and white.

BTW, I would make the white pinstripe down the body line below the door handle a wide stripe like 1/2”

The 3M reflective pinstripe will crack if you try to bend it around corners and such. I would use a quarter inch or less, and maybe heated up with the heat gun a little bit wherever you’re going to go around the corner or curve. If it cracks, I just overlap it and then use a razor blade for anything that might be sticking out so it’s all the same with.

Finally, on painting these little details, it doesn’t have to be perfect. It has to be 10 footer quality. All of mine were done with artist brushes, and believe me, I’m no artist, with a rag damp with mineral spirits in the other hand.

View attachment 97462View attachment 97463View attachment 97464View attachment 97465

When you’re done, unlike me, you might actually want to wash it once in a while…

EDIT EDIT: and if you don’t like it, you can just paint over it after a couple days. If you don’t like it immediately, as you do it, you can wipe it off with mineral spirits.

And final thing to clarify, I’m talking about all quarts of “brush on” paint, no rattle cans. Rattle cans are for making posters. The brush on stuff wears like iron.

I like the cob webs on the wheels. That's a nice touch!
 
I like the cob webs on the wheels. That's a nice touch!

I don’t know how they stay on there even when I drive in the rain. I’m still playing catch-up from the 40th.
 
Broke my record for longest tank. 270.6 Miles @ 16.4 mpg. 11.2 hours runtime. Sucks it only lasted me 1 week lol.
I think my '97 Ranger has a 21 gallon tank in it, I thought most extended cabs had somewhere around 20 gallon... On my 2.3L I've gone as far as 450 miles on a tank but now that it's getting more consistently close to 25mpg I could push it further... but at $4.60ish for regular here it's harder to stomach the cost so I fill up around 16-18 gallons...
 
I think my '97 Ranger has a 21 gallon tank in it, I thought most extended cabs had somewhere around 20 gallon... On my 2.3L I've gone as far as 450 miles on a tank but now that it's getting more consistently close to 25mpg I could push it further... but at $4.60ish for regular here it's harder to stomach the cost so I fill up around 16-18 gallons...
I have a 2010 4.0 SOHC Extd cab, it holds 17 gallons. I have been paying about 3.60$ recently, today was 61$ in total. Normally only get 180 or 190 to a tank, but I started paying attention to how I drive lol.
 

Sponsored Ad


Sponsored Ad

Special Events

Events TRS Was At This Year

TRS Events

Member & Vendor Upgrades

Become a Supporting Member:

Or a Supporting Vendor:

Recently Featured

Want to see your truck here? Share your photos and details in the forum.

TRS Latest Video

TRS Merchandise

Follow TRS On Instagram

TRS Sponsors


Sponsored Ad


Sponsored Ad


Amazon Deals

Sponsored Ad

Back
Top