
By Todd~Rod
This is a “How To” on replacing the leaf spring brackets on the Ford Rangers. After having my mechanic replace the rusty rear leaf spring brackets and shackles, I took it upon myself to replace the front leaf spring brackets after one had rusted and broke on me.
First thing of course is to purchase the replacement brackets. I got mine from the for dealer for around $23.00 each. Though they are a cheap part, they can be a pain to install.
Now that you bought the brackets you need to go and buy the bolts, washers, and nuts to mount them to the frame of your truck. I got my hardware from the local hardware store for around 10 bucks.
You’ll need:
- (8) 3/8″ x 2″ bolts
- (16) 3/8″ washers
- (8) 3/8″ lock washers
I also purchased (2) 1/2″ x 4″ bolts to replace the bolts that hold the leaf spring in the hanger. You only need to get (2) 1/2″ washers for these bolts. I used the existing locking nuts. If yours are rusted or bad you may want to replace them.
Editors Note: Make sure you use Grade 8 hardware. I also recommend using 1/2″ bolts instead of 3/8″ bolts. You may also want to try 9/16″x4″ grade 8 bolts for your leafs.
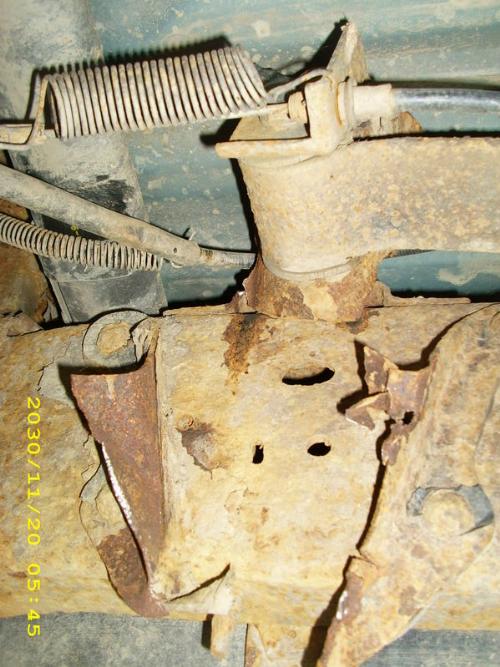
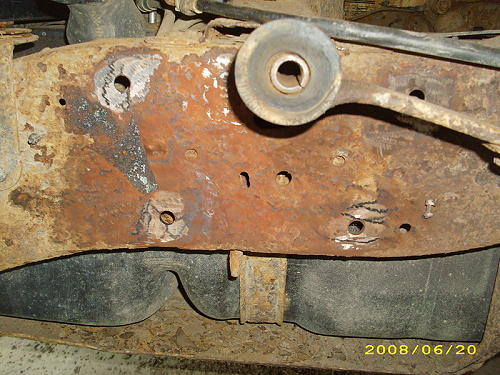
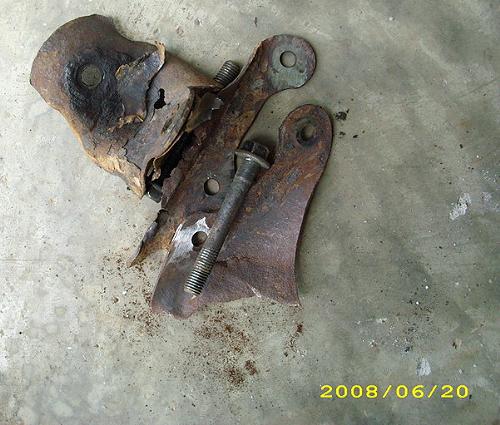
Broken Bracket:

Now I am going to go through the steps in order to replacing the brackets. You will need someone to help you with a few things, so make sure you make arrangements to have someone help you.
You will need to get a GOOD Torx T-55 socket to take out the 6 bolts that attach the bed to the frame.
I say GOOD T-55 socket because I used a cheap 3/8 T-55 socket and ended up twisting the hell out of it loosening the very tight and rusty bolts. You’ll have to break them loose with a breaker bar or a ratchet, but they should come out fairly easy with an impact wrench. An impact wrench will be your best friend on this project.

Once you get the bolts out of the bed, determine if you are going to reuse the bed bolts or purchase new ones. I priced them at ford garage for $10 something a piece. You may need to replace the clips that the bolts thread into. They slip over the frame rail to keep from spinning when you turn the bolt. You may break one if it’s rusty. I didn’t price those because I could reuse those and my bolts. After the bed is unbolted, you will need to disconnect your taillights. There are four screws on each light holding them to the bed. Take the screw out, unplug the bulbs and feed the wires down through the bed.
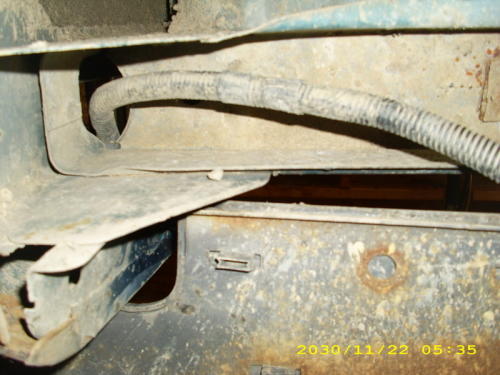
After the wires are dropped down though the bed, you need to pull the wire loom from the bed where they are attached, making sure you get all the plastic push clips out. You may have to lift the bed up to get the ones right above the rear bumper. They are a pain to get to.
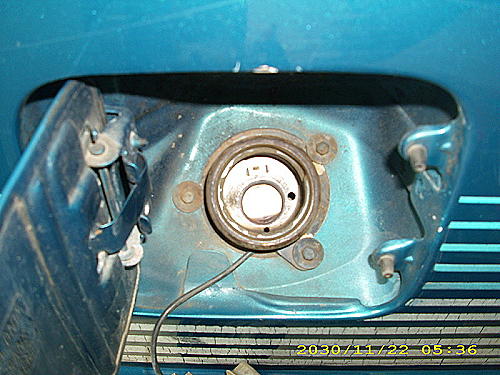
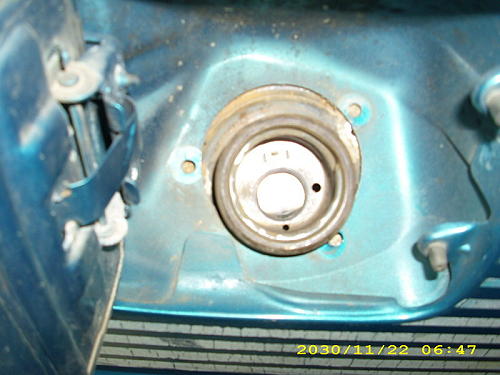
Now that the bed is unbolted and wires from the taillights dropped, you need to get a 6mm socket and unbolt the (3) bolts holding the filler neck behind the gas door
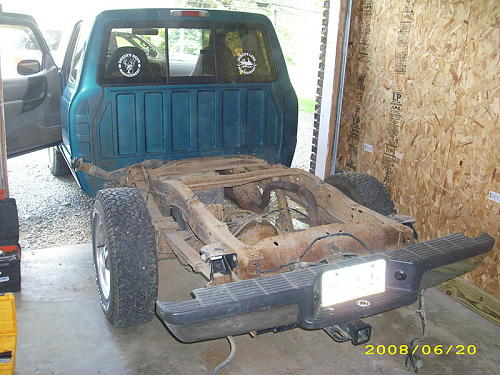
Before you attempt to lift the bed off, go around again and make sure there is nothing hanging up or still connected to the frame or bed. It’s best to set the bed on some sawhorses or other sturdy structure that will support it. If you set the bed up on it’s end you run the risk of bending the rocker panels and bedside.
There is another step if you want to take that I chose not to do because I had 3/4 tank of gas. You can unbolt the skid plate that covers the tank and then unbolt the tank straps.
Now you are ready to grind the rivets that hold the rusty old brackets to the frame. If you drop the tank, you could use a torch and blow them out, but I chose to use my trusty angle grinder. This does take a while and make sure you grind the head clear down to the bracket.
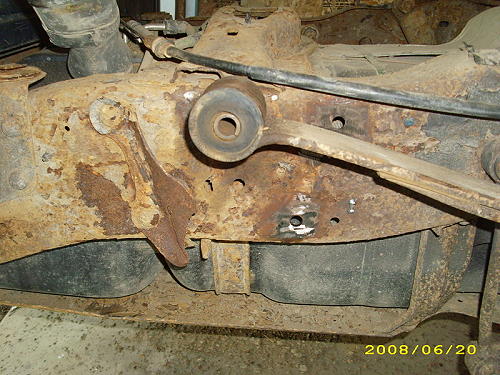
Once you get the head ground down to the bracket, get a chisel and hammer and knock the bracket loose from the frame. Get your grinder back out and grind the rest of the rivets down to the frame. This makes it easier when you bang the rivets through the frame. Take a hammer and punch and hammer the rivets out of the frame. The rivets should come out of the frame fairly easy.
I suggest bolting the bracket to the frame then maneuvering the spring into place for the bolt. The bracket on the driver side is a pain to bolt on if you don’t drop the tank, but I figured I’d have more work dropping the tank and putting it back into place then I would getting the bolts in.
You may need to use a jack and jack stands to get the spring in position and line up with the new bracket.
After the bracket is mounted and the spring is in position, tap the new bolt in and bolt it up.
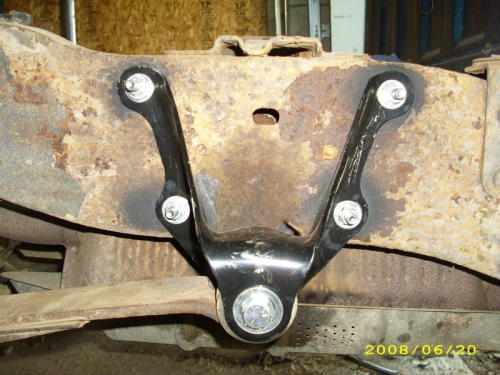
If you choose to take on this project, I suggest replacing both sides. If ones bad, the other is probably just as bad. The passenger side is easier to replace other than grinding off the rivets.
Now that you’ve replaced your brackets and have everything bolted down, everything is reverse for putting the bed back on. Just be careful on the driver side where the filler neck is when you are dropping the bed back on. Also make sure that the clips for the bed bolts are lined up with the holes on the frame.
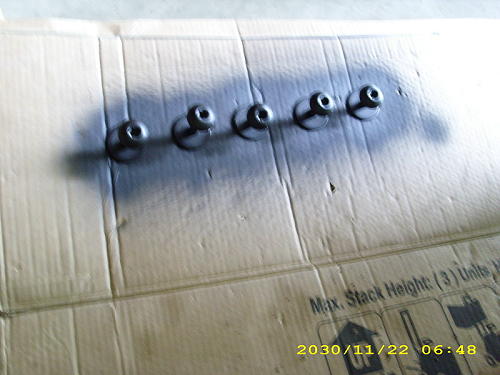
I chose to clean up and reuse my bed bolts. I know there are only five in the picture. The 6th one that was a pain to get out and twisted the hell out of my socket was still in the bed until I ran to the auto parts and got a new stronger T-55 socket.
Old Bracket:
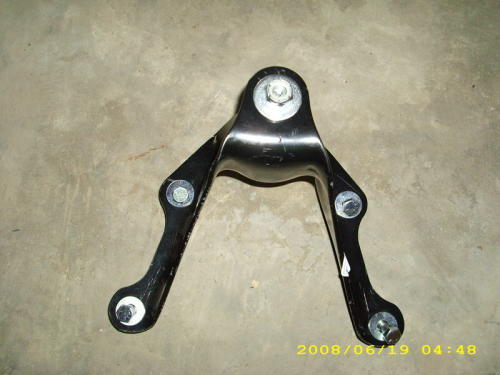
New Bracket:
Replacement Bracket:
Well, there you are. I hope this helps. If you have any other questions, feel free to pm me.
Editors Note: You don’t have to take the tail-lights off when removing the bed. There is an electrical connector behind the bumper, a little one on the driver’s side, that you can disconnect by hand, which is sufficient to remove the bed.
About The Author
Jim Oaks is the founder of TheRangerStation.com, the longest-running Ford Ranger resource online since 1999. With over 25 years of hands-on experience building and modifying Ford Rangers — including magazine-featured builds like Project Transformer — Jim has become one of the most trusted authorities in the Ford Ranger off-road and enthusiast space.
Since launching TheRangerStation.com, Jim has documented thousands of real-world Ranger builds, technical repairs, drivetrain swaps, suspension modifications, and off-road adventures contributed by owners worldwide. TheRangerStation.com has been referenced in print, video and online by enthusiasts, mechanics, and off-road builders looking for practical, and experience-based information.