
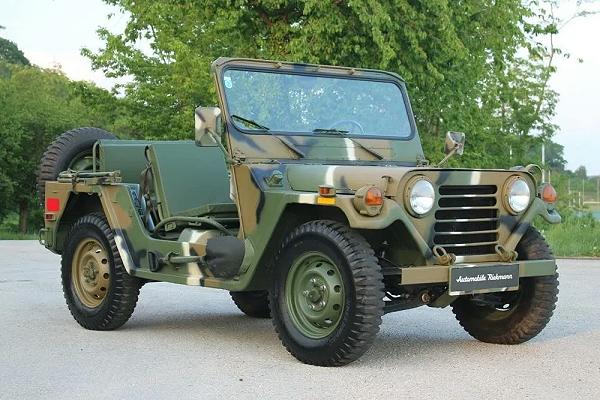
Military Vehicle camouflage patterns consist of an arrangement of different colored painted areas, designed to break up the lines of specific vehicles in a specific environment. The pattern is part of a scientifically developed method of camouflage that is applied uniformly to all equipment of a military force at a given time. The number of colors, their arrangement on the vehicle and the actual colors used are determined by the system in use and each unit is responsible to apply the pattern and colors to each vehicle in their command.
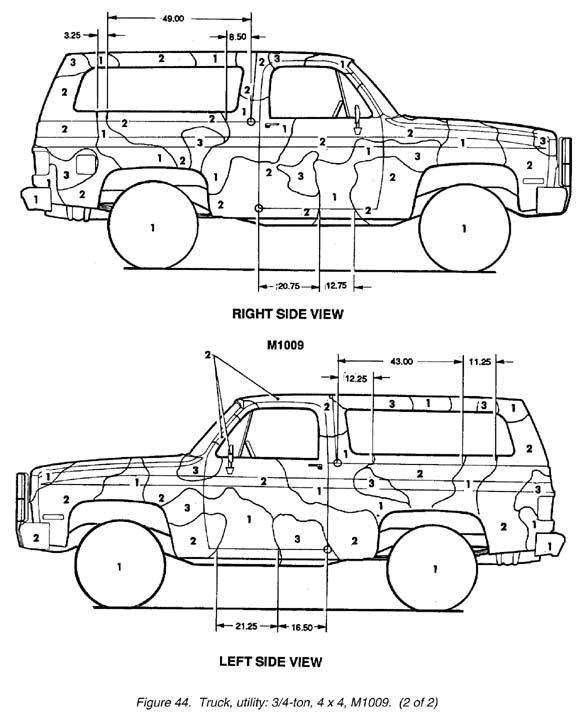
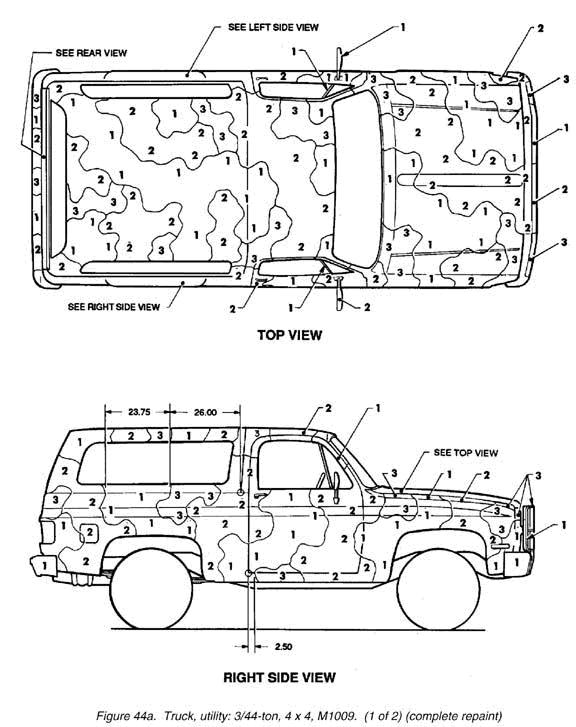
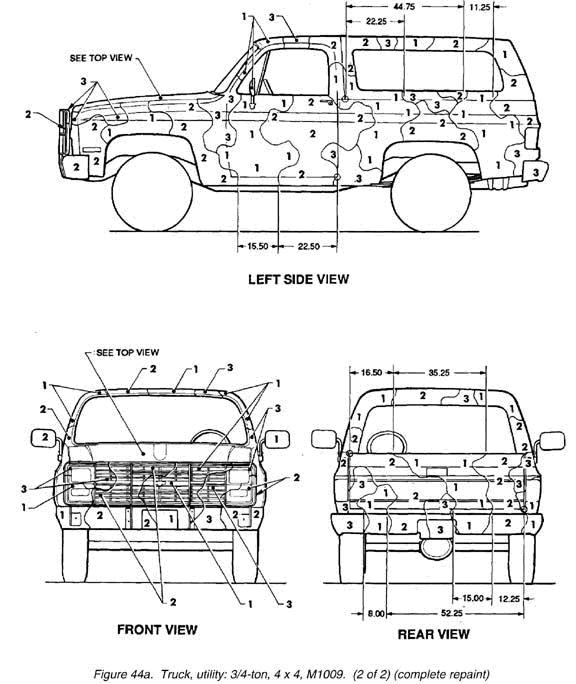
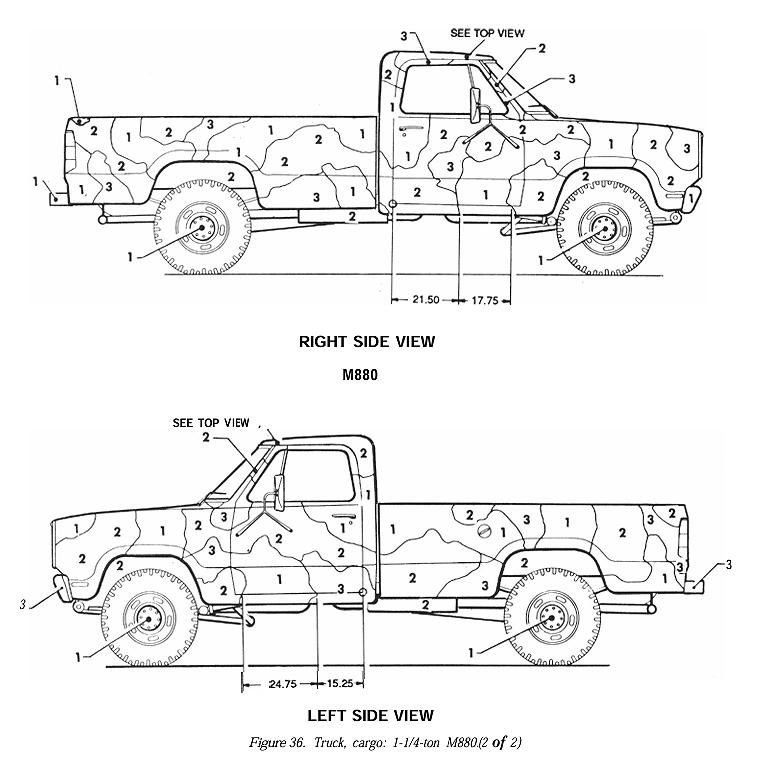
These patterns are from TB 43-0209, Color, Marking and Camouflage painting of military vehicles, construction equipment, and materials handling equipment, published by the Department of the Army. For each version of CUCV (pickup, utility, and ambulance) there are the original patterns, and the revised pattern which is to be used if the vehicle is completely repainted.
Camouflage Pattern Designs for Military Vehicles
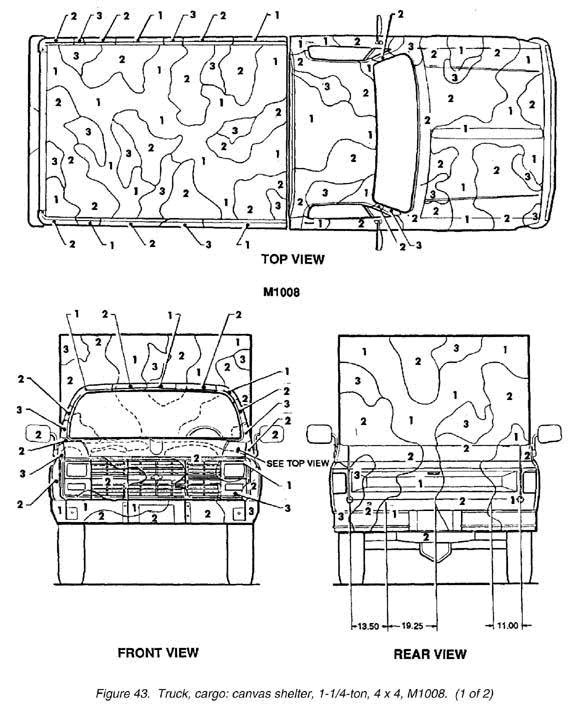
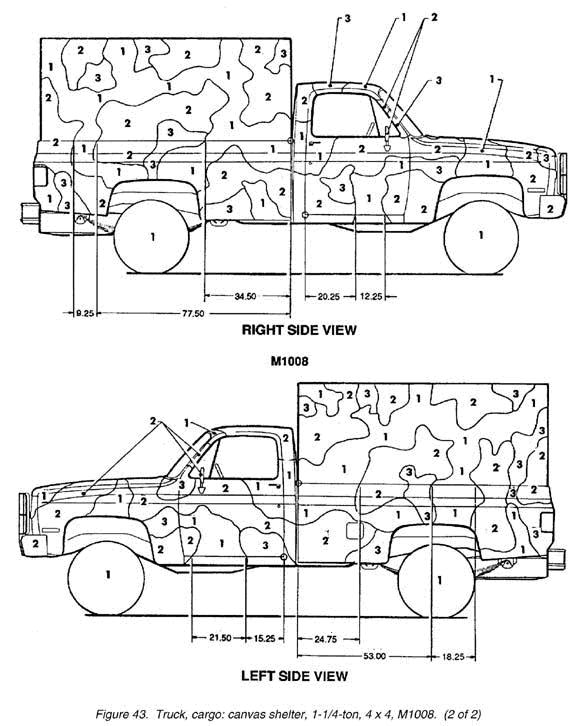
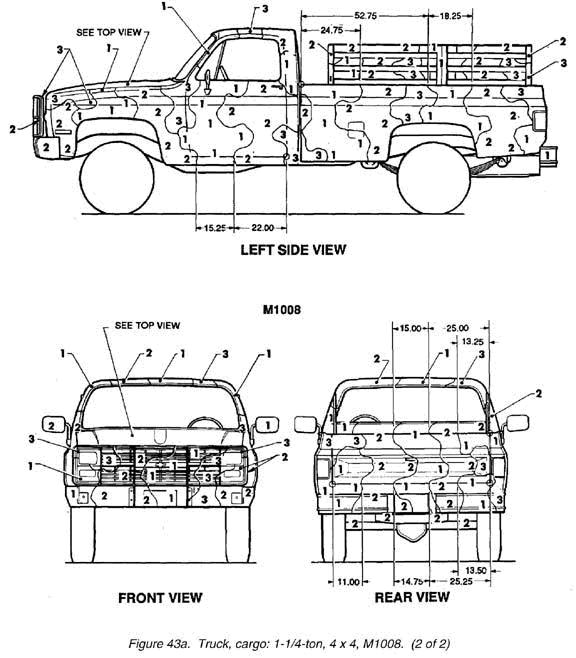
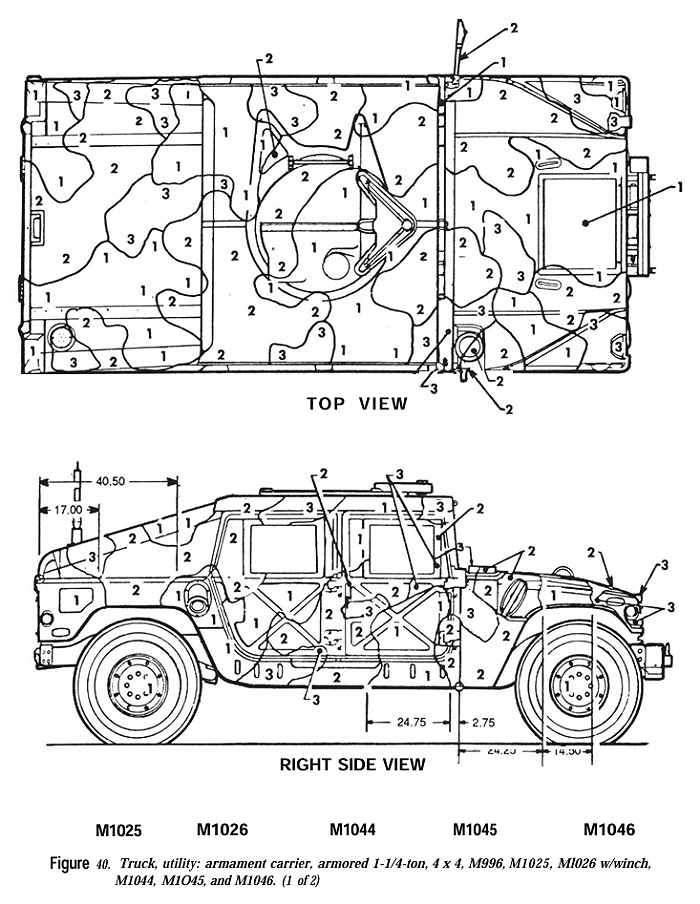
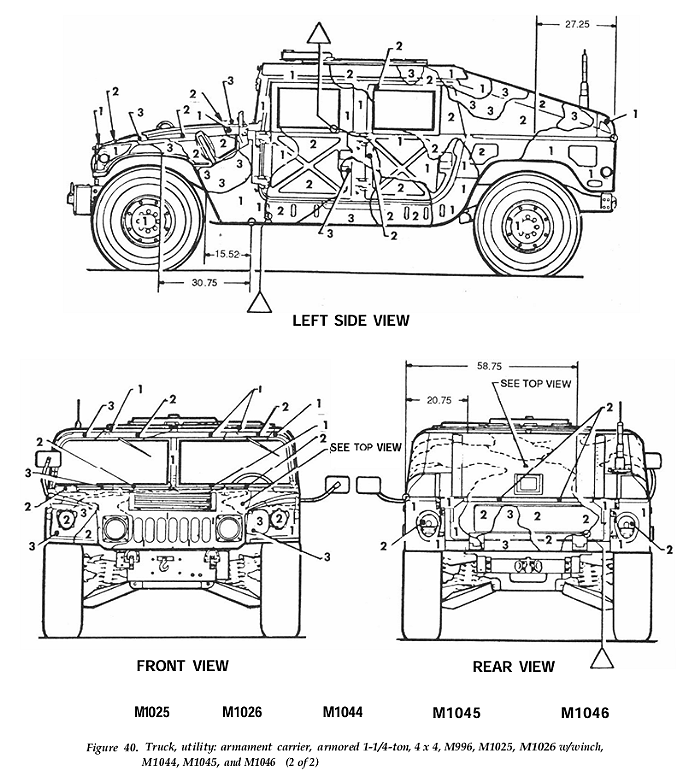
Camouflage patterns, when painted on a military vehicle, are a guide for a design developed for the specific item of equipment. The design is an outline drawing of the item on which wavy lines give the boundaries of the color areas. Within each such area is a number that stands for the color to be used in that area, except that areas which are to be black are shown as solid black. As can be seen from the chart on the Military Vehicle Camouflage Page, the color represented by the number varies according to the seasonal or terrain color combination being used. An individual design drawing is given for each of the five views of the vehicle: front, back, left side, top, and right side.
Here are the four-color patterns for the M-151, the M-715 and the M-114. Click on the pattern name to open a full-size copy of the pattern page from TB 43-0209:
Camouflage Painting Notes excerpted from the TB:
All military vehicles and equipment have characteristic shapes and shadows. These shapes and shadows contrast with the material surroundings and make the object stand out. Pattern painting using wavy, irregular patches of camouflage colors does much to break up the characteristic shapes of the equipment by reducing contrasts with sod and vegetation, pattern shape, and placement. Patterns have been designed for each type of vehicle to cut off sharp corners, avoid straight, vertical, and horizontal lines, and extend shadows in shapes similar to natural features and vegetation; however, the accuracy with which the pattern is applied completely determines how well the pattern camouflages the equipment.
The black bands, located at the visual center of each side in a pattern, are the key to the three-color camouflage systems. These bands must be in the correct place and must be the correct width. To ensure correct placement and width, each pattern has between 10 and 25 critical reference points. Critical reference points are based on fixed features on the item and are reflected on the vehicle pattern. All dimensions are listed in inches. All dimensional tolerances are limited to +1.00 inch.
These patterns are of the “color by number” format.
In this format:
The numbers in the parenthesis reflect the FS color numbers, and are the colors used in the current “383” NATO camouflage colors.
Additional painting tips…
I have found that printing out the below patterns and then using a copier to enlarge the pattern needed for each side of the truck onto an overhead transparency works great. This way you can use an overhead projector to very accurately transfer the pattern to the vehicle. You may find that you will have to place the projector some distance from the vehicle, this can result in distortions, at least it did when I tried it. A solution for this is positioning the projector towards the front or rear of the truck, and aligning the projection on that half, tracing it out, then proceeding to do the other half. On the top of the truck, I have no idea how to do this other than eyeballing it or stringing up an overhead projector in the rafters to shine down on the truck.


M-880 Dodge Pick-Up Pattern

HMMWV (Humvee) Camo
About The Author
Jim Oaks is the founder of TheRangerStation.com, the longest-running Ford Ranger resource online since 1999. With over 25 years of hands-on experience building and modifying Ford Rangers — including magazine-featured builds like Project Transformer — Jim has become one of the most trusted authorities in the Ford Ranger off-road and enthusiast space.
Since launching TheRangerStation.com, Jim has documented thousands of real-world Ranger builds, technical repairs, drivetrain swaps, suspension modifications, and off-road adventures contributed by owners worldwide. TheRangerStation.com has been referenced in print, video and online by enthusiasts, mechanics, and off-road builders looking for practical, and experience-based information.