
Introduction
This article explains how to take advantage of Ford’s parts interchangeability and convert a 2001-2011 Ford Ranger live axle to a manual locking hub axle.
History
In 1998, Ford changed the Ranger front suspension to an SLA style – identical to that found on Gen II Explorers (1995+) and Aerostar vans from 1989-ish. Identical except for one minor difference – the Ranger had locking hubs.
The factory hubs were called PVM – Pulse Vacuum Modulation, I believe. As the name implies, the hub is activated (locked) from engine vacuum. While this was an interesting idea, the design proved problematic and prone to failure.
As of mid-year 2000, Ford did away with the hubs and switched the Rangers to the same live axle setup that is found on Explorers and Aerostars.
The locking hub design was also used in other parts of the world, and one company, AVM of Brazil, designed and manufactured stronger replacement hubs. These hubs did away with the vacuum actuation and utilized the old “hand-turned knob” design.
Parts
NOTE: Parts reference a 1998 Ford Ranger, 4WD
- Unit bearings – 2 required, left and right, with or without ABS (make sure you use quality Timken bearings)
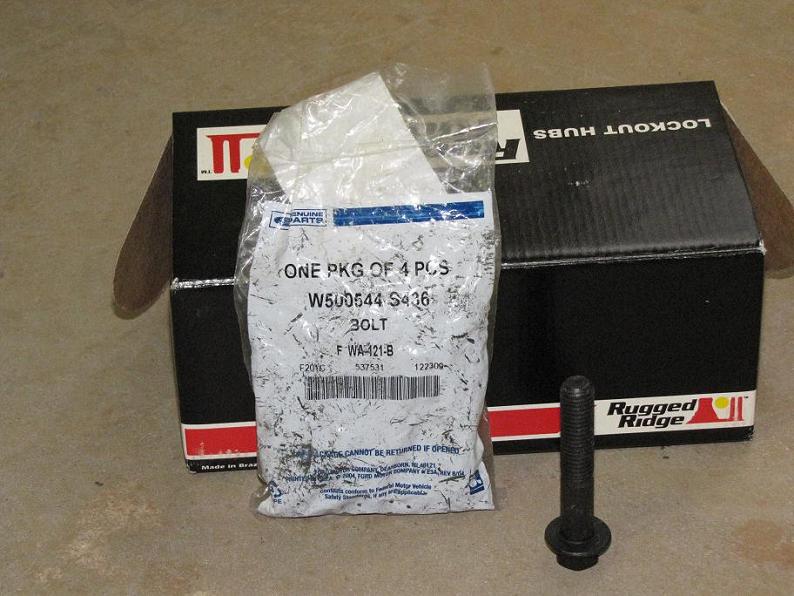
- Unit bearing retaining bolts – 3 required per side – Ford W500544-S436
- CV axle, left
- CV axle, right
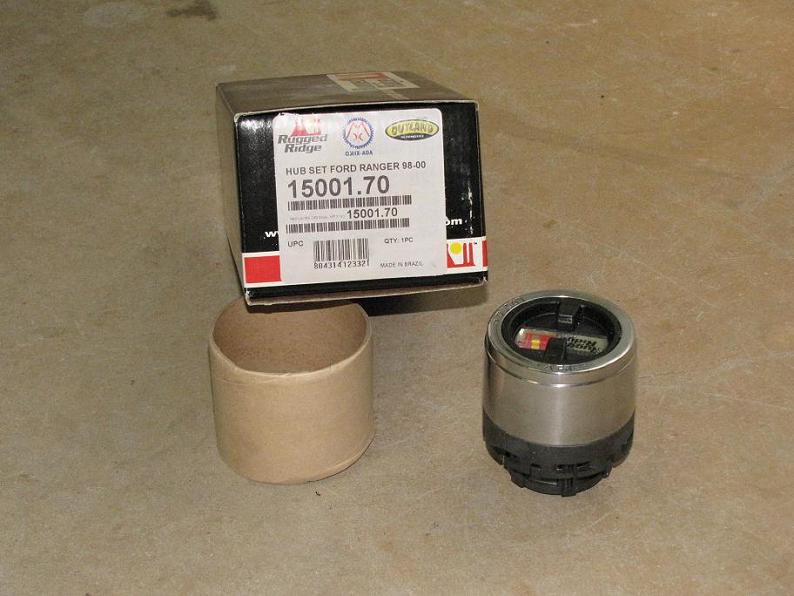
- AVM hub set – 15001.70
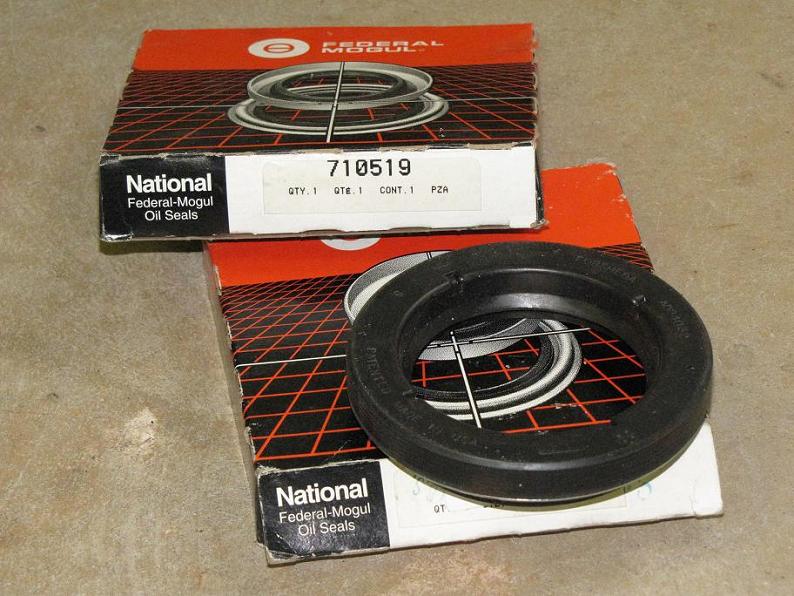
- Knuckle seats – National 710519
- Lock rings – Ford F87Z-3B457-AA

Description:
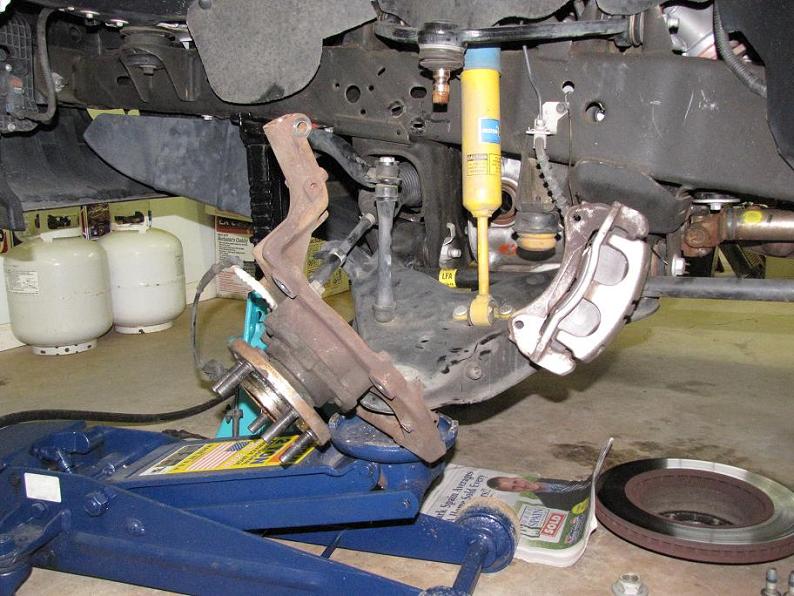
Support front of truck on jackstands, remove front wheels, brake calipers and mounting brackets, dust shield and rotors.
The following steps are for one side of the truck (photos show left side.) Right side similar.
Disconnect ABS wiring connector, if applicable.
Remove axle locknut (inside center of hub)

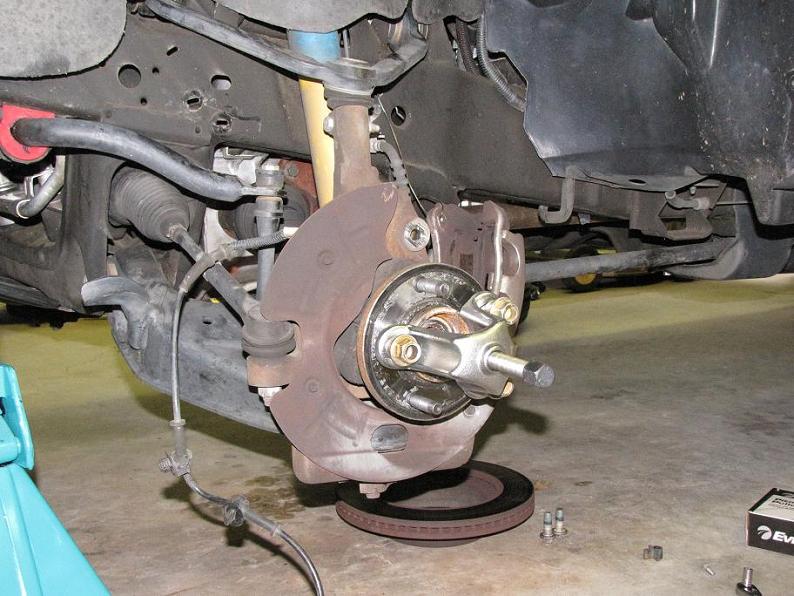
Using a hub puller, start pushing axle out of hub. Do not push axle all the way out – all you want to do is break the fit. (See photo)
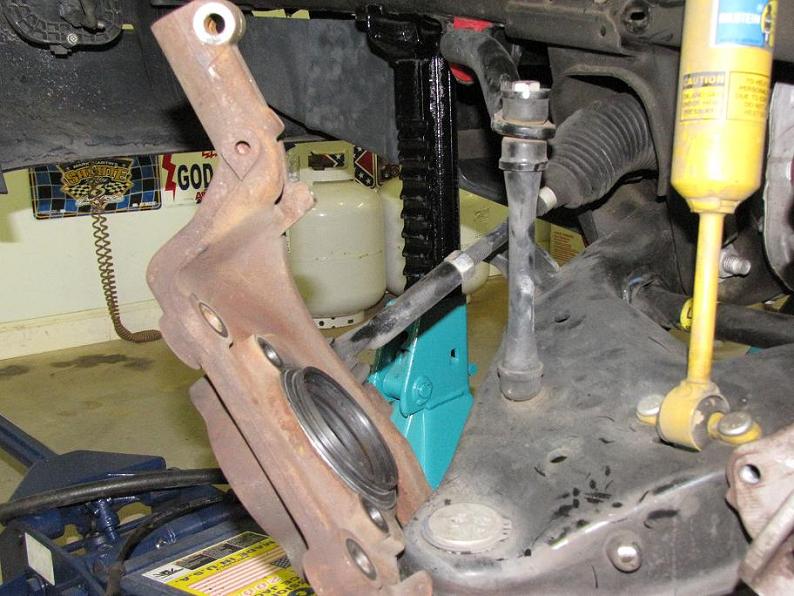
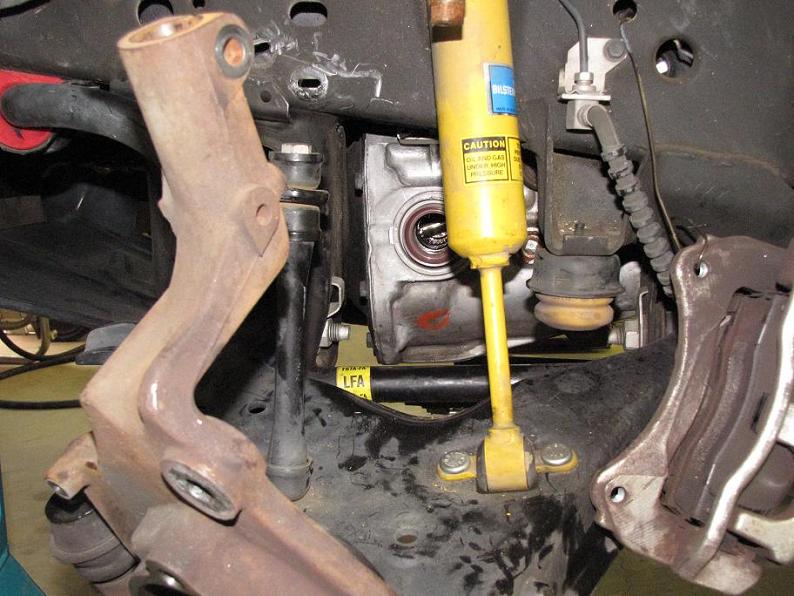
Disconnect knuckle from upper ball joint. Support lower A-arm with a jack, as it has the load of the torsion bar on it.
Use hub puller to push axle out of the hub. (See photo)
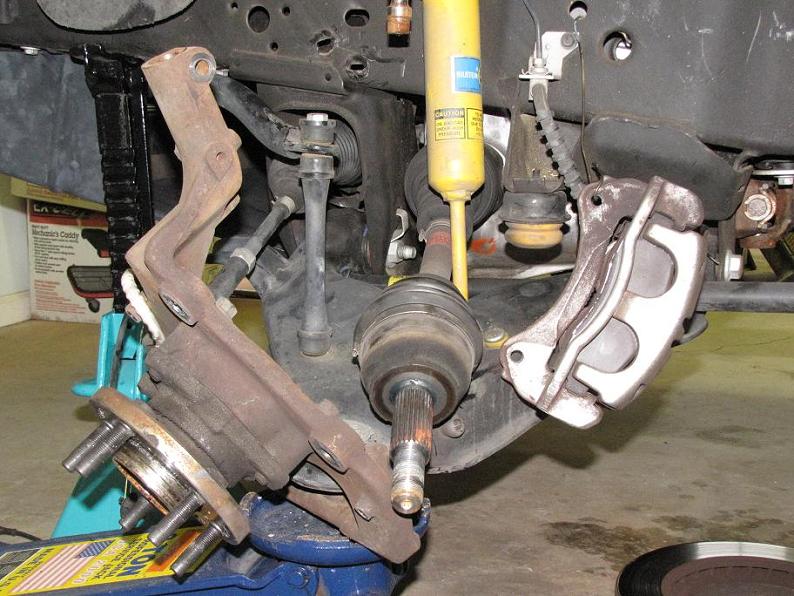
Remove CV axle. The inboard end locks into the differential, so a short, quick pull is required. Alternatively, a pry bar could be gently used.
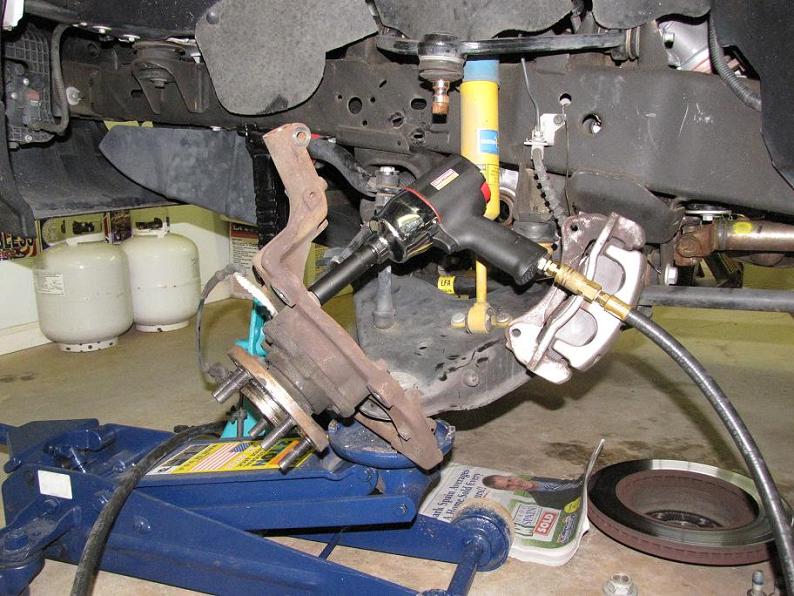
Remove the 3 bolts that attach the unit bearing. (Impact driver shown but not needed.) Remove unit bearing
Install seal in back of knuckle. Ensure surface of seal is below surface of knuckle. (See photo)
Replace axle seal on the side of the differential, if necessary.
Install new CV axle. A strong, quick push will be required to insert and secure axle in differential. Work outside end into new seal in knuckle. (See photo)

Install new unit bearing, ensuring the ABS wire is routed so it will not be pinched by the brake dust shield. Make sure new, unused bolts are used to fasten the unit bearing to the knuckle. (See photo)
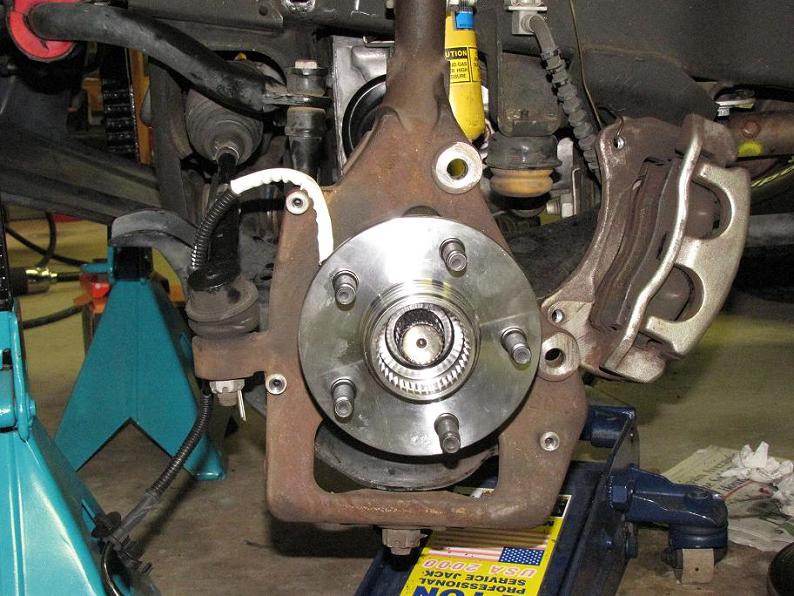
Reattach knuckle to upper ball joint.
Install lock ring in groove in axle. (See photo)

Wipe a small amount of grease on the inner splines of the unit bearing hub and the outer splines of the axle shaft.
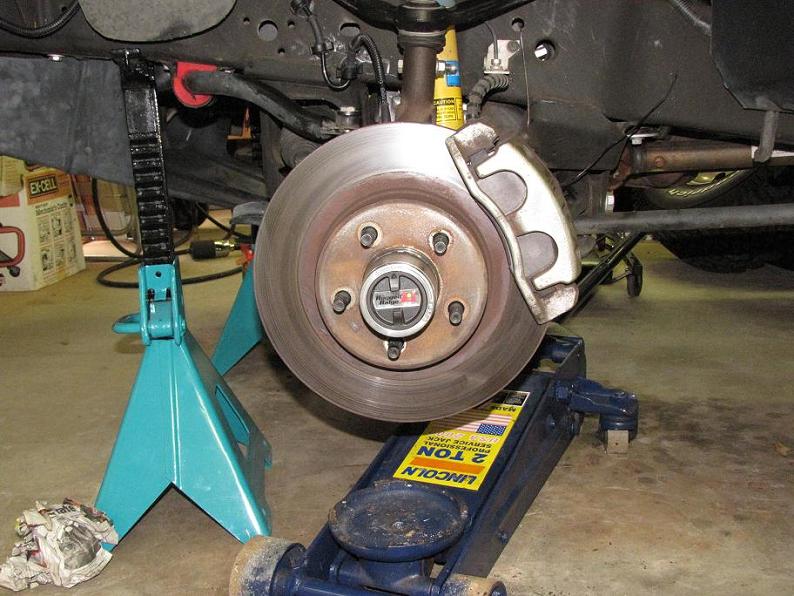
Press locking hub into unit bearing, making sure the splines engage on both the axle and the bearing. Install dust shield, rotor, caliper mounting bracket, caliper and ABS wire. (See photo)
Lastly, have a front-end alignment done – pulling it apart like this probably did not change anything, but it never hurts to make sure.
The end result!

Notes From Various Readers
Be sure the seal tightens the snap ring against the inner surface of the unit bearing. There is a specific depth that the seal needs to be at. If not, there will be no seal made with the CV. There should be no free play at the knuckle end, any play should be controlled and feel as though you are pulling against a seal.
The small roller bearing that the CV rides on is serviceable. 80k is the interval but 20-30k in severe conditions can’t hurt.
The AVM hubs are not as strong as the live axle setup.
One thing I do not like about the AVMs are the way they mount – the body is plastic, and it just pushes onto the hub. It looks like a weak link to me. I had the AVM hub fly off when I hit a big Jersey pot hole. A couple times before I figured out a fix. I bought metal zip ties like you would use on a replacement CV boot and zip tied it around the outside. Easy fix.
Related Articles
1998-2011 Ford Ranger 4×4 Dana 35 SLA Front Axle
1998-2000 Ford Ranger PVH Hub Swap To Live Axle
1998-2000 Ford Ranger Manual Locking Hubs
1998-2000 Ranger Hub Bearing Replacement
Permanently Lock Your ’98-’00 PVH Hubs
Adding Manual Control To Your 1998-2000 Ford Ranger Pulse Vacuum Hubs
Troubleshoot / Fix Your PVH Hubs
1998-2000 PVH Hubs Diagnose & Repair TSB
1999-2000 Ford Ranger PVH Hub Operation & Troubleshooting
Co-Author
This modification was performed by TRS forum member Scott B. who submitted the article to the author to be published at The Ranger Station for other Ford Ranger owners to use.
Last Update:
About The Author
Jim Oaks is the founder of TheRangerStation.com, the longest-running Ford Ranger resource online since 1999. With over 25 years of hands-on experience building and modifying Ford Rangers — including magazine-featured builds like Project Transformer — Jim has become one of the most trusted authorities in the Ford Ranger off-road and enthusiast space.
Since launching TheRangerStation.com, Jim has documented thousands of real-world Ranger builds, technical repairs, drivetrain swaps, suspension modifications, and off-road adventures contributed by owners worldwide. TheRangerStation.com has been referenced in print, video and online by enthusiasts, mechanics, and off-road builders looking for practical, and experience-based information.