
By thegoat4 (Forum Member)
The worst happened the other night. Driving to HEB, turned on the heat, and POP! Antifreeze mist all over the windshield. Crap. I do NOT like having parts of my truck disabled, tied off, or otherwise. Especially when they explode.
The core was $60 at my favorite Ford dealer. They couldn’t locate that little foam oval that goes around the pipes at the pass thru. I just flipped the old one over.
Needed tools: preferably a screw gun or small impact and an air ratchet for all of the screws. You can do without, but you will not be happy. Air blow gun or hair dryer. Garden hose (with water). Big torx bit, I believe T45, but I might be wrong. Two-jaw puller. Plastic trim clip remover prybar thingy. Pointy object, like an O-ring pick. Flat and Phillips screwdrivers. Flashlight. Buddy. Perhaps a copy of the Bible or Zen and Motorcycle Maintenance.
The procedure is basically what’s in the manual, but with some changes to avoid opening the AC system. I also removed extra stuff for more handholds and less confusion.
Unhook battery, remove air bag modules, ignition cylinder, glove box door. Lay the air bags dangerous-side-up; resist the urge to stack other parts on top of them.
Remove trim along bottom edges of doors and trim from the floor to the leading edges of the door frames. The left side took scary prying of a plastic “nail” below the parking brake. Pry out the piece of trim across the top of the dash, near the windshield.
Pull steering wheel off, remove trim around column, top piece is a pain. Remove the park release and hood release handles, trim below the steering column, and the kneecap catcher shield behind it. Pull center console with the radio still in it, remove trim around cluster, remove cluster. Good time to change those lightbulbs if you need to.
In the engine compartment, the fuse box is held in place with two plastic tabs. Pull it loose and lay aside. You see three plugs with bolts in ’em on the firewall below. Unscrew all three. Pull the heater hoses and plug with bolts if you still have water in the system. Pull off the air intake pipe. Unplug the ECM. Unplug the sensor in the accumulator, take loose the washer hose running over the blower box. There are three studs on the firewall side and one stud back inside the cab you need to remove the nuts from. Look below the glovebox hole and you’ll see it on the wall. Once the box is loose, roll it away from the firewall over the top of the engine and hold it back with a bungie cord. Mind kinked hoses.
Back inside, unplug everything you see. You don’t need to but unplugging everything is faster that figuring out what’s what. There will be a ground lead on the passenger side, near the door frame. Here’s the worst part of all. Those three plugs you unscrewed on the firewall, they plugged into a big honkin’ plug monster on the cab side. It has six hellish little plastic clips. Good luck. I pulled back on the plug gently and pried each tab with a pick one-by-one in the dark by feel at a funny angle while more or less applying a sleeper hold to myself. While you’re there, unplug the pedal switches and steering column. Remove the column, it has a pinch bolt at the U-joint. Try not to rotate the shaft after removing.
I took out the AC controls, but it seemed like I didn’t need to.
There are two little screws towards the middle of the dash, against the windshield. Remove. There is a brace left of center at the bottom near the ashtray. Remove. Get a buddy. Take out the big bolts you see along the windshield and door frames. Pull the dash back a bit. There’s a big plug on the left, screwed together with a 10mm head. Have a ratchet ready and unhook it. You could reach it through the cluster hole before pulling the dash, but it kinda sucks.
There are random wires with those stupid plastic clips/nails holding them to the dash. You’ll need to pry a couple loose. Be careful with the antenna wire one as it’s more sensitive to abuse. I’ve got one on order. Put dash somewhere clean, not like I did. I blame the brainular blood starvation brought on by that plug monster.
Heater box has four studs going through the firewall. Three near the blower box, one near the center of the wall. Remove the heater box, take off the cover of the heater core, pull off the oval foam piece, and just cut little slits in the other foam piece, slide out the core. Now go hose out all the damned antifreeze, barsleak, bugs, M&Ms, and whatever else has accumulated in that box. Get it clean as you can and make sure to blow all the water out of the foam. Hair dryer for those without compressed air handy.
Doesn’t the truck look weird without the dash in it? Yeah, I thought so. This is a good time to change your registration sticker. You can get ALL of the glue off.
Now, put everything back together. It’s pretty self-explanatory at this point. The only trick is leftover screws. I had three. One was kinda big. Hmm. Don’t forget that screw-together plug on the left before you hang the dash back up, and the center brace at the bottom of the dash. Each time you’re about to cover up a hole, take a good long look inside for screwless holes and bachelor plugs.
Plugmonster is much nicer on reassembly. I snapped off four of the tabs for the sake of my future self.
Torque guidelines: little screws, studs, and bolts-snug. Plug screws-snug. Other ones-tight.
Top off or fill the coolant, check all of your fuses and lights, wipe off the 800 handprints on the dash, and the two footprints on the ceiling. Turn up the heat full blast and run the truck up to temp, top off the surge tank.
Commence happydance.
I made close to a dollar on recovered change!
Feedback by rangerrunner
It just so happened that I had to go through this over the weekend. I found the write-up VERY helpful (along with alldatadiy online!) This job brings to mind a few choice words. Nightmare and hellish are a couple of mild ones!!! Anyway, I got it done and I appreciate the advice, especially about not purging the A/C. I did put the camera on the workbench and recorded a few of the “highlights”.
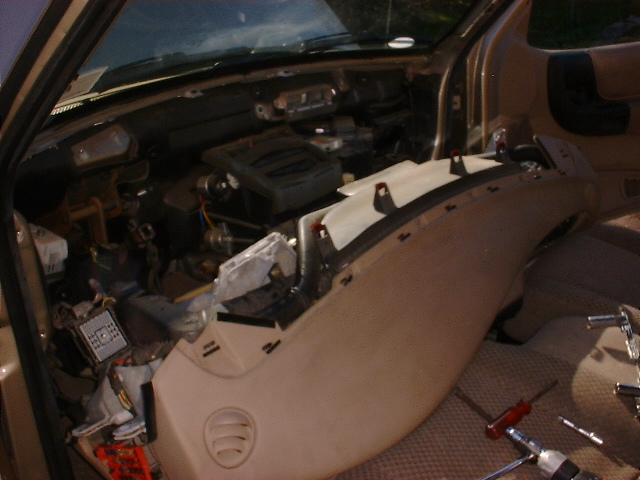
After pulling the steering column I laid the dash on the seats. The only thing I did not disconnect was the antenna wire.
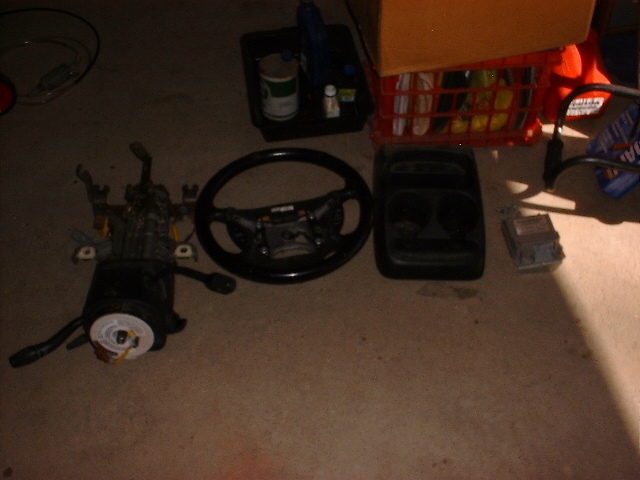
I did neatly lay the parts safely out of the way.
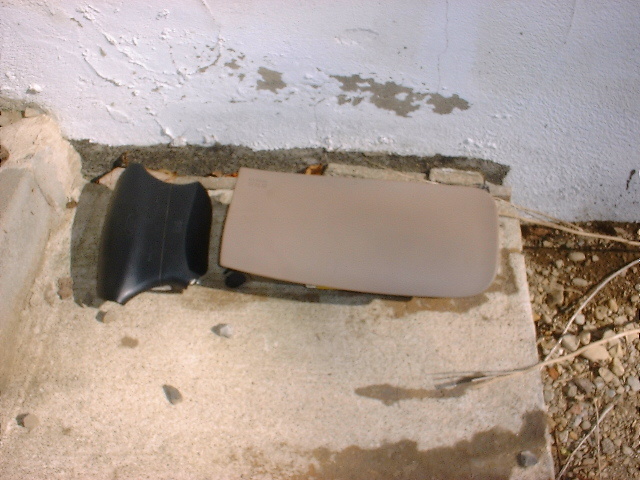
Those air bags got their own spot even further out of the way!
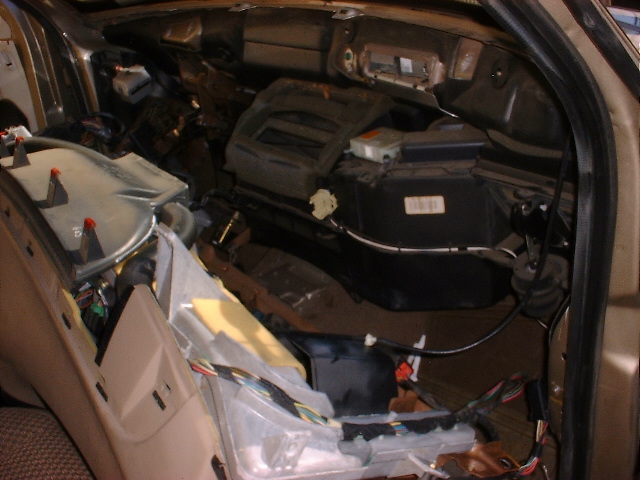
When you get all the inner plenum bolts off it practically falls off the firewall.
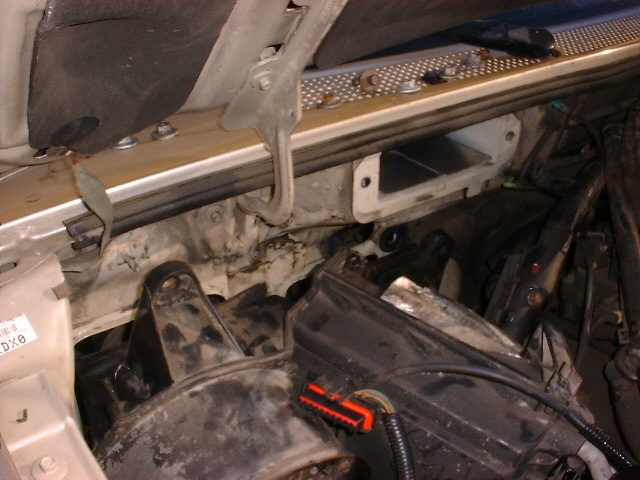
I left the A/C charged and pulled back the evaporator core housing just enough to reach the fasteners.
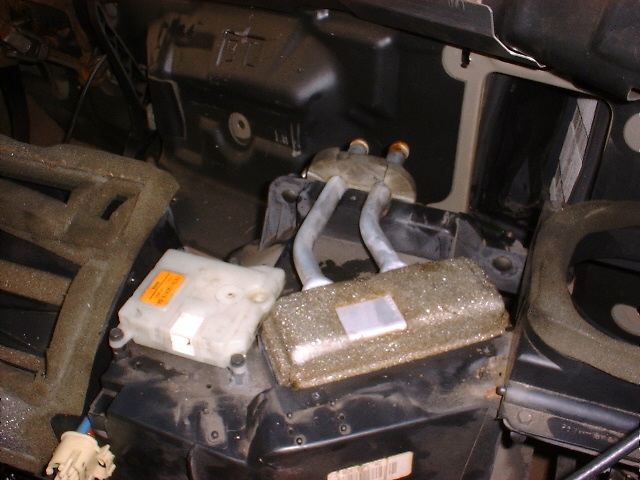
Just pull that bad boy out…

…match up, test, attach some padding and drop that new baby in.
Thank God its over!!!
About The Author
Jim Oaks is the founder of TheRangerStation.com, the longest-running Ford Ranger resource online since 1999. With over 25 years of hands-on experience building and modifying Ford Rangers — including magazine-featured builds like Project Transformer — Jim has become one of the most trusted authorities in the Ford Ranger off-road and enthusiast space.
Since launching TheRangerStation.com, Jim has documented thousands of real-world Ranger builds, technical repairs, drivetrain swaps, suspension modifications, and off-road adventures contributed by owners worldwide. TheRangerStation.com has been referenced in print, video and online by enthusiasts, mechanics, and off-road builders looking for practical, and experience-based information.