
I noticed it was time to replace my shifter bushing when I could move my shifter side to side almost 3-inches in gear!! That’s a lot of slop. I went down to my local ford dealership and bought the following part numbers:
- 1L2Z-7Z120-AA (2 needed)
- 1L2Z-7228-AA (2 needed)
- E8TZ-7E018-A (2 needed)
The parts cost about $36.00 w/ tax. You may want to go ahead and replace the inner shift boot (which is another $30 dollars) for it may be worn or torn. This is part # 1L2Z-7277-AA.
MAKE SURE TRANNY IS IN NEUTRAL BEFORE REMOVING INNER SHIFTER….IT WILL SAVE YOU A LOT OF HEADACHES.
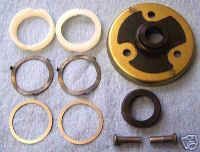
Shifter Bushings, Washers, Inner Shift Boot, and Pins
1). Remove the 4 screws that hold the shift boot to the floor. Pull boot up out of the way.
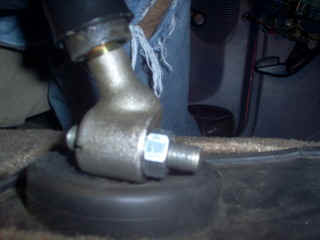
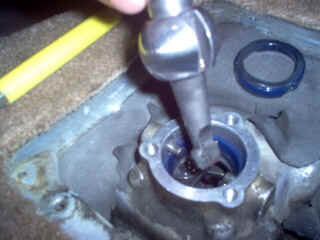
2). Use a 19mm or 11/16 wrench to remove the nut from the slip bolt. Place the nut on the opposite side of the bolt and tighten it to slip the bolt out of the shifter. Now the shifter should be free.
3). Remove inner shift boot. There should be three-star bits holding it in place.
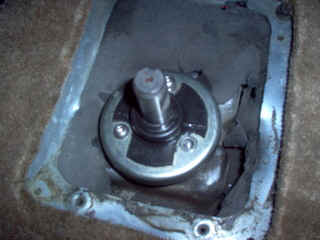
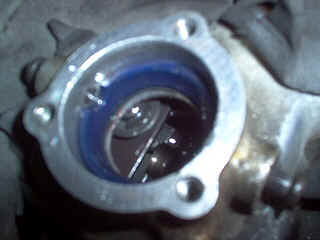
4). Gently pry out the top shifter bushing and remove inner shifter.
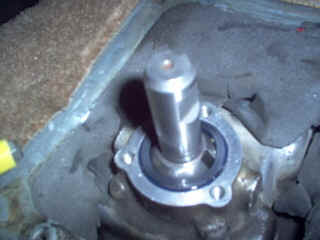
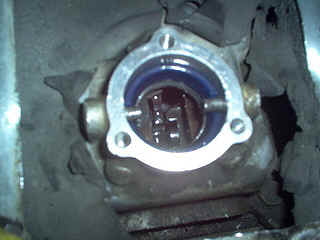
5). Knock the two pins back and pry the remaining lower bushing out.
6). There should be a plastic bushing, a wavy washer and a flat washer. The wavy washer should have little clips that will clip onto the plastic piece. The flat washer will go in between the wavy washer and bushing.
7). Install the lower bushing, with the wavy washer down.
8). Knock pins back into place, make sure heads are flush.
9). Reinstall the inner shifter.
10). Install upper bushing with the wavy washer up.
11). Reinstall the inner shift boot.
12). Reinstall the shifter and push the slip bolt back through the hole and tighten the nut.
13). Pull the shifter boot back down and tighten the 4 screws.
ALL DONE!!!
I noticed that it was much easier to and a much more positive feel to each shift.
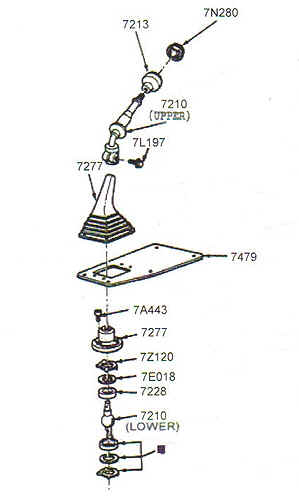
The order of parts is from top to bottom wavy washer, flat washer, bushing, bushing, flat washer, then wavy washer.
Related Article:
Ford Ranger Manual Transmissions
Co-Author
This procedure was performed and documented by TRS forum member Ranger44 who submitted the information to the author to be published at The Ranger Station for other Ford Ranger owners to use.
About The Author
Jim Oaks is the founder of TheRangerStation.com, the longest-running Ford Ranger resource online since 1999. With over 25 years of hands-on experience building and modifying Ford Rangers — including magazine-featured builds like Project Transformer — Jim has become one of the most trusted authorities in the Ford Ranger off-road and enthusiast space.
Since launching TheRangerStation.com, Jim has documented thousands of real-world Ranger builds, technical repairs, drivetrain swaps, suspension modifications, and off-road adventures contributed by owners worldwide. TheRangerStation.com has been referenced in print, video and online by enthusiasts, mechanics, and off-road builders looking for practical, and experience-based information.