• Welcome Visitor! Please take a few seconds and Register for our forum. Even if you don't want to post, you can still 'Like' and react to posts.

SEEIN BEIN


gaz

Well-Known Member
U.S. Military - Veteran
Joined
Sep 21, 2007
Messages
1,737
City
Wa, Bremerton 98310
Vehicle Year
1987
Total Lift
Ranger 5" (1½" Hiryder/3" body), BII 4" Procomp
Total Drop
Ranger 5sp, BII A4LD
Tire Size
Ranger 32"/4:10LS, BII 33"/3:73LS
My credo
Deengineer until it is how Blue Oval should have sold it!!
Hello,

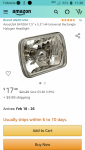
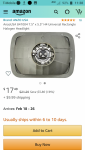
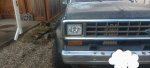
I decided to attemp to make my 87 Ranger safer by adding new H4 headlight housings, auxillary driving lights, fog lights and replacing all my marker lamps with LED counterparts.

The driving and fog lights were easy I had some lying around from my worldly travels that simply needed a vehicle and the correct halogen bulbs.

I went through Summit Racing for the halogen bulbs; they had great prices on Hella H4, H3 long life and yellow for the aux and fog. My new headlamp conversions include H4 bulbs but I grabbed as set of Hella long life bulbs also from The Summit.

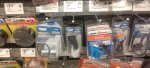
For the markers, I went through Amazon, purchasing 2 different brands. I chose a 4 for $10 LED bulb for the front marker/turn signal and tail light/brake/turn signal from a company called Everbrite; four 1157 bulbs for $10. They are about as Brite as the stock incondesent bulbs but...hopefully, will last the claimed 30k hours.

I choose a different company and lumen level for the reverse bulbs. For reverse I choose Antline Extremely Bright white...WoW, money well spent.

They cost a little more but are claimed to be approximately 650 lumen vs 400 lumen claim on the Everbrites. Fortunately, the first time I needed to use reverse, it was pitch black and a tight situation. The second I hit reverse the world behind my truck was DAYLIGHT!!!

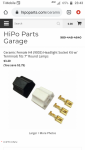
I will be putting the headlight conversions on their own relays, utilizing the switch wiring to initialize them.

Washington is often wet, so I am not a white light endorser, the yellower color works bettering wet so all but the back ups are as close to the 2.9k spectrum as is legal.

Once it's all up I will get some pics, hopefully of before and after.
 
Last edited:
Lower frequency light has better penetrating power, lower frequency meaning yellows and reds. That is why sunrise and sunsets are yellows and reds. When the sun gets down to a low angle, the light has more atmosphere to travel through. The higher frequencies (blue light) don't have the penetrating power to go through all that atmosphere and phizzels out, leaving the sunset reddish color.
 
Lower frequency light has better penetrating power, lower frequency meaning yellows and reds. That is why sunrise and sunsets are yellows and reds. When the sun gets down to a low angle, the light has more atmosphere to travel through. The higher frequencies (blue light) don't have the penetrating power to go through all that atmosphere and phizzels out, leaving the sunset reddish color.

Please refrain from using science. We only accept personal opinions, conjecture, and cantaloupe as valid arguments.
 
How do you like that scientific term I used, phizzel. Or is it fizzel?
 
How do you like that scientific term I used, phizzel. Or is it fizzel?

tenor (6).gif
 
It was suggested that I wire in relays for my head lights and auxillary lights, great suggestion. I have fully embraced this idea and will be building a custom wire harness to use fused power direct from the battery via relays to the new head lamps, controlled with the stock light switch.

-stock headlamp harness nearest the battery for control signal.
-ceramic female H4 connectors
-Tyco relays.
-16g multi-strand OFC wire for the control circuits.
-10g multi-strand OFC wire for the power circuits.

As I understand it, by using 10g wire for the power alone, will improve the brightness output by 30-50% depending on wether the stock wire is 16g or 14g.
 
Last edited:
There is a snowplow pigtail that will plug into the factory headlight connector if you are into reusind the factory wiring.
 
85,

Here's a pic of the ceramic H4 female connectors. It is essentially the same as the stock sealed beam headlight connector, the main component is ceramic vs plastic, it includes a water boot an includes gold plated wire connectors.

There are less expensive version of this component, not to say that they are particularly expensive or that I am made of money. I chose this company's product because of the cost of their kit, their reputation and it's quality components.

There are cheaper relays too, lights are extremely important, so I selected the best made relays I could find, Tyco 5 terminal 20/30a.

Making the whole setup waterproof is the next bit. All connections will have heat shrink, then waterproof liquid tape, followed by a tape wrap and conduit.
 

Attachments

  • Screenshot_20210125-234333.png
    Screenshot_20210125-234333.png
    288.2 KB · Views: 158
I just looked into going to relays a couple years ago and found I think it was Meyer uses the male side for their light kits on their snowplows. So basically instead of your stock harness plugging into the back of a sealed beam it plugs into your relay harness.

I found the pigtails separate from the whole harness then.

07180-2.jpg


No idea how the quality compares, I ended up going LED and with the much reduced current load on the switch I have yet to revisit going to relays.
 
These are available @ The local O'Riley's for $3 but are made of plastic with no waterproofing and use 18g wire, however in a pinch they would offer great repair potential.
 

Attachments

  • f2c65481-c907-43df-b71a-7f05ab5cb445.jpg
    f2c65481-c907-43df-b71a-7f05ab5cb445.jpg
    136.8 KB · Views: 154
The Anzo H4 Headlight Conversion Kits arrived from Amazom.com; each headlamp (sold individually) included an installed H4 bulb. Upon initial inspection they look nice enough though I found 3 issues discussed by other users, while easily remedied, true;

1) it had been reported that inside the housings should be cleaned prior to use. There was in fact some small dibree inside so i rinsed them out, then followed up with a couple isopropyl alcohol rinses.

2) it was reported that the seals may not be 100% water proof. Of the first 2 housings one was water proof and the other was near water proof. The suggested remedy is to coat the outside seam (where the lense is sealed to the back of the housing) with a thin bead of silicone sealant, which is my plan.

3) the depth of the housing is a hair less than the sealed beam housing's. My solution is to add a ¼" thick strip of double sided foam to both the left and right sides, possible all the way around the perimeter of the backside of the housing, to ensure the hold down structure can cause enough pressure to hold them securely in place.

I have begun to attempt to measure the improvement between the stock sealed beams, the new wire harness and the new headlight conversions. I downloaded an application on my phone the can measure light levels using the phone's camera light meter. I snapped some pics on the stock sealed beam patterns to further demonstrate any changes/improvements ..)
 

Attachments

  • Screenshot_20210206-113819.png
    Screenshot_20210206-113819.png
    373.1 KB · Views: 164
  • Screenshot_20210206-113828.png
    Screenshot_20210206-113828.png
    347.6 KB · Views: 153
I installed the passenger side lamp with the stock harness to see what observations I could make driving last night. The H4 bulb/conversion housing makes a completely different pattern and the light looks much different.

Pic of stock.

Then pic of Anzo housing with Hella 55/60, 3200.

I did take some initial light measurements with the LUX application on my phone, here are the results using the stock harness:

Stock = 543 LUX
Anzo = 1,753 LUX
 

Attachments

  • image000000_53~2.jpg
    image000000_53~2.jpg
    107.7 KB · Views: 161
  • image000000_54~2.jpg
    image000000_54~2.jpg
    130.6 KB · Views: 152
Gaz, Do you know how much voltage drop you were getting? I’ve got 12.2v at the headlights, a drop of 1.9v. A 14% drop doesn’t seem like that much. I need better lights, but i’m not sure adding relays is worth it in my case.
 
sickwilly,

What year is this vehicle?

Do not hesitate, the voltage drop is from the current needing to run through the entire old system to get to the headlamp.

Build the stand alone wiring system powered strait from the battery.

You will need at least:
• one 20amp fuse
• one 5 pole relay
• appropriate wire (I recommend using 10g but at least 16g).

This relay will be controlled by your STOCK light switch; you just cut the supply to you headlights and use that as the power to activate your relay.
 
Last edited:

Sponsored Ad


Sponsored Ad

TRS Events

Member & Vendor Upgrades

For a small yearly donation, you can support this forum and receive a 'Supporting Member' banner, or become a 'Supporting Vendor' and promote your products here. Click the banner to find out how.

Recently Featured

Want to see your truck here? Share your photos and details in the forum.

Ranger Adventure Video

TRS Merchandise

Follow TRS On Instagram

TRS Sponsors


Sponsored Ad


Sponsored Ad


Amazon Deals

Sponsored Ad

Back
Top