• Welcome Visitor! Please take a few seconds and Register for our forum. Even if you don't want to post, you can still 'Like' and react to posts.

I bought a High Rider...


OK... tomorrow is the day... I think! As long as the wind isn't blowing hard tomorrow evening, I'll be painting. Fingers crossed. I'm happy enough with my primer.

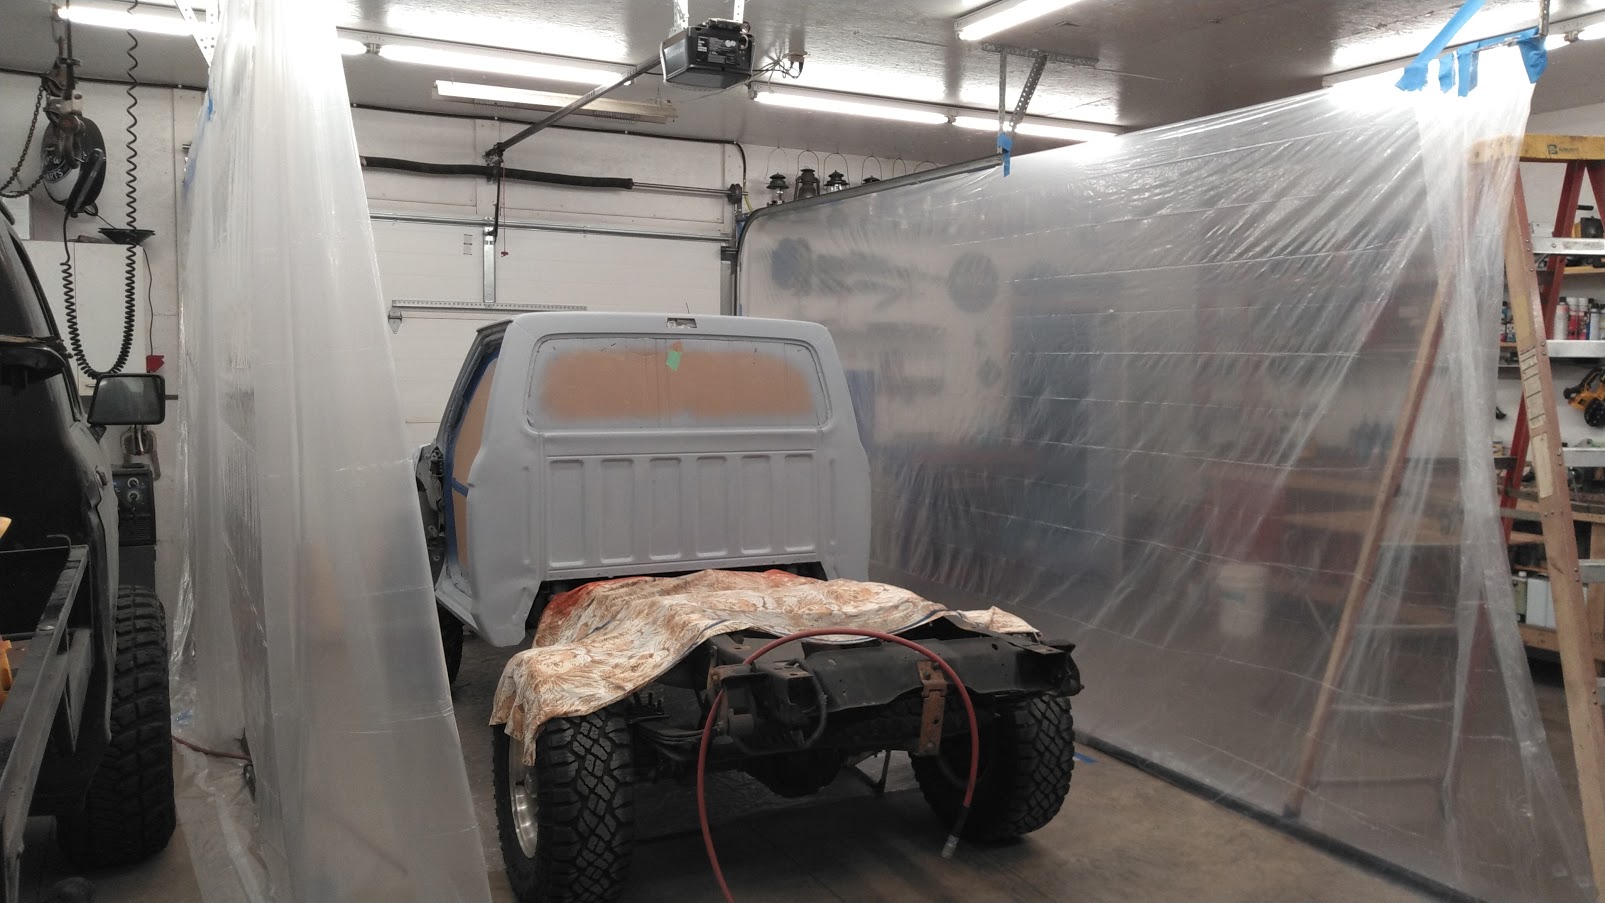
This is paint booth v4.0 - 1.0 was nothing and overspray everwhere, 2.0 was covering things up with sheets and some plastic on the floor with a box fan surrounded by cardboard, 3.0 was a three sided plastic enclosure in the same spot with this fan. I don't think the back side will be necessary nor did it help much so I left it open and made the walls longer.
KJ4EymF.jpg


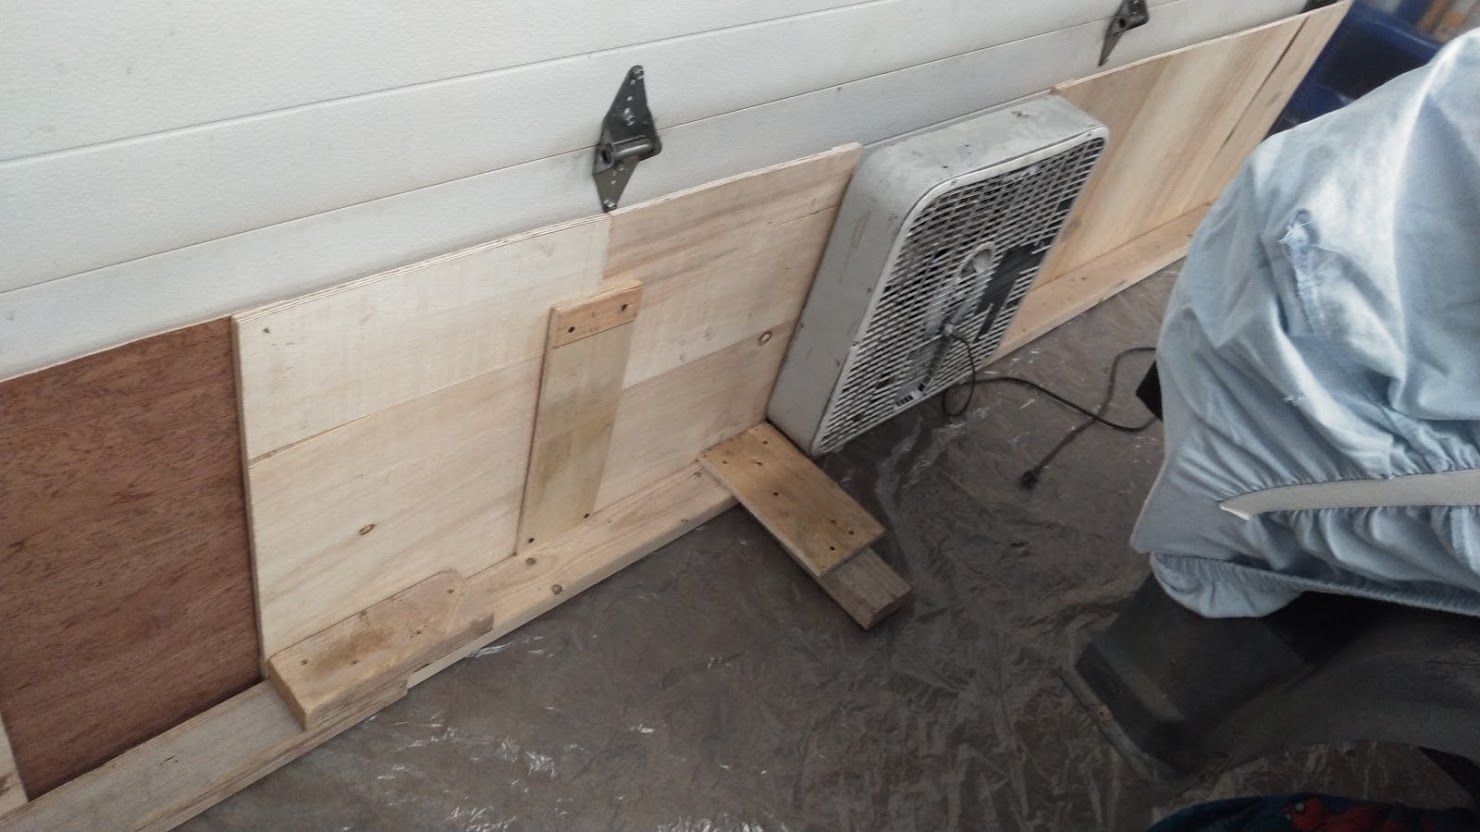
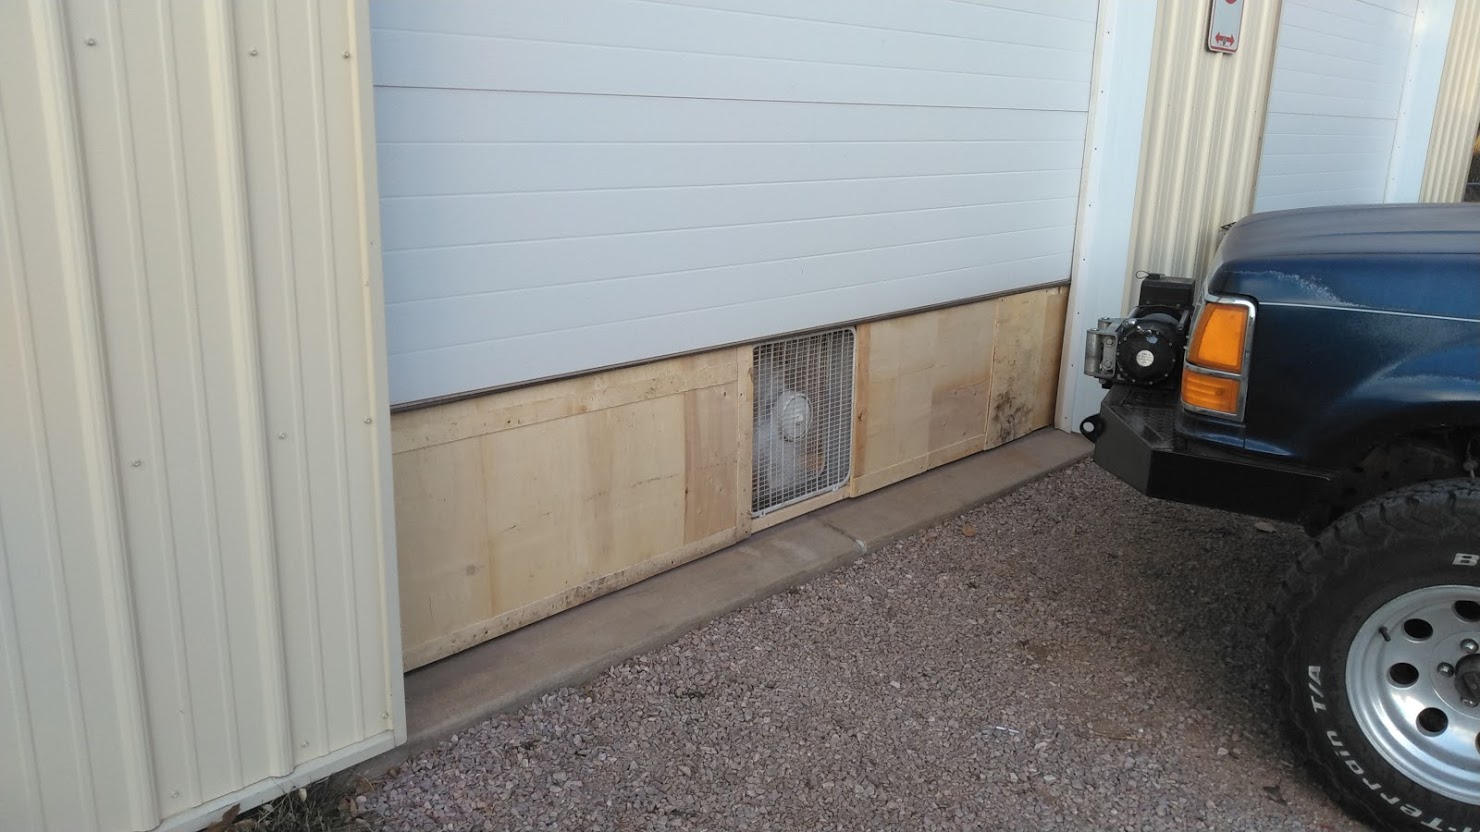
This fan works pretty well. Obviously it could be improved... but with a north window open and the fan sucking out the south, it moves plenty of air but the wind can affect it badly. Kinda ghetto but I'm not sure how I could improve without a major redesign.
GiEuNqH.jpg

GlOYm4t.jpg
 
Hate to say this but I have to go several steps backward.

I shot my first coat of base on Saturday night and refilled my gun... went back to shoot another coat and saw this disaster.

L1HdNNA.jpg


It's basically all over, every section of the cab has at least some of this going on, the back, rear roof and driver's side B pillar being the worst. It peeled up everything down to bare metal.

I talked to my buddy that paints for a living and he said I most likely did not use enough primer and then sanded through what little primer was there when I scuffed it, and the solvents in my base coat reacted with the etch primer I had below everything else. His process is to use etch primer, then 4-5 coats of 2k primer, then sand, and prime again if needed then sealer then base coat, clear. Mine was etch, 1 coat of 2k, sand, another coat of 2k, sand, base, clear... apparently not right but who knows why it didn't bite me before this.

His advise was to use lacquer thinner on a rag to remove the bubbled spots, wet sand it smooth, etch/spot prime and then scuff the whole thing and shoot sealer directly over it all and then follow that up with base/clear. Any input?

Kind of embarrassing to post this but what I was doing was working fine for a hood, two fenders, and a door....
 
Any input?

purple-blue-matte-plasti-dip-rubberized-coatings-11268-6-64_1000.jpg


Kind of embarrassing to post this but what I was doing was working fine for a hood, two fenders, and a door....

This is the kind of thing that keeps a feller up at night when he gets to thinking about painting his truck.

It happens to everybody, you get to learn something about something new now! :icon_thumby:
 
Oh damn dude that sucks. I had to re-do my fenders because of some huge runs so I know what it's like to have everything perfect and then it goes to shit.

What kind of paint are you using? I sanded through to my etch primer as well but I was fortunate to not have this happen. I used a urethane paint
 
purple-blue-matte-plasti-dip-rubberized-coatings-11268-6-64_1000.jpg


This is the kind of thing that keeps a feller up at night when he gets to thinking about painting his truck.

It happens to everybody, you get to learn something about something new now! :icon_thumby:

I had visions of matches and the 5 gallon pail of kerosene sitting in the corner... but I don't need an arson conviction...

Redoing things doesn't bother me much, I have done a lot of that, but in this case it's like $100 down the drain every time I mess something up.

Oh damn dude that sucks. I had to re-do my fenders because of some huge runs so I know what it's like to have everything perfect and then it goes to shit.

What kind of paint are you using? I sanded through to my etch primer as well but I was fortunate to not have this happen. I used a urethane paint

I used:
Impact IMP130 gray etch primer
Nason SelectPrime 421-19 2k Primer
TCP Global (Restoration Shop) Dark Midnight Blue Pearl Urethane Basecoat
Restoration Shop KC2020 Ultra Flow Urethane Clear

Should be all compatible stuff... I feel like maybe I just had a lot of sand through to the etch primer that I couldn't see. My buddy said that I really need 4-5 coats of buildup before I even consider sanding the primer or I will have stuff like this happen.

I guess I am fortunate that since it's just the base coat, I can basically wipe it off with a rag soaked in lacquer thinner instead of doing a lot of sanding.
 
I used Restoration Shop's Urethane as well, with SpeedoKote 2K Urethane primer.

I looked at the data sheets for all that and yeah it should all be compatible. I've seen wrinkles like that when using enamel over a lacquer or something.

Hopefully round 2 goes better! I guess with 4-5 coats you'll be able to block it all until it's nice and flat (y)
 
I'm going to try a different primer. I ordered a gallon of U-Pol UP2253 2k urethane... it is a LOT cheaper than Nason, $84 shipped with a quart of hardener and has a lot of positive reviews. I was spending $67/quart w/ hardener for the Nason primer. I ordered another gallon of base coat too... an expensive bummer, but I'm running low, and I don't think a quart would have done my whole box plus the hood if I decide to redo that.

I just Googled that SpeedoKote stuff, looks like it's about the same price as the U-Pol I ordered. Maybe I'll try that next time.

Good to hear that there is other positive feedback on TCP products... I don't fault their product here at all, I'm sure it's an issue with my process.
 
I'm sure it's an issue with my process.

That's usually how it goes, especially with paint. I blamed my gun at first when I had a bunch of runs, but I knew it was my own fault; too slow, gun not setup right, etc

Good luck this time around!
 
Finally worked through sanding out all the wrinkled base coat. What a pain. 80% of it was in corners and edges too, very slow going. Basically everywhere that has primer on it in the pics below was wrinkled up. I used up the last of my Nason primer doing this spot prime coat and am going to shoot probably two coats of U-pol over this and then a sealer.

I also modified one of my HF purple HVLP spray guns - they come with a 1.4mm tip and that is apparently a little small for primer and thick stuff so a common mod is to drill the tip out to 2mm with a 5/64 drill bit. I did that and wow, what a difference! Primer definitely lays down smoother and with a lot less overspray. I should have done that a long time ago.

6SlxwIy.jpg

MPPSgcJ.jpg

cszLn4o.jpg
 
Huge amount of progress made. I shot two full coats of primer and let it sit for two weeks while I was in NM. This last Friday I was ready to paint again so I did a coat of sealer, several coats of base and two coats of clear. It's not perfect and has some dust, a couple small runs, two light spots and some minor orange peel but I am very happy compared to the shit show from last time.

tUwen4t.jpg

HQQwlod.jpg

ktOENko.jpg


I let the clear cure till Sunday afternoon before I messed with anything too much. I figured I will wait a couple more days before hanging body panels, but could start on the interior right away. So I installed my new carpet and the seats. Still need to do some trimming around the shifter, and clean up my shifter boot.

I'm not super happy with the carpet color but I'm going to live with it. Would have liked a darker blue. It was cheap enough that I may replace it with another color someday.

The carpet came from Stock Interiors and had some insulation glued to the back, but I glued more on the passenger side. The muffler is pretty close to the floor there.

o9G6GsP.jpg

pwrqNnS.jpg

SN7U6q7.jpg
 
Man... you guys and the resto projects are killing me! Good to see you making progress.

I'm not sure what my future holds.... and it's gonna be another year maybe two before I'm back into a space that will allow me to do anything like this. So for now I'm still just dreaming about a "some day" project.
 
I got the doors on last night, and one fender started. I forgot to paint over my welded shut holes on the inside of the passenger side fender so that's drying right now.

Glad this pile of parts is shrinking, I need to rearrange my shop so that I can start working on installing my shop heater.

lJ5eUik.jpg
 
Oh come on, you are way on the wrong side of summer to fuss over a heater!
 
Oh come on, you are way on the wrong side of summer to fuss over a heater!

I could wait a while longer to put up the heater itself but the gas line to the shop needs to happen ASAP. I have been telling myself "next year" for five years now, I finally have all the materials to install it so I just need to buck up and get it done! I'm tired of moving everything from one side of the building to the other when it's in the way!
 

Sponsored Ad


Sponsored Ad

Special Events

Events TRS Was At This Year

TRS Events

Member & Vendor Upgrades

For a small yearly donation, you can support this forum and receive a 'Supporting Member' banner, or become a 'Supporting Vendor' and promote your products here. Click the banner to find out how.

Latest posts

Recently Featured

Want to see your truck here? Share your photos and details in the forum.

TRS Latest Video

TRS Merchandise

Follow TRS On Instagram

TRS Sponsors


Sponsored Ad


Sponsored Ad


Amazon Deals

Sponsored Ad

Back
Top