Building (Fabing) a 24" wet saw. (lapidary)


View attachment 120120
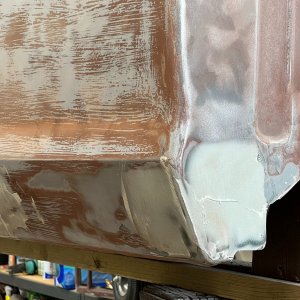
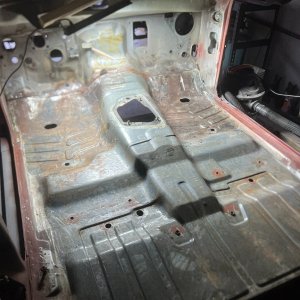
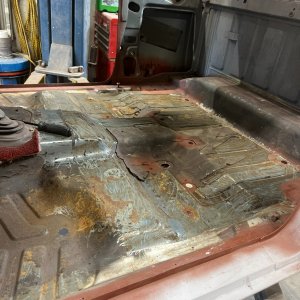
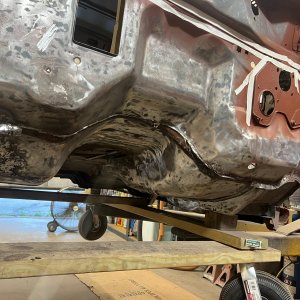
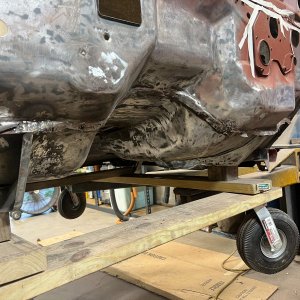
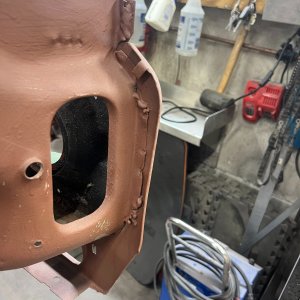
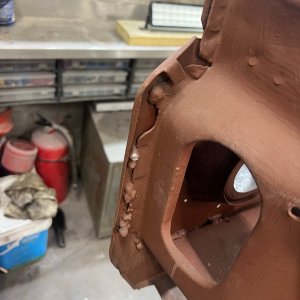
The weather has been formidable. The sheetmetal stubs are being removed in preparation for the coolant tub & sump. Welded to the left & right sides. The blade will be positioned in the far right rear corner. A 20" blade is the largest size I believe can fit. 1-3/8" pillow block bearings were cheap at $39 / pair. At 7 inches long x 2" wide, the drive department should live a long life, may use a VFD to control the 2HP single phase motor.

Today I need to give a visit to a friend that has a rather large sheetmetal brake, hopefully I'll be able to bend a 90 degree on my 1/16th (.065") material, 28 " wide. The $50 Rayobi sawzall has hung in there all these years, now with new life on lithium (batteries) haha.
OT; the 4Ah batteries are much better investment. Run time is much longer and the dont seem to degrade as fast. I bought into Ryobi decades ago and still use some of the tools from then. I just bought two 2Ah, I couldn't afford the 4Ah.
 
Need a gas hose for the Hobart 140, only used it for flux wire so far. Just open it up & connect to the valve with what even 1/8th" ID urethane hose I have & run it out the back to a known connector which for some unknown reason is unobtainable unless you want to pay $39 samolieans. I found one on an old TIG torch I can use for now. MIG on 25/75 works nice, even with flux wire.

The $40 pair of 1-3/8th inch cheapo pillow block bearings showed up. Made in Canada the box says. Sheetmetal is a task anyday, anywhere. 1/16th (~ 0.065") so TIG would be nice but with the additional metal I need to add, I'll go MIG. The joints will be touching, but the epoxy paint has been melting and moving around my edges making the edge thinner than I want. I'll tack MIG, and see. The Rayobi on Lithium batteries gave it a new life, 2AH :(~


1731853188369.jpeg
 
I'm using TIG, man I need a torch TIG start button. How many ways to start the torch and a foot square pedal ain't one of them. MIG and me....hummm. The Synchrowave 250 rocks. Got it for $600 in nice condition, but someone ran the water cooled torch w/o water. Their loss, my gain. Rebuilt the pump-cooler & torch lines and heaven! Finally get to use the tank. More soon. Got everything from the ups man, so coming along.
 
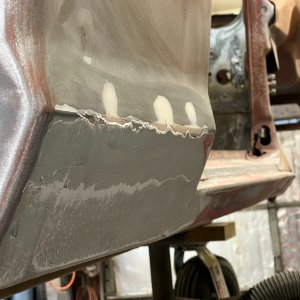
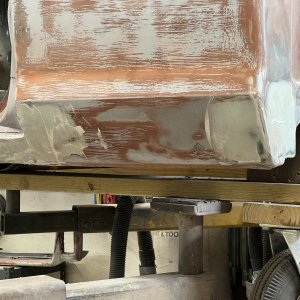
Well been staying in the garage most of the mornings grinding, welding, hammering, more welding. I think that using a 1/8" filler rod works good when TIGing thin 1/16" sheetmetal. I'm used to fusing with less filler, but so far so good. I may be done, but now comes the final grinding part where it's time to make her pretty. Love that diamond cutoff disk for coarse grinding. Works. The 60 grit flapper wheel comes last. There will also be a water test to look for leaks, but I believe it will be tight. We'll see about that. Pics coming.

I received the VFD to slow down the single phase motor. It was only $46 from ali express. Hope to keep the electrical on 125Vac single phase. The 3750 rpm motor spins too fast, but it is new old stock purchased for $30. The VFD will keep the phase voltage up at lower speeds at a lower frequency. The load will be good for a 3/4hp motor, so a 2 hp motor should be big enough to use in a variable situation. I'm used to 200 - 500 HP motors on a VFD (Variable Frequency Drive).

With all the welding 60+ inches has induced some curvature. So that's fine. Used to that. Next step is to grind off the excess weld. Maybe do the heat & shrink trick to the sheetmetal. A body man I am not, but still learning new tricks (at 66 y/o). But I'm tickled with my Synchrowave 250. She is a sweetheart, torch has a remote start trigger that I just installed. The desk guy gave me an old Miller TIG torch switch. 16th inch welding rod pins fit perfectly into the cannon plug for the RCF -14 foot pedal. A newly repaired first gen torch water cooling system is working great with a plastic laundry detergent 1 gallon reservoir. I don't remember unloading it out of my truck, but it weighs 548 Lbs. I think my 4'11" wife helped. It's on the Miller cart.

Happy Thanksgiving Everyone.
 
I can see the VFD being beneficial, giving you the flexibility to use different speeds for materials of different hardness. VFDs have come a long way. They even use them with tiny 3 phase AC motors in Radio Controlled toys.
 
This VFD is for single phase in & out. Kind of a rare find as 99% of the market wants to control a 3 phase "spindle" motor for a DIY CNC. I also purchased a simple "zero crossing" detected PWM controller which is rated at 10KW (8 amps/125Vac) that will work I'm sure for $16. Nothing but a fancy fan speed controller.

Yea I used to market (import) various 3 phase mini controllers & motors, and a LiPo batteries. A whole line of stuff for RC aircraft.

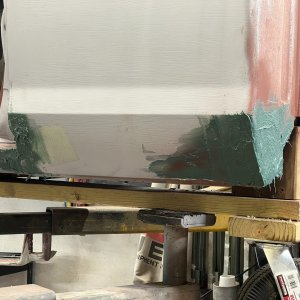
After a couple of touch up welds, the water test is tight. Now for some panel straightening, may have to purchase a "hammer & dolly" to persuade some high spots. Then comes the top rails, 2 ea. 1"x 1"x .06 wall square box to raise the top of this open box to raise the top lip up 2". Will help conceal the blade depth & add rigidity to the structure. The pre fab'ed top lid will hinge open. Need to buy some of that piano hinge material. Need to paint those new welds with something, epoxy maybe? Decent quality primer that will be oil resistant.
 
Hello all,

Update on the slab saw. Been working in the garage (shop) on this thing. Just sprayed primer around again so the welds are well covered. Also used some water based clear urethane to add sealing properties (from the inside) as the built it tank is a structural member of the whole thing. My synchrowave 250 has really outdone itself making me look better than I really am.

The 25mm linear rail "stuff" is really precision. The forward-back axis will travel 18 inches with the left-right axis should travel 6 inches. I will need to build up the "X-Y carriage" before installation with some 3/4" 7075-T6 aluminum plate that I have sitting around. Plus a vise system that will be also constructed of plate material, however I may piece it together with the same material alloy but 1/2".

Below is a general design that I'll be employing. A cast iron design is nice however I believe it's overkill as I can achieve the same function with the best aluminum alloy (7075-T6) bolted together. Notice the #7 AWG sides this thing is constructed with-
1733485270039.jpeg

1733486192492.jpeg

Here is a dining table shot of the 25mm rail material with the bearing block placed.
Mechanically these assemblies are without any detectable play, runout. Very nice at this price point no doubt. They will live in a well oiled environment, however with cutting debris, so we'll see how they do long term.

My neighbor (with the machine shop) has given me a 100 pound belt sander. So I am de-railed currently as I clean the thing up, get it working properly. Uses a 48" x 6" belt. It's also in primer, and later today it will receive some hammered silver to launch it on it's new journey as a semi restored (paint job rebuild) piece of "substantial" shop equipment. Pics coming.
 
Last edited:
The 25mm linear rail "stuff" is really precision.
Those things are great. Keep them lubricated or they won’t last long. Some type of covers to protect them from water/grit would be advisable in this application.

Building (Fabing) a 24" wet saw. (lapidary)
 
Exactly you were reading my mind Sir! Need to source these.
 
1734275866277.jpeg

Here is an old Taiwanese hundred pound heavyweight contender. Worked before a spray can rebuild, I cleaned & lubed, then masked all the important adjusters and rolling areas before primer & hammered silver paint. Now....not only does it operate like new, it looks like it! Still is a bear to move around, but now mounted atop a even cheaper designed $ 40 "tool stand" from harbor freight.
1734276197186.jpeg

Here is my progress so far...ground away the tack welds and got the 4ea 5/8 bolt holes drilled installed on my bench. It's was square when I took it apart.....So the whole thing will go back in soon, welded in place. I was careful to disperse the induced vibration across a larger area with shims. This is resting on the thin 16 AWG (0.64") steel sheet metal. Next will to machine the shaft to my drawing, which is waiting on coffee at the moment. Those are $40 for the pair of "triple shielded" 1-3/8ths" pillow blocks.
1734276912517.jpeg
 
Last edited:
Lucky for me my neighbor lets me knock out projects on in his machine shop.
Building (Fabing) a 24" wet saw. (lapidary)

Now for the slip fit. There is 0.0015" interference fit for the 5/8-18 grade 8 bolt shank that's going into the end of this aluminum shaft. Going to heat up the shaft in the oven & freeze the bolt. Should simply slip right in with no pressing required. I may put a couple of #10 screws in to hold it.
Building (Fabing) a 24" wet saw. (lapidary)

This cast iron pulley is what is riding on the other end.
 
Been working on the adaptor plate gather all ye linear sliders. Used flat heads! And everything lined up using scribe lines starting from a single corner. Terrible I am using calipers to scribe lines. Favorite trick. Now that I have the two axis tied together at 90 degrees, the final plate, that is the vise base is next to fab up. I'm using a 1/2" x 7" wide steel plate. Actually a cut off chunk from the top section of an I beam.

Scrapyard finds are a blessing when they come straight & square. The rust can be gone with my die grinder's sanding wheel. Then one can work clean & actually see the scribe lines.

The shaft came together no problem. Resting inside a 350 F oven for an hour, and the 5/8-16 8.8 bolt in the freezer, they came together with only a slight tap the press fit was never pressed. Just like a wrist pin & piston assembly, just like butter! Pics coming.
 
Hope everyone had a dynamite Christmas & an upcoming New Year!

Here is the latest pic from the scrapyard.....
1735481215278.jpeg

1735480951085.jpeg

Side of a scrapped I beam, probably sold it for some Jim Beam! Half inch x 7".
Here is a couple of pics of the adjustable vise coming together, the lower carriage will have the ends enclosed to house a 1/2"-20 lead screw. May go with a stub Acme square thread if I can find a section that is not bent as the person I scrounged it from used it for a pry bar.
1735481535310.jpeg

1735481636467.jpeg

This end will have a knob after it's all welded up. Only then can I position it accurately inside the tub & attach it square to the blade. Or within the adjustable region I should say. The Synchrowave 250 is my best friend so far, running up to 125 amps.
Building (Fabing) a 24" wet saw. (lapidary)

Here is the mock up, the right plate is the one that will move.
 
Last edited:
Purchased a brand new Milwaukee Sawzall, quits running every 10 seconds on any battery unloaded. Called tech support & got in a verbal fight with "Takisha" regarding their new quality. Their new "Diablo" blades melted throwing sparks. Jeeze, I'm normally the slowest, most oiled machinist I know. Feeds & speeds you know. I took out some old metal cutting blades I have had (bi-metal) and they still worked fine cutting 1/2" to 5/8ths" x 18" long cuts at a slight angle. Welded up the vise base, still square even. Time to drill some through holes.

Who knows of a decent drill sharpener? I believe most of my stubbies need a touch up & spending more time sharpening than using. I like stub drills in hand heald work, not only for the lathe. I must own a thousand drill bits. UPDATE: --...-...---..-..... The Taiwanese belt sander is holding it's own. Need to install a belt tensioner because when it's working, sounds like I'm murdering a goat that belt is so loud. Next one is too small. But the Rustoleum hammered silver paint is holding the whole show together and looking good~
 
Project Farm did a review of drill bit sharpeners, it's been a while since I watched it but it had a couple decent options... I have one that I found used that works pretty good but it only goes down so far...
 

Sponsored Ad

America 250

Latest posts

Featured Rangers

Want to see your truck here? Share your photos and details in the forum.

TRS Latest Video

Official TRS Merchandise

Follow TRS On Instagram


Product Suggestions

Back
Top