
- Joined
- Jun 5, 2021
- Messages
- 64
- Points
- 601
- Vehicle Year
- 1986
- Engine
- 2.9L
- Transmission
- Manual
Recently my fuel filter housing cracked while I was changing the filter. This was always a question of when it would break and not “if.” At the moment, I am in the process of hooking up inline filters as a replacement, but I got to wondering about potentially casting a replacement out of polyurethane resin.
This isn’t something that is completely new. I first thought of casting a stock replacement shift knob when first seeing how worn down mine is and also threads on F-Series forums looking for a replacement for a restoration.
There was one NOS Dorman replacement piece on the internet at the time and I bought it just for this purpose. That was years ago but I finally got around to molding and casting now.
Now, if anyone reading is more experienced in this realm, you are probably going to cringe or outright feel pain at the results. Fair warning.
I purchased 10A silicone on Amazon for about $8 and molded the knob in a can. After cutting the can apart and removing the knob, I noticed the silicone had not fully formed around the top of it, leaving that part of the mold extremely thin. Fully expected and I could make a pour hole for the resin there.
I bought SRC Tough-Cast 75D polyurethane resin as it was the cheapest available at the time. Use is straightforward: 1:1 mix ratio, ~3-6 minute working time, 1 hour cure. Reviews on the site noted that bubbling is very difficult to prevent, but I never thought my first casting would be usable in the first place. This is the result:
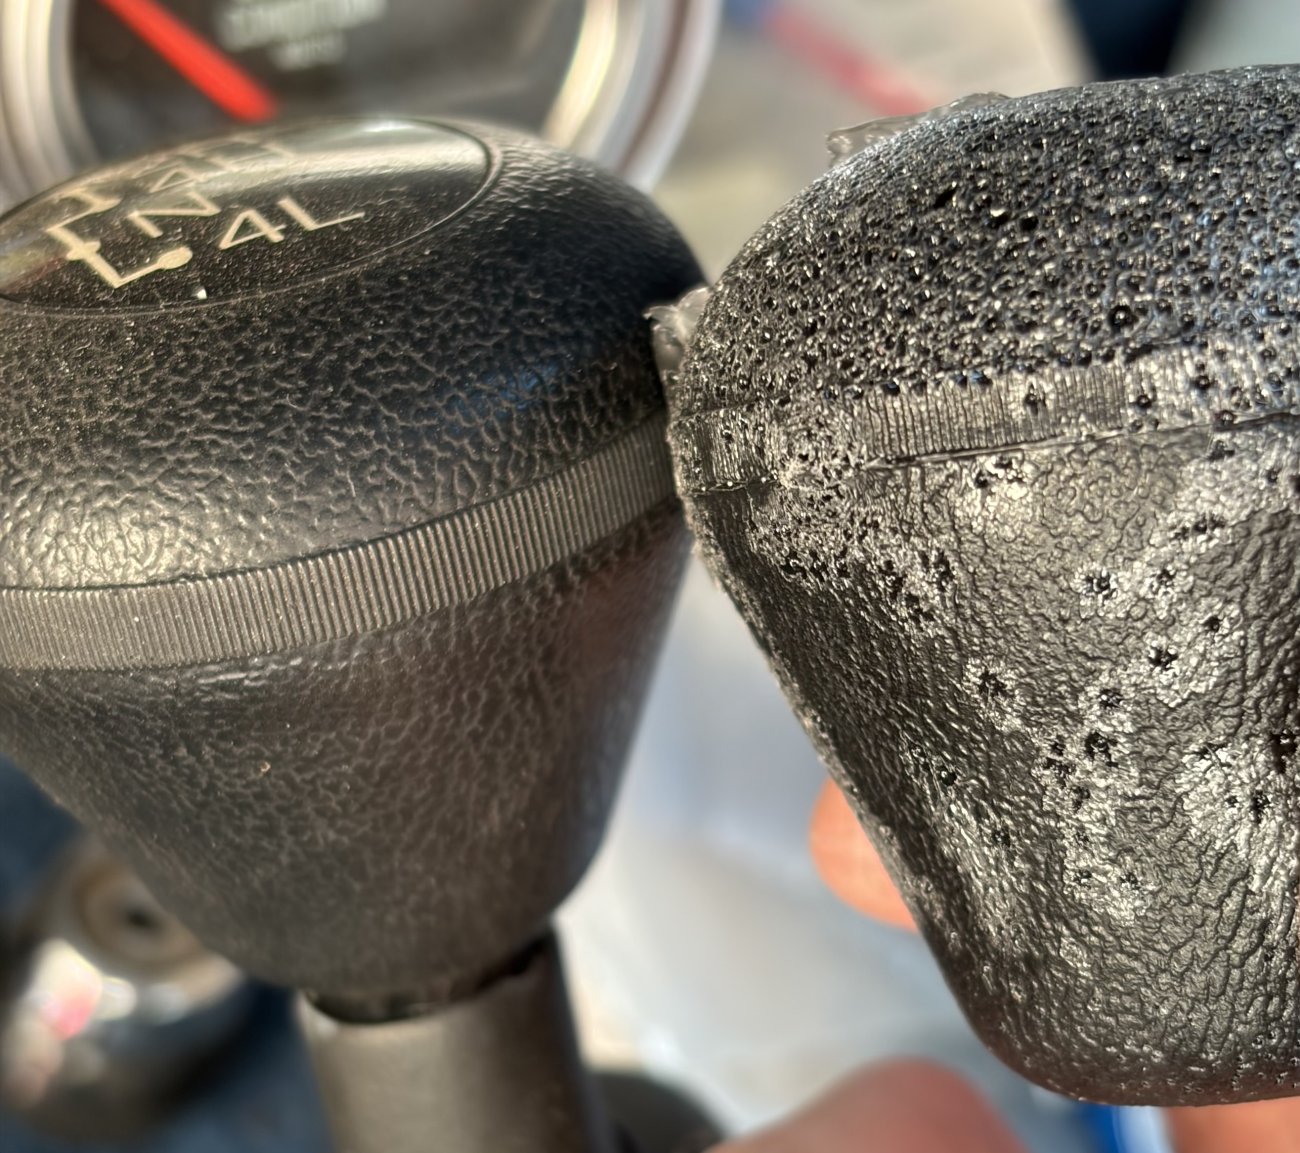
Not surprising.
I then tried my hand at duplicating the filter housing. This was a nightmare even in spite of sealing the container thoroughly and preparing the piece very diligently, so I ended up making a mold of the outside and the inside separately and seeing how they’d work as a two-piece mold. I fully expected it to fail, and that’s what happened.

The detail is definitely there, in spite of the bubbles, and a proper mold would do the trick for the structure. However, it does screw onto the upper portion without issue.

All in all, I think there’s potential to continue on and refine the process to a point where usable parts can be made, especially considering that restorations will probably (…hopefully) become more common in the next 10 years or so and there’s little support for the Rangers and Bronco IIs, at least at this time.
My exhaust is next on my agenda after the inline filters are installed and I’m thinking about duplicating the hanger isolators to 1) preserve some semblance of originality if I decide to replace them and 2) see what I can do with less complex shapes/pieces. We’ll see what happens.
This isn’t something that is completely new. I first thought of casting a stock replacement shift knob when first seeing how worn down mine is and also threads on F-Series forums looking for a replacement for a restoration.
There was one NOS Dorman replacement piece on the internet at the time and I bought it just for this purpose. That was years ago but I finally got around to molding and casting now.
Now, if anyone reading is more experienced in this realm, you are probably going to cringe or outright feel pain at the results. Fair warning.
I purchased 10A silicone on Amazon for about $8 and molded the knob in a can. After cutting the can apart and removing the knob, I noticed the silicone had not fully formed around the top of it, leaving that part of the mold extremely thin. Fully expected and I could make a pour hole for the resin there.
I bought SRC Tough-Cast 75D polyurethane resin as it was the cheapest available at the time. Use is straightforward: 1:1 mix ratio, ~3-6 minute working time, 1 hour cure. Reviews on the site noted that bubbling is very difficult to prevent, but I never thought my first casting would be usable in the first place. This is the result:
Not surprising.
I then tried my hand at duplicating the filter housing. This was a nightmare even in spite of sealing the container thoroughly and preparing the piece very diligently, so I ended up making a mold of the outside and the inside separately and seeing how they’d work as a two-piece mold. I fully expected it to fail, and that’s what happened.
The detail is definitely there, in spite of the bubbles, and a proper mold would do the trick for the structure. However, it does screw onto the upper portion without issue.
All in all, I think there’s potential to continue on and refine the process to a point where usable parts can be made, especially considering that restorations will probably (…hopefully) become more common in the next 10 years or so and there’s little support for the Rangers and Bronco IIs, at least at this time.
My exhaust is next on my agenda after the inline filters are installed and I’m thinking about duplicating the hanger isolators to 1) preserve some semblance of originality if I decide to replace them and 2) see what I can do with less complex shapes/pieces. We’ll see what happens.
Attachments

Last edited: