Soooo, I may have overdone it…
I finally pulled the seat out of the Missing Linc (87 2.9 5sp short short). I couldn’t find a replacement cushion, and before I started trying to cannibalize a passenger cushion into the driver’s cushion, etc., I wanted to see what I was dealing with.
Remember, it was a donor from a 93; I wish I had noted the miles. The cushion was totally chewed away in the back left corner where you slide in and out as you’re getting in and out of the truck.
View attachment 145038
View attachment 145039
The rest of the cushion seemed to be in decent shape, except the foam was pushed through the wire support maybe as much as a half an inch. The metal frame of the seat itself, and the tracks, were in excellent condition. The seat was tilting towards the door, and, to my horror, I found a little bit of rust around that left rear bolt area. Nothing too bad, but it was sagging, especially when you consider my fat ass bouncing up and down on it.
I followed
@scotts90ranger ’s excellent advice and I cut a piece of carpet to put under the cushion. Fuzzy side up, I cut my scrap carpet fairly precisely with tin snips so it overlaps the frame about a quarter inch in each direction, including the armrest side. I drilled a few holes, and I probably put about a dozen zip ties around it to hold it in place.
I had compiled an assortment of softer and firmer foam over the decades, and I also bought a sofa seat cushion foam from Hobby Lobby. After inspecting the seat foam, I cut and placed dense foam (stadium seats from five below), and I took just a little bit foam out of the existing cushion, so it would nest right into that failed corner. Think what Lego blocks look like. I drilled some holes and zip tied the various pieces together while also gluing them together with E 6000, and I ran a few zip thighs through the existing seat, cushion, and edges of the repair blocks to hold them in place. I’m gambling that the seat cover, which is not damaged, will hold it all together once it’s fully assembled.
Here’s where I may have messed up. I used more of the stadium seat material, which is about 3/4 of an inch thick, across the entire sitting area of the cushion. Well, when I got it back together, between that and the carpet, it’s like sitting on a booster seat. I’m looking out just below the sun visor in the up position. But a couple thoughts on that.
Like anything, once you take something apart carefully and put it back together, you can take it apart and put it back together in 10% of the time. I think I could remove that seat, strip the covers off and pull out that extra stadium seating across the fanny, and have it back in the trunk in 30 or 45 minutes. But…
As bad as the seat was, I really didn’t care as I was driving down the road. But as I recently related, the ongoing problem with my elbow and my hand, may have been caused by, and is certainly irritated by, having too much weight on my elbow/arm on the armrest. So part of the repair was just a normal repair, and the part of the repair was to make it firmer and taller to take a load off my arm on the armrest. I haven’t tested driven it yet, but I’m already planning on doing that, removing the fanny foam.
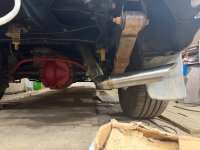
As regards the rot in the floor, it’s not total cancer, but enough to weaken that spot where the bolt connects and it sits down maybe 1/2-3/4”. I don’t have time to do a proper patch right now. So - wait for it - I wire brushed the area, and then I put an extremely thick coating of rustoleum all over it, and worked it in really well with a short bristle brush. I didn’t paint it, I coated it. Btw, very bright, carnival red, he can’t see it anyway Then I cut the web out of one of my scrap pieces of the 4 inch aluminum channel, resulting in a flat plate (about 3/16”) that was about 3 1/2 inches by maybe 7 inches (I never measured it). On the bolt end, it rests against the solid floor where it rises up on three sides of the bolt. On the door side, I cut it so that it’s resting on solid metal out where the door gasket sits, and it rests on top of the bolt for the seatbelt, which is very solid. I used a longer bolt, and an and a big washer and nut on the bottom, and it’s solid as a rock and the seat is straight now.
The story continues: When I put the custom seat covers over the original seats, I fixed up the armrest which was leaning down like they all do. I built a custom backing plate between the armrest and the side of the seat, and I made an aluminum spacer to put under the head of the bolt that holds it in place. Well, when I was putting this back together, I modified that spacer. Then, when I was trying to take the edges off on the belt sander, it caught funny and went flying across the shed of miracles. I know where it is within two or 3 feet, so it should only take a month or two to excavate that far and reclaim it. I’m starting that today. It’s part of the Lord‘s plan to motivate me to clean up the mess.
I’ll have more pictures when I get the armrest back together. After a break, I forgot to bring my phone outside with me, and my legs were hurting so bad I didn’t fetch it and get pictures of the repair progressing. Sorry about that. I’ll have more when I do the armrest, and I’ll probably pull the extra foam out.

")