
Original Poster: John H. AKA wvcat
Difficulty: 7 out of 10
Time to install: Approximately 6-8hrs
Disclaimer: Activities and vehicle modifications appearing or described at The Ranger Station and it’s pages may be potentially dangerous. We do not endorse any such activity for others or recommend it to any particular person – we simply describe the experiences and opinions of other Ranger/Bronco II owners. If you choose to engage in these activities it is by your own free will and at your own risk. Any and all modifications will likely cause a vehicle to behave differently than stock. Some modifications may significantly increase your risk when driving the vehicle or be dangerous in some driving situations. Use good judgment when engaging in any activity or making any modifications. Do not take unwise risks. Consult a certified professional if you are not sure of something. The Ranger Station and the authors of these articles assume no liability for how any particular individual chooses to use the information presented here. Some of these modifications may void your vehicles warranty. Please also read our Legal notice HERE.
Editor’s Note: It may be easier to swap the dash wiring harness from the truck donating the doors, but in this situation, the power window harness didn’t have 4wd and the existing 4wd harness didn’t have the power options. Thus, the original poster chose to modify his existing harness.
Brief Explanation: This is a how to to add power doors to your truck. Power windows, door locks and mirrors. I am not going to cover adding the individual components here because I added complete power doors to a project truck. In my case I am working with a 2000 Ranger XL 4wd but most rangers should be similar with the exception of different color wires on different years. Before you even start consider the following. If you hook something up wrong, you could damage the computer components in your truck and therefore this is a do at your own risk type mod. Basically, you will be adding a wiring harness, 5 relays, hooking into the fuse box for 3 separate power supplies and adding wires to the gem module. When complete the system will work as if factory installed and will even include the auto down function on the drivers door window as well as the accessory delay relay that allows you to roll the windows up after you have removed the keys. (this cancels when you open your door) It would be possible to make your own harness and install it without removing the dash however I removed the dash and used a factory donor harness that had power doors from a 2wd truck. If you could economically find a factory harness swapping it in would save you some work. I had no luck finding one. Ok here goes.
Tools Needed:
- Typical hand tools
- Wire Strippers
- Wire Crimpers
Parts Needed:
- Donor Harness (with power options and relays)
- Butt connectors
- Electrical Tape
- Power Doors
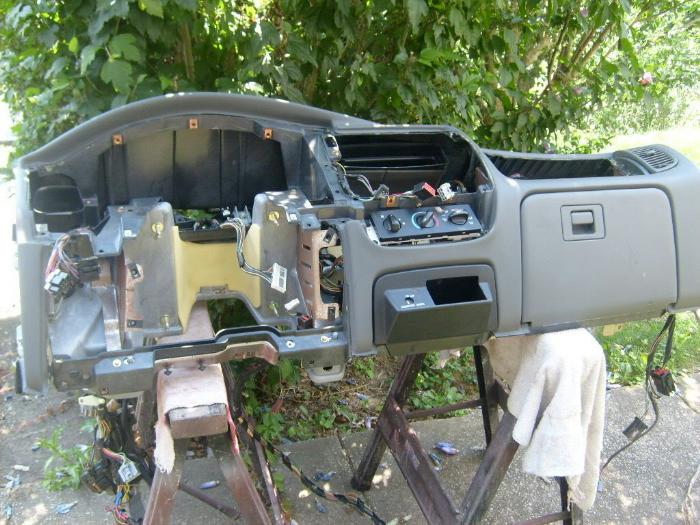
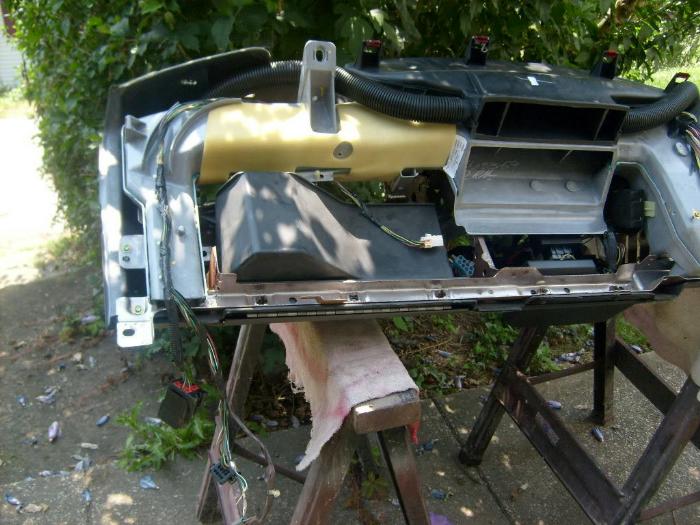
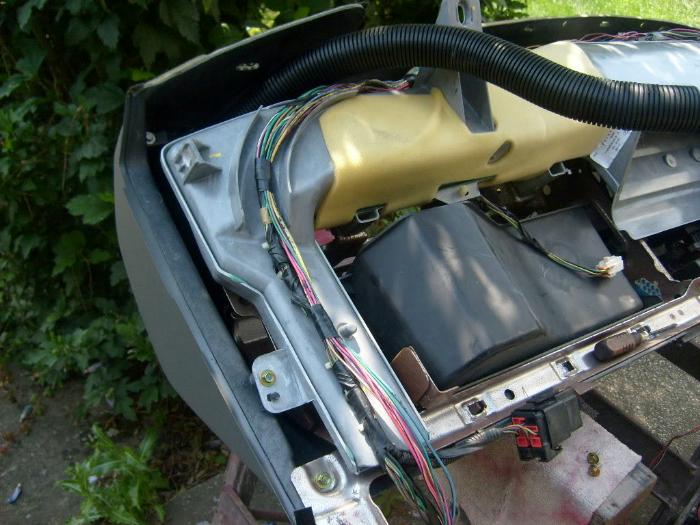
I am not going to cover removing the dash but here is the factory dash removed without any modifications to the harness.
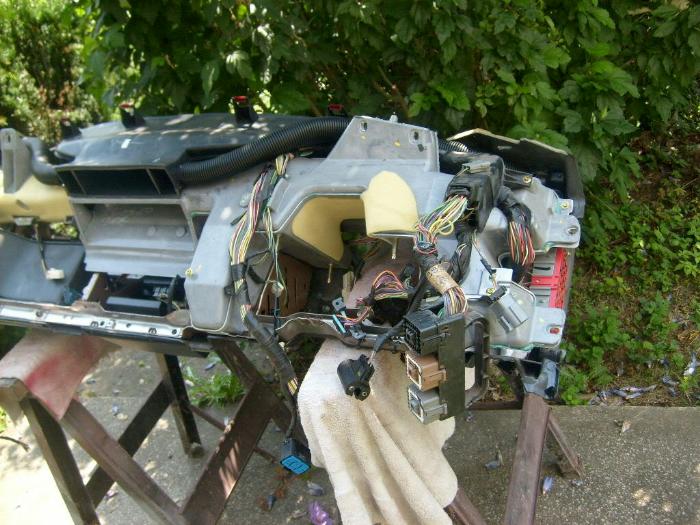
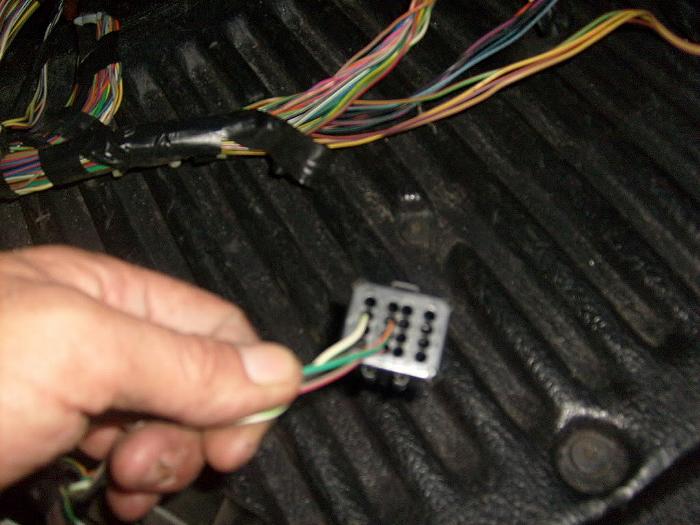
I removed the factory harness from the dash. Note the door plug near the fuse box with only 4 wires on the driver’s side.
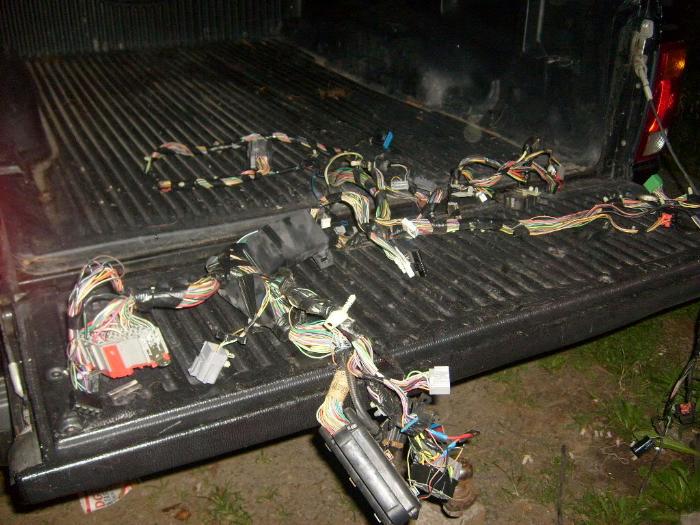
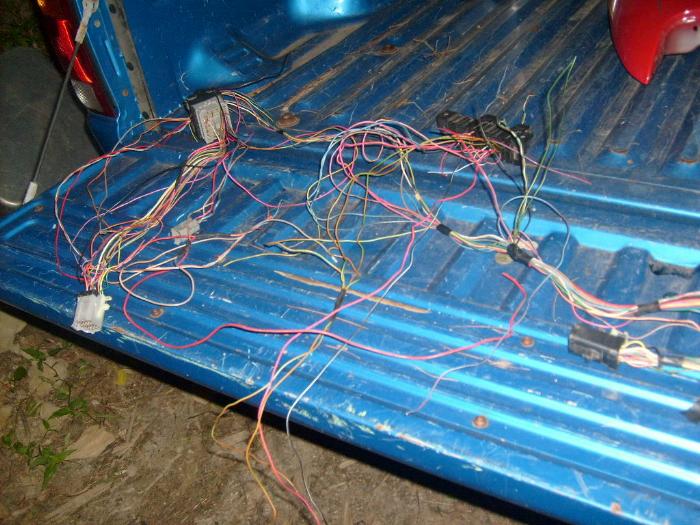
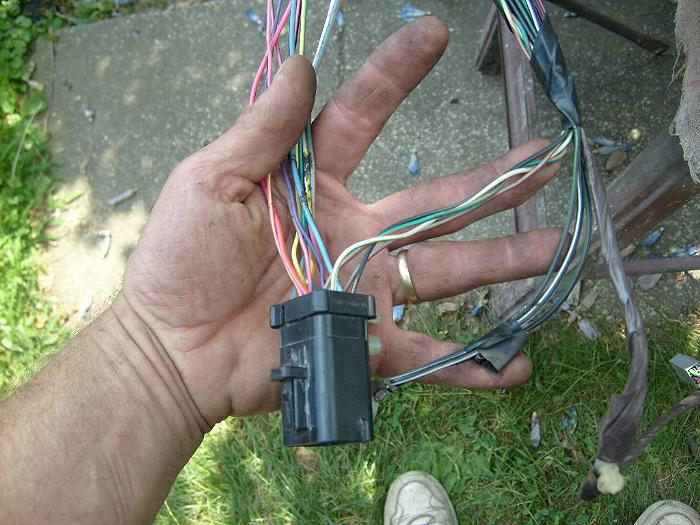
After dismantling the donor harness here is what is required for the power doors.
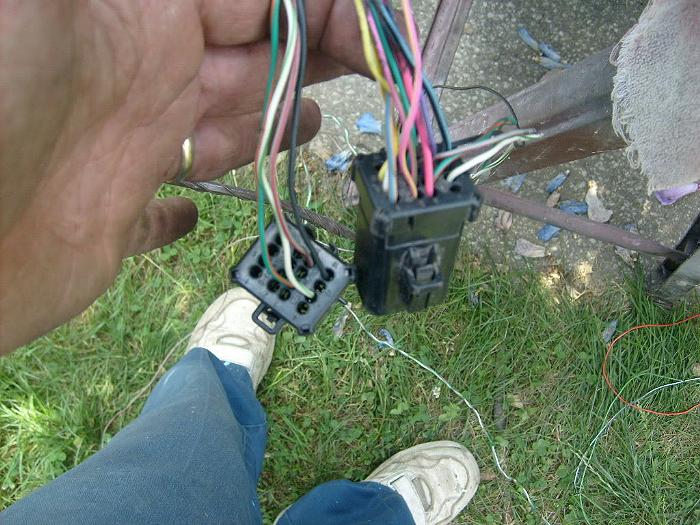
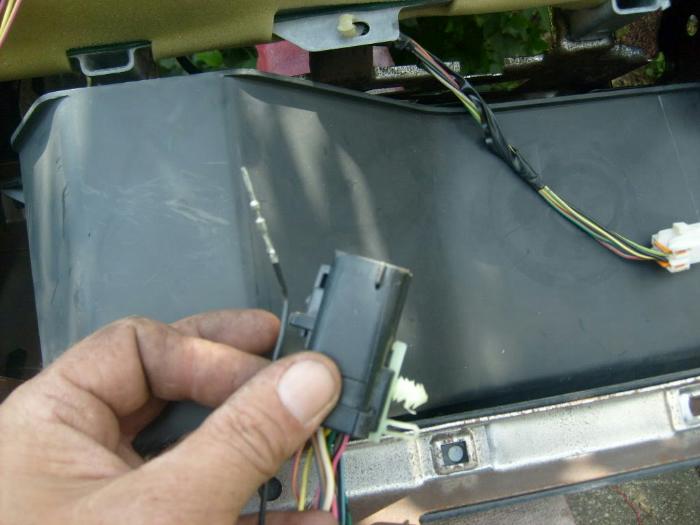
Here’s the difference between a power door plug and a manual door plug. Note the wires on the power door plug donor I have folded over, these are already existing in your truck.
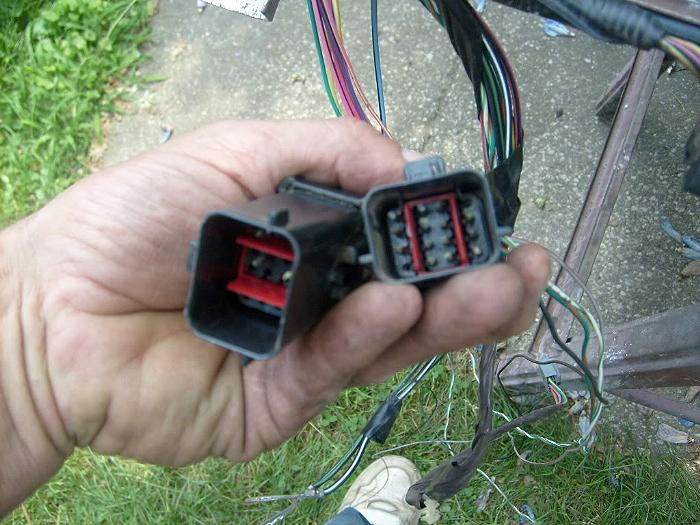
The first step is to remove the wires one by one from the donor harness plug and install them in the correct position in your factory harness plug. If you look at the picture above you will see a red piece of plastic inside the plug, this has to be removed and then use a tiny screwdriver or scribe to push the tab back and remove the wire. This is what a removed wire looks like.
After you transfer all the wires this is what it should look like. Don’t forget to reinstall the red plastic lock into the plug. Note the 4 factory wires and the 9 you just added.
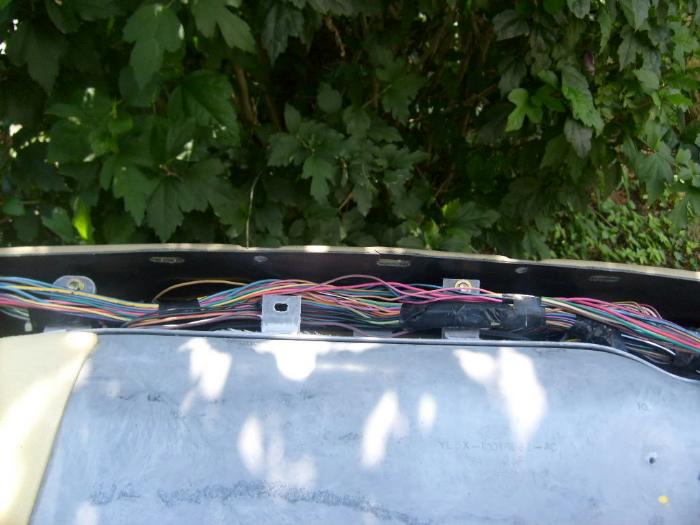
I just taped the new harness to the existing harness.
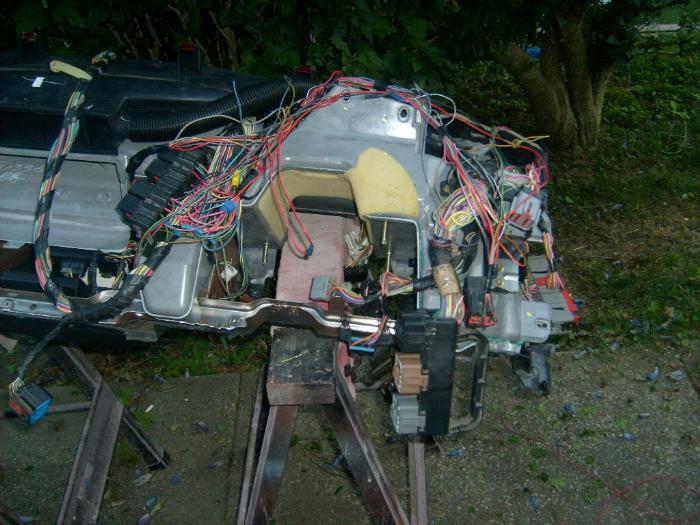
You will be required to add this relay box to the center of the dash with 3 mini relays and then 2 other relays. Note the wires going over the black relay box, they go to the gem. The all unlock relay is on the bottom right (note the black relay with red in the plug.
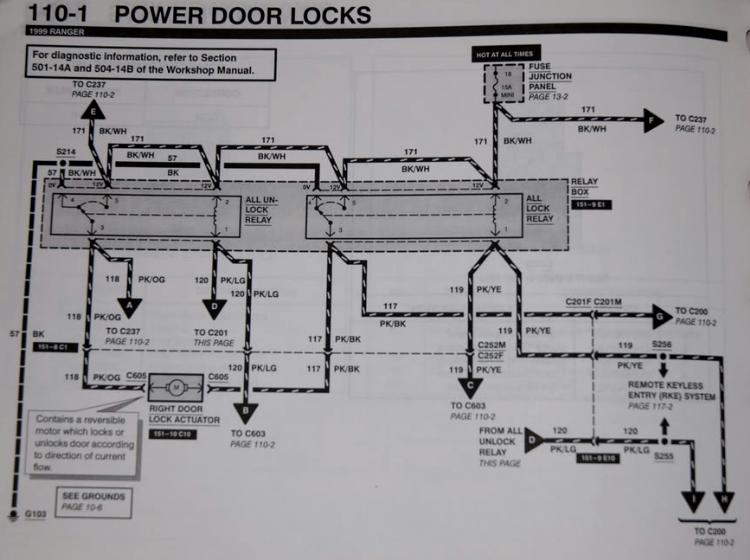
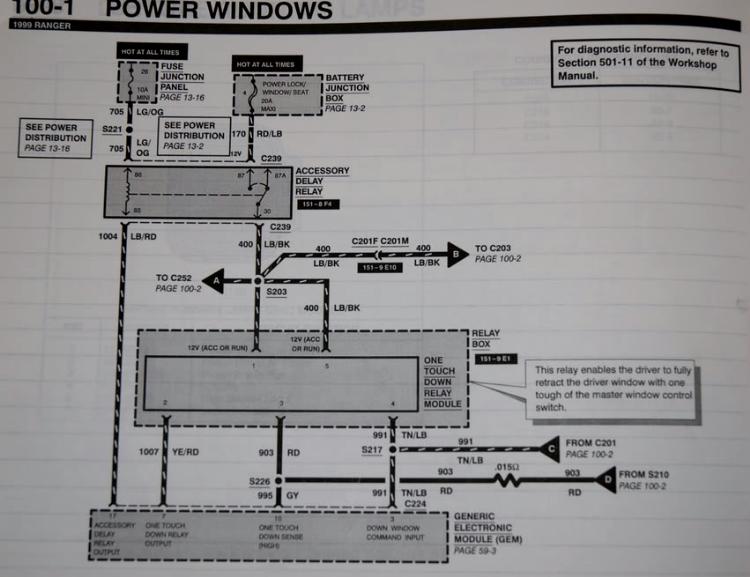
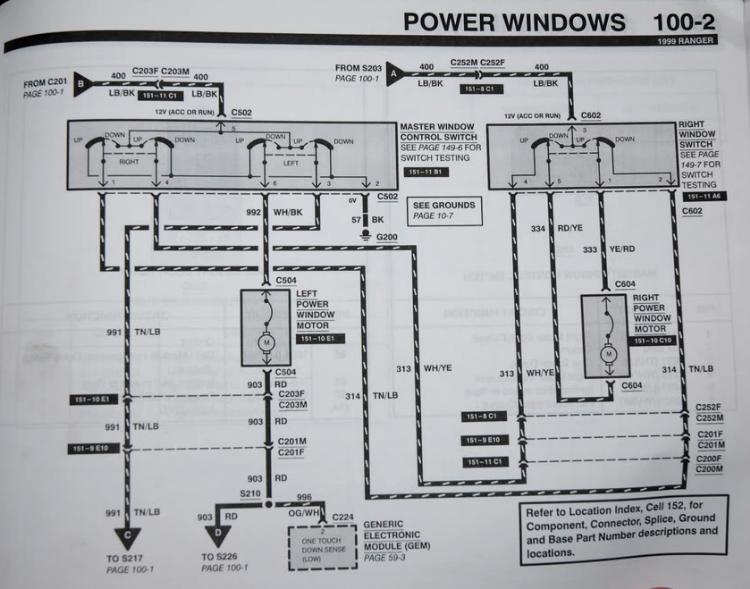
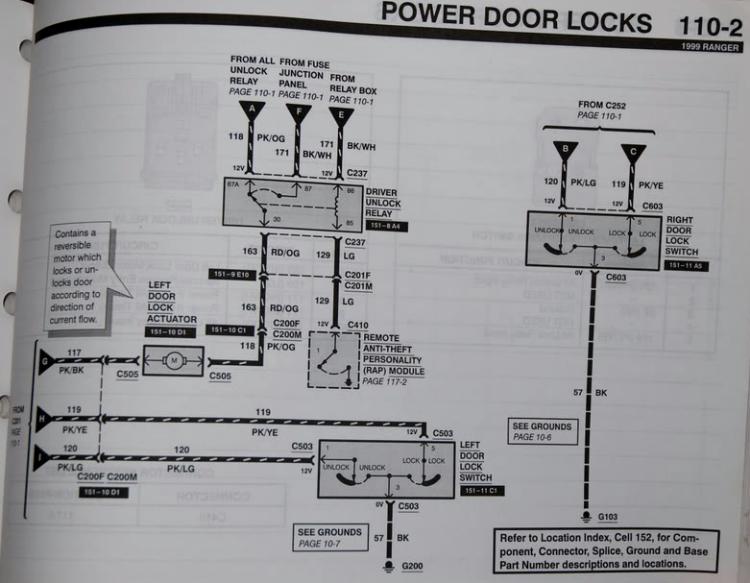
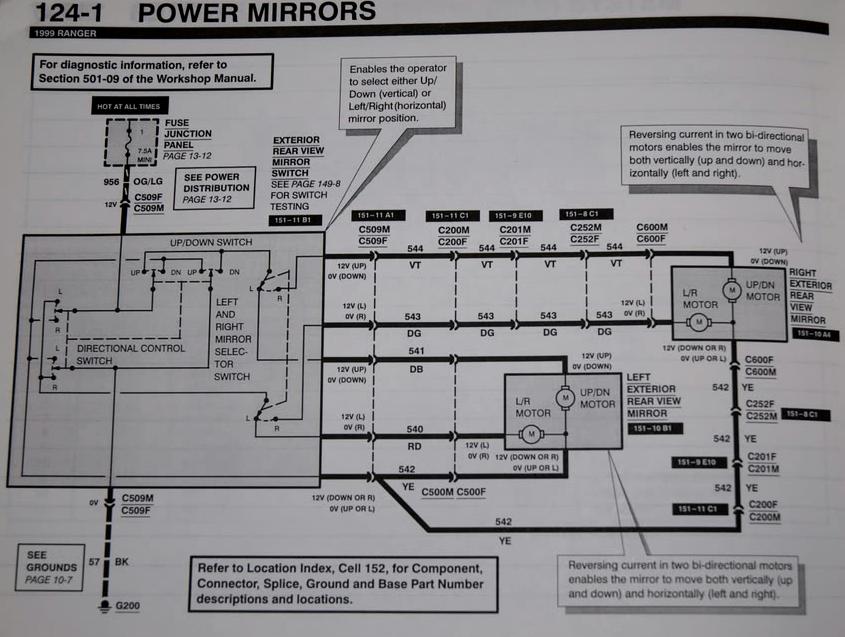
Unfortunately, this is all the pictures I can find so I’m not sure if I have any more, but this will get you the basic idea and concept of how to do it. Between these pics and the following wiring diagrams you will have all the required information on how to do it. A big thank you goes out to Ramsey Leonard for providing me with the wiring diagrams.
You will need a donor harness with relays or…
The factory wiring pins for the door plugs – approximately 20 that snap in
The factory wiring pins for the gem module – approximately 5 that snap in
The factory wiring pins for the fuse box – approximately 3 that snap in
The factory relay box behind the dash with relays and wiring ends that snap in
The 2 relays for the auto down and accessory delay with plugs and wires
Miscellaneous wiring supplies such as butt connectors, tape, strippers, and crimpers as well as a lot of time to have your truck down, its not really an afternoon job.
Good Luck,
John
About The Author
Jim Oaks is the founder of TheRangerStation.com, the longest-running Ford Ranger resource online since 1999. With over 25 years of hands-on experience building and modifying Ford Rangers — including magazine-featured builds like Project Transformer — Jim has become one of the most trusted authorities in the Ford Ranger off-road and enthusiast space.
Since launching TheRangerStation.com, Jim has documented thousands of real-world Ranger builds, technical repairs, drivetrain swaps, suspension modifications, and off-road adventures contributed by owners worldwide. TheRangerStation.com has been referenced in print, video and online by enthusiasts, mechanics, and off-road builders looking for practical, and experience-based information.