
Original Poster: Captain Ledd
Disclaimer: HERE.
Kudos to my friend Mack for helping me out on this.
Tools Required:
- 7mm socket
- 8mm socket
- 5.5mm socket
- T20 Torx (optional – some 7mm)
- T15 Torx (optional – all 5.5mm)
- A small extension might be useful in a few spots, but not necessary
- Body panel remover tool (a wide flat bladed screwdriver or a Popsicle stick works good too)
LED replacement bulbs (and other bulb info):
Bulbs:
- Larger: #194 series – 6 total
- Smaller: #74 series – 16 or 18 total (I had 2 empty on mine)
Time:
Seriously, this was a bazillion times easier than the horror stories I’ve heard. If you have everything ready to go it’s literally like a 10–15-minute job.
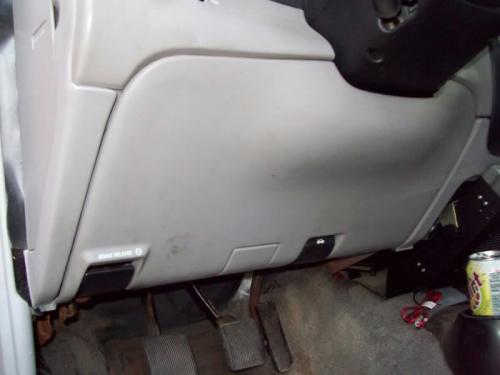
STEP 1
There are 4 bolts along the bottom. 2 are in the open, 2 are holding the hood latch. There are some spring retainers holding the top part of the panel in. Just pull straight back and they should pop out.
4x 7mm (T20 Torx)
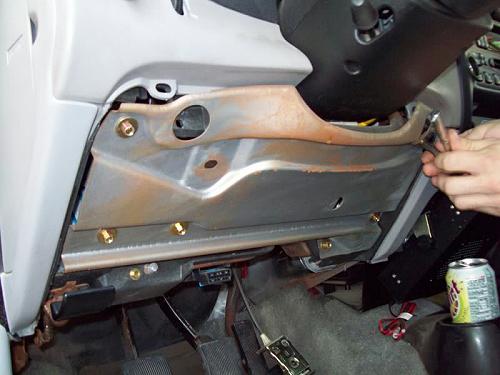
STEP 2
Remove the metal knee bolster panel
6x 8mm
STEP 3
Pull these 2 screws out and the 3 on the top part of the gage cluster
5x 7mm

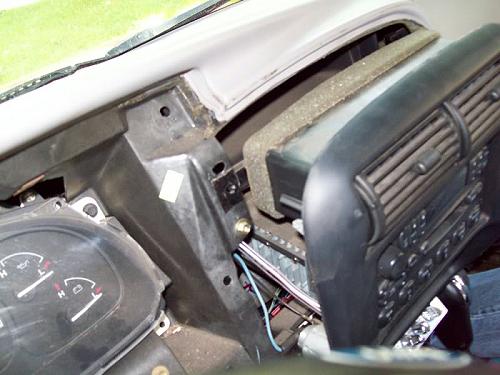
STEP 4
Unscrew the 2 bolts holding the radio/HVAC facia. They will be right above the HVAC control knobs. This is where the body panel remover tool comes in handy. you don’t have to take the whole piece off but pull it out just enough to get the next piece out.
2x 7mm
(yeah, I know, I already removed the other piece, see next step)
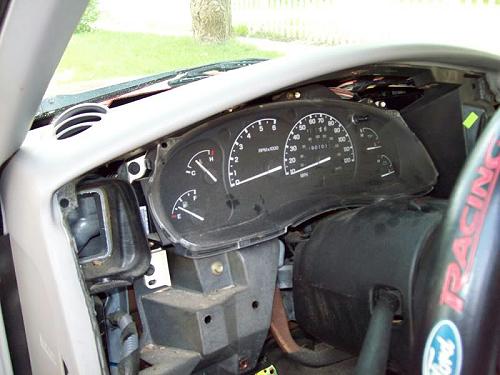
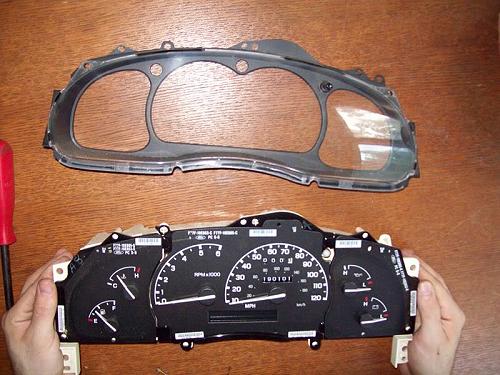
STEP 5
Now remove the piece surrounding the gage cluster so that it looks like this:
I don’t think there’s any spring retainers on this piece, but it does take some finagling to pull it out.
STEP 6
Unscrew the gage cluster and pull it out. Unplug the wire harness(s) and/or speedometer cable if your speedo is mechanically driven. These ones came off by hand really easy, didn’t need to pry or anything.
4x 7mm
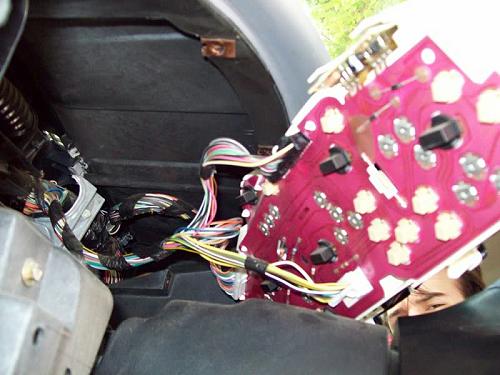
STEP 7
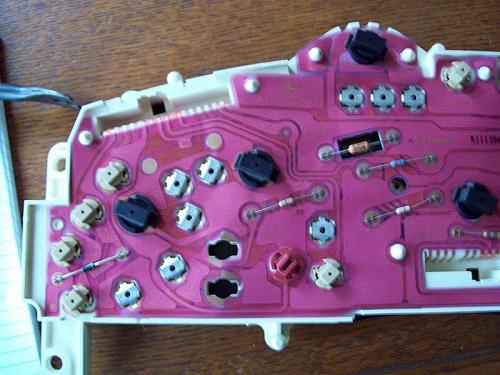
Now you can replace your light bulbs.
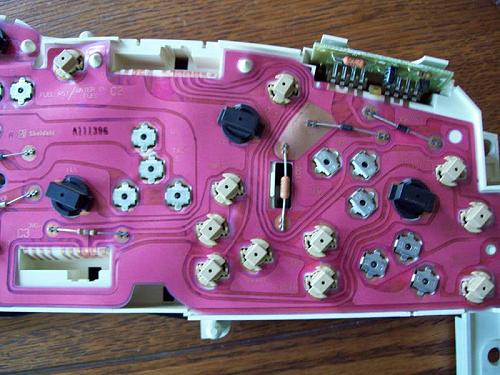
Black housings: #194 bulbs
Off White / Light Tan housings: smaller bulbs, #74 series
Silver = not bulbs, leave them alone
The lone red thing on the top pic= THEFT light (already an LED, at least on mine)
TO REMOVE BULBS:
Twist counterclockwise, lefty loosie, unscrew like a standard bolt/screw, etc.
They may make a popping noise when they come out, but don’t worry about it.
STEP 8
Reinstall in reverse order. after having done this, I figure it’s a 10–15-minute job. It was stupid easy. Not at all like I have heard it was.
Optional
Now if your Ranger is finally past its initial break in period (190,000 miles) like mine, there gets to be some crap behind the gages.
7x 5.5mm (T15 Torx)
The clear cover pulls off, and you’ll find something that should look like this:
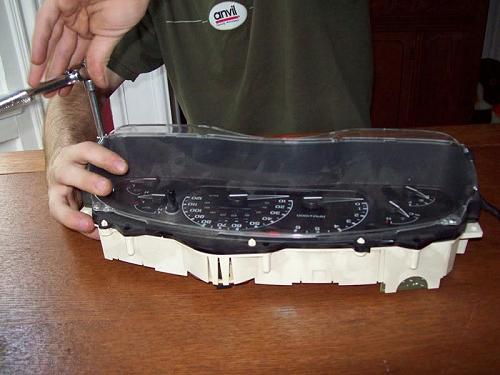
Now as far as I could tell the clear piece does not separate from the black base that separates the gage areas. I didn’t particularly reef on it hard as I didn’t want to break it. But there’s plenty of room to get a paper towel and some Windex back behind there. I gave the gage faces a wipe down with Windex too. I wouldn’t use anything very harsh on them.
Also, if the clear piece is kind of scratched to the point where you can see it when it’s in the truck (after many years of cleanings or use), try some Turtle Wax on it. Dries clear and should take care of any of the small imperfections (I don’t think you could use it well on the inside of the clear plastic, but you’re welcome to try it). It also works on scratched CD’s
Now enjoy your nice, clean, well illuminated gauges!
About The Author
Jim Oaks is the founder of TheRangerStation.com, the longest-running Ford Ranger resource online since 1999. With over 25 years of hands-on experience building and modifying Ford Rangers — including magazine-featured builds like Project Transformer — Jim has become one of the most trusted authorities in the Ford Ranger off-road and enthusiast space.
Since launching TheRangerStation.com, Jim has documented thousands of real-world Ranger builds, technical repairs, drivetrain swaps, suspension modifications, and off-road adventures contributed by owners worldwide. TheRangerStation.com has been referenced in print, video and online by enthusiasts, mechanics, and off-road builders looking for practical, and experience-based information.