
This page provides an overview of performing an Early Bronco Dana 44 swap into a Bronco II or Ford Ranger. It is intended for experienced off-road enthusiasts and shows what the process looks like. This is not a complete installation guide.
Table of Contents
- Overview
- Step 1: Before Picture
- Step 2: Remove Axle & Suspension
- Step 3: Front Suspension Removed
- Step 4: Install Dana 44 and Coils
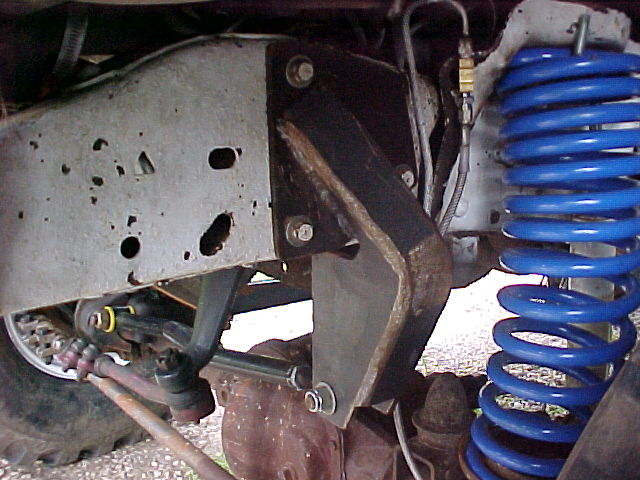
- Step 5: Radius Arm Brackets
- Step 6: Drill Holes for Brackets
- Step 7: Install Brackets
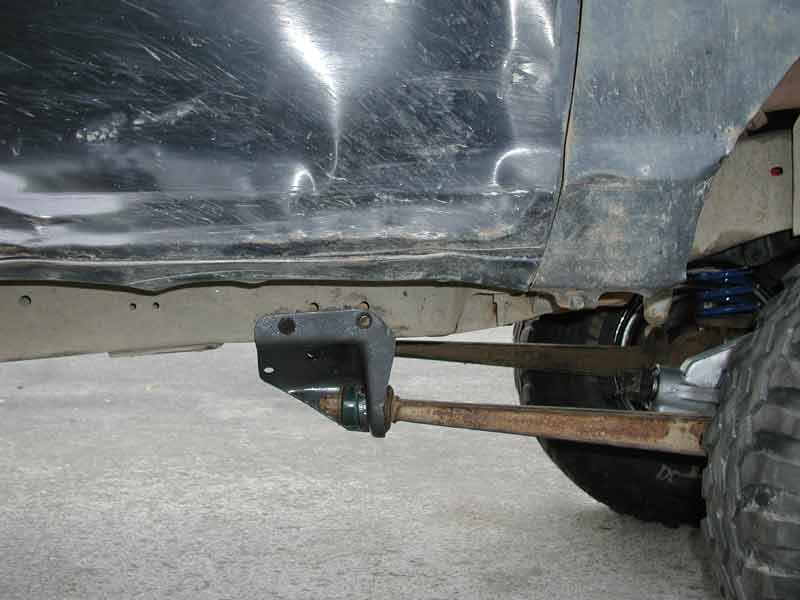
- Step 8: Track Bar Mount
- Step 9: Finished
- FAQ
Overview
This overview shows the basic steps for swapping an Early Bronco Dana 44 into a Bronco II or Ford Ranger. The goal is to upgrade the front axle to a stronger solid axle while maintaining proper coil and radius arm placement. The process can be done in a weekend with proper tools and mechanical skills.
Step 1: Before Picture

Step 2: Remove Axle & Suspension

Remove the old TTB axle and suspension components.
Step 3: Front Suspension Removed
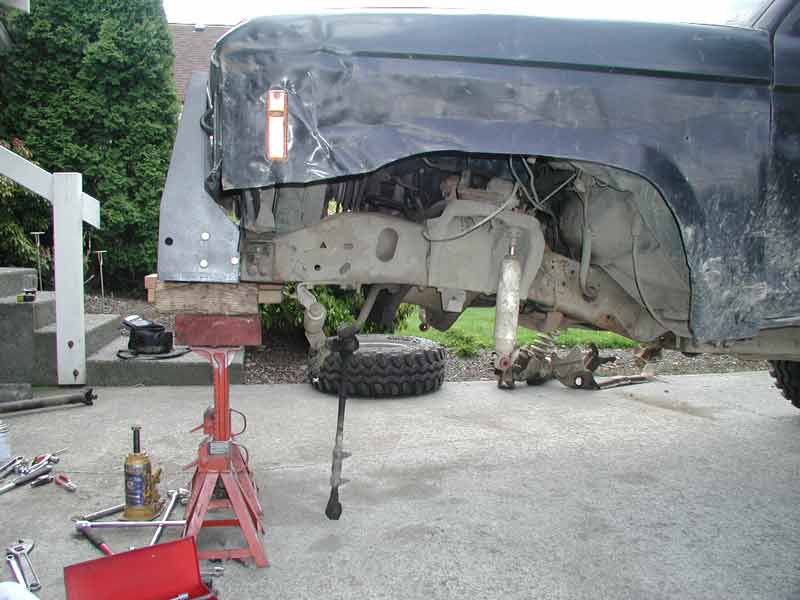
Took about an hour to remove everything.
Step 4: Install Dana 44 and Coils
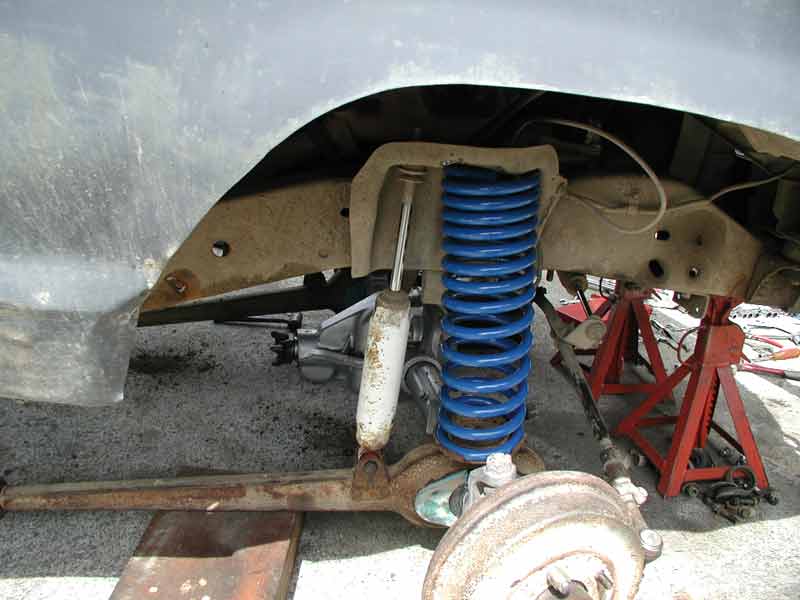
Slide the Dana 44 under the truck. Place the coils on the axle and carefully let the truck down on them. Hook up the shocks. These are Duff early Bronco 3.5″ variable rate coils. Axle is from a 1974 Bronco. 4-inch lift shocks work, 6-inch would be better. Stock coil buckets work, but upgrades are recommended for long-term flex.
Step 5: Radius Arm Brackets
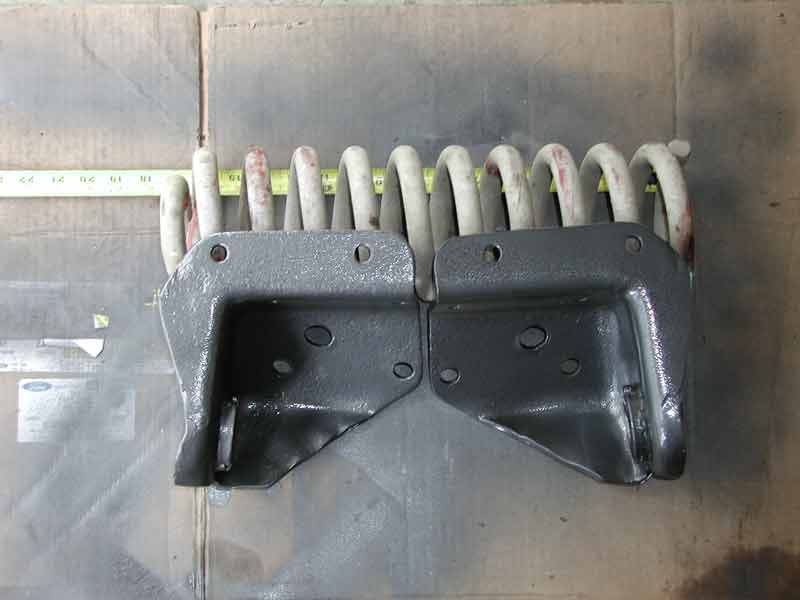
Use radius arm drop brackets from a 1978-79 F-150 or Bronco for proper caster alignment. Axle included 4-degree Duff bushings.
Step 6: Drill Holes for Brackets
Drill mounting holes for the radius arm brackets.
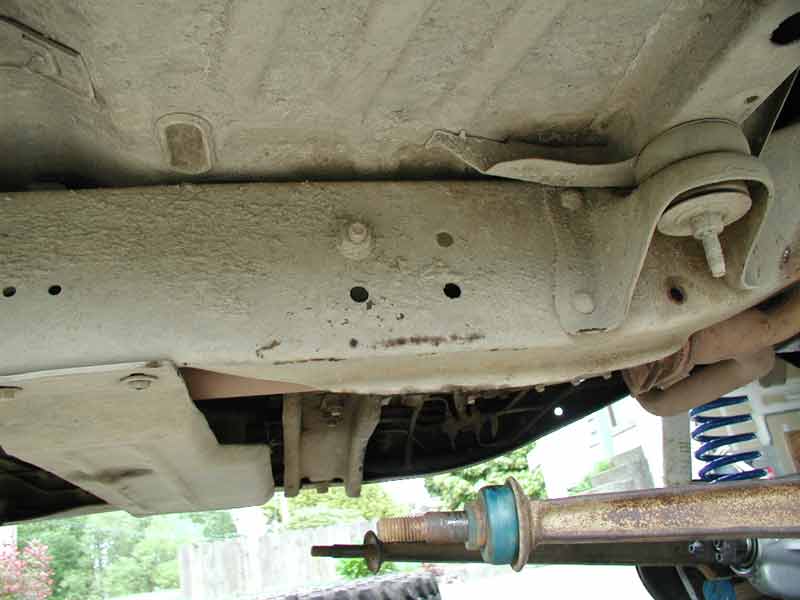
Step 7: Install Brackets
Align the bracket holes with existing frame holes to maintain original wheelbase.
Step 8: Track Bar Mount
Install a track bar mount. Bolt-up is recommended, but welding is optional if comfortable. Mount attaches to existing power steering gear bolts.
Step 9: Finished

After the swap, the axle sits 4 inches higher than the Skyjacker 4-inch lift. Brake, crossmember, and steering connections are omitted for brevity. This swap was done solo in one weekend.
Frequently Asked Questions
Can I use any Dana 44 for this swap?
Early Bronco Dana 44 axles work best due to width and coil compatibility. Minor modifications may be needed for u-joints or brakes.
Will I need new coil buckets?
Stock coil buckets work for basic installation, but reboxing or upgrades are recommended for long travel setups.
Will this swap change my wheelbase?
No. Using the recommended radius arm brackets maintains the stock wheelbase.
Do I need a lift to perform this swap?
A lift is not required. The swap can be done in a driveway with basic mechanical skills and tools.
Related Articles
James Duff Ford Ranger Dana 44 Axle Swap
Ford Ranger Solid Axle Swap (SAS)
Dana 44 Solid (Live) Front Axle
Last Updated:
About The Author
Jim Oaks is the founder of TheRangerStation.com, the longest-running Ford Ranger resource online since 1999. With over 25 years of hands-on experience building and modifying Ford Rangers — including magazine-featured builds like Project Transformer — Jim has become one of the most trusted authorities in the Ford Ranger off-road and enthusiast space.
Since launching TheRangerStation.com, Jim has documented thousands of real-world Ranger builds, technical repairs, drivetrain swaps, suspension modifications, and off-road adventures contributed by owners worldwide. TheRangerStation.com has been referenced in print, video and online by enthusiasts, mechanics, and off-road builders looking for practical, and experience-based information.