- Joined
- Apr 13, 2009
- Messages
- 16,201
- Points
- 3,101
- Vehicle Year
- '06, '11
- Engine
- 3.0 V6
- Transmission
- Automatic
If you used duct tape (red/green approved...) it wouldn't have to be temporary!

Are you implying that government workers aren’t the best and most professional? Wow, never considered that….
More likely the 6.5lbs extra in your backpack... LolToday was a visit to the chiropractor. I wonder why that needed to happen? The 10' long 4"X6" pressure treated lumber tied together in pairs wouldn't have anything to do with it, would it?
Watched this.
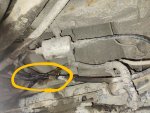
back in the 80s when I was in junior high and got my first socket set, it came in a metal case with a thin flimsy plastic tray that cracked and sagged and all the sockets would pool in the middle of the box (Buffalo Barcolay tools, Dad got the set to replace his smaller K mart set, and was so unimpressed with the quality that he gave me the set and kept the K mart set lol) so to fix the tray, took it out and flipped it over and sprayed some expanding foam on the underside. let it harden up and cleaned up where it came through the cracks and it was perfectly solid and kept the sockets where they need to be. easiest and cheapest fix for a junk socket set lolI used one of my harbor freight bits to fix my multi function switch. And I thought I’d share another one of “Rick’s tips.”
View attachment 110934
You know how when you get one of these nice little sets, and it bangs around for a week or two, and then all the bits are out of place rattling around inside the box? I cut a little piece of foam the size of the footprint of the box, and I lay it on top of the bits before I close the lid. When the lid snaps shut, the bits don’t move.
But then, of course, when you drop the box and it pops open, not only to the bits mixed up, they’re mixed up all over the floor. To solve that problem, I use a couple of zip ties in a loop around the box. It’s not pulled tight, it’s actually fairly loose, but it’s enough so the lid won’t pop open even if the latch releases. You can slide it on and slide it off easily every time you use the set, but if you drop it, it doesn’t pop open.
View attachment 110935
I do this with all kinds of stuff with all kinds of thicknesses of foam, from something thin, like this, up to 3/4 of an inch, which I use for some of my socket sets
Hope it helps…
That's an awesome fix. Going to use it on some tap and die sets...back in the 80s when I was in junior high and got my first socket set, it came in a metal case with a thin flimsy plastic tray that cracked and sagged and all the sockets would pool in the middle of the box (Buffalo Barcolay tools, Dad got the set to replace his smaller K mart set, and was so unimpressed with the quality that he gave me the set and kept the K mart set lol) so to fix the tray, took it out and flipped it over and sprayed some expanding foam on the underside. let it harden up and cleaned up where it came through the cracks and it was perfectly solid and kept the sockets where they need to be. easiest and cheapest fix for a junk socket set lol
AJ
back in the 80s when I was in junior high and got my first socket set, it came in a metal case with a thin flimsy plastic tray that cracked and sagged and all the sockets would pool in the middle of the box (Buffalo Barcolay tools, Dad got the set to replace his smaller K mart set, and was so unimpressed with the quality that he gave me the set and kept the K mart set lol) so to fix the tray, took it out and flipped it over and sprayed some expanding foam on the underside. let it harden up and cleaned up where it came through the cracks and it was perfectly solid and kept the sockets where they need to be. easiest and cheapest fix for a junk socket set lol
AJ