• Welcome Visitor! Please take a few seconds and Register for our forum. Even if you don't want to post, you can still 'Like' and react to posts.

M5R1/R2 Hybrid Build


broncc

Well-Known Member
Ham Radio Operator
Joined
Nov 30, 2020
Messages
451
City
N/A
State - Country
MA - USA
Vehicle Year
1989
Vehicle
Ford Bronco II
Drive
4WD
Engine
4.0 V6
Transmission
Manual
Total Lift
5"
Tire Size
31
My credo
Giving my truck more money than it deserves.
I have a lead on a cheap R2 transmission that I would like to dissect to build my R1. I know the R2 has a different bolt pattern, probably bearings, etc. Ideally, I would take the 3.9:1 first from the R2 to replace the 3.4:1 in my R1. What I do not know is if the first gear will fit in my R1. Does anyone have measurements of the shafts in the transmissions or advice/experience on doing so?
 
I can’t say the answer to your question.

However, I know the transmissions are physically not the same size. The clutch and and bell housing are about an inch wider.


If you already have all the parts, not too hard to check them, but I wouldn’t assume any of the parts are interchangeable.
 
If that gear does fit, which I will guess that it does not, you will also need to swap countershafts, and any other gear that is different than your R1 to match what's on the R2 countershaft. I highly doubt any of this is doable but if you have access to a very cheap or free R2 to disassemble and compare to your R1 parts, it would be valuable for the rest of us to know.
 
Darn. If you need to change shafts I believe it won't work. I recall hearing that the shafts are different lengths. I may still try to measure for science.
 
Okay well I cracked open some R1s today and have pics. For the sake of completeness and any future transmission rebuilders I will include all the measurements I can.

0602212209_HDR.jpg

Top is the 2004 2.3L shaft with a 16 tooth 1st. Bottom is the 1994 4.0 with 17 tooth 1st.
The frontmost bearing is a 2205-3VH 31mmID 52mmOD. The middle bearing is a 206E/60 37.5mmID 60mmOD. The rearmost bearing is a 6304N 20mmID 52mmOD.
The shaft is 14" long as best as I can measure.


Here is the output shaft with measurements of the 4.0

0612211749_HDR.jpg

Going from front to back (right to left) we have diameter: 25mm, 32 spline, 42mm, 48mm, 40 spline, 40mm, 35mm, 34 spline, 33mm, 30mm

As an additional note the 2wd trans has a 28 spline output and the 4wd has a 25 spline output.

Let me know if there is anything else I should measure, I'm still new to this.
 
Last edited:
Except for bolts....and *maybe* a bearing or 2

NOTHING will interchange between the R1 and R2.
 
Except for bolts....and *maybe* a bearing or 2

NOTHING will interchange between the R1 and R2.

You can modify the shifter stub shaft to swap shift levers.

I have a chrome FX4 lever on my R2, I had to grind a new notch for the wedge bolt.

But yeah, basically if anything interchanges between the two it is an accident on Ford's part, the R2 is basically a bigger R1.
 
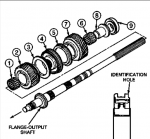
With the dubious future of the R1/R2 hybrid I have decided to make a pure R1 hybrid with the two transmissions I have, but reached another hiccup in my quest for low. The 2wd R1 output shaft and the 4wd R1 output shaft have different diameters for first gear. First gear spins on a bearing, that spins on a spacer, that slip fits onto the shaft. All of these components are a different diameter. I think I will need to turn this on a lathe to get it to fit...

1623647992012.png

It is #8 with the part number snippet 7173. I haven't seen much documentation of this swap other than people mentioning that they did it. This manual from the tech library implies that the early M5R1s had a 3.7 first? This rebuild manual from the tech library is for a 97. My transmission is a 94 with the 3.4 first. Did I stuff up and get the wrong donor transmission? Is there some rare 4.0 4wd 3.7 transmission I missed finding? Is it standard procedure to need a lathe for this swap? Will update as the story develops...
 
Last edited:
I have reached another hiccup in my quest for low. The 2wd output shaft and the 4wd output shaft have different diameters for first gear. First gear spins on a bearing, that spins on a spacer, that slip fits onto the shaft. All of these components are a different diameter. I think I will need to turn this on a lathe to get it to fit...

View attachment 61385

It is #8 with the part number snippet 7173. I haven't seen much documentation of this swap other than people mentioning that they did it. This manual from the tech library implies that the early M5R1s had a 3.7 first? This rebuild manual from the tech library is for a 97. My transmission is a 94 with the 3.4 first. Did I stuff up and get the wrong donor transmission? Is there some rare 4.0 4wd 3.7 transmission I missed finding? Is it standard procedure to need a lathe for this swap? Will update as the story develops...

as I’ve said before.... the gears from an R2 WILL NOT swap into an R1.
 
I think the 3.8 Supercoupe t-birds had an R2 with different gearing, might be better might be worse. :dntknw:
 
as I’ve said before.... the gears from an R2 WILL NOT swap into an R1.

Forgive me for not being clear yet. These are both R1 transmissions. I will edit my earlier post.

I will continue to attempt to fit R2 gears into an R1, though. I don't expect success but I need to satisfy my morbid curiosity now...
 
Last edited:
I have been thinking on the 2004 2.3L 2wd transmission for a bit now. It seems consistent with the description of the HD variants of the R1. Comparing the 1st/2nd synchros to the 3rd/4th, the first two are a larger diameter. The bearings the first two gears ride on are also larger. This was not mentioned in the tech library, but the output shaft is a larger diameter with more splines.

This potentially is bad news for any type of hybrid swap and also the tech library. If the lowly 2.3 2wd also got the HD internals this implies that all 2001+ transmissions are in fact, HDs. This means the cheapest source of the 3.7:1 first (2001+ 2wd 2.3s) is not viable for the swap. It also means that all transfer cases may not be compatible across the 2000/2001 date. I don't see why they would choose a different spline setup just for a 2wd transmission... I think more investigation is required and any measurements from other users would be helpful. Maybe even just counting the splines on a 4wd 4.0 SOHC to confirm the HD status of a trans without opening it will be enough.
 
I haven't torn into M5R1 newer than 1998 yet but I can tell you for certain that the main shaft is the only difference between 4x4 and 4x2 variants. All of the gears, bearings, etc will swap right onto a 4x4 shaft from a 2wd trans or vise versa.

There were some changes made to them in the late 90s that are kind of irrelevant here and even more changes after 01... I need to get my hands on a few more newer ones to document things.
 
Since my Bronco is coming along slower than I hoped, I will post the rebuild guide early. I even borrowed a camera for this. It is just a normal R1/R1 build.

--------------------------------------------

This is meant to be a supplement to the tech library packet here.

For this swap you will need your 4.0L OHV transmission and a suitable donor. To be safe, any pre-2000 4wd will work. There are others that are likely compatible suggested in the tech library. I chose a 1997 3.0L 4wd.

Difficulty: 7/10 You will need specialty tools, including precision measurement devices and be able to read some complex instructions from the manual.

Tools: torque wrench, snap ring pliers, bearing splitter, torch/oven, press, measurement tools (calipers okay, micrometers best), mallet, 55mm capable wrench, new collar nuts, beer

Time: Day for a first timer, 4 hours if you know what you are doing.

Disclaimer: The Ranger Station.com, The Ranger Station.com Staff, nor the original poster are responsible for you doing this modification to your vehicle. By doing this modification and following this how-to you, the installer, take full responsibility if anything is damaged or messed up. If you have questions, feel free to PM the original poster or ask in the appropriate section of The Ranger Station.com forums.

====disassembly====

Before starting the swap get yourself a clean, well lit working surface. Clean both of the transmission cases and drain the fluid. When you break the tail housing off make sure to use a torch and rock the bolts back and forth with plenty of PB or similar. The bolts will very easily take the aluminum threads with them.

The first tricky part of the disassembly is the rear collar nuts. I found the best way to break them off is to lay the transmission on the floor and sit on the bell housing. Put the wrench tightly on the nut and smack it off with the mallet.
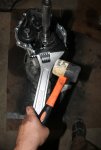
tools.JPG

As you follow the guide to take the transmission apart, its best practice to arrange the parts in a clear order to make assembly easy. I chose to place the components in a way where they tip towards the center of the transmission.
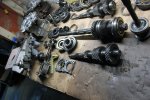
organize 2.JPG

The rear main bearing removal is the most risky part of the whole procedure and can easily cause damage to the reverse gear. I break away from the manual here to prevent the needing a $300 specialty tool. On the side of the transmission is a 12mm bolt that holds in the 5th/reverse shaft. Undo that and pull the shaft out being mindful of the detent ball and spring. This allows you to get a regular bearing splitter with some thin wood shims behind the bearing to pull it off.
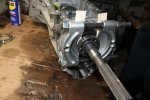
split.JPG

The innermost item before the center countershaft bearing is a spacer with a ball bearing in it. Be careful or it will roll under your workbench!

Once the center and front bearing caps are removed, wiggle the shafts front to back to help slide the bearings off of the countershaft. This makes it easier to pull the main shaft apart. Be careful with the front cover. It contains multiple seals and shims.

At this point, if your transmission is in known good shape, you could skip right to the assembly part. I got my donor off the shelf from the junk yard and wanted to be sure everything was alright. The pic below shows why that was a good idea.
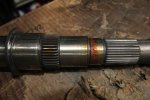
clean.JPG

Undo the third gear snap ring and set and everything behind it aside. Set up your press with wood to protect second gear and press the shaft out of the remaining gears. Be sure to catch the shaft; there is a bearing surface on the end that hits the ground first!
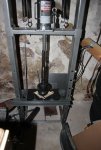
press.JPG

Once it is all apart it is time to clean everything. The case should be clean, the oil passages in the main shaft shot with parts cleaner, and the inside of the spacers cleared of metal shavings. Clean out the front oil pump by shooting it with cleaner and the collector in the tail housing pulls straight out. The oil funnel likes to collect bits of the synchros before it goes to the front bearings. Ensure the case mating surfaces are completely free of RTV.
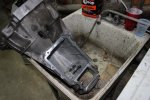
wash.JPG

Once everything is clean and apart it is time to take stock of what you have. Look for the best bearings and select gears that show no signs of wear. It is best practice to keep gears that mesh together as a set. Feel the input and output shaft where the main seals rest with a finger nail. Select the shaft with the smallest groove. Look at the shift forks and pick the ones with the most meat left. If you are reusing sychros, Ford provides no official wear measuring procedure. I believe measuring how far the synchro rides up the taper to be sufficient.
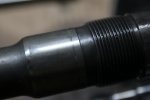
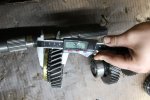
sealing surface.JPGsynchro.JPG

For ID purposes here is what main shaft gear has what teeth:


Gear​
4.0L​
Other​
1​
36​
35​
2​
32​
31​
3​
29​
27​
4​
23​
23​


====reassembly====

To put the bearings back on the shaft without special tools, lightly heat them and slip them on. They do not need to be smoking to fit on. Lightly tap the inner race to make sure its seated. The third gear thrust bearing and spacer must fit behind the snap ring! If it does not, the gear is not properly seated.
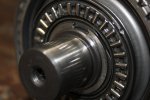
snap ring detail.JPG

Install the three shafts into the case with no bearings. Install the center bearings first. Place the races into their holes half way and use the retainer to pull them into place, sneaking up on it by turning all the bolts a little bit at a time. Stand the transmission up on some wood to install the front bearings. Tap them in as far as they will go and measure how far they stick out. Verify the shims you have are correct by referencing the shop manual for measurement procedure.
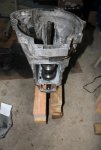
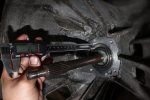
assemble.JPGpreload.JPG

Clean the front surface with parts cleaner and apply a VERY LIGHT layer of RTV on the sealing surface and bolt threads. Below are pictures of what too much RTV can do:
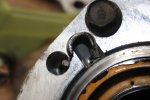
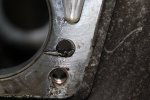
rtv1.JPGrtv2.JPG The oiling passages are nearly clogged.

Put the 5th/reverse shift fork back on the shaft before reinstalling. Use a small punch to hold down the detent ball. The big nut on the output shaft can just be smacked to approximate torque and pinned on with a chisel. When installing the tail shaft bolts, make sure to anti-seize the threads to prevent further damage to the case.

Congratulations! You now have a 4.0L transmission with better gearing.
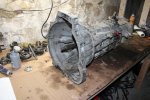
done.JPG
 
Last edited:
My assumptions (from various places on web including your numbers)

Input1st2nd3rd4th5th
4.0Mainshaft23353127n/a23
Counter38172534n/a48
Ration/a3.4022.0491.3121.0000.792
OthersMainshaft 23363229n/a23
Counter38162432n/a48
Ration/a3.7172.2031.4971.000.792

Input shafts have 23T for either; OD gears have identical number of teeth. Everything in between is different.

Countershaft
4.0: 38-34-25-17-48
Other: 38-32-24-16-48

Mainshaft
4.0: 35-31-27-23
Other: 36-32-29-23 (So, I think your table is bass ackwards between 4.0 and others)
 
Last edited:

Sponsored Ad


Sponsored Ad

TRS Events

Member & Vendor Upgrades

For a small yearly donation, you can support this forum and receive a 'Supporting Member' banner, or become a 'Supporting Vendor' and promote your products here. Click the banner to find out how.

Recently Featured

Want to see your truck here? Share your photos and details in the forum.

Ranger Adventure Video

TRS Merchandise

Follow TRS On Instagram

TRS Sponsors


Sponsored Ad


Sponsored Ad


Amazon Deals

Sponsored Ad

Back
Top