
People have been building boats about a million years longer than they have been building trucks so there is no reason why we can’t learn something useful from the boat builders. A very useful thing we can learn is an easy method for making parts fit unusual shapes. The method I want to show you is called fitting by back-measuring and by using your head you can apply this method to almost any shape. It would be useful for building sub boxes, building hood scoops, shaping a bumper to the contours of the fenders—anything.
The first step is to get a board to use as a pattern, ¼” plywood works well, and roughly shape it to within an inch around the inside or outside of the area where you need to fit a part. Here I am doing an inside fitting. An outside fitting is no different except the pattern might be U shaped to loosely fit over a transmission hump for a console or around a window pillar to make a gauge pod—for example, or L-shaped if you were going to pick up the contours of a fender to make a bumper look like it belongs on your truck.
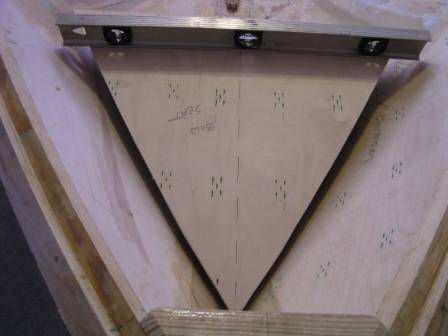
Level the pattern on the exact plane that the part will fit. It doesn’t have to be level with Mother Earth, unless that’s what you need. For instance, a console over a transmission hump could be angled away at 45-degrees so you could see the gauges. What I am doing here is forming a seat to go into the bow of a small boat.
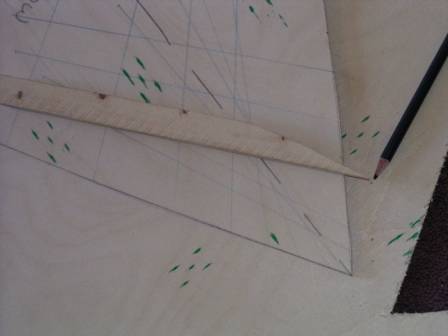
Next you need a sharp stick of maybe 4-6” length—you’ve been playing with sharp sticks since you were so high so this should be easy. The stick should be more or less straight along one side and it needs a notch cut into it, as mine has.
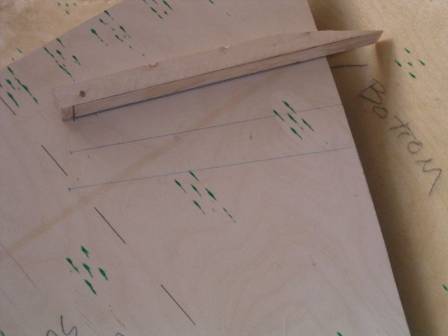
What you are going to do with your sharp stick is very simple. Place it flat on the pattern, touch it to truck, boat, whatever, and draw along the stick carefully until the notch stops your pencil or sharpie. Make a thicker mark in the notch. Keep doing this all over the place. In straighter place you don’t need very many lines and marks. In places where the shape is rapidly changing, make lots of lines and marks.
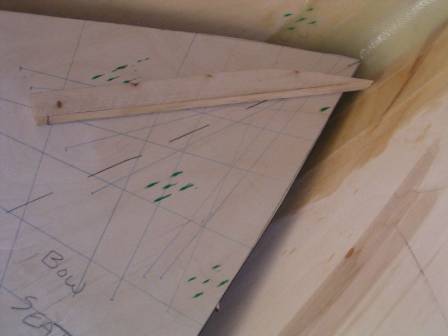
The lines can cross each other and go any which way—it doesn’t matter. The lines are simply pointing at a spot off of the edge of your pattern and they can point from anywhere on the pattern. Just make sure you can find the marks at the end of the lines you are drawing. Once you have enough lines to pick up the shape, remove the pattern and go find a piece of material large enough to make the finished part with.

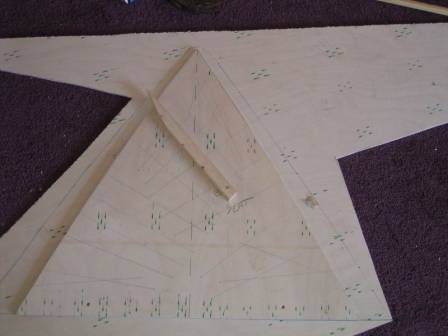
In this case, I found a big piece of scrap and decided that if I cut away everything that didn’t look like a bow seat, I would end up with a bow seat. The way you decide which pieces don’t look like your finish part is to place your measuring stick along the lines you drew, align the mark on the line with the notch on your stick and at the very point of the stick, mark the material. You are going to do what you did on your truck, boat, whatever, just in reverse.
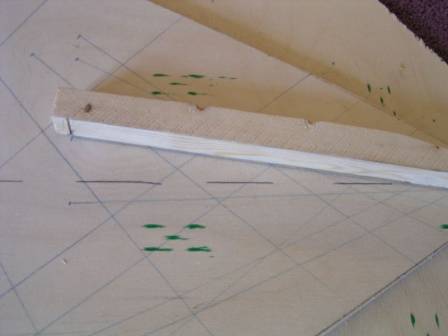
Again, align the notch, mark, stick, line…
And mark the point of the stick onto the material. Do it, obviously, everywhere there is a line and mark. After you have it all done you will have a whole bunch of points marked around, or inside, of your pattern. Your pattern is no longer necessary. Now you get to play that childhood favorite—Connect the Dots. I usually just sketch it in but I’ll show you a way that is a little better for long, smooth curves—say you are fitting Batmobile fins to the bedsides of your ranger.

Take little nails and pound them into the marks that you made. Bend a thin stick around the outside of the nails using other nails or weights to hold the stick. Draw inside the stick. On the parts you are going to sketch you can do a nice job of making a smooth curve if you keep your eye a couple of marks ahead of where the pencil is and draw in short quick strokes. Now, using a tool suitable for what you are going to cut, remove all the bits that don’t look like what you are building.
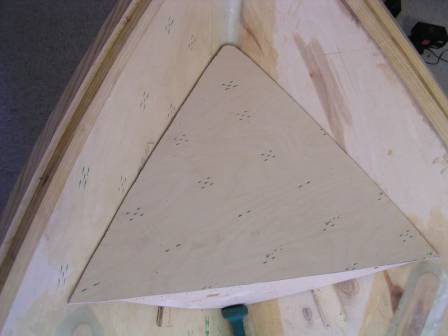
Here is the part ready to by puttied and taped into place. Using this method of fitting it takes about ten minutes to shape a part. Your pattern does not have to be very pretty at all. You can use your imagination to expand on this simple way of fitting things.
About The Author
Jim Oaks is the founder of TheRangerStation.com, the longest-running Ford Ranger resource online since 1999. With over 25 years of hands-on experience building and modifying Ford Rangers — including magazine-featured builds like Project Transformer — Jim has become one of the most trusted authorities in the Ford Ranger off-road and enthusiast space.
Since launching TheRangerStation.com, Jim has documented thousands of real-world Ranger builds, technical repairs, drivetrain swaps, suspension modifications, and off-road adventures contributed by owners worldwide. TheRangerStation.com has been referenced in print, video and online by enthusiasts, mechanics, and off-road builders looking for practical, and experience-based information.