
Beginning a fiberglass project can be daunting, so here are a few things that may help.
First Some Terminology:
Resin: Polyester or Epoxy based liquids, that when combined with an activator or hardener, will harden entrapping the glass fibers.
Fiberglass Cloth: A woven material made of fine glass fibers. Cloth adds strength to a fiberglass structure but can be hard to lay out on compound curves.
Fiberglass Chop Strand Mat (CSM): CSM is an excellent material for compound surfaces and quickly building up layers. CSM can be pulled apart into smaller pieces to help it get into tight spots.
Plug: A positive shape that fiberglass materials and resin are laid upon to help make the final part or a mold. A plug can be reused or destroyed when the final part has cured.
Mold Release: A substance that will not permit the fiberglass resin to adhere to the underlying surface. Various types of materials can be used as mold release, such as mold release wax, aluminum foil pressed onto the surface of the plug, and even painters tape.
Construction:
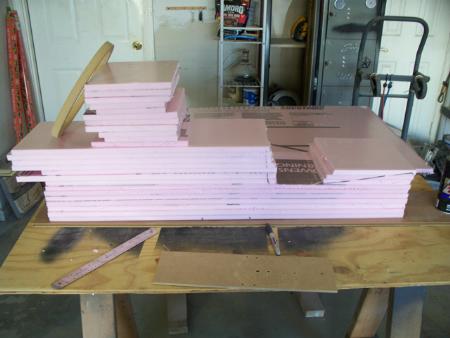
When I began my center console build, I began by planning out my design for functionality and design. Once I had a general shape in mind I began to construct my “plug”. To do this I chose 1/2″ thick pink insulation foam sheets from Home Depot. I chose this medium as it is easy to cut and sand to shape. Here is a photo of the pieces stacked into a very rough shape.
I wanted a speaker mounted in the rear section of the console so I made a speaker mounting ring out of 3/4″ Medium Density Fiberboard (MDF) using my router and a circle jig. I made my circle jig out of 1/4″ MDF and marked it to mount the router in the proper locations to cut the inner and outer circles.
My Circle Jig:
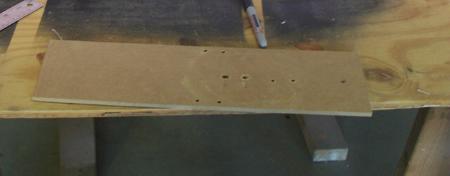
Now keep in mind you must cut the outer circle first to maintain a center point, then cut the center out. The ring will fall off the outside.
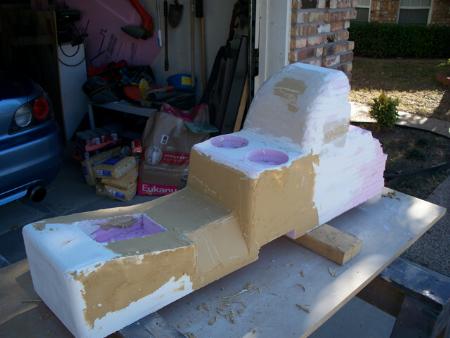
Ok so now I have a rough shape and a speaker mount, so I began to rough cut the shape close to the design I wanted.

It took some time and determination, but I finally got the overall shape how I wanted it. Now keep in mind if you are making a plug for a mold, the plug must be the exact size you want the finished part. However, if the plug is only to serve as a base for the build, then you want it to be slightly smaller than the final dimensions as you will be building layers on top of the plug. In my design I laid up the glass over the plug to make it sturdy enough to remove the plug then I removed the plug and built up the inside layers thus not increasing the outer dimensions.
Once my rough cut was done I began to coat the foam plug in drywall mud. I used this material because it is easy to apply and easy to sand. The drywall mud helps to refine the fine details as well.
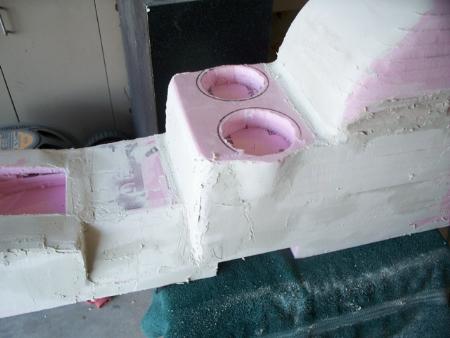
This image shows the drywall mud and some body filler applied and dried. I then sanded the drywall/filler smooth.
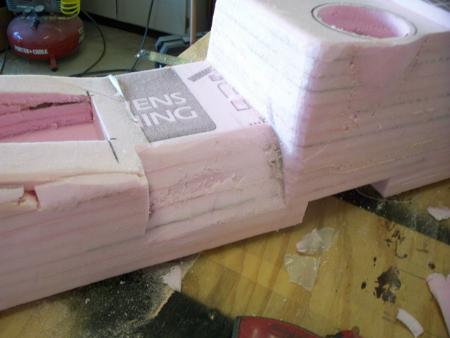
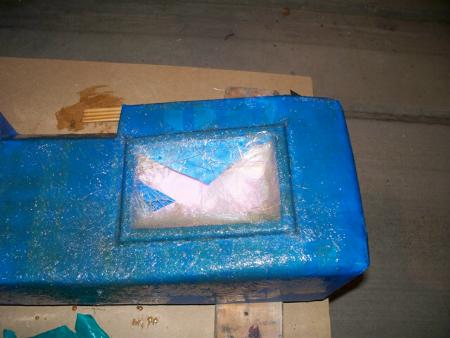
Once it was sanded smooth I began to shape the area to mount the ring in the rear of the console. Sorry no pics of that. When I was happy with the overall shape and location of the ring, I wrapped the entire plug in the blue painters tape.
I used the tape to form the transition from the speaker ring to the console.
Another method would be to glue/staple some fleece fabric to the area, stretch it to shape and then use resin on the fleece.
The resin will harden trapping the fleece and making a base for the fiberglass layers to come.
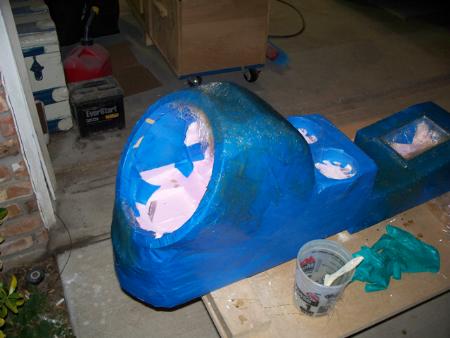
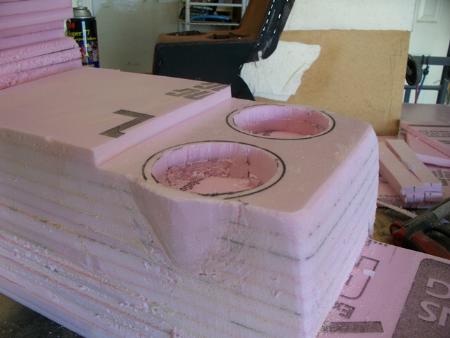
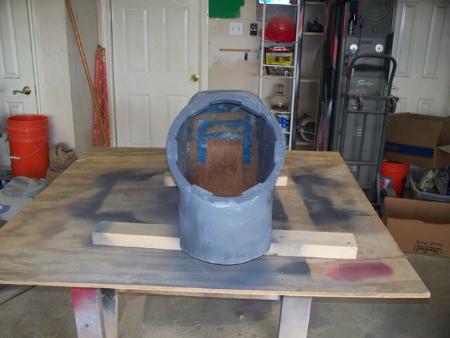
After I had it all taped up I began to apply my mixed resin to the CSM. The raised trim ring around the shifter was made from 1/4″ MDF and ran through the router to round over the edge. I continued building up the layers over the entire surface until I had it about an 1/8″ thick all over. I let it cure and then prepared to pull the plug out of the cured part.
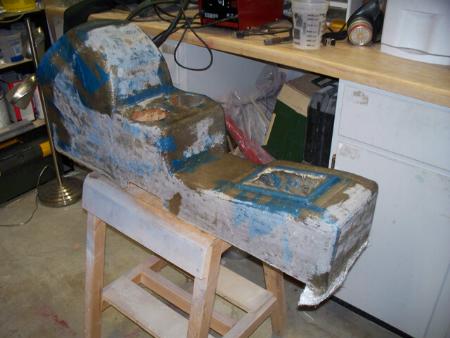
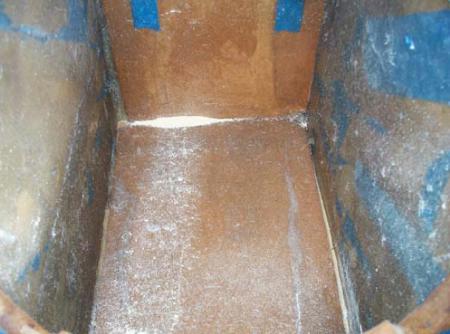
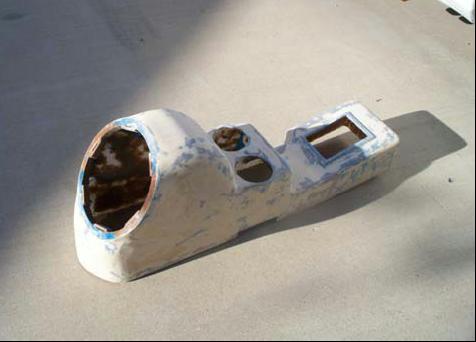
Here you can see the shell. The plug was removed using a utility razor knife to cut up the foam and pull it out. The blue areas are the remaining painters tape. The light areas are where I did a rough sanding with a 40 grit disc on the drill to knock down the rough edges of the fiberglass. The dark areas are where I began laying up the reinforcements. I also placed a piece of 1/4″ MDF just behind the cup holders on the inside to separate the speaker from the front and create a sealed enclosure.
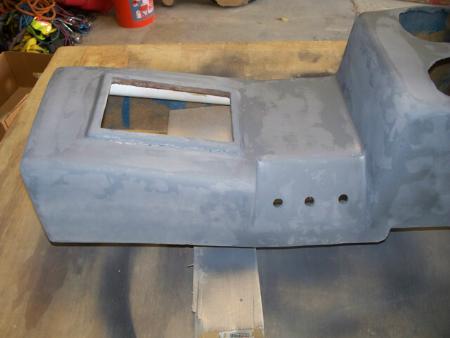
Above is a pic of the baffle I added, it was glassed in and extra layers placed over the baffle to seal it. You can also see where I added fiberglass tape to the edges of the speaker ring to reinforce that area.
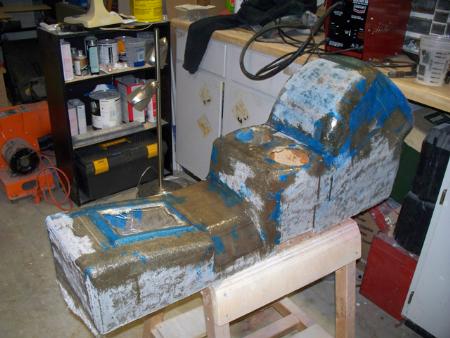
I built the inside of the enclosure up to about 6–8 layers of fiberglass. Enclosures built from fiberglass need to be thicker to support the stress from the pressure inside the enclosure. I also added another section of 1/4″ MDF to the bottom of the speaker section to enclose this area. The inside was totally sealed using fiberglass CSM.
Here is a shot inside the speaker area with the bottom in place and glassed in.
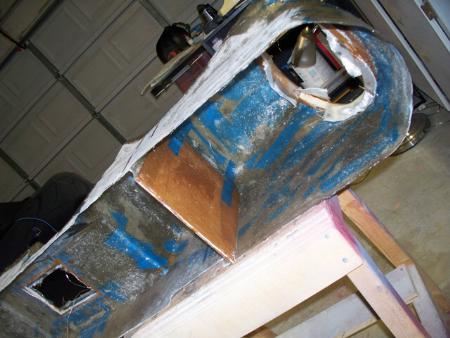
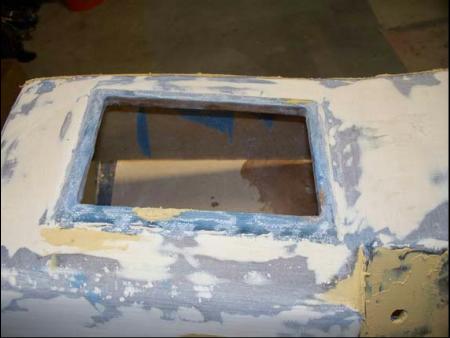
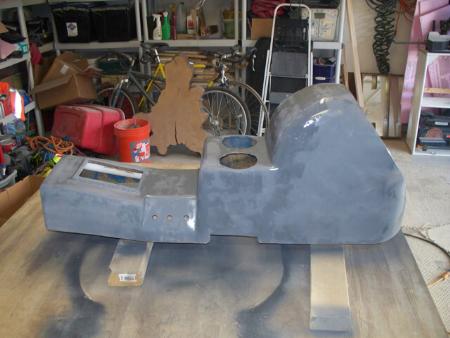
The front portion of the console was built up to make it stronger, but not as thick as the enclosure. I also added a metal plate with 3 holes for switches in between layers. This gives the switch mount extra support when operating the switches.
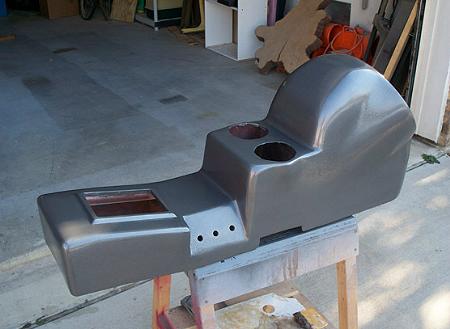
Once I had enough layers built up and it had cured, it was time for me to begin sanding the outside in preparation for filler.
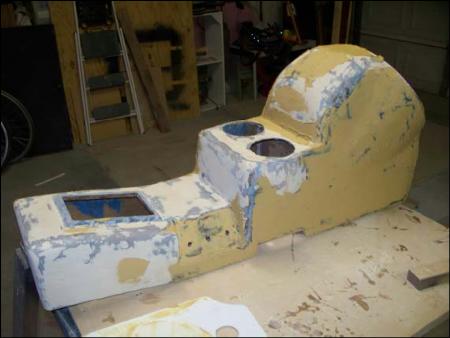
Here it is after applying some body filler and sanding. Then I added some more filler to fill in the low spots. This can take a few rounds of sanding, filler, primer, sanding, filler, sanding, filler sanding, more primer – you get the idea. This goes on until you get it smooth and symmetrical.
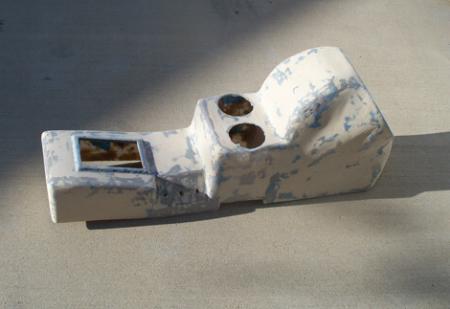
After these shots I added another layer of filler and sanded it down and then primed it.
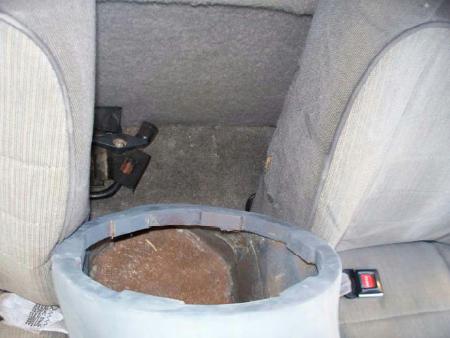
When the primer dried I did a test fit in the truck…
Looking down behind the seat and the console…
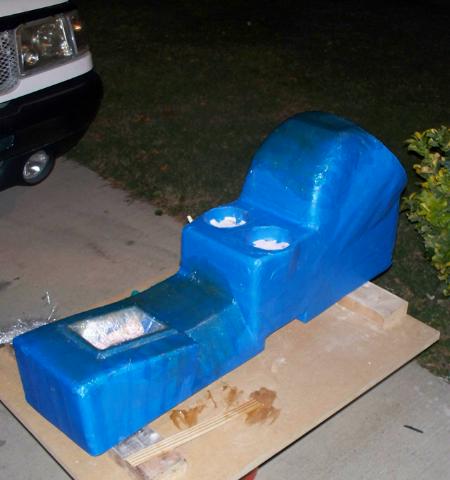
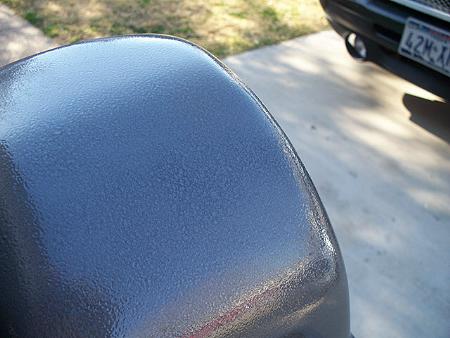
The console is now finished and painted:
Hammered Metal Texture

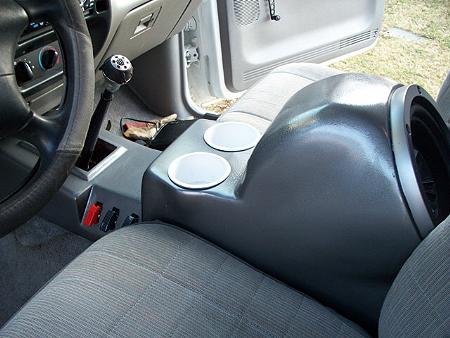
The cup holders are now epoxied in place and the sub has been treated to a bead of silicone as a gasket this time. Had a funny whistle before – LOL. Now I just need a leather boot.
Materials I used:
Resin: Started with Bondo brand resin, then I switched to US Composites B-440 Resin – awesome product.
Filler: I used Dynatron Dynalite body filler, easy build, easy sand, low pinholes/voids.
CSM: I used Evercoat Sea-Mat, Bondo brand Woven Fiberglass Tape and Bondo CSM.
The pink foam can be found in different thickness at Home Depot and Lowes (blue).
Resin and Glass Application:
Applying the CSM/Woven glass and resin is quite easy. You will need graduated mixing cups, stir sticks and short bristle brushes. A roller helps to get the resin into the mat/cloth also, but is not needed.
Mix up a quantity of resin/hardener that can be applied in an appropriate amount of time, usually within 10 minutes. Although most standard mixes will give you longer, it is best to work in smaller amounts.
Use your brush and spread out a layer of resin on the surface to be covered, lay the CSM or cloth into the resin and then press it into the resin with the brush. Hold the brush momentarily in place to allow the resin to soak in. This is called wetting out the glass. If there is excess resin, you can lay additional layers of CSM/cloth on top of the first and repeat the procedure. If a bit more resin is needed, add in moderation. You want the resin to be soaked into the CSM/cloth without excess resin puddling on the surface.
Allow the resin to cure fully before trying to sand it. While it is curing the chemical reaction is going to create heat, so it is important to keep it in an area out of the wind and cooler temps as these will slow down or inhibit the reaction and the resin will never cure fully. When cured, begin sanding with 36 or 40 grit paper or a sanding disc on a DA or drill sanding pad. Only sand enough to rough up the surface for the next layers to be applied. When you begin to smooth it all out, go with smaller grit papers such as 100, 150, 220, 320 and finer depending on the finish you are going for. If the surface will be for a mold – 1500 or 2000 grit paper would be the best finish. If painting, 400 or 600 would be adequate and then color sand the painted surface. If the item will be wrapped in fabric, 220 to 320 should be ok.
Well, I hope I have covered all of the basics here, want more information, check out www.fiberglassforums.com as these guys are professionals and have learned a lot from just reading the posts there.
Good Luck with your fiberglass projects!
~Tom A.K.A. Hazmat Ranger
About The Author
Jim Oaks is the founder of TheRangerStation.com, the longest-running Ford Ranger resource online since 1999. With over 25 years of hands-on experience building and modifying Ford Rangers — including magazine-featured builds like Project Transformer — Jim has become one of the most trusted authorities in the Ford Ranger off-road and enthusiast space. In 2019, he was loaned a Ranger FX4 by Ford Motor Company to test and document across the TransAmerica Trail. Jim continues to inspire and guide Ranger owners around the world.