
Looking to install an add-a-leaf in the spring pack of your Ford Ranger?
Here’s How:
1) Raise the rear of the vehicle with a floor jack positioned under the rear axle. Place jack stands under the frame rails, a few inches in front of the rear springs’ front hangers. Ease the jack down until the frame is resting on the stands. Keep a slight load on the jack. Chock the front tires to prevent any possibility of movement. Remove the tires, U-bolts and shocks.
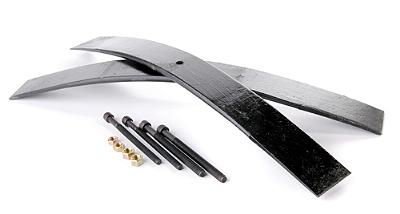
U-bolts & U-bolt plate
2) Using a pair of c-clamps, clamp the stock rear springs together. Place one towards the front of the stock centering bolt and one towards the rear.
Note: If you’re installing a short add-a-leaf, try to not clamp the overload leaf (thick flat leaf on the very bottom) with the rest of the leafs. Your short add-a-leaf will likely go above the overload leaf, so you just need to remove the overload leaf, install the add-a-leaf, and then re-install the overload leaf.

c-clamping the spring when doing a long add-a-leaf
3) Carefully remove the stock centering bolt from the stock location and discard. If you spray the nut and bolt with PB Blaster in advance, it helps get the nut off. If the nut won’t come off, you’ll have to cut it off with a grinder and cut off wheel.
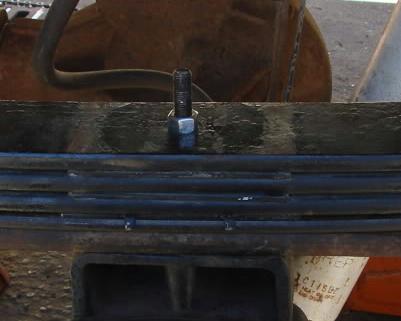
Leaf spring centering bolt
4) Once the centering bolt is out, loosen the clamps until the pack opens up enough that you can get the add-a-leaf in. You may need to lower the axle housing by easing down the jack. Don’t overextend the brake and axle vent hoses. The vent hose may need rerouting or replacing.
5) If a long add-a-leaf is used, place it directly underneath the main leaf which is the longest one with the eyes/bushings. If a short add-a-leaf is used, place it towards the bottom of the spring pack but above the overload spring.
6) With the springs in place and the centering bolt holes lined up, install the new centering bolt (through the bottom – threads are at top). Do not try to compress the leafs together with the center-bolt; this may strip the bolt/nut threads. Use the c-clamps to help compress the springs together, and hand tighten the nut. After tightening, trim off the excess bolt length.
Special note: Do not use an air gun to tighten the nut all the way down. Once the springs are starting to come together, Tuff Country recommends using a hand wrench to finish tightening the nut. If an air gun is used to tighten the centering bolt all the way down, the centering bolt may strip causing the springs to come apart.
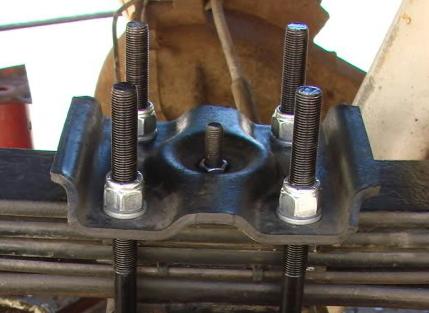
7) Install the U-bolt plate and U-bolts. The centering bolt head is intended to line up with an opening in the axle lift block, or spring perch (depending on what it’s sitting on) Ensure that everything has lined up and is in place.
8) Repeat this procedure on the other side.
Torque Specs For Centering Bolts & U-Bolts:
3/8″ centering bolt = 17 ft lbs.
7/16″ centering bolt = 27 ft lbs.
1/2″ centering bolt = 41 ft lbs.
Torque the U-bolts to 85 ft lbs.
Note About Shocks & U-Bolts:
U-Bolts – The threads on U-bolts will often strip when you remove them. Be prepared to have to replace your old ones in the process of this.
Shocks – Adding an add-a-leaf may require a longer shock.
About The Author
Jim Oaks is the founder of TheRangerStation.com, the longest-running Ford Ranger resource online since 1999. With over 25 years of hands-on experience building and modifying Ford Rangers — including magazine-featured builds like Project Transformer — Jim has become one of the most trusted authorities in the Ford Ranger off-road and enthusiast space.
Since launching TheRangerStation.com, Jim has documented thousands of real-world Ranger builds, technical repairs, drivetrain swaps, suspension modifications, and off-road adventures contributed by owners worldwide. TheRangerStation.com has been referenced in print, video and online by enthusiasts, mechanics, and off-road builders looking for practical, and experience-based information.