Introduction:
I see discussions from people asking questions about turning their Ford Ranger into an overlanding vehicle. This article will hopefully give those of you interested in turning your Ranger into an overlanding vehicle the knowledge and inspiration you need to not only get started, but hopefully accomplish that goal.
What Is Overlanding?
Overlanding is about exploration, rather than conquering obstacles. While the roads and trails we travel might be rough or technically challenging, they are the means to an end, not the goal itself. The goal is to see and learn about our world, whether on a weekend trip 100 miles from home or a 10,000-mile expedition across another continent. The vehicle and equipment can be simple or extravagant – they, too, are simply a means to an end. History, wildlife, culture, scenery, self-sufficiency – these are the rewards of overlanding.
Where Do I Start?
I’ve done a trip in 2017 where I was gone for 3-weeks, and then spent several weeks completing the Trans America Trail in 2019. When I planned for those trips I asked myself:
- How long will I be gone?
- Where will I sleep?
- What will I eat, and how will I prepare it?
- How will I bath myself?
- How will I navigate and know where to go and not get lost?
- Do I have a first aid kit and fire extinguisher in case of emergency?
- What might break or fail on my truck, and will I need to take tools or parts to fix it?
- What will I do if I get stuck / stranded?
- How will I communicate with people if I do get stranded?
- Will the area be so remote that I might need extra fuel?
When you ask yourself those questions, you’ll know how to prepare your truck for the journey.
Do You Need a Heavily Modified 4-Wheel Drive Truck?
I see people discuss their desire to get into overlanding and feel like they have to sell their 2-wheel drive Ford Ranger and buy a 4-wheel drive Ranger, put a lift on it, and then heavily modify it. The reality is that you don’t need a heavily modified 4-wheel drive vehicle to become an overlander. That’s not to say that you might not eventually decide to move up to a 4-wheel drive vehicle, but I wouldn’t let the fact that you have a 2-wheel drive vehicle stop you.
The closer to stock your truck is, the more reliable it will be.
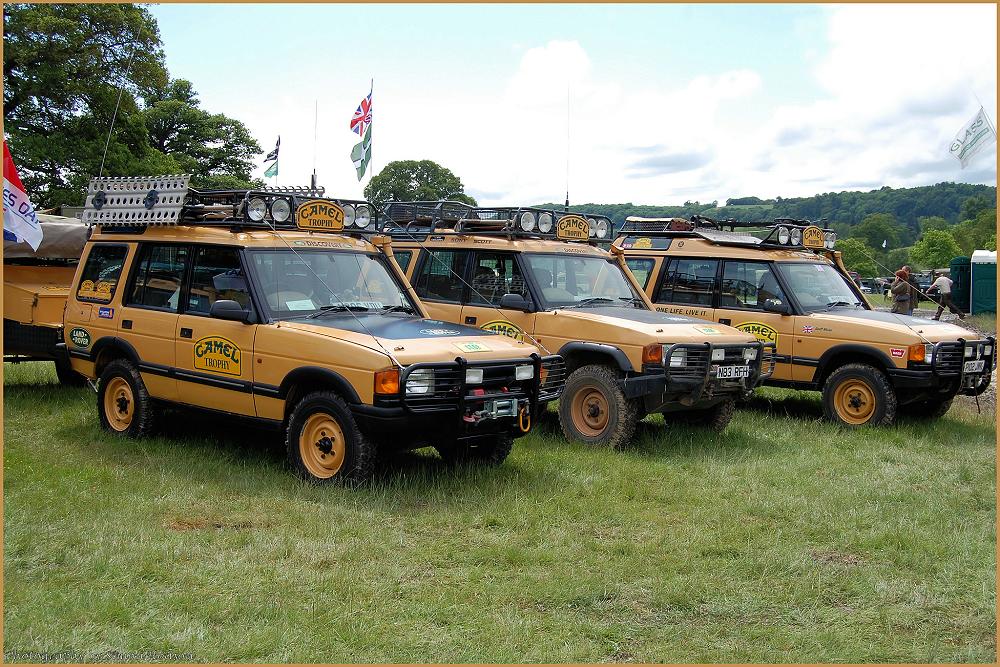
From 1980 to 2000 the Camel Trophy used fairly stock Land Rovers to traverse harsh terrains. The main emphasis of Camel Trophy was more toward testing human endurance and adaptability than pure competition. These vehicles were equipped with a snorkel, winch, recovery gear, roof rack for carrying supplies, auxiliary lights, and 2-way radios for communication.
In 2007, Travis Schanafelt departed in his 2WD 2001 Ford Ranger on a solo journey through North America covering over 22,000 miles in ten weeks. Travis traveled to Key West, Florida, the southernmost point in the U.S., and then traveled north all the way to Prudhoe Bay, Alaska, the northernmost point of the United States.
He slept in the back of this 2-wheel drive 2001 Ford Ranger traveling 22,000 miles across the United States and Canada. If you think you need a 4-wheel drive truck and a roof top tent, this proves that you don’t.
What Should My Ford Ranger Be Equipped With?
Tires:
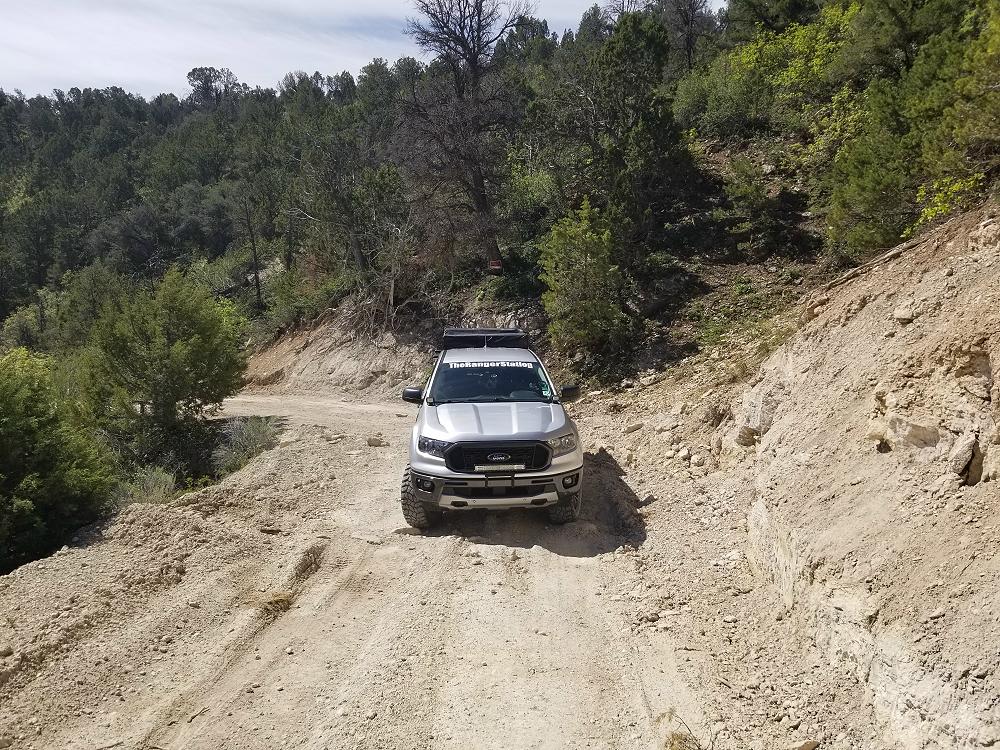
A good tire is important to make sure that your Ranger can get traction on unmaintained trails or roads. Just because it shows up on the map as a county or forest road doesn’t mean it’s been maintained.
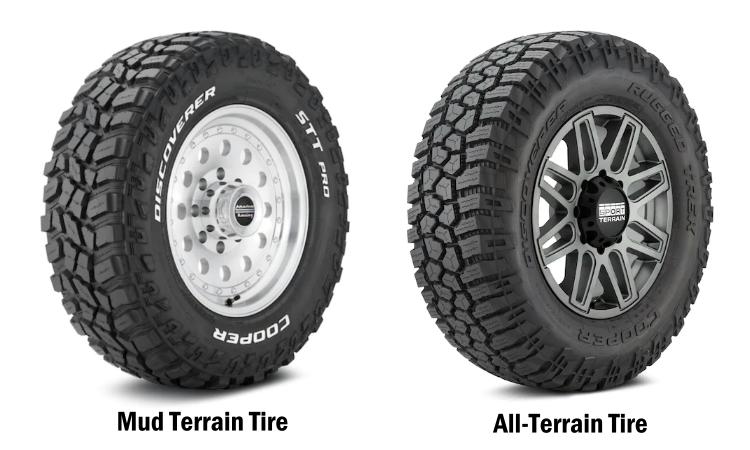
I suggest either a good set of all terrain or mud terrain tires. You’ll get more miles out of a good all terrain than a mud terrain. Make sure you have a matching fullsize spare and a good jack and lug wrench. If your truck is lifted and has taller tires, your stock jack my not have the ability to jack the truck high enough to get the tire off of the ground so you can change it. I actually carry a mini floor jack and a 4-way lug wrench in my Ranger.
You’re building an overlanding truck, not an off-road truck, so you really don’t need a tire over 33-inches.
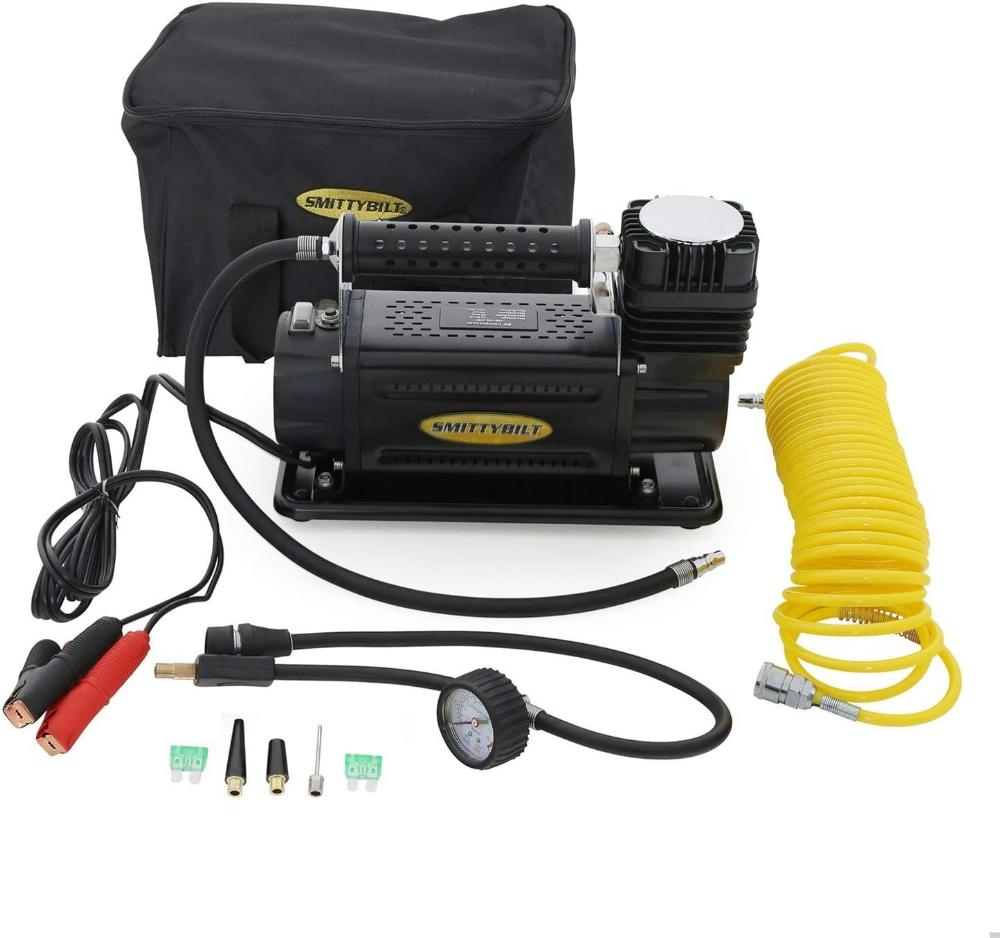
Air Support / Tire Repair:
Speaking of tires, it’s a good idea to have an air compressor or compressed air tank to air up a tire in the event of a flat. This also means that you should carry a basic tire repair kit in case you need to fix a tire. Some people have expensive ARB onboard air compressor setups. I personally carry a Smittybilt 5.65 CFM portable air compressor. Having air available is also nice if you find yourself having to air your tires down for traction, and then needing to air them back up when you hit the highway.
Lockers / Limited Slip Differentials:
A locker is an idea setup because it will send power to both wheels all of the time. A limited slip can send power to both wheels if they both have traction, but if you get a wheel off of the ground, the limited slip is likely going to send all of the power to that wheel spinning freely. Applying brake pressure can create resistance and get both wheels spinning. An open differential simply sends power to the right rear wheel.
A rear locker can not only benefit a 4-wheel drive truck, but a two-wheel drive truck as well. You’ll get further with both rear wheels turning than just one. If you have a limited slip and don’t want to invest in a locker, you can try applying brake pressure to get both wheels turning. If you have an open locker, you have the option of getting a locker that replaces the spider gears inside of your stock differential such as a Lock Right locker. This type of locker isn’t that difficult to install.
If your truck has open differentials instead of a limited slip, then I’d suggest investing in a locker.
Want to know if you have a limited slip or non-limited slip axle? Check out:
1983-2011 Ford Ranger Axle Codes
2019 & Newer Ford Ranger Axle Codes
Suspension Lift:
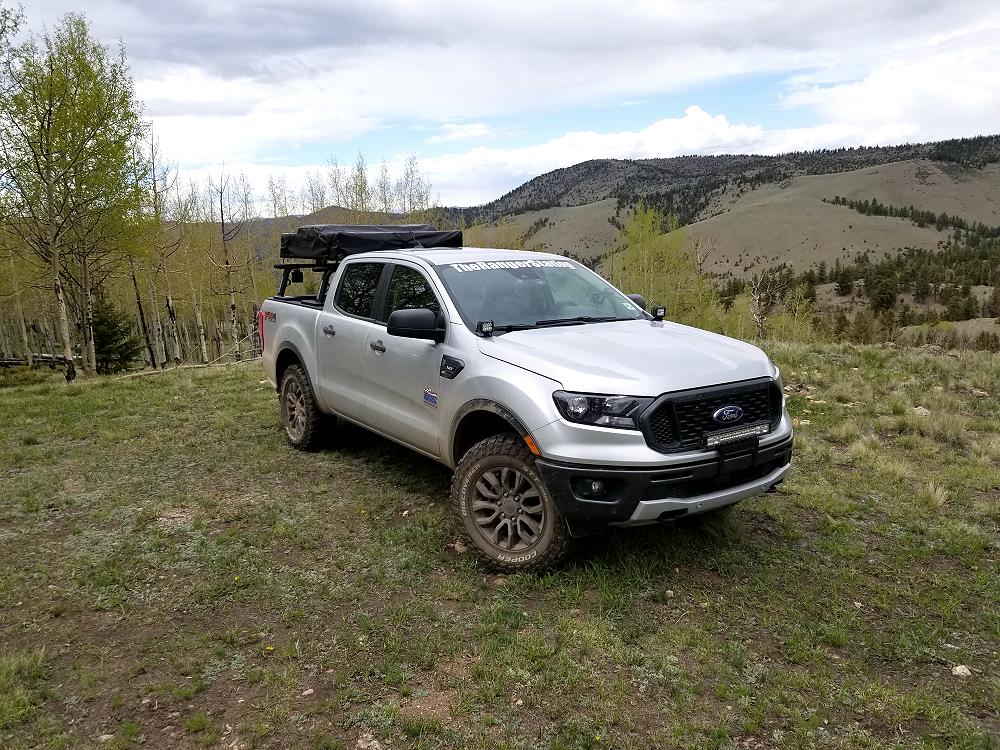
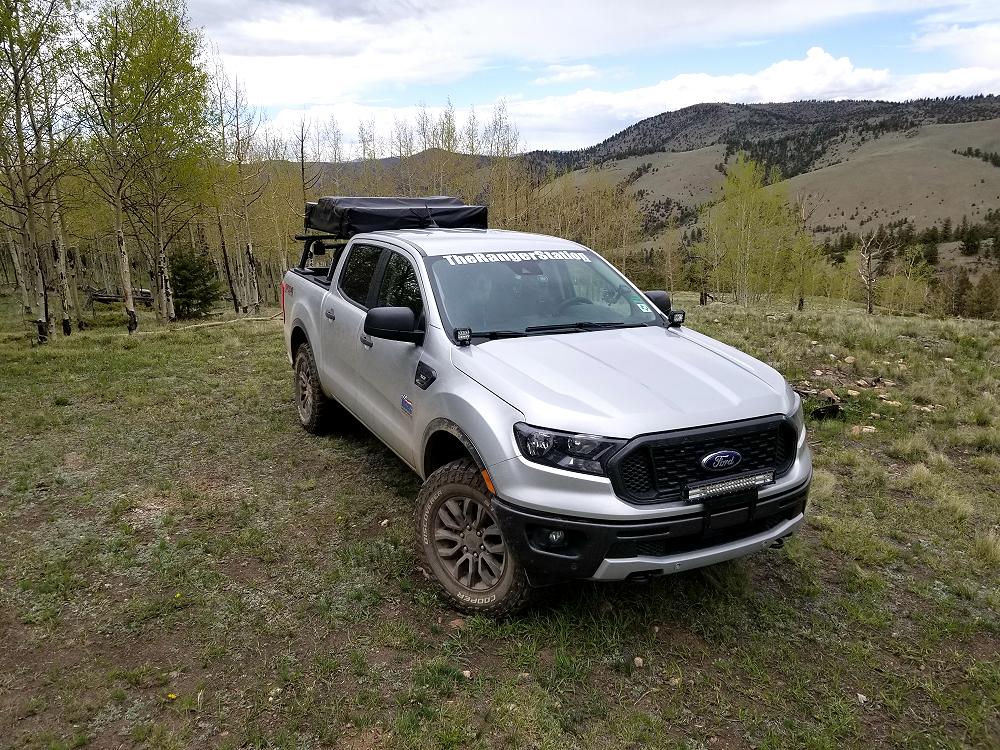
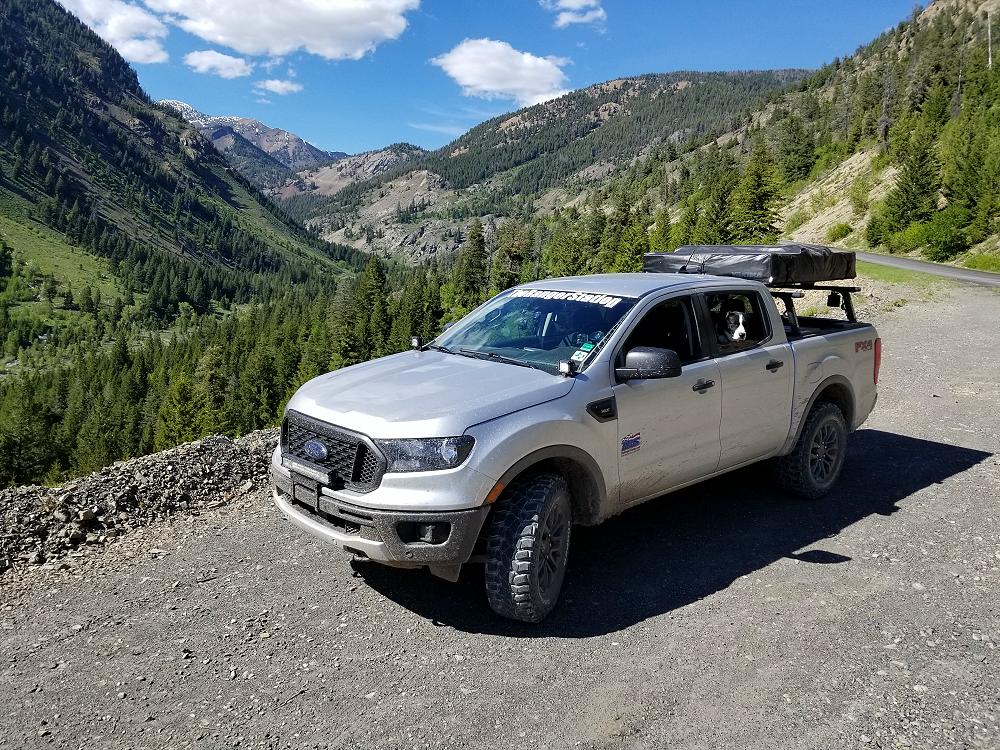
When I did the Trans America Trail in a 2019 Ford Ranger FX4 (Loan Ranger) I left the suspension stock and just added Cooper Discoverer STT PRO mud terrains that were a size larger than stock. My 2021 Ford Ranger FX4 has a Skyjacker 3.5-Inch lift on it with 295/70/17 (33.5 x 11.8 x 17) tires.
A lift kit will allow you to gain ground clearance and larger tires, but too much lift will raise your center of gravity, increase your chances of rolling over, and a much larger tire is going to require more power to turn them on the older 1983-2011 Ford Rangers.
There really isn’t a clear answer for this that will fit everyone. This is something that you’ll have to figure out based on your own experience and needs.
Getting More Power:
Loading down your older Ford Ranger with overlanding gear is going to make it heavier and require more power to move it. It will be worse if you’ve added larger tires. The best way to compensate for this power loss would be going to numerically higher axle gears. When I went from the stock tires on my 1996 Ford Ranger to 33-inch tires I switched from 3.73 gears to 4.56 gears to compensate for the larger tire diameter. This Gears Needed After Adding Larger Tires Calculator is a great tool to show you what gear ratio your truck will need when adding larger tires to return the stock performance.
Fortunately, the newer 2019+ Ford Rangers come with ample power to handle 33-inch tires and a bed full of overlanding gear.
Now, I’m not saying that you’re definitely going to have to change the gear ratio in your older Ford Ranger, but keep in mind that adding larger tires and loading weight into the truck will affect its performance. If you don’t increase the tire size to dramatically and don’t go overboard weighing the truck down, you’ll probably be fine. If you feel a significant loss of power than I’d suggest a gear swap.
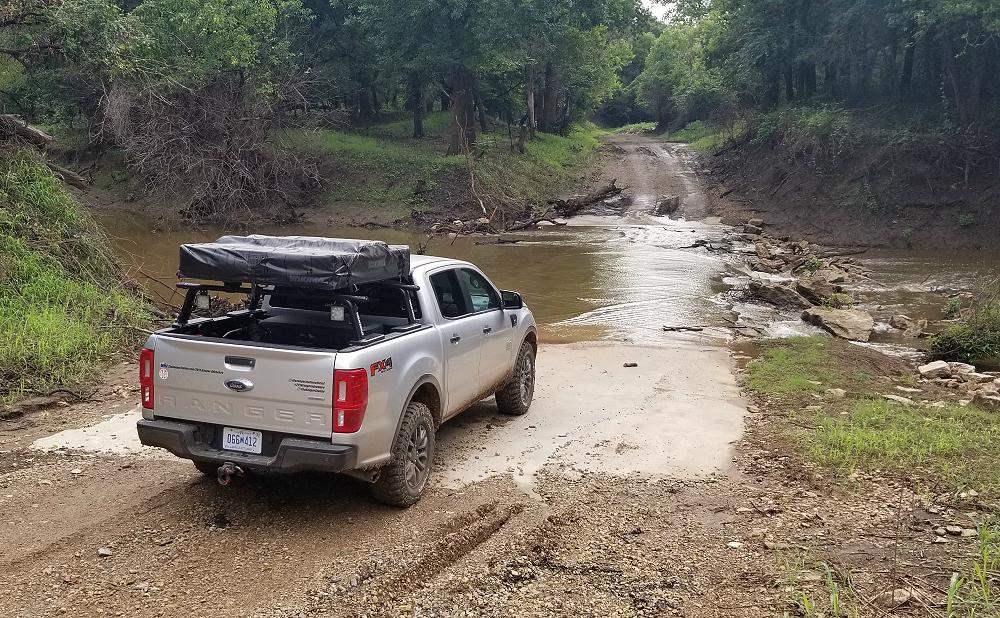
Recovery Gear:
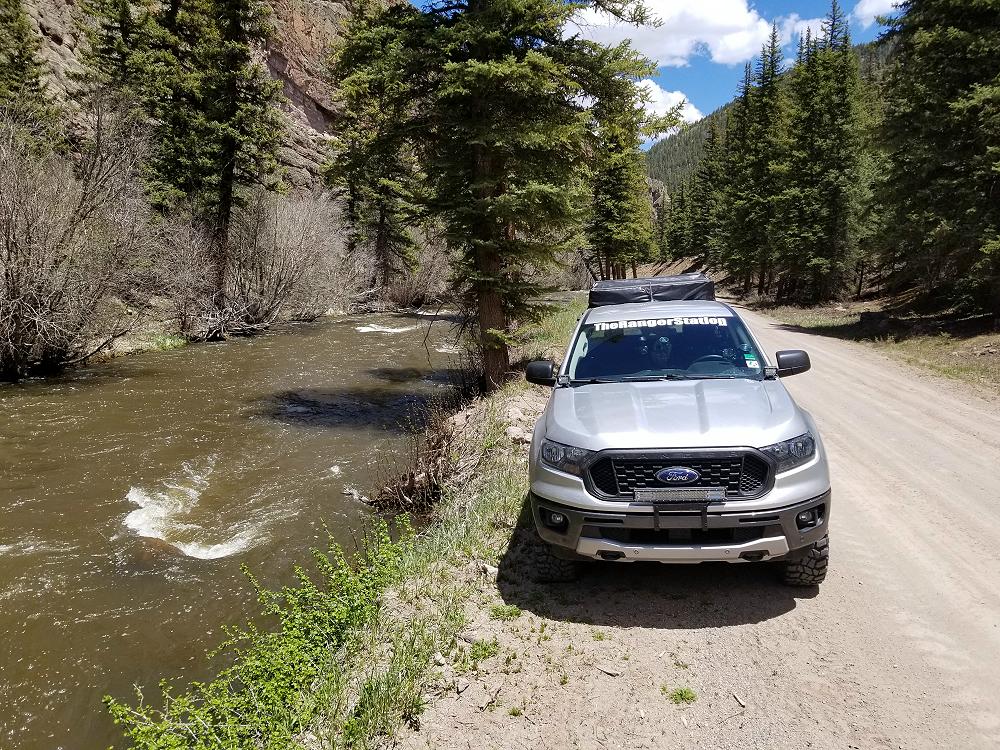
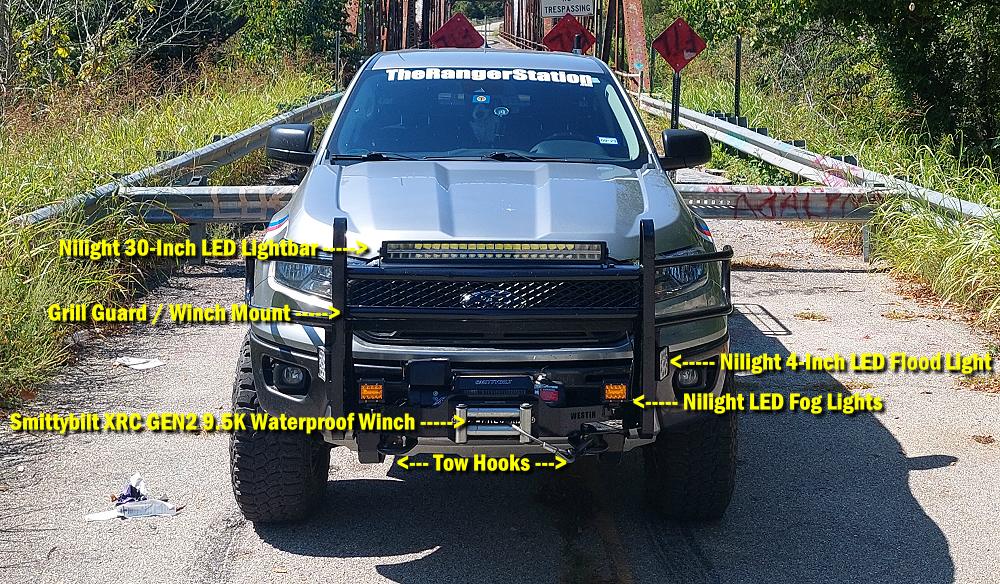
I’ve been on county and forest roads that could barely pass as a road. Some got gradually worse the farther you went. I’ve even been on a mountain pass in Utah and had to turn around due to thick snow, and an hour later I was in Moab and it was 90 degrees at night. You should always be prepared for the possibility that you could get stuck somewhere. This means having tow hooks on the front and rear of your Ranger for someone to connect a tow strap or winch cable to. If you’re traveling alone than you should consider a winch to get yourself unstuck.
Serious overlanders generally have an 8,000lb or higher rated winch mounted on their vehicle to extract the vehicle if it should get stuck. My 2021 Ford Ranger FX4 has a Smittybilt GEN2 9.5K winch on it. Make sure that you carry a tow strap, and d-rings. If you have a winch, you’ll also want to consider carrying a snatch block, tree saver, and a good pair of gloves.
I recommend that people carry a Hi-Lift Jack if they don’t have a winch. The Hi-Lift jack can not only lift the Ranger up and off of obstacles, but it can also act as a hand winch and allow you to manually winch your Ranger if it gets stuck.
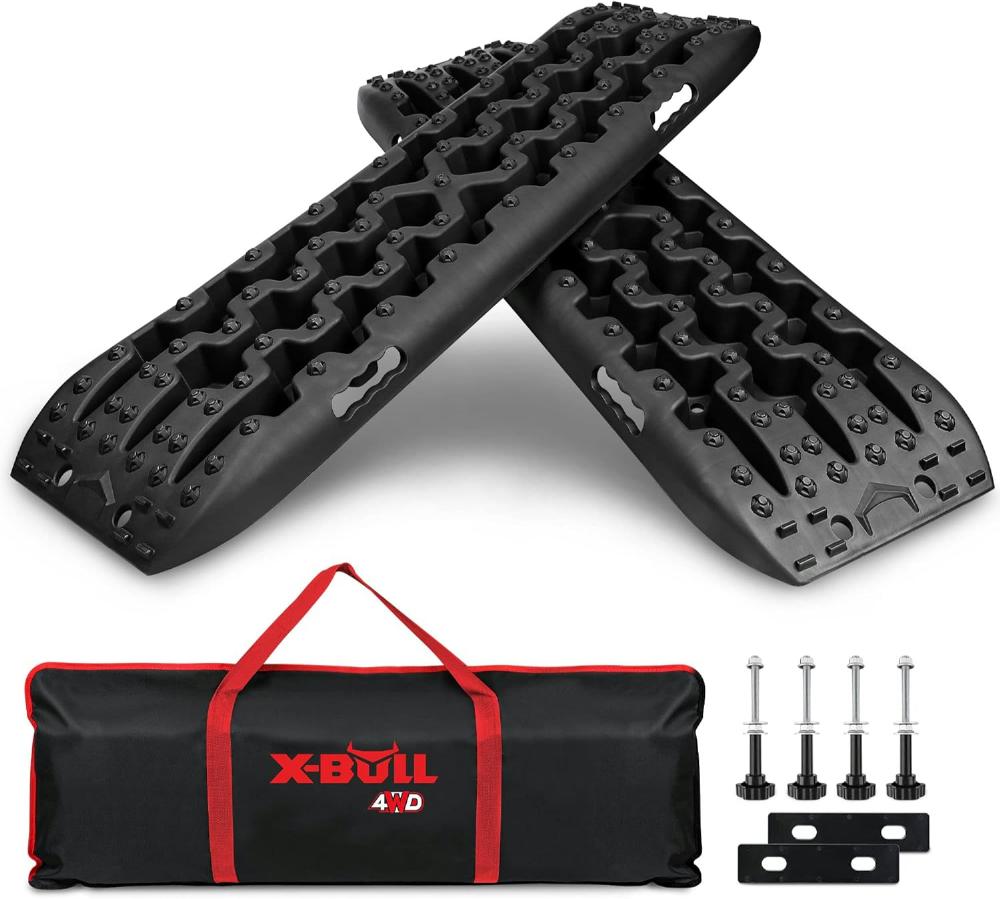
Traction boards are also a good thing to carry if you don’t have a winch.
At the point that I turned around in Utah I was traveling alone and didn’t have a winch. I had a Hi-Lift jack, recovery gear, and traction boards, but made the decision to not risk it. Good judgement is the best tool that you can have.
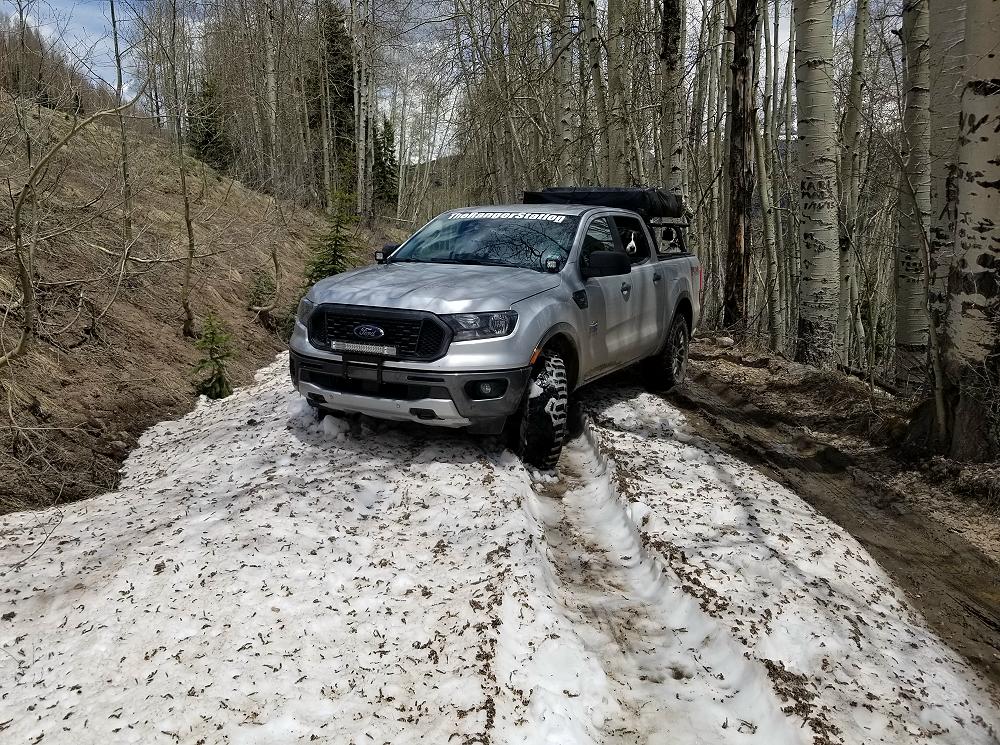
When you’re traversing a trail across a mountain in higher elevations, you could round a bend and become faced with snow that you may not have expected. Just a small patch of thick wet snow could bring you to a stop. You can still find snow on trails in the Rocky Mountains in June.
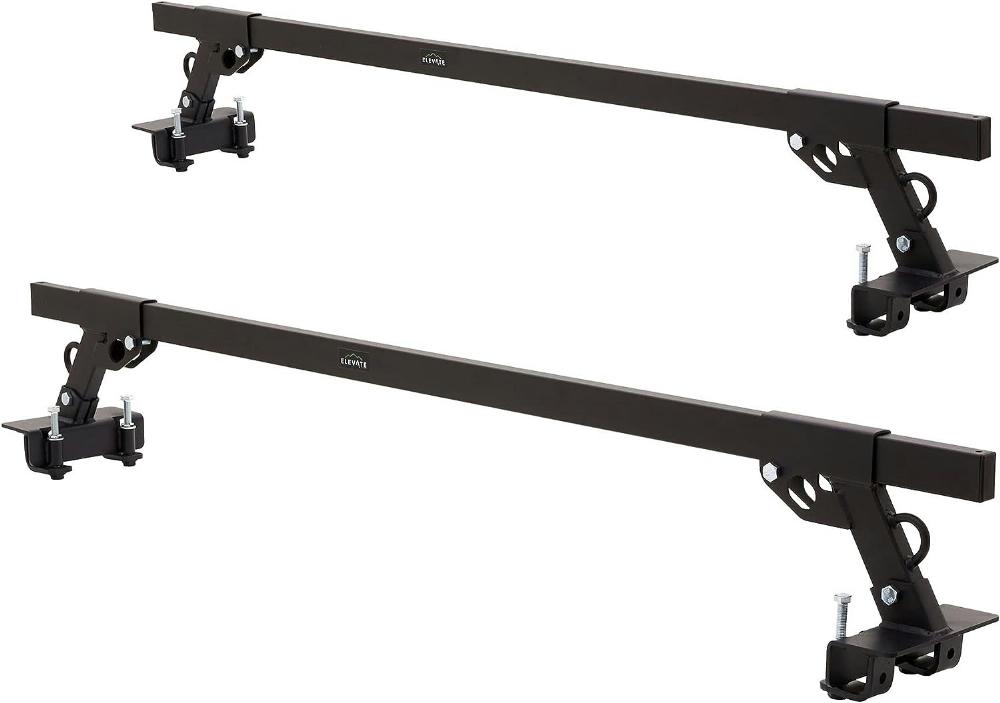
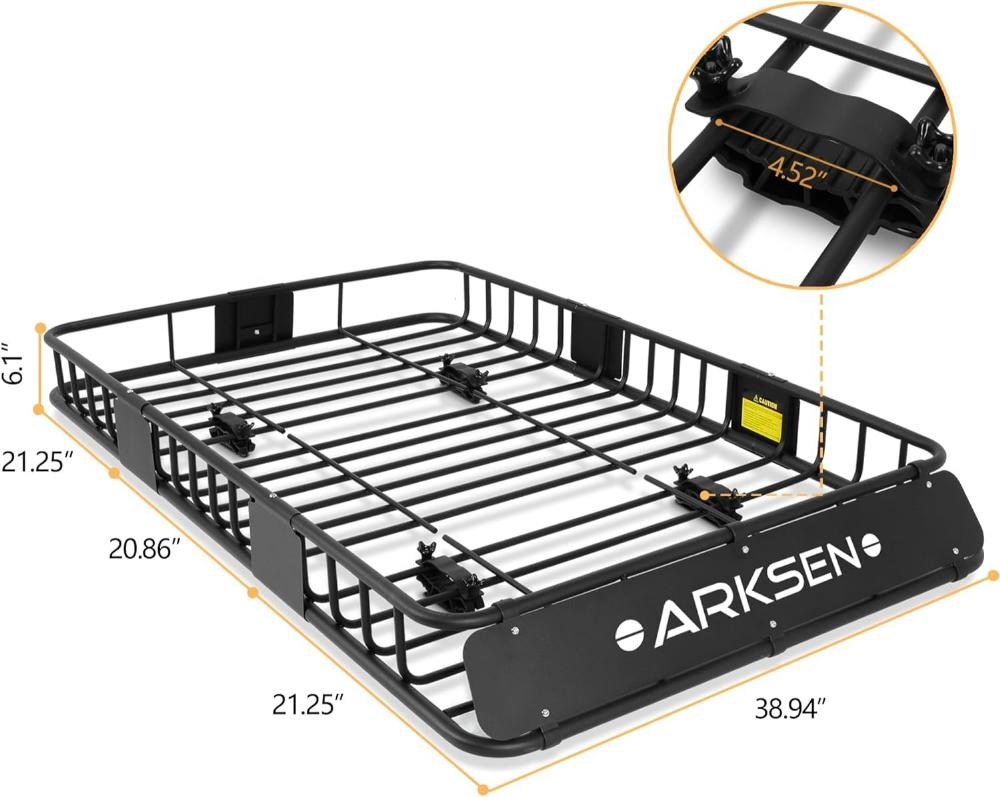
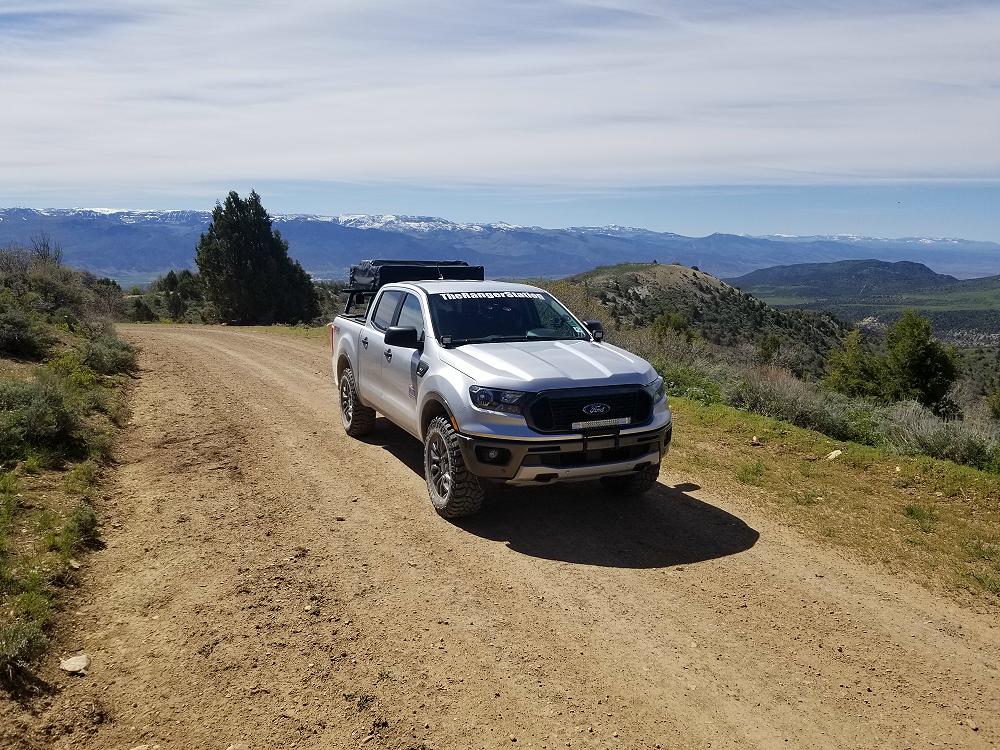
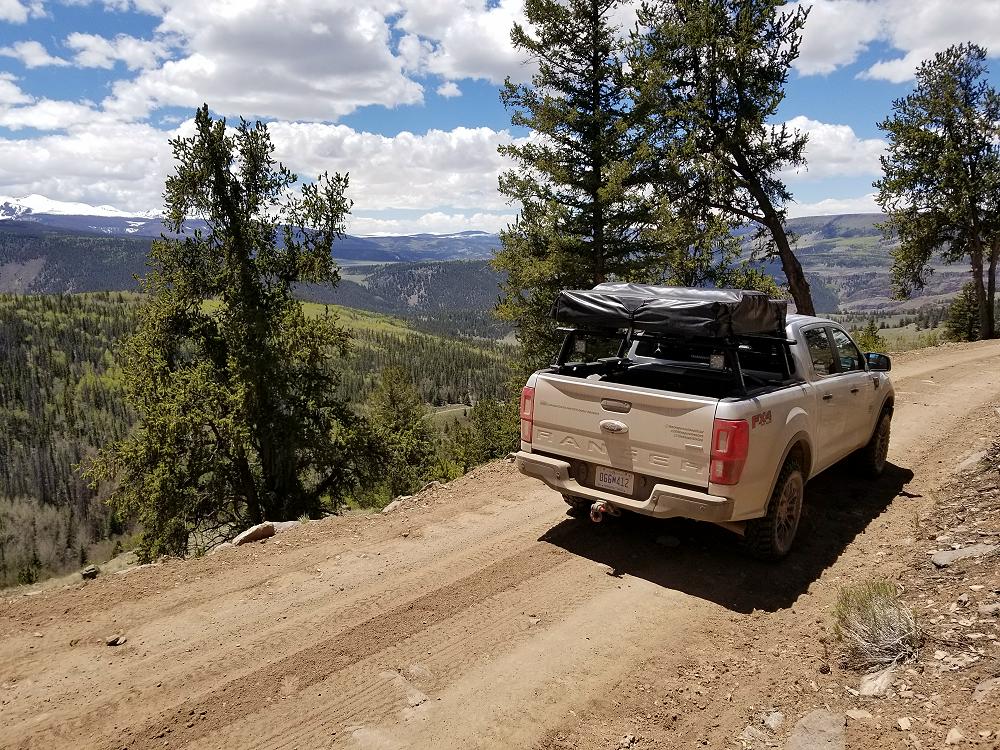
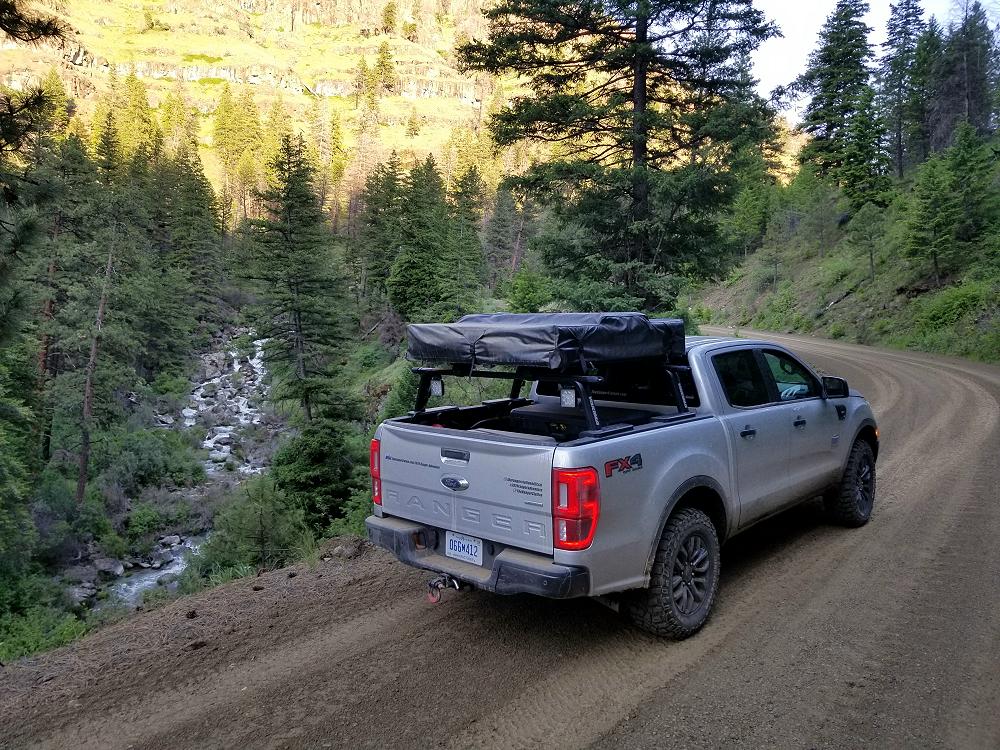
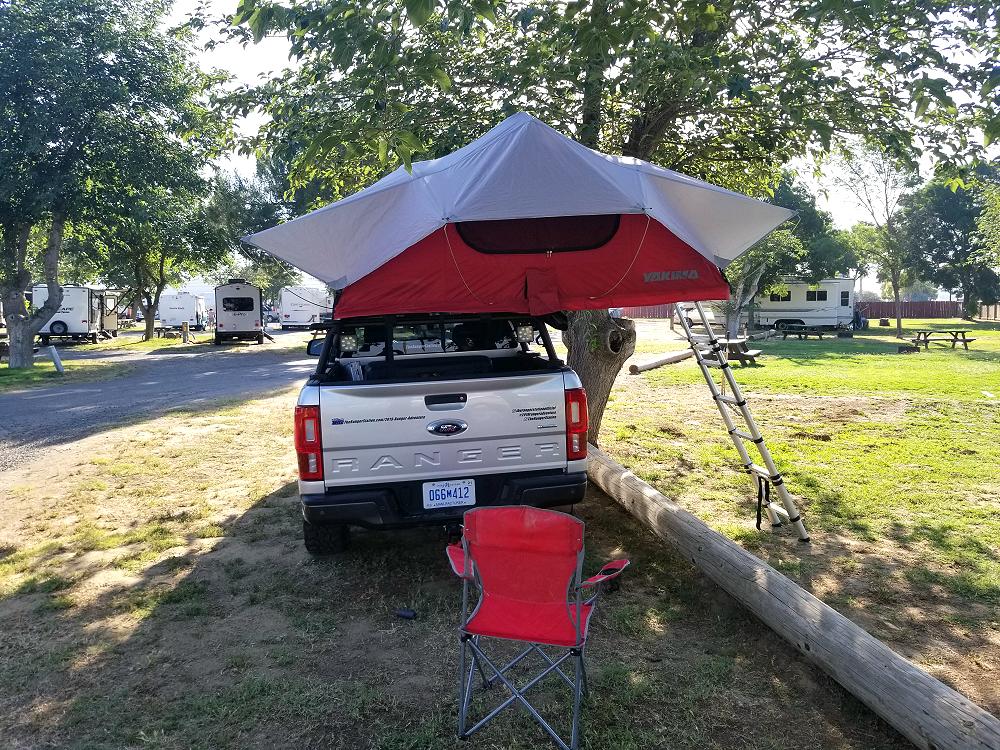
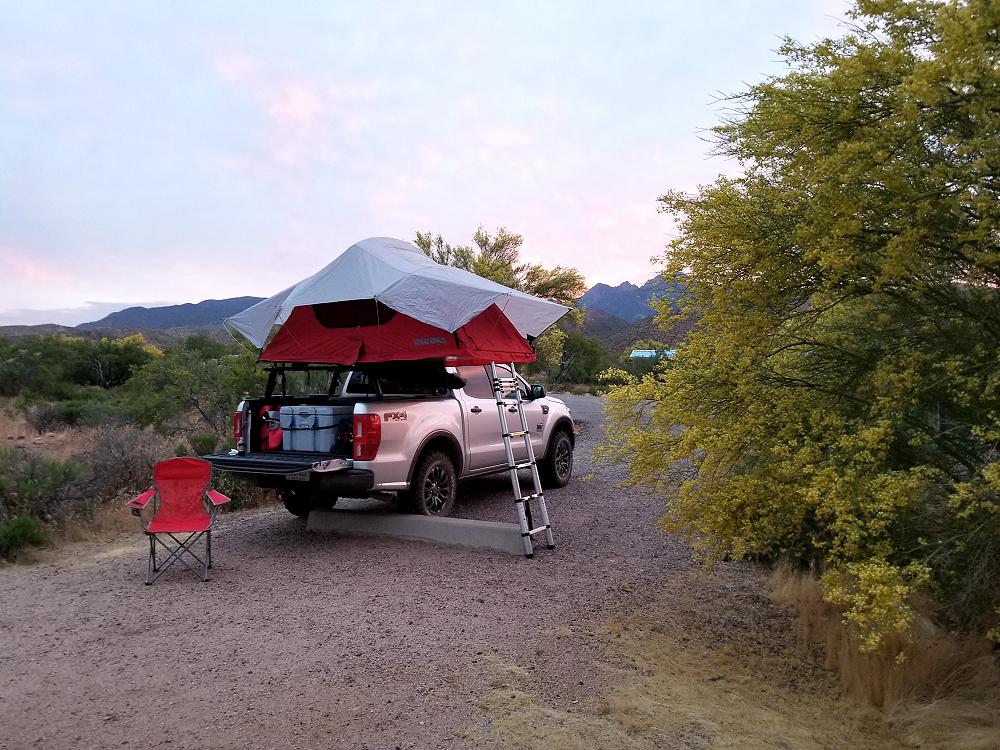
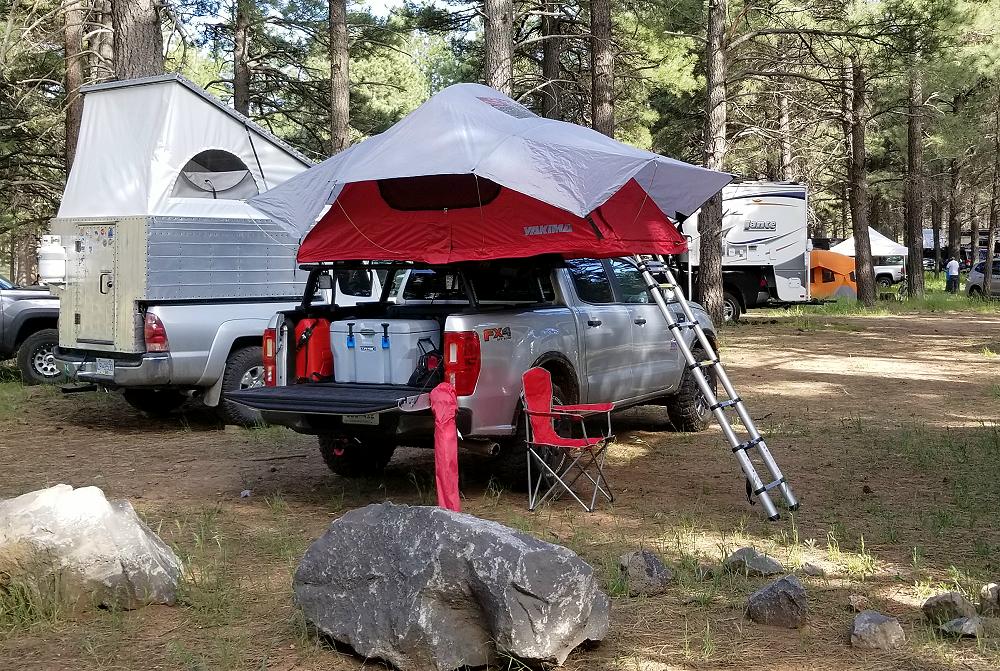
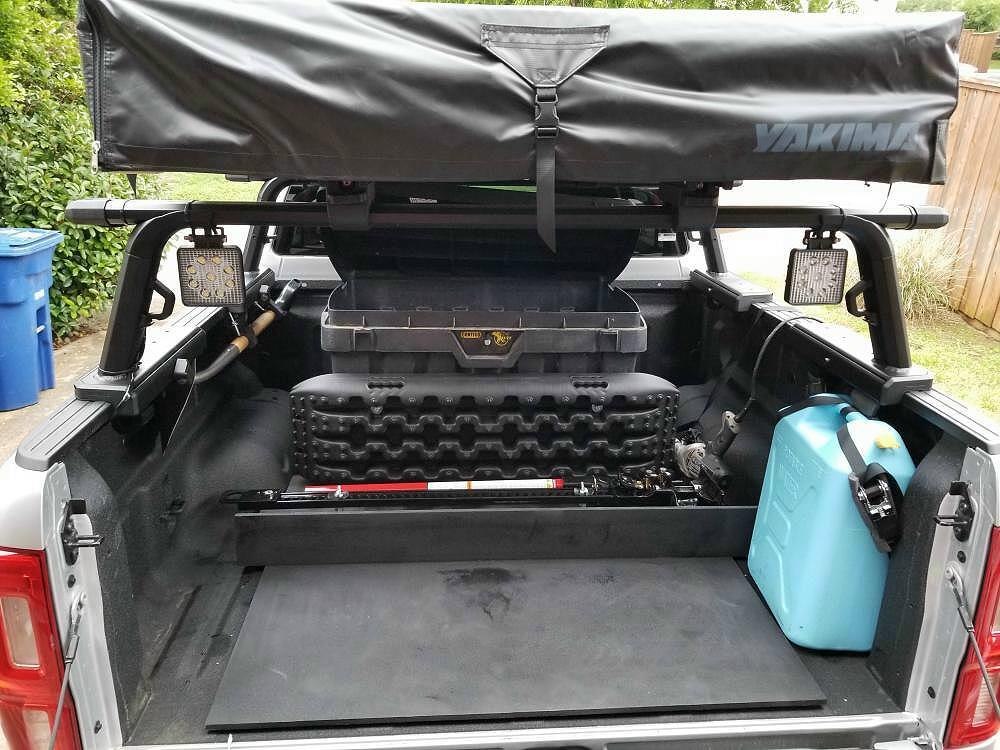
Bed Racks & Roof Racks:
A rack over your bed, camper shell, or truck cab will allow you to carry more gear. A bed rack will be necessary if you want to install a roof top tent.
You don’t have to spend a ton of money on a bed rack and basket either.
Here is the bed rack and basket on my 2021 Ford Ranger FX4:
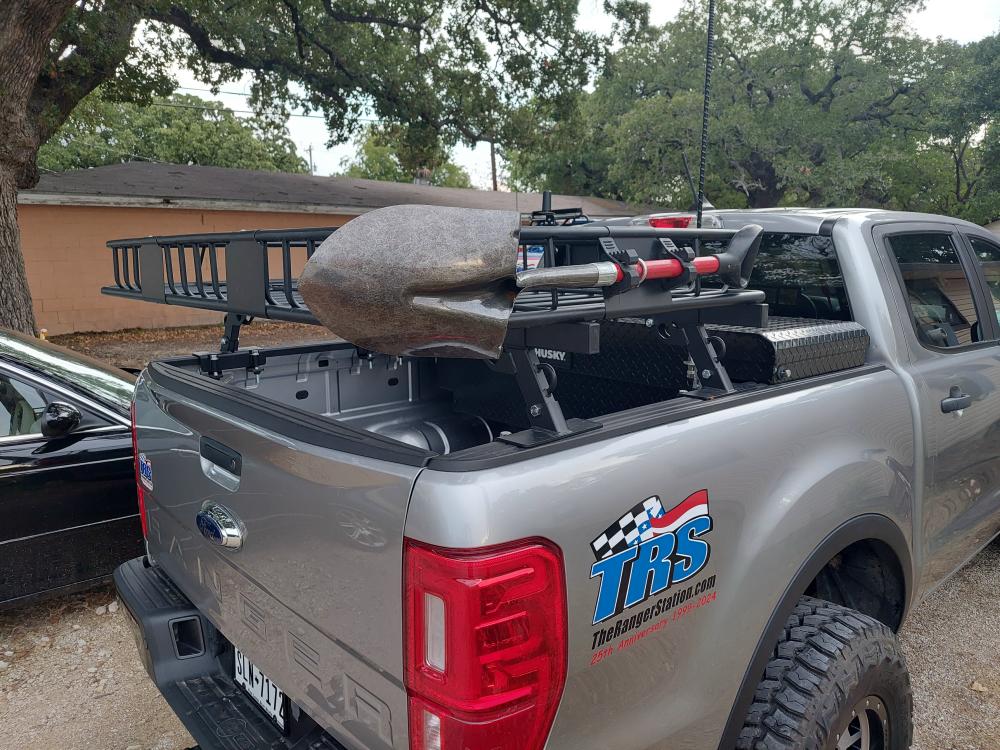
I spent $300.00 on that setup.
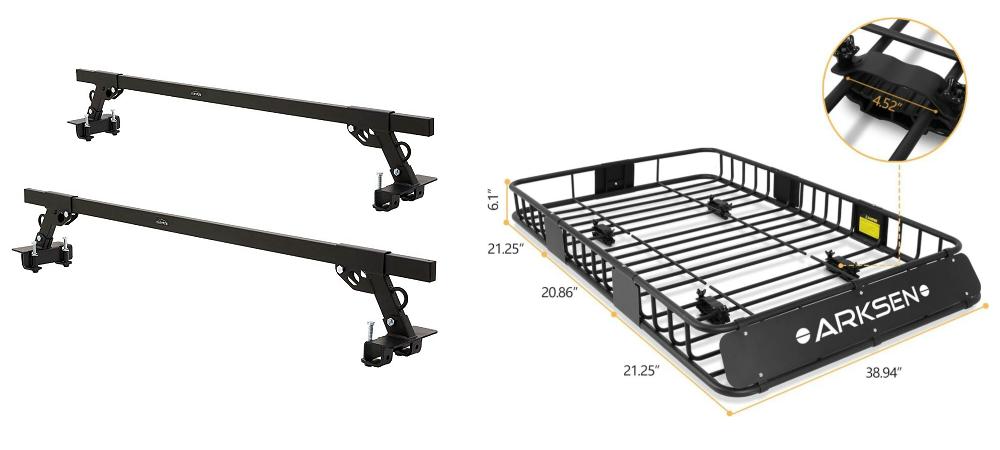
I started by buying a set of Elevate Outdoor Truck Bed Crossbars for $150.00, and then an Arksen 64″x39″ Universal Heavy Duty Roof Rack for another $150.00.
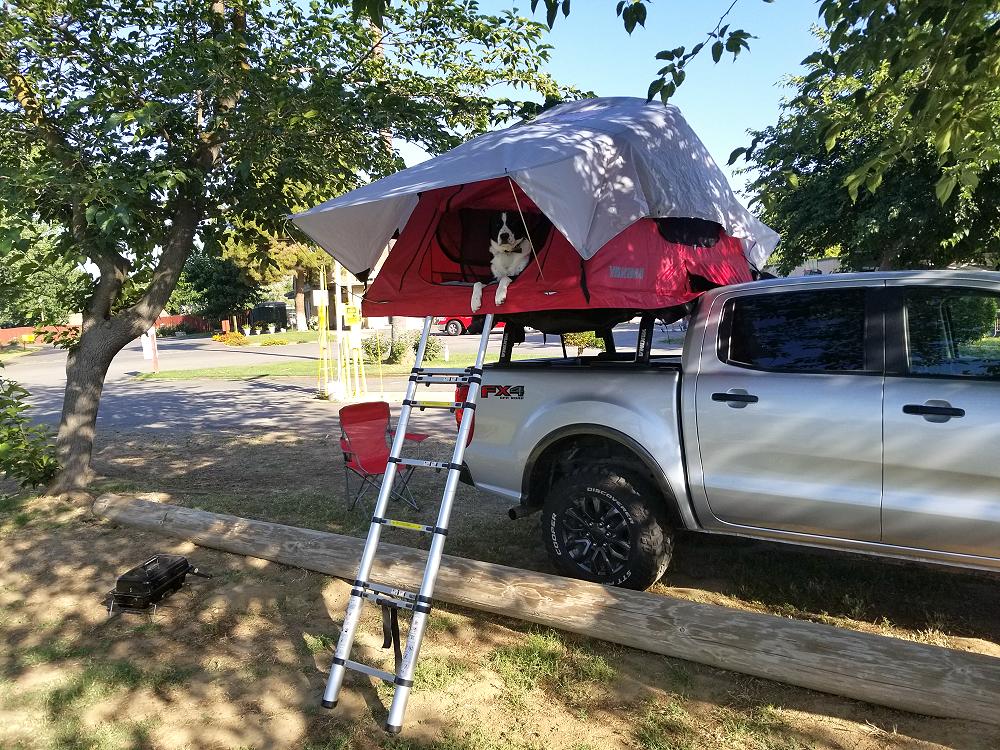
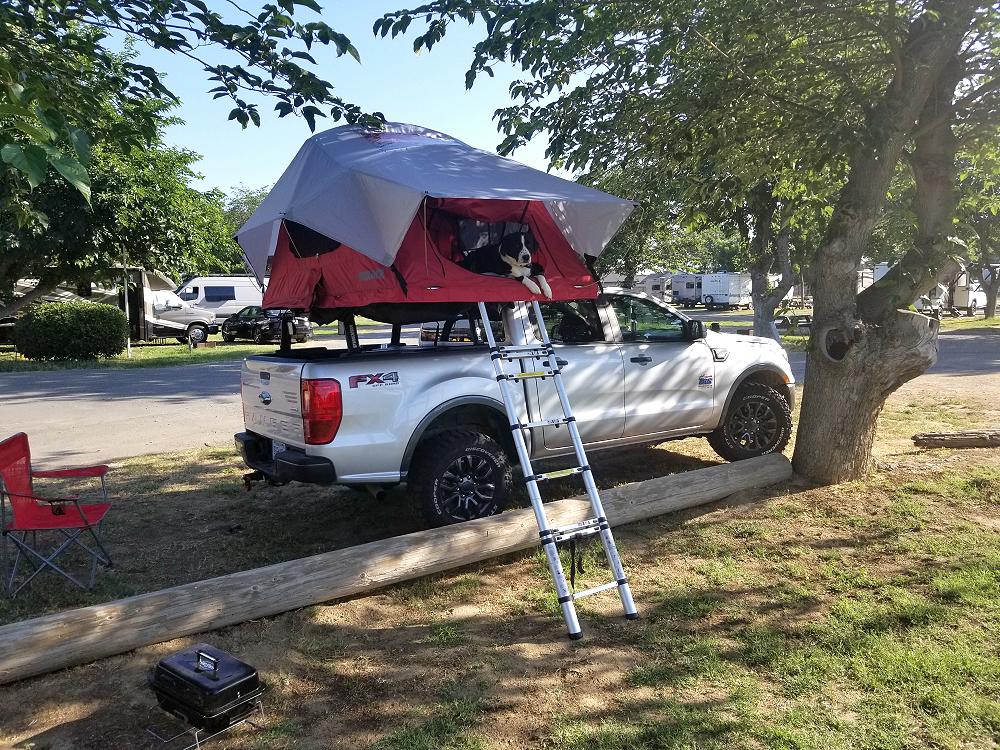
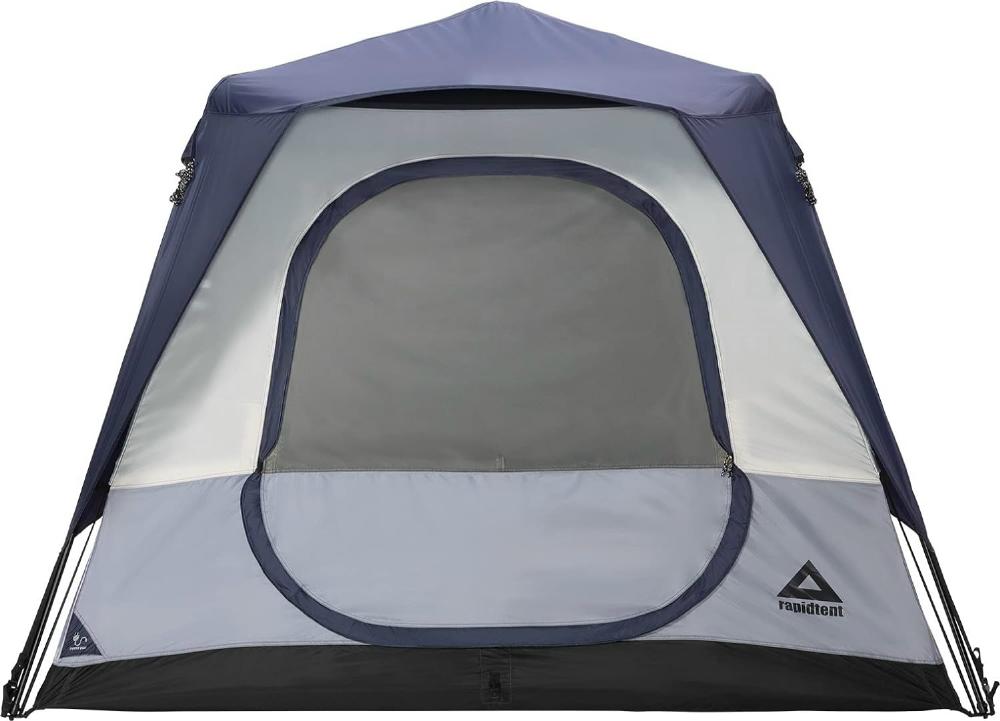
Roof Top Tent / Ground Tent / Sleeping Platform:
Notice that those Camel Trophy Land Rovers didn’t have roof top tents on them. To be fair, they probably didn’t have that option, but I doubt they would have used them if they did.
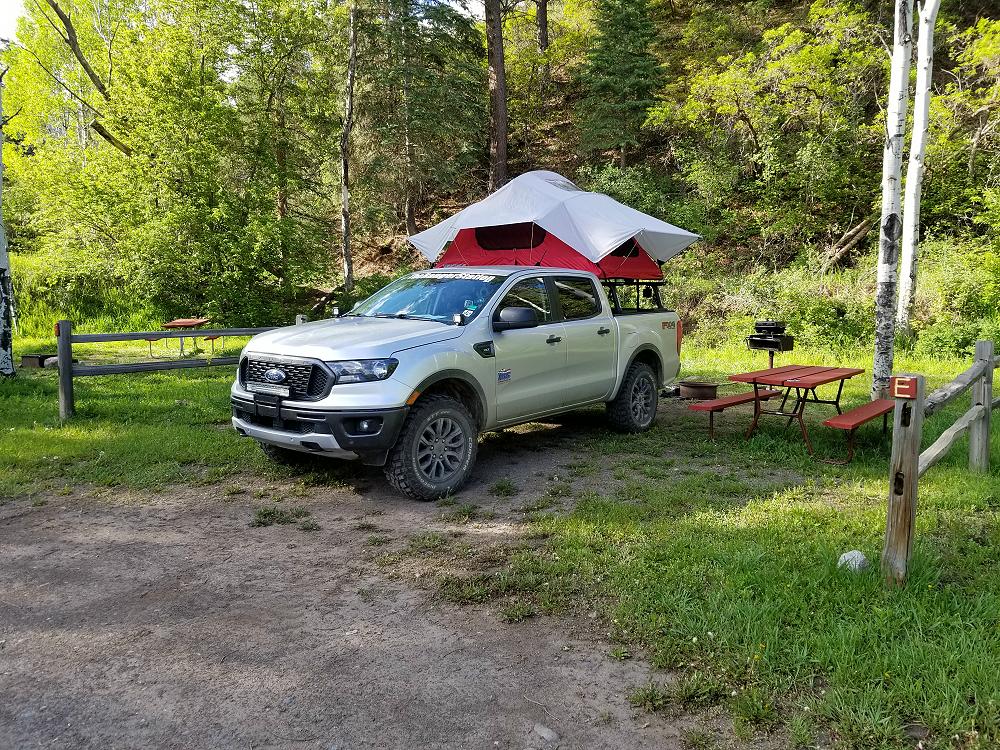
A roof top tent is great for setting up camp quick at the end of a long journey. You don’t have to worry about finding a flat dry place to set up your tent that’s free of rocks or sticks, and you’re up off of the ground if it rains. You’re also up off the ground from animals, rodents, and snakes.
The downside is that it renders the vehicle un-usable as long as the tent is deployed.
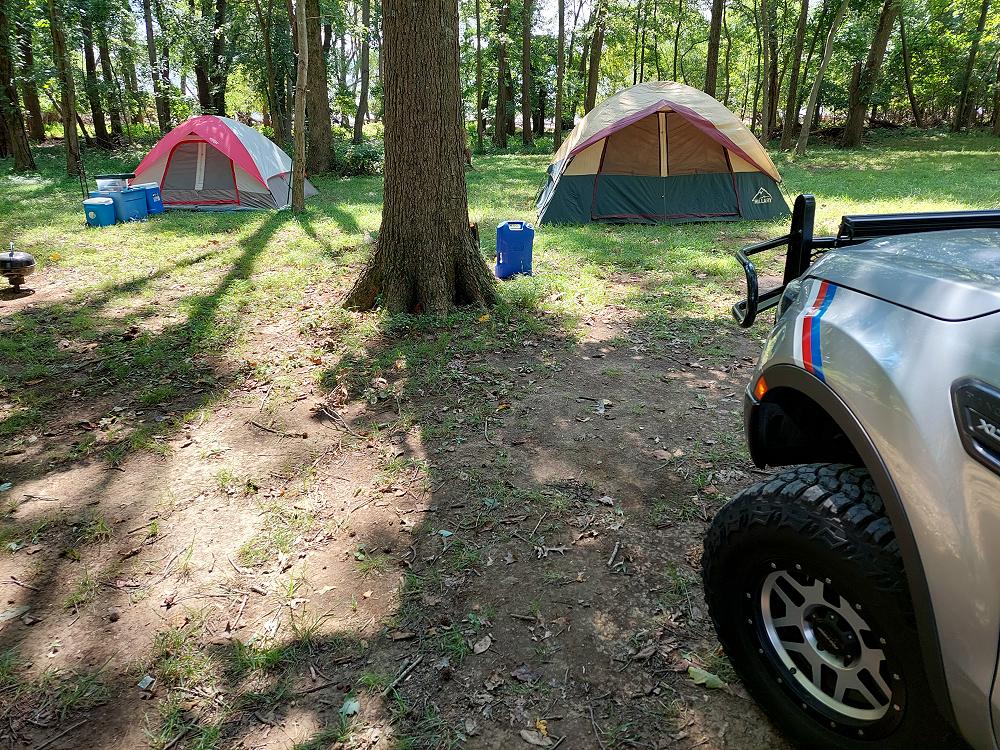
A ground tent will allow you to set up a base camp and still leave your vehicle free to go off and explore in.
The Gazelle T4 has become a very popular tent. It’s a rugged tent with built in poles that allows you to put it up and take it down quick. It has a 210 denier Oxford weave polyester shell and a 300 denier Oxford weave polyester floor. It’s 94″ x 94″ x 78″ tall setup, but it’s 67.5″ long when packed up. It has a packed weight of 30 lbs.
I recently got a Caddis RapidTent. It has a 190-denier polyester shell with a 210-denier polyester floor and is 96″ x 96″ x 72″ setup but only 50″ long when packed up. It has a packed weight of 20 lbs. 8 oz.
My concern was the amount of space the Gazelle T4 tent was going to take up in my bed and that it was going to be to long to fit in the basket on my bed rack. The Gazelle is definitely the better tent if you have the room to carry it.
Another point of consideration as that the Gazelle and RapidTent are $300.00 tents where a good roof top tent is going to cost you over $1,000.00. Don’t be discouraged though. If you check your local Facebook marketplace you’ll likely find some roof top tents for sale. I’ve seen people sell lightly used ones for as little as $650.00.
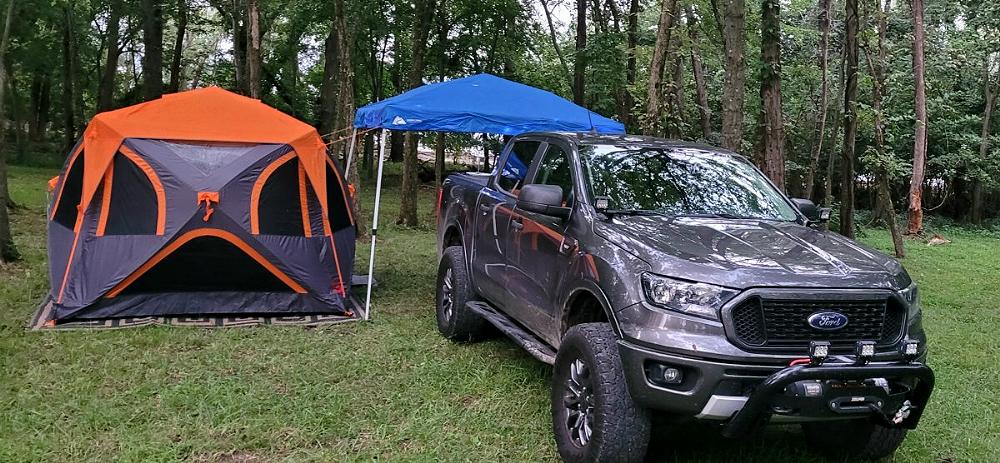
Another option is a sleeping platform in the bed of your truck if you have a camper shell.
Auxiliary Lighting:
I have found myself in the middle of a national forest navigating a ‘forest road’ after dark, have arrived at a campground as it’s getting dark, or have simply needed to light the area up around my truck at night for various reasons. As a result, this is the lighting setup I’ve used:
I don’t spend a ton of money on expensive brand names, and I personally don’t like full width lightbars across the roof of my truck.
Above you’ll see:
- Nilight 30-Inch LED Lightbar (LINK)
- Nilight 4-Inch LED Flood Lights (LINK)
- Nilight LED Fog Lights (LINK)
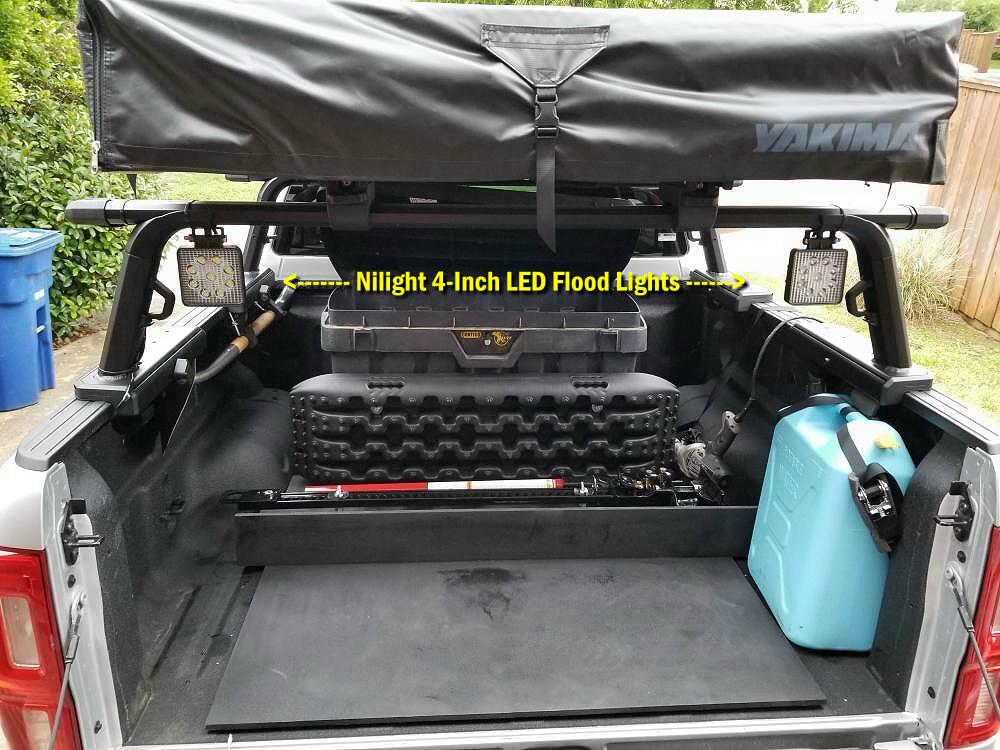
Notice that my 4-inch LED flood lights are mounted on the side of the grill guard and pointed off to the side instead of being mounted as ditch lights up on the hood. I’ve done it both ways and prefer them on the front of the vehicle instead of on the hood. Having lights mounted up near your hood or over the windshield can result in the light glaring off of the hood.
By the way, that 30-Inch LED bar puts out 24,800 lumens of light and is extremely bright.
The 4-inch lights are not Nilight’s cheapest lights, but they have a built-in EMC for EMI/RFI protection to prevent radio interference.
When I had the ‘Loan Ranger‘ I had Nilight 4-Inch LED Lights mounted on the back of the bed rack as well. I’m currently adding lights to my new rack. My new rack will have (2) lights on the rear, and (1) light on each side.
In the photo below you can see the 4-inch LED lights on the rear of the bed rack under the tent. This not only allowed me to light up the camping space behind my truck at night, but also gave me a ton of light behind the truck if I had to backup on a trail at night.
HELPFUL TIP: Get a wiring harness for your LED lights that also includes a remote (See HERE):
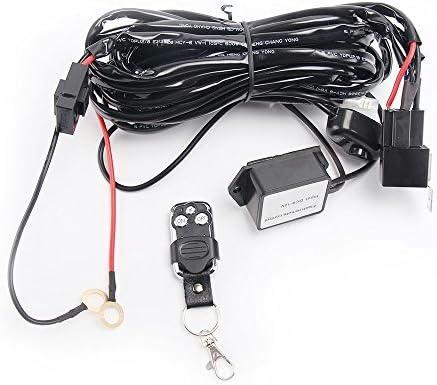
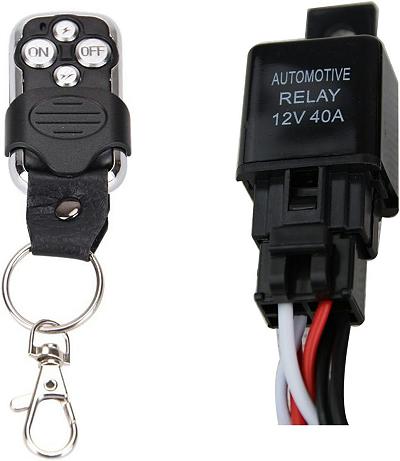
The harness with a remote has (2) great advantages:
1- You don’t have to run wires in to the cab of your truck to turn your LED lights on and off. When Ford loaned me the ‘Loan Ranger’ I used one of these harnesses to operate the lightbar and used Velcro to mount the remote onto the center console. When I wanted to turn on the light, I just pushed the button.
2 – If you take the remote(s) into your tent at night, you can turn the lights on to either see what’s out there or scare it away. The little button at the very top of the remote makes it flash / strobe, and the little button at the bottom changes the flash pattern. The strobing light will also scare off whatever is wandering around your campsite at night.
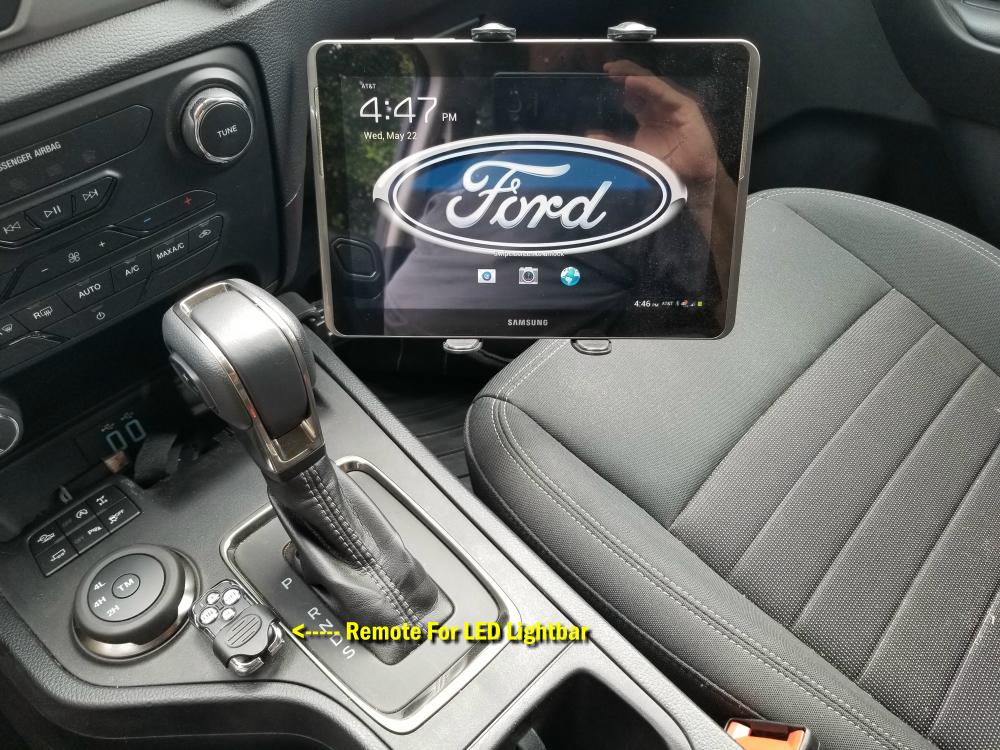
Below you can see the remote mounted to my console.
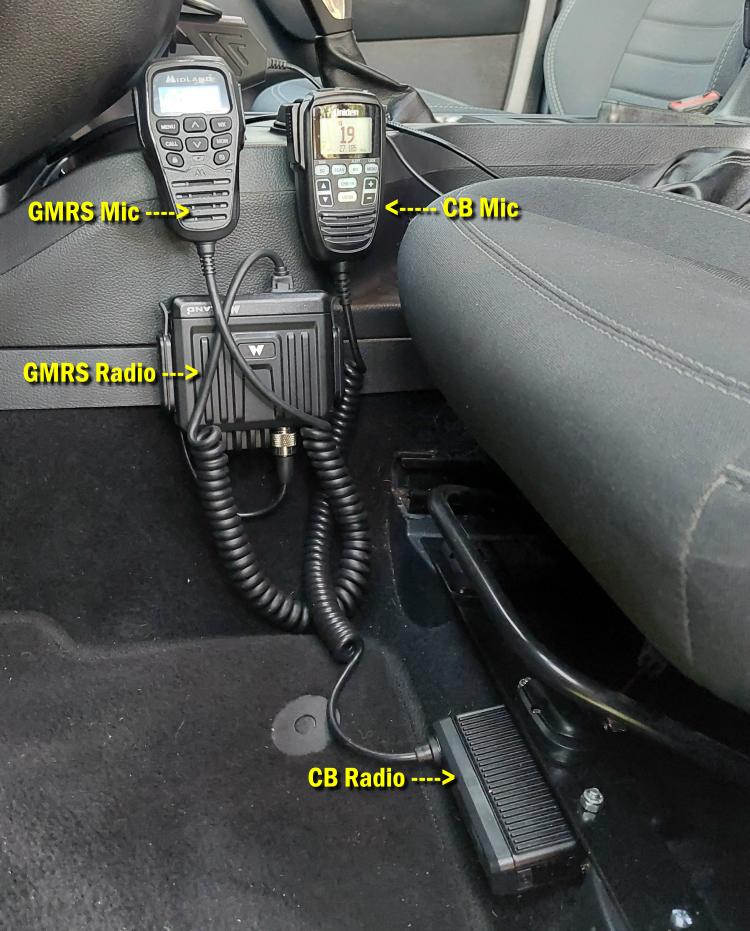
Communications:
Trail communications is important. If you’re traveling in a group, you’ll need to stay in communication with the other vehicles. If you’re on your own and get stuck or stranded, having a radio could help you call for help.
There are three different types of radios you’ll find in off-road and adventure vehicles:
- CB Radio
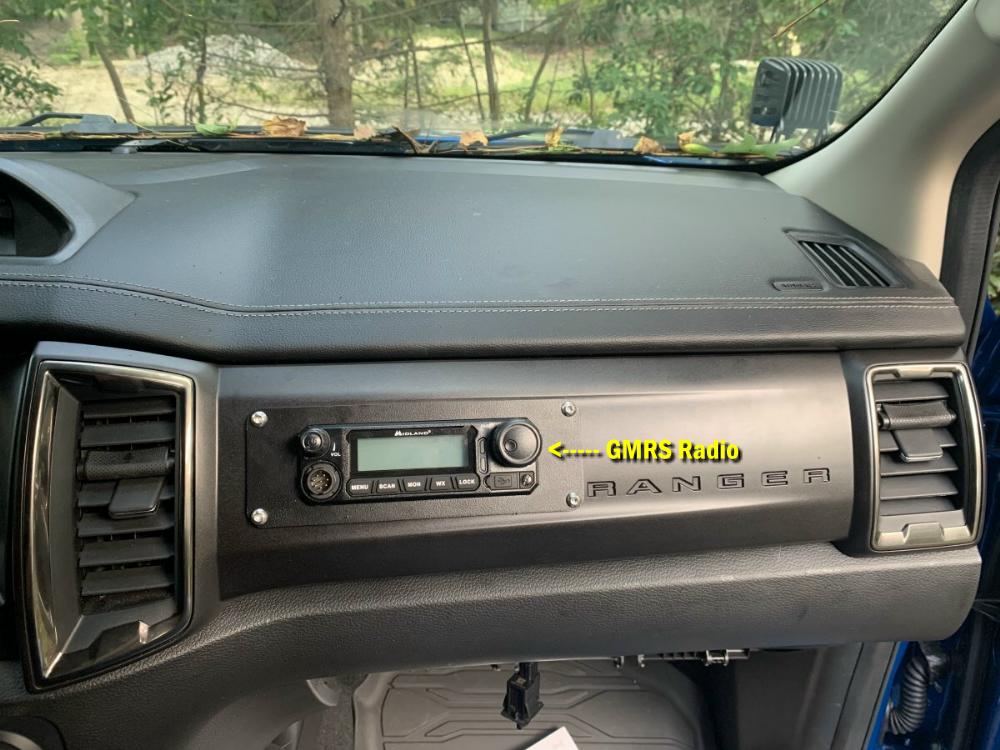
- GMRS Radio – Requires a license but no test.
- 2M Ham Radio – Requires that you pass a test to get a license.
Today most people use either GMRS or 2-Meter ham radios. The Midland GMRS radios are the most common. A nice feature of the GMRS is the clarity, no need to tune the antenna to your radio, and the availability of compact GMRS portable radios to communicate when you’re outside of the truck. GMRS can also have a longer range than CB radio.
CLICK HERE to learn more about GMRS radio and how to apply for the license.
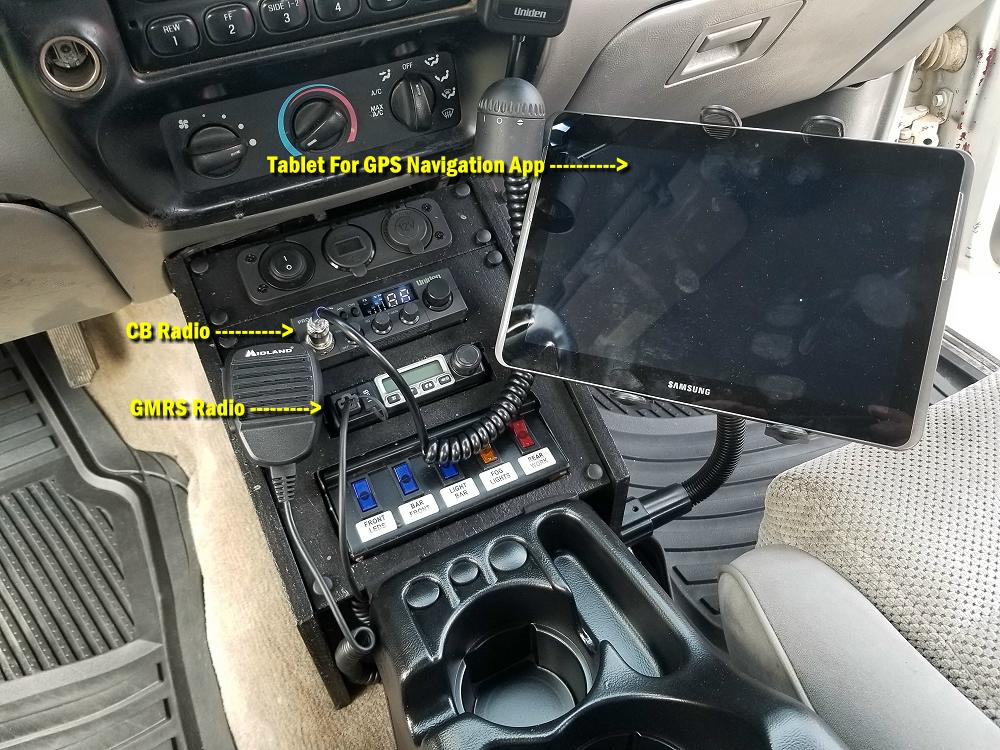
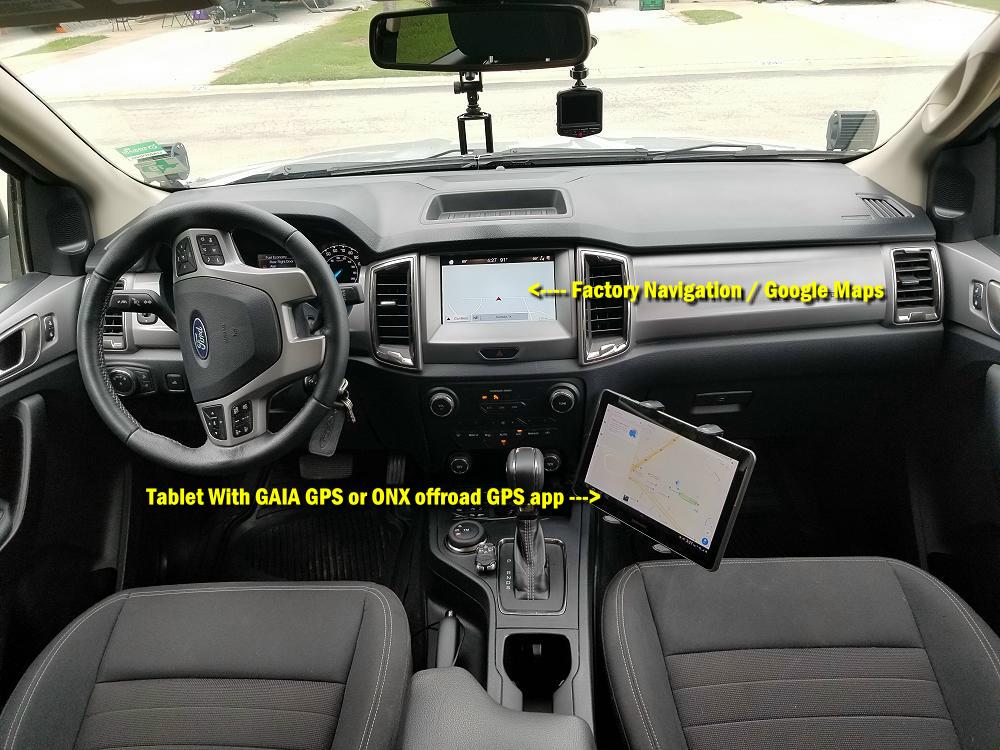
GPS Navigation Apps:
You’re going to need a good GPS navigation app like GAIA GPS or ONX OFFROAD. There are a lot of overlanding routes out there, but to find them you’ll need a good GPS app for your phone or tablet. I would recommend a tablet so that your phone is free if you need it. When you decide on an adventure, you can go online and get the GPS tracks to load into your GPS app. There are numerous websites and facebook groups out there that will have GPX files that you can download into your GPS app to navigate these adventures.
In the photo below you’ll see that even though I have the factory navigation in the dash, I have GPS app loaded on a tablet. It’s hard to see, but there is a red triangle near the highest point on that blue line that represents my vehicle / location. All I have to do is follow that blue line. This photo was taken when I was navigating the Trans America Trail.
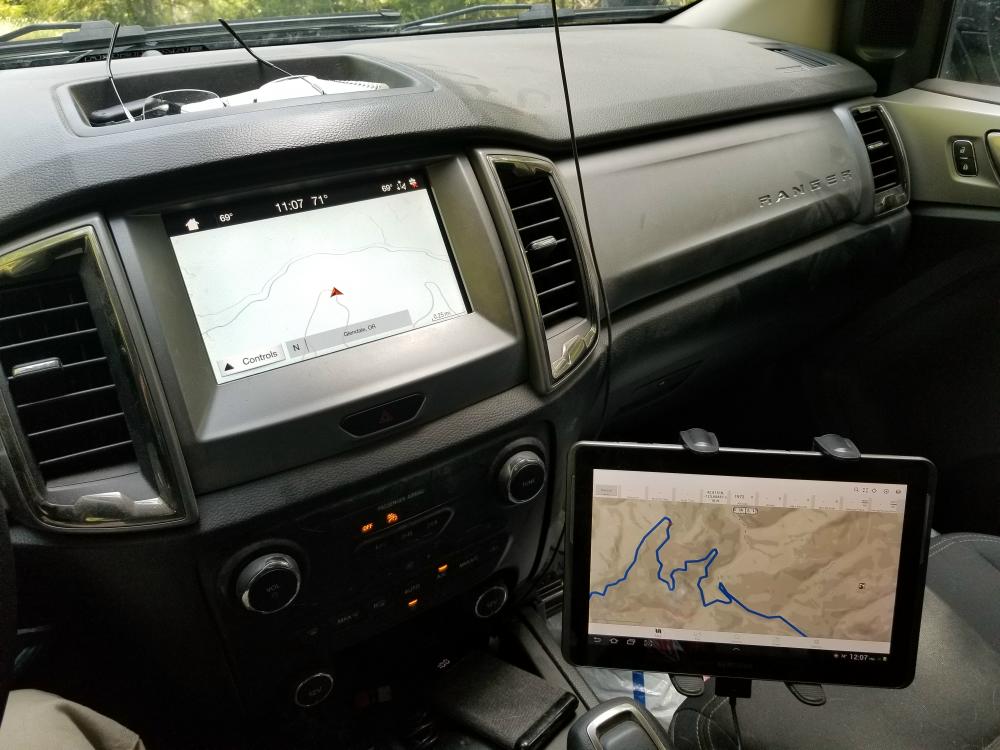
A GPS app can also help you discover trails. Google Maps might show you that something is a road, but a good GPS app like GAIA GPS or ONX OFFROAD will show you whether it’s actually a road, or a two-track trail.
Get Trained:
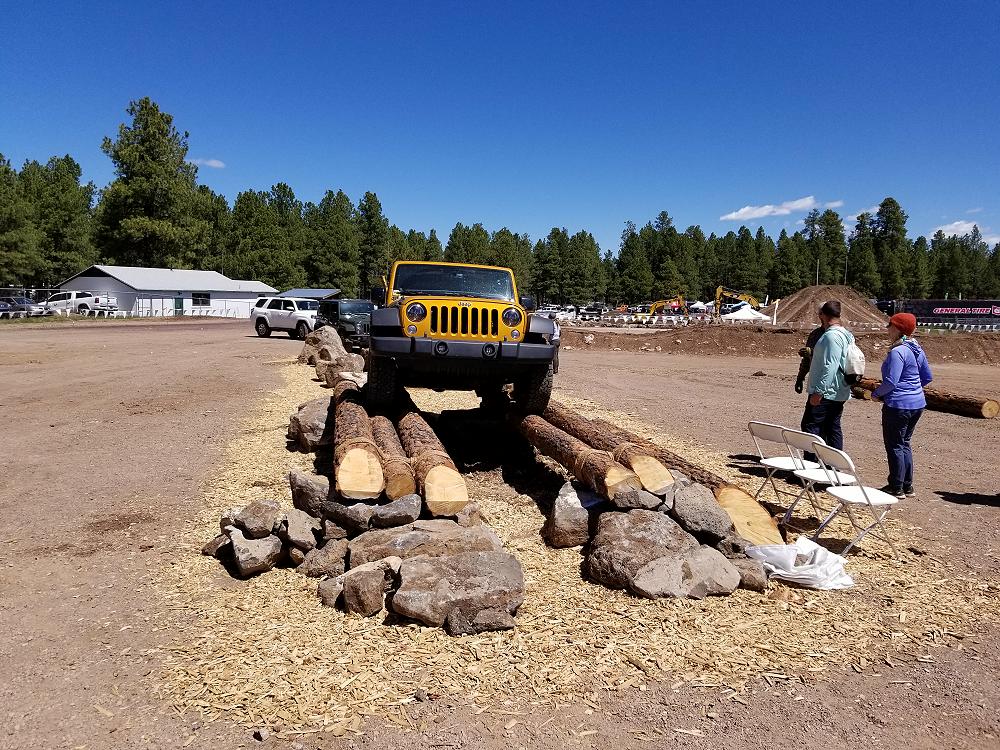
Overland Expo is not only an excellent event to see what’s new and what’s happening in the overlanding world, but they also offer classes that can help those that are new to off-roading as well as experienced off-roaders. In fact, Overland Expo offers over 175 classes.
You can learn advanced winch techniques:
How to pick a line and be a spotter (I jokingly called this class ‘Relationship Building’ because there were a lot of married couples)

And so much more.
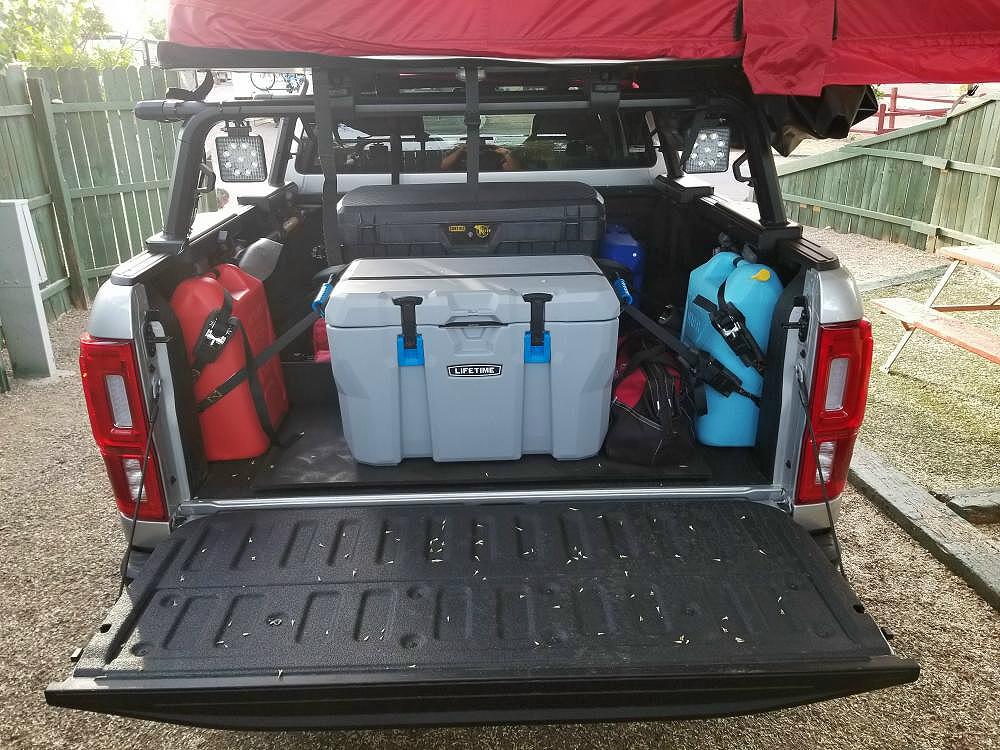
Carrying Fuel & Water:
When traveling the Trans America Trail, I found myself in some remote areas with long stretches in between towns. Because of this, I made sure that I topped off my fuel tank every time I came into a town with a gas station. Even with doing this I found myself critically low on gas crossing from Utah into Nevada. Fortunately, I had a 5-gallon can of extra fuel in the bed. It’s better to have it and not need it, then to run out of gas in an extremely remote area. Make sure you know where you’re traveling and how far apart your fuel stops will be and carry extra fuel if you need it.
I also carried a 5-gallon can of water for cooking, drinking, and clean up.
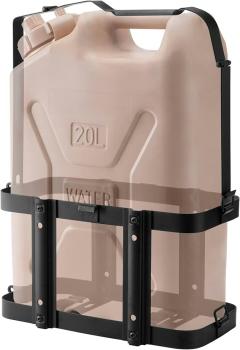
There are several choices when it comes to gas and water cans. From the older and more traditional 5-gallon metal Jerry can to the molded plastic Rotopax cans.
I personally have been using the Scepter cans because they cost less than the Rotopax and carry twice the fluids.
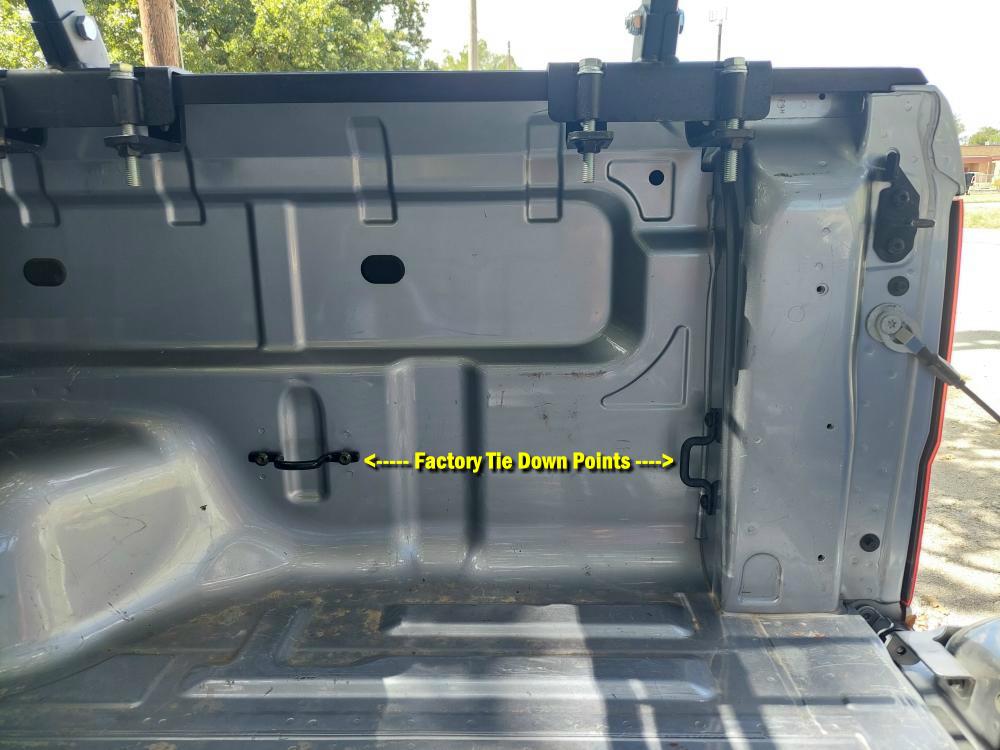
Below you can see how I secured the cans in the bed of the Ranger.
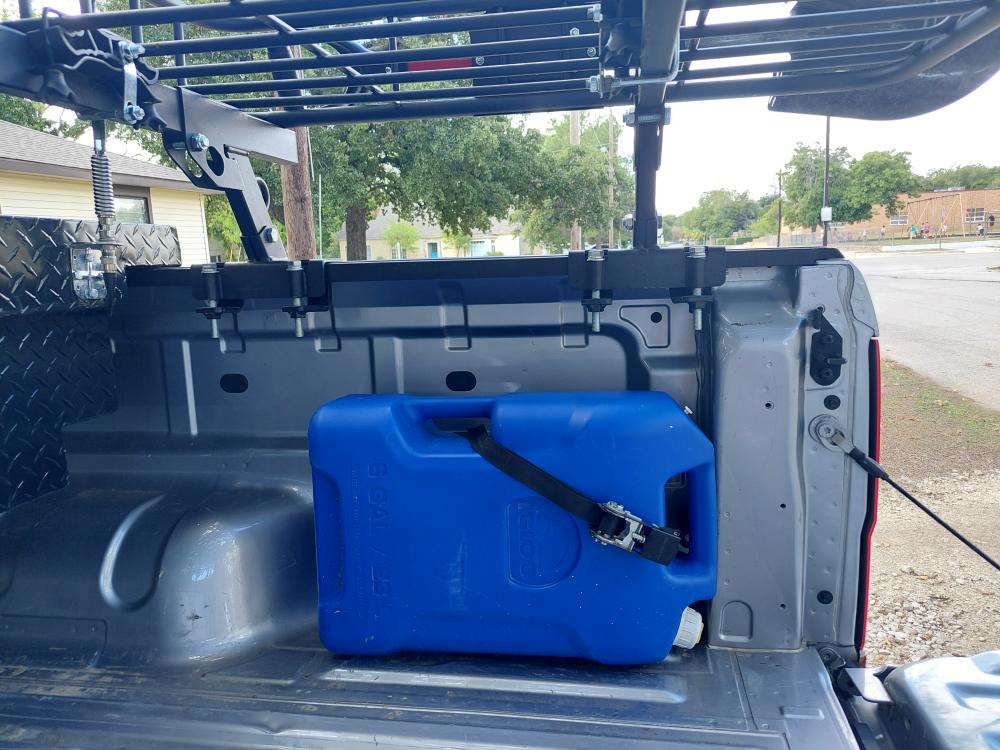
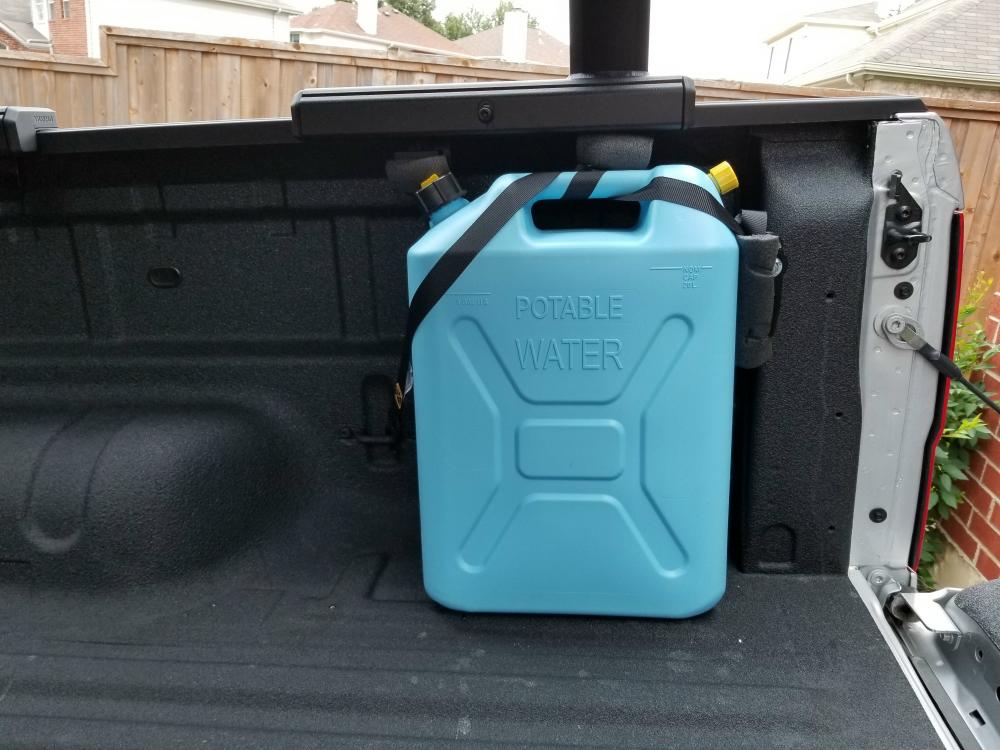
I secure them with the factory tie-downs and a ratchet strap.

You may want to invest in a Jerry Can holder. If you want to use the Rotopax style cans you can get mounts for those as well.
Food Storage And Fires:
Food Storage:
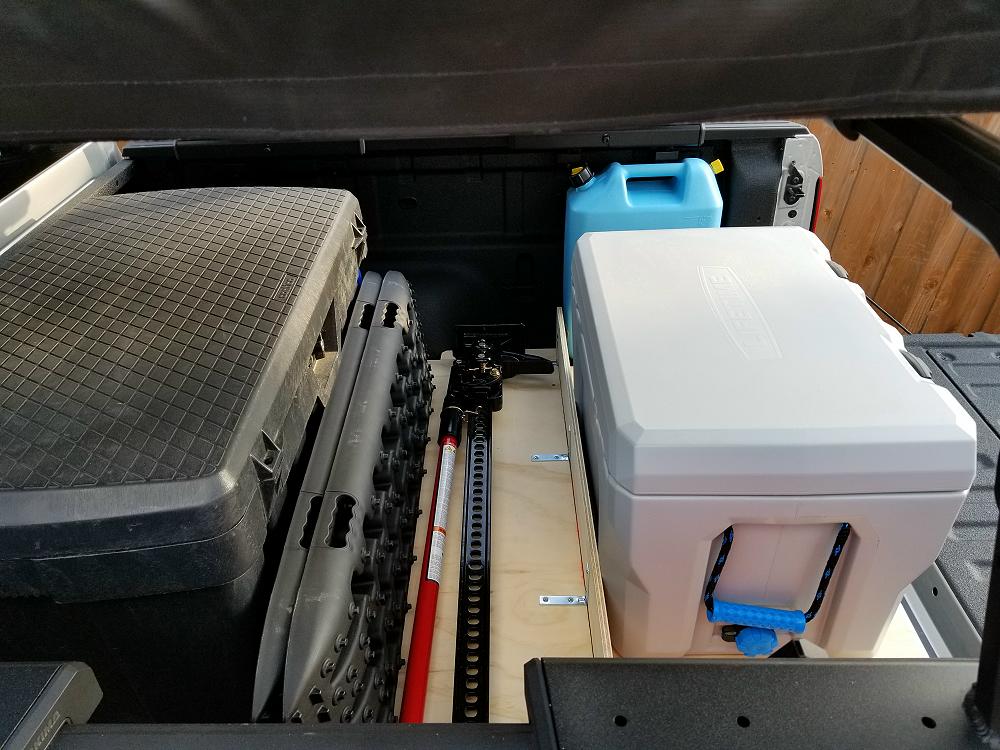
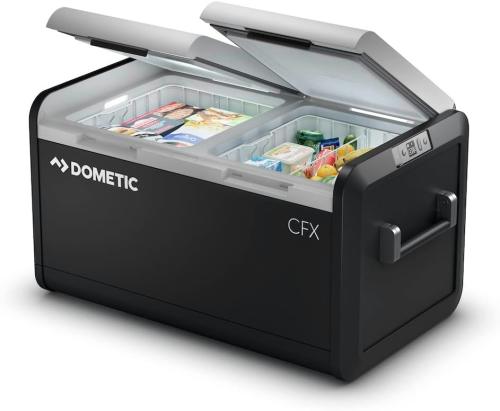
You’re going to need a cooler or a 12-volt fridge for any food products that need refrigerated. Make sure that whatever you keep your food in is bear proof if you’re going to be camping anywhere there may be bears. I use a Lifetime 55-Quart Cooler for my refrigerated items. I freeze a few water bottles to help keep it cold and make the ice last longer and marinate and freeze any meats that I know I won’t be using for a few days. You do plan your meals, right?
If you don’t want to deal with ice you can get a 12-volt cooler (fridge). Some even have separate refrigerator and freezer sections such as the one below.
Make sure you don’t store any food in your tent or leave any open food in your truck. Keep your food in secure storage containers.
Fire:
Be aware of any fire restrictions. A fire restriction is a temporary ban on open flames, especially recurrent when there are drought conditions. This means no campfires, open fires, or barbeques, regardless of whether or not you are in a commercial campground. However, burn bans can mean different things depending on the location. It could mean no wood-burning, no open flame, no charcoal burning, no bio-fuel stoves, or others, so it is best to check in with local authorities or do your research before heading to the area.
Stage 1, Stage 2, and Stage 3 fire restrictions are implemented due to fire danger and the risk of catastrophic wildfire.
Stage 1 (High):
Designated Campgrounds: Wood and charcoal fires (including wood-burning stoves) are prohibited in South Fork Campground. All fires and stoves are allowed in all other campgrounds.
Wilderness: Wood and charcoal fires (including wood-burning stoves) are prohibited below 6,000 feet. Year-round elevation/site-specific wilderness fire restrictions also apply. Refer to the Minimum Impact Restrictions. Gas, propane, alcohol (with and without a shutoff valve) and tablet/cube stoves are permitted.
Stage 2 (Very High):
Designated Campgrounds: Wood and charcoal fires (including wood-burning stoves) are prohibited. Gas propane, alcohol (with and without a shutoff valve) and tablet/cube stoves are permitted.
Wilderness: Wood and charcoal fires (including wood-burning stoves) are prohibited below 6,000 feet. Year-round elevation/site-specific wilderness fire restrictions also apply. Refer to the Minimum Impact Restrictions. Gas, propane, alcohol (with and without a shutoff valve) and tablet/cube stoves are permitted.
Stage 3 (Extreme):
Designated Campgrounds: Wood and charcoal fires (including wood-burning stoves) are prohibited at all campgrounds. Gas, propane, alcohol (with and without a shutoff valve) and tablet/cube stoves are permitted.
Wilderness: Wood and charcoal fires (including wood-burning stoves) are prohibited at all elevations. Gas, propane, alcohol (with and without a shutoff valve) and tablet/cube stoves are permitted.
Propane Fire Pits:
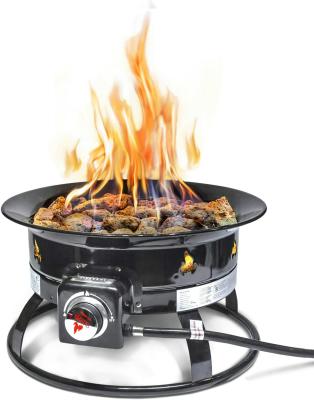
Many overlanders use a propane fire pit and propane stove instead of wood and charcoal fires based on the information above. These fires are easily extinguished do to their shut off valve and don’t render sparks like a wood fire which could lead to a forest fire.
My Trans America Trail Setup
Below is the bed setup I used when I did the Trans America Trail in 2019: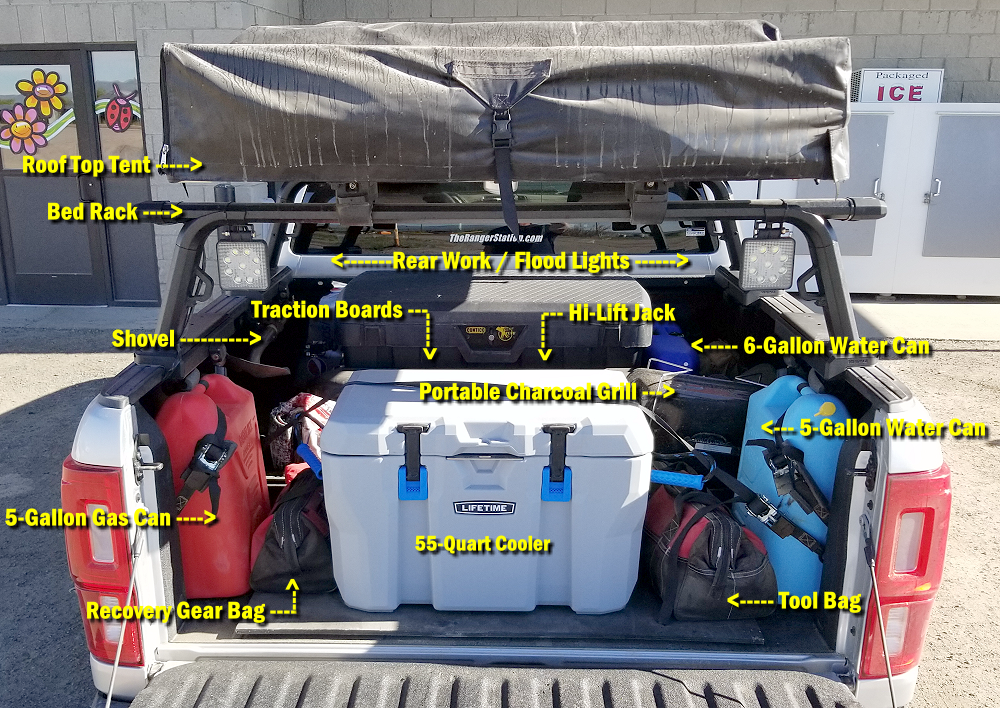
The 5-gallon water and gas can are from Scepter, and you can find them at your local Tractor Supply or on Amazon. The Lifetime 55-Quart cooler came from Walmart, but you can get them from Amazon as well. I was actually surprised at how long it keeps ice, plus it’s bear resistant.
You’ll also see a shovel (useful for making sure your campfires are extinguished), some Husky tool bags from Home Depot loaded with tools and recovery gear, an Igloo 6-gallon water can, a Contico Pro TuffBin truck box for storage, and a mini charcoal grill.
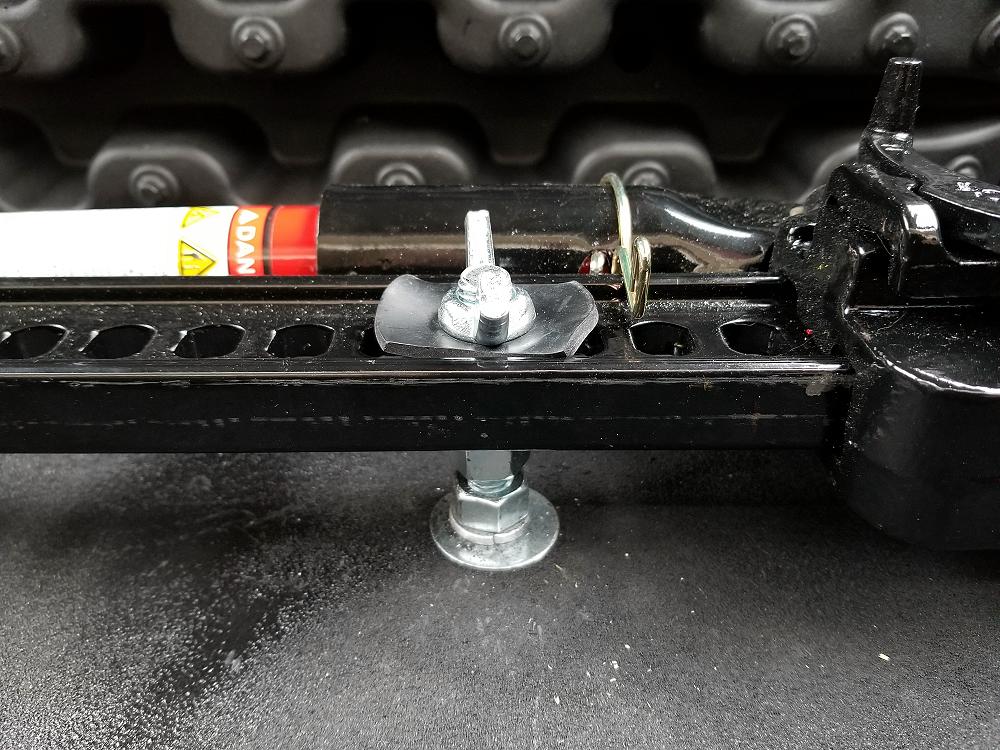
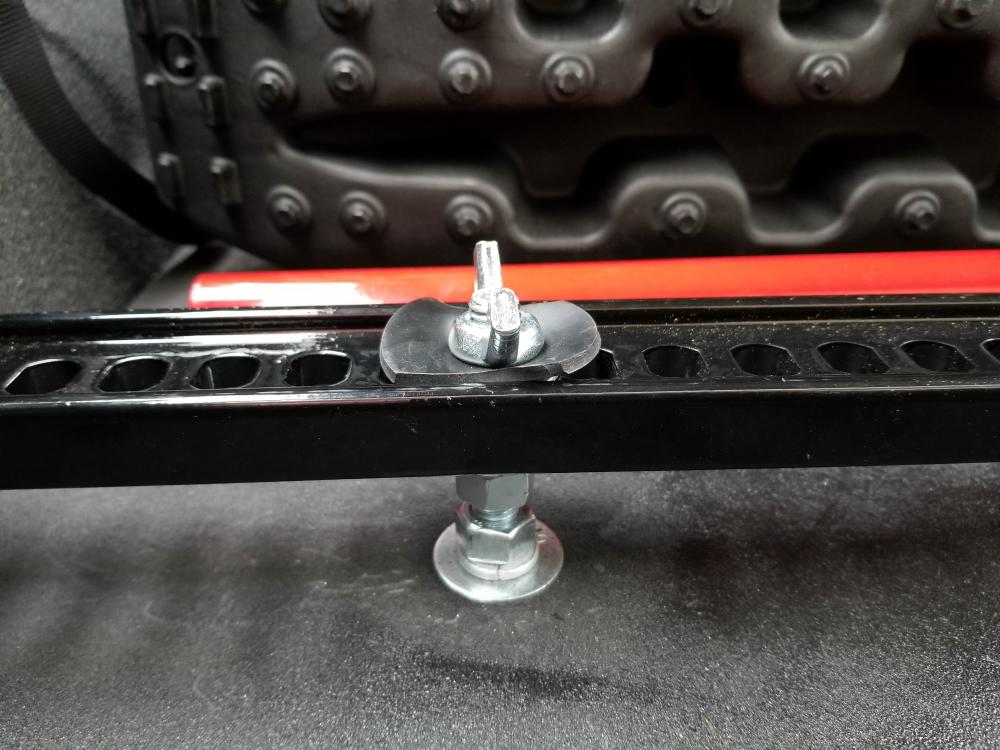
What you can’t see is a pair of Xbull Traction Boards attached to the Contico box and a Hi-Lift jack secured to the 3/4″ plywood that it’s all sitting on.
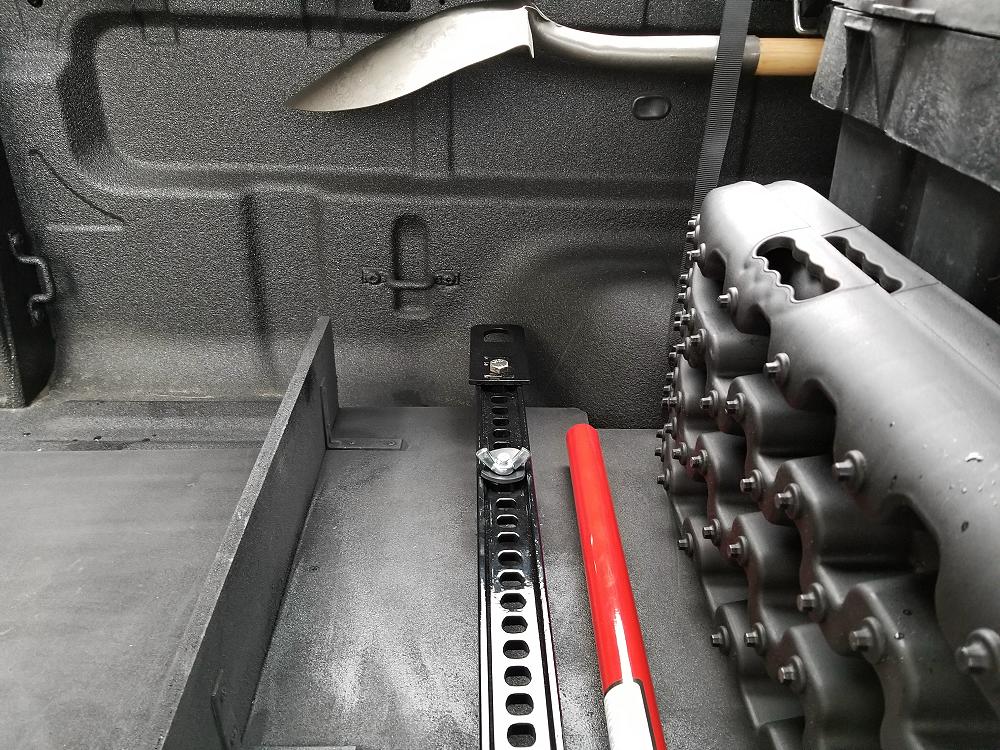
The Hi-Lift is secured by mounting a 1/2″ carriage bolt through the bottom of the plywood, securing it with a washer, lock washer, and nut, and then adding another nut and washer for the jack to lay on. A metal washer lays on top of the jack, and then I put a rubber washer on and a 1/2″ wing nut. The rubber washer keeps the wingnut from coming loose.
On the front there were Nilight 4-Inch LED lights mounted on the hood using clamp on mounts, and a Nilight 20-Inch 28,800 lumen LED lightbar on the front bumper.
At the time Ford loaned me the Ranger there wasn’t a winch mount available, and Ford didn’t want me drilling holes in it.

More Ford Ranger’s For Inspiration:
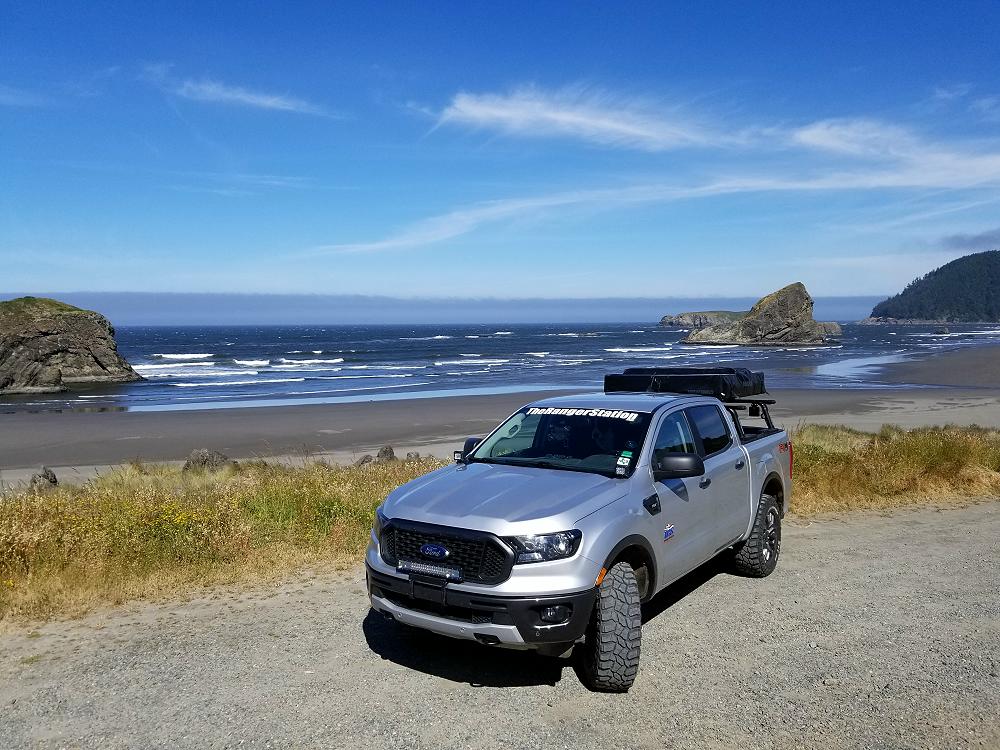
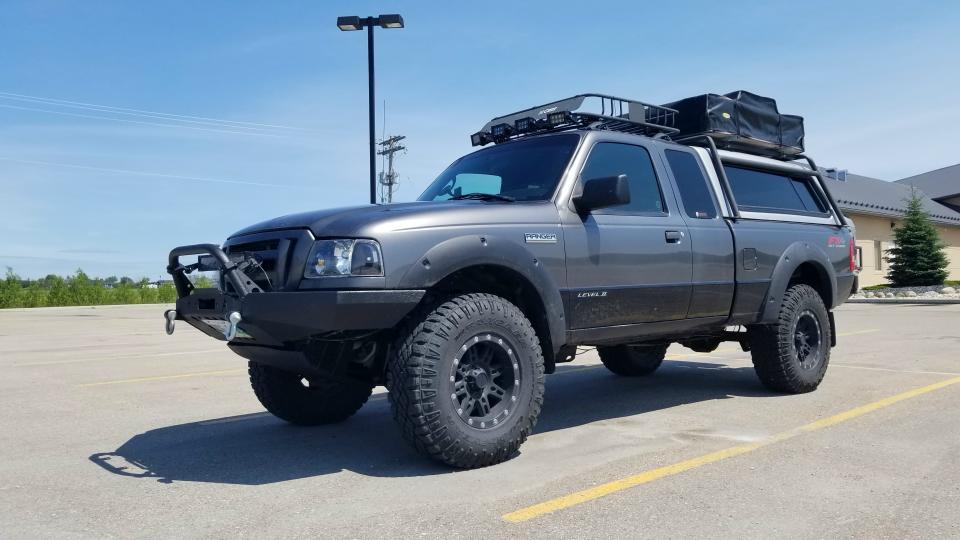
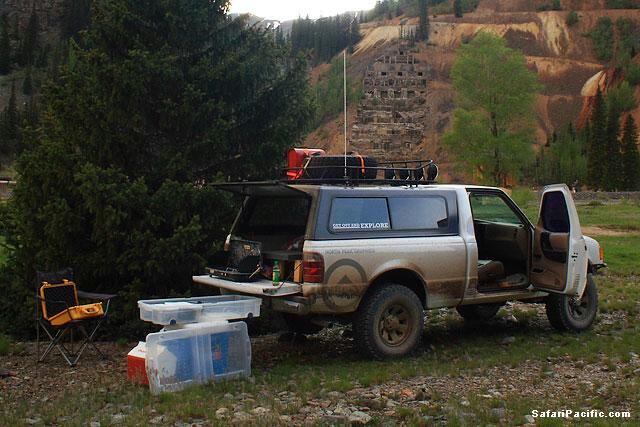
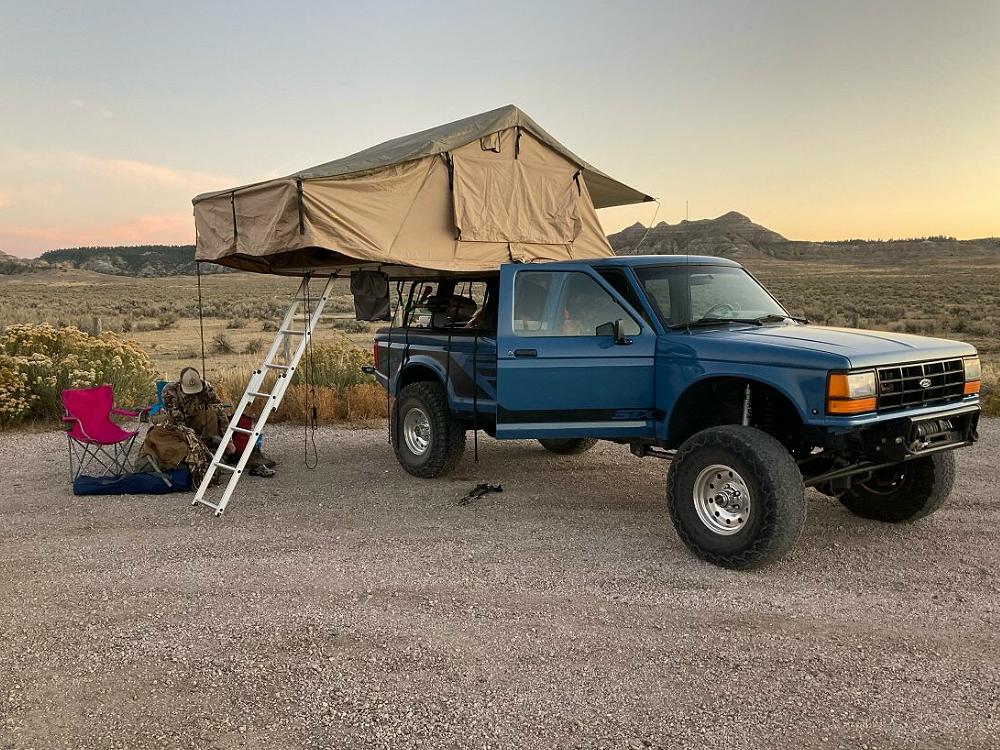
I’ve been showing you pictures of my Ranger, but you don’t need a newer Ford Ranger to become an overlander. The 1985 Ford Ranger shown below is proof of that.
Want to learn more about the Ranger below and see other overlanding Ford Rangers, check out our Overlanding Ford Ranger Featured Vehicles.
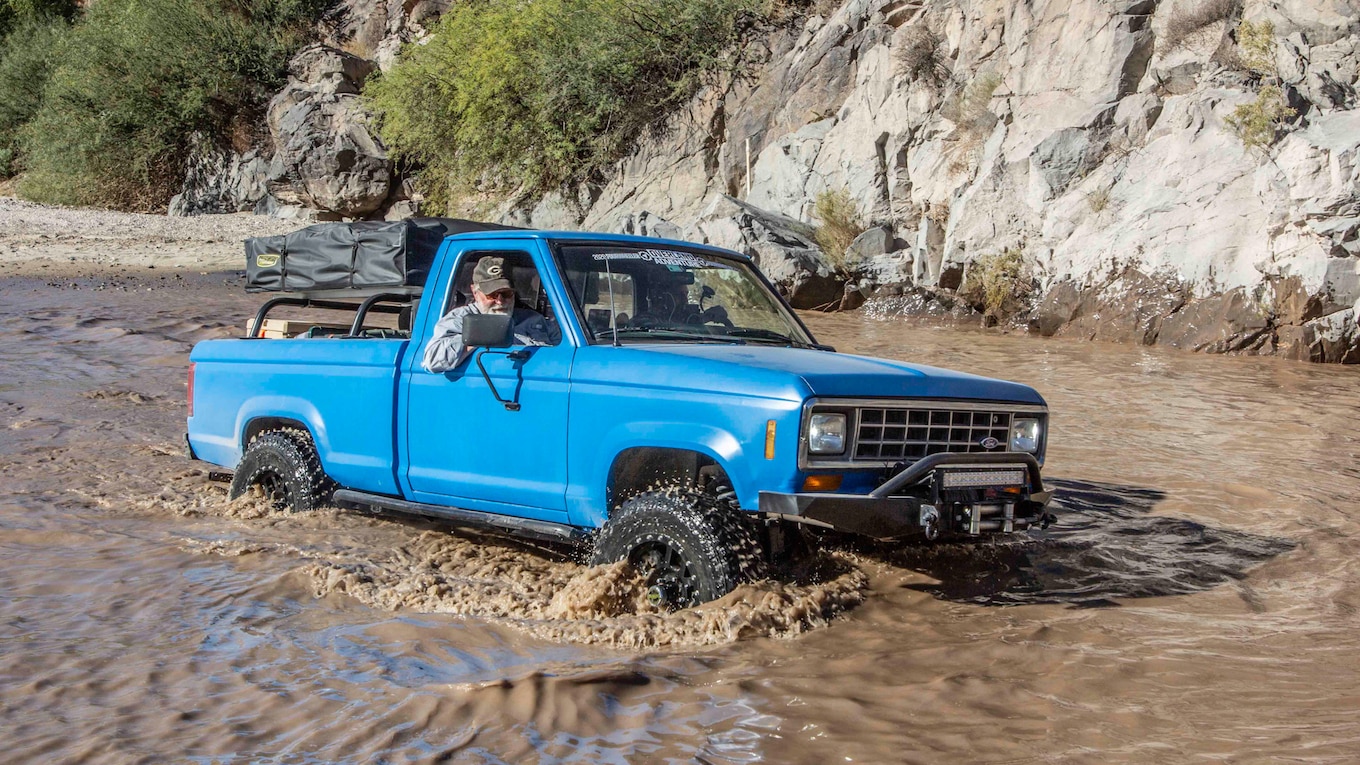
Photo Gallery:
Click the photos to enlarge.