• Welcome Visitor! Please take a few seconds and Register for our forum. Even if you don't want to post, you can still 'Like' and react to posts.

Let's discuss adding A/C to my 1st gen V8 truck that never had it to begin with..


Bird76Mojo

Well-Known Member
V8 Engine Swap
Joined
Jun 28, 2009
Messages
2,636
Reaction score
1,265
Points
113
Location
IL
Engine Type
V8
Wait... thinking even harder... you really need this... back to your drawings...

Sorry... but not really
Thinking even harder?


While I trust your advice to be very good, and I should most definitely follow it, Ford decided not to use any filter on the 87 Ranger or the 92 Thunderbird. It's not even available as an option for those years. I may regret not running one, but I'm trying to keep this as low cost as possible since it's all experimental and might fail spectacularly.

I won't know how much oil to run, how much refrigerant to run, etc.. Since my aftermarket condenser is smaller than both the Thunderbird and the Ranger. The compressor will certainly be larger than necessary (Ranger is an FS6 model, while Thunderbird is the FS10 I'm using), being that it's from the Thunderbird system that has a much larger condenser than the Ranger, and I'm using a Ranger evaporator which is a good bit larger than the Thunderbird unit.

Condenser = smaller than either factory unit
Evaporator = factory Ranger evap is larger than the Thunderbird evap
Compressor = larger than the factory Ranger unit
Custom hoses = will be shorter than either model's factory hoses.

That's some screwed up math to try to figure out, but overall, I'll have a factory Ranger evap, a smaller condenser but a larger compressor, so the amount of oil may increase due to compressor size but the amount of refrigerant should stay "close" to the same, though it will have to be reduced some because of using a little more oil.. Going with the factory Ranger capacities might be a good idea in my opinion. I think it was one ounce less of oil than the Thunderbird.
 
Last edited:


Uncle Gump

Token Old Guy
TRS Event Staff
TRS Forum Moderator
Supporting Member
VAGABOND
TRS Event Participant
Joined
Sep 17, 2018
Messages
13,942
Reaction score
13,435
Points
113
Location
Ottawa IL
Vehicle Year
2006/1986
Make / Model
Ranger/BroncoII
Engine Size
4.0L SOHC/2.9L
2WD / 4WD
4WD
My credo
Lead follow or get out of my way
OK... when I questioned this entire system in my head before posting what I did... I kept getting stuck at the high side filter. A TXV system uses a receiver/dryer (also serves at a filter)... in the high side before the TXV. This prevents trash from plugging the TXV. The orifice tube system uses an accumulator... which is the drier and filter but it is in the low side. Now the orifice tube most likely has a fine mesh screen as part of the assembly... I kept thinking that a high side filter was also used.... it is also depicted in you diagram. Are the Ranger a T-Bird systems you mentioned TXV or orifice tube systems?
 

Bird76Mojo

Well-Known Member
V8 Engine Swap
Joined
Jun 28, 2009
Messages
2,636
Reaction score
1,265
Points
113
Location
IL
Engine Type
V8
Both the 1987 Ranger (year of my truck) and 1992 Thunderbird (year of my donor engine and compressor) system are orifice tube. Neither had any type of in-line filter other than the fine mesh on the orifice tube. Not in any factory hoses I've seen anyway.


BUT, A/C that was added by dealers after Ford delivered the trucks to them, those systems usually used a (temp sensing) expansion valve from what I've read. My local junkyard has 2 first gen Rangers that have dealer installed A/C, so I guess I should have paid more attention to them. You can usually tell by the dash controls. Instead of a square A/C push-button to activate the compressor, there is a round, red or blue, translucent push-button that's added to the dash panel.


Factory A/C control push-button:


I believe this is the switch typically added when dealers installed A/C, but I've also seen round, translucent red push-buttons in the junkyard:


Rockauto lists this as a 1989 expansion valve for dealer installed A/C only:


I do notice that the later Rangers added an in-line muffler/filter, with a high pressure switch port on it for even later models, and I "thought" they changed from a cycling switch on the low side, to a low pressure switch. The reason I thought that was due to this video, where he installs all new A/C system parts (except the evap) and there is a cycling switch on the accumulator, and some other type of switch on the filter/muffler:

At 9:11 in this video he removes a "high pressure switch" and at 14:25 he removes the "cycling switch" on a 1994 Ranger:


On Rockauto, this is listed as a "discharge" hose for a 1993 Ranger, but they don't list a high pressure switch for that year. Notice no port for a high pressure switch on the filter/muffler:


Rockauto listed this as a 1994 Ranger "suction and discharge hose" - notice the port for a high pressure switch:


Bird76Mojo

Well-Known Member
V8 Engine Swap
Joined
Jun 28, 2009
Messages
2,636
Reaction score
1,265
Points
113
Location
IL
Engine Type
V8
It seems like as Ford went along, they started seeing room for improvement, or perhaps there were customers coming back for repairs and Ford thought they could save some money on warranty claims by using a filter in the system. This would have been back in the days of the "black death" compressor failures, which quickly clogged orifice tubes.
 

Uncle Gump

Token Old Guy
TRS Event Staff
TRS Forum Moderator
Supporting Member
VAGABOND
TRS Event Participant
Joined
Sep 17, 2018
Messages
13,942
Reaction score
13,435
Points
113
Location
Ottawa IL
Vehicle Year
2006/1986
Make / Model
Ranger/BroncoII
Engine Size
4.0L SOHC/2.9L
2WD / 4WD
4WD
My credo
Lead follow or get out of my way
Well I was really just giving it due diligence and ensuring you were well informed... and it appears you are.

So... lets go back to what I originally said...

Your Call...
 

Bird76Mojo

Well-Known Member
V8 Engine Swap
Joined
Jun 28, 2009
Messages
2,636
Reaction score
1,265
Points
113
Location
IL
Engine Type
V8
I'm not that well informed at all. You've seen how stupid I am when it comes to A/C stuff. lol I need people to call me out when I'm building something wrong or making a bad decision.. Your help and advice has been priceless.

I just figure if Ford didn't run the filter/muffler in the 87 Ranger or the 92 Thunderbird, then I can surely get away with not running one, which will save me some cash and simplify the build a bit. Remember, I'm trying to do this entire conversion/retrofit for under $500. So far, it's looking like I can achieve that..

I got a little more done today on my swap..

Here's my solution to the tight confines around the back of my compressor. The only downside is that I'll have to have the hoses crimped first, then I plan to silver solder the tubing to the compressor manifold. I'll have to soak a rag in ice water and keep it wrapped around the fittings to avoid overheating the crimped hose connections, but I think it's doable. Silver solder melts at around 450 degrees compared to silver brazing which has a melting point of around 1200 degrees, or having them tig welded at much higher temps. The direction I need the hoses to go, they won't be able to crimp them if I soldered or welded them to the block first..

thumbnail (4).jpg

thumbnail (5).jpg

thumbnail (6).jpg

thumbnail (7).jpg

thumbnail (8).jpg

thumbnail (9).jpg


I found a couple stainless brackets in my scrap pile that worked perfectly in the space I have available for my condenser, so I took what was left of my cab corner patch panels and cut some pieces to duplicate the stainless brackets.. Cut, grind, smooth, mark and drill...

thumbnail (10).jpg


Some extra holes in them, but they'll never be seen anyway...

thumbnail (11).jpg

thumbnail (12).jpg

thumbnail (13).jpg


After fitting up the brackets, the spacing couldn't be more perfect. The assembly fits snugly inside my core support and will stay put without bolts. I do have some minor grinding to do on the back side of where the hood latch mounts, on the center piece that comes down in the middle of the core support. The grille attaches to that piece, so cutting it out isn't an option. I'll grind about 1/6" to an 1/8" off in some places to tuck things in tighter to make room for my radiator to fan clearance. I already cut the extra length off of a couple bolts that stuck through too far and would have damaged the new condenser..

thumbnail (14).jpg


Then it was time for some paint, since it's so easy to see from the front of the truck. I never painted the aluminum radiator core, because it didn't look too bad as it took up the entire empty space in the core support, but this condenser being a bit smaller than the opening in the core support, I just thought it looked terrible in raw aluminum. So I hit it with some high heat paint to hide it a bit better. I don't see it affecting the condenser much, as you can order them with high heat paint as a more expensive option.

thumbnail (15).jpg

thumbnail (16).jpg


That's all for today. Tomorrow I plan to keep fitting up the condenser and radiator, then test fit the mechanical fan. I have to use a hole saw to cut some openings in the passenger side of the core support for the condenser fitting to pass through. I'll be using 90 degree connections on those.

Then I have to start fitting up my cut up heat/AC plenum box. I already have a fiberglass kit so sealing it up shouldn't be a big deal. If this A/C retrofit goes well, I'll soon have a V8 swap heater plenum for sale without the A/C option. Already fiberglassed and painted...


GB :)
 

Uncle Gump

Token Old Guy
TRS Event Staff
TRS Forum Moderator
Supporting Member
VAGABOND
TRS Event Participant
Joined
Sep 17, 2018
Messages
13,942
Reaction score
13,435
Points
113
Location
Ottawa IL
Vehicle Year
2006/1986
Make / Model
Ranger/BroncoII
Engine Size
4.0L SOHC/2.9L
2WD / 4WD
4WD
My credo
Lead follow or get out of my way
You're getting close now...

To me it looks like the compressor block/fittings/hose connections are going to be your biggest hurdle to leap. I know I would exhaust all resources before I had the fittings crimped prior to being soldered together. Some of those crimping tools look like they will get into some pretty tight spaces.
 

Bird76Mojo

Well-Known Member
V8 Engine Swap
Joined
Jun 28, 2009
Messages
2,636
Reaction score
1,265
Points
113
Location
IL
Engine Type
V8
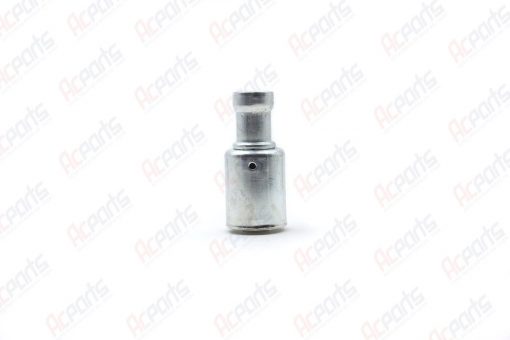
I've thought about getting some longer pieces of steel tubing and bending them to fit in the tight location I need them to, head the right direction to whatever component they're going to attach to, then weld them to the manifold block. After that, use fittings like this silver soldered or brazed to the tube:


BUT, the problem there is getting the tight 90 bends I need. I've gotten pretty good over the years at filling tubing with sand, then heating it cherry red and bending it to whatever shape I need, but I'm not sure I could get a tight enough 90 bend.. Having tubing bent somewhere will only add more cost.


Another option would be to tig-weld threaded connections on to my manifold block, like this:


Then use expensive, tight clearance 90 degree fittings like these:


But again, I'm not sure of these options fitting in my location due to clearance issues. It's extremely tight behind the compressor.


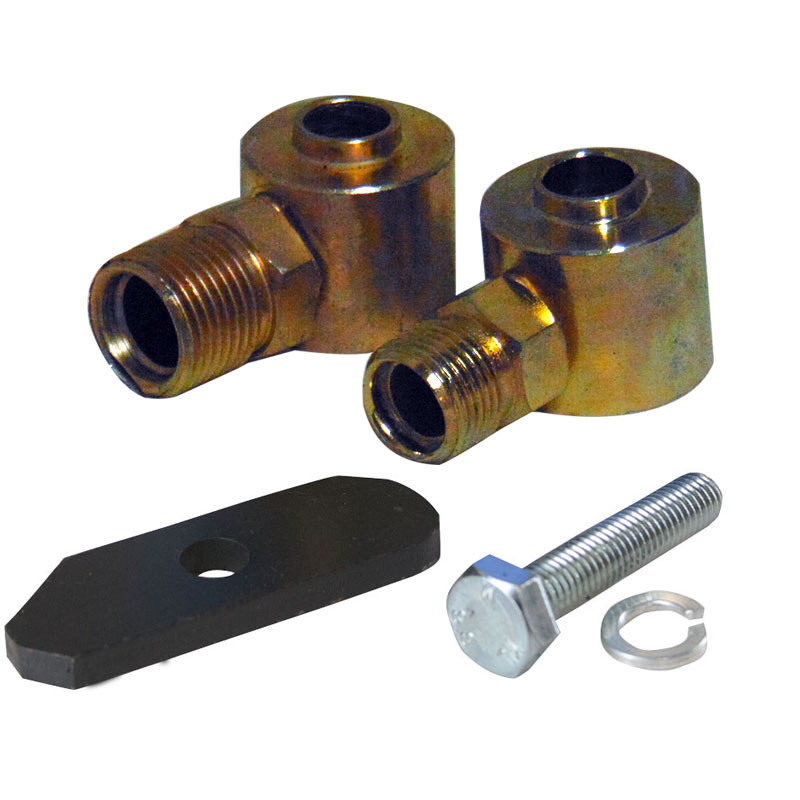
I'd love to go with an option like this, and eliminate the compressor manifold block altogether, but the port sizes on my compressor are different from one another, so fitting like this staying centered could be an issue?

 
Last edited:

Uncle Gump

Token Old Guy
TRS Event Staff
TRS Forum Moderator
Supporting Member
VAGABOND
TRS Event Participant
Joined
Sep 17, 2018
Messages
13,942
Reaction score
13,435
Points
113
Location
Ottawa IL
Vehicle Year
2006/1986
Make / Model
Ranger/BroncoII
Engine Size
4.0L SOHC/2.9L
2WD / 4WD
4WD
My credo
Lead follow or get out of my way
I like the last option you posted... no soldering required. They will give you way more positioning flexibility too... opposed to a crimped on rigid 90 degree fitting. If your 90's don't get crimped exactly how you need them... you will have to "twist" the hose to get them where you need them. This will put some undo stress on your 90's and solder joints.
 

OldMan2

Active Member
U.S. Military - Veteran
Joined
May 29, 2019
Messages
188
Reaction score
233
Points
43
Location
BuckRidge, GA
Vehicle Year
1991
Make / Model
Ranger
Engine Type
2.3 (4 Cylinder)
Transmission
Manual
2WD / 4WD
2WD
My credo
Do your best to be your best.

Bird76Mojo

Well-Known Member
V8 Engine Swap
Joined
Jun 28, 2009
Messages
2,636
Reaction score
1,265
Points
113
Location
IL
Engine Type
V8
Again, the problem with the last option, the swivel, is that the low side swivel will fit the opening in the compressor very loosely. If I still had access to a lathe, it would be easy. I'd just turn down a press fit bushing and install it on to the swivel "bung" where it meets/goes in to the compressor. Keeping it centered..

I think I'm going to stay the course on silver soldering my hose ends in to the manifold block. I've already got $25 in those two fittings... I'll have them crimped to the hoses and then silver solder them in to place. If not, back to square one I guess. lol

When I place an order on Amazon for some other parts, I think I'll add this to the cart, and also keep a rag in ice water within reach while soldering. It's meant to withstand heat when brazing, and I'll only be silver soldering. Temps less than 450f. Compared to brazing at 1200+

https://www.amazon.com/Uniweld-91861-Cool-Blue-Paste/dp/B011N5YH5O


As for the crimping, I'll be making multiple trips to a shop about 30 miles away for crimping hose ends.. No avoiding that.


No progress to report today. It's been pouring rain all last night and today, and my mother wanted me to haul some porch roof material for her today using my trailer, and of course, she had to stop 15 times on the route home to dig up roadside flowers for her flower beds... Came home soaked to the bone.
 

Bird76Mojo

Well-Known Member
V8 Engine Swap
Joined
Jun 28, 2009
Messages
2,636
Reaction score
1,265
Points
113
Location
IL
Engine Type
V8
But wait, there's more!!! lol

Just found this picture with measurements. The reason I didn't want to go with these fittings, and use weld-on MIO (male insert o-ring) fittings on my compressor manifold block was due to possible clearance issues. Now that I have an idea of dimensions, I may go this route. I'll have to add all of the fittings to my cart and see what the price difference is. This stuff gets expensive fast.

Then I'll have to double check my dimensions to see if I have the clearance needed.


Uncle Gump

Token Old Guy
TRS Event Staff
TRS Forum Moderator
Supporting Member
VAGABOND
TRS Event Participant
Joined
Sep 17, 2018
Messages
13,942
Reaction score
13,435
Points
113
Location
Ottawa IL
Vehicle Year
2006/1986
Make / Model
Ranger/BroncoII
Engine Size
4.0L SOHC/2.9L
2WD / 4WD
4WD
My credo
Lead follow or get out of my way
How loose is loose? if the wiggle factor is within the fitting OD vs sealing surface... who cares. Let it live off center... as long as it seals.

Might save a couple 60 mile round trip to the A/C shop/
 

Bird76Mojo

Well-Known Member
V8 Engine Swap
Joined
Jun 28, 2009
Messages
2,636
Reaction score
1,265
Points
113
Location
IL
Engine Type
V8
That's information that's has proven impossible to find. The Ford FS-10 compressor o-rings, i can measure my old ones, but the outside diameter sealing surface of that swivel adapter is unknown.

That style of swivel is meant for a Sanden G or GV head compressor. The port sizes from this manual are listed at 16.7mm and 15mm but they use sealing washers that are metal and rubber that are permanently joined together, and there are seemingly hundreds to choose from. (a ton more research)

https://www.sanden.com/objects/Sanden Singapore SD7 Series Compressor Catalogue.pdf

Another problem that presents is that I would have to add another adapter in a hose or fitting for a high pressure safety valve..


With most adapters costing around $50+ and the 90 degree fittings to mate to them costing another $20+ easily, and being unsure of fitment issues, and me already having the $25 fittings that I cut off, and a silver soldering kit on hand, I'll consider all of the different GM adapters as a last resort. I still think I can silver solder it together after crimping without damaging the hose connections. I've got a lot of experience when it comes to welding, brazing and soldering, etc.. With modern heat sink pastes and gels (most professional HVAC techs use rags soaked in cold or ice water when soldering or brazing near valves and such) I think I can make this happen on the cheap. The key will be to apply heat very quickly to the area needing work, and that will minimize heat soak in to the hose ends. Using too small of a torch would cause a lot of heat soak waiting for the part to come up to temp, but I've got my choice of several cutting/brazing setups..

If soldering doesn't work and I still need to fabricate the compressor block, I'll buy the weld on MIO fittings and have them tig welded on, and go with the short drop 90 degree hose end fittings. I'll have to cut off the crimped on hose ends, so I'll lose that much hose and a trip to the shop 30 miles away..
 
Last edited:

Bird76Mojo

Well-Known Member
V8 Engine Swap
Joined
Jun 28, 2009
Messages
2,636
Reaction score
1,265
Points
113
Location
IL
Engine Type
V8
Well, I got some more mock-up done today. That's about it though.

So far it's looking promising..

#1 - The condenser will fit in front of the radiator just fine, and I'll have plenty of clearance for the mechanical fan. I test fit all of it and everything should be fine. I do have to cut off my lower radiator mounts, extend them and weld them back on again.

#2 - I'll have to eliminate the coolant crossover tubes that go across the intake to the heater core. They were a pain in the arse to deal with anyway. I originally had to cut them shorter to install heater hoses without them running in to the heater plenum. The A/C plenum leaves even less room, so I have to pick up a fitting that threads in to the lower intake and has a port for the heater hose and another port for the coolant temperature sensor. From a quick Google search, it looks like several are made that should work fine. If not, then brass a "T" with a hose barb and adapter for the sensor will suffice. I'll then use plain old heater hose and run it from the front of the engine to the heater core.

thumbnail (17).jpg


#3 - Adding the A/C plenum without the evaporator was ok to do, but with the evaporator in place, it was impossible to insert the final plastic evaporator cover, and it won't all slide in to place put together as a single unit. So I had to remove the upper intake. It all slides in to place easily now, and it looks to have ample clearances everywhere I need it so far. Fiberglassing the plenum may be tricky to get right to allow enough clearance for installing all of the parts, so I'll have to take care when adding/shaping the fiberglass to make sure it will still slide in to place past the passenger valve cover. I already have some fiberglass mat with heat shielding that I'll stick on to the plenum when finished. It's worked well on my heater plenum after my V8 swap.

thumbnail (18).jpg

thumbnail (19).jpg
 

Sponsored Ad


Sponsored Ad

Members online

Today's birthdays

Member & Vendor Upgrades

For a small yearly donation, you can support this forum and receive a 'Supporting Member' banner, or become a 'Supporting Vendor' and promote your products here. Click the banner to find out how.

Truck of The Month


Shran
April Truck of The Month

Recently Featured

Want to see your truck here? Share your photos and details in the forum.

Follow TRS On Instagram

TRS Events

25th Anniversary Sponsors

Check Out The TRS Store


Sponsored Ad


Sponsored Ad

Sponsored Ad


Amazon Deals

Top