
- Joined
- Aug 10, 2014
- Messages
- 503
- Reaction score
- 22
- Points
- 18
- Age
- 31
- Location
- Madison, IN
- Vehicle Year
- 1995
- Make / Model
- Ford Ranger
- Engine Type
- 4.0 V6
- Engine Size
- 4.0L
- Transmission
- Automatic
- 2WD / 4WD
- 2WD
- Tire Size
- 215/70R15
This is a mod I did a few weeks ago and am finally getting to posting.
This isn't meant to be a definitive how-to guide but rather a showing of what I've done and what worked for me. Still, if anybody thinks it's tech-article material, then I'll re-write this in that format and submit it.
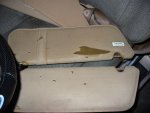
First, here's the main reason I'm doing the mod:
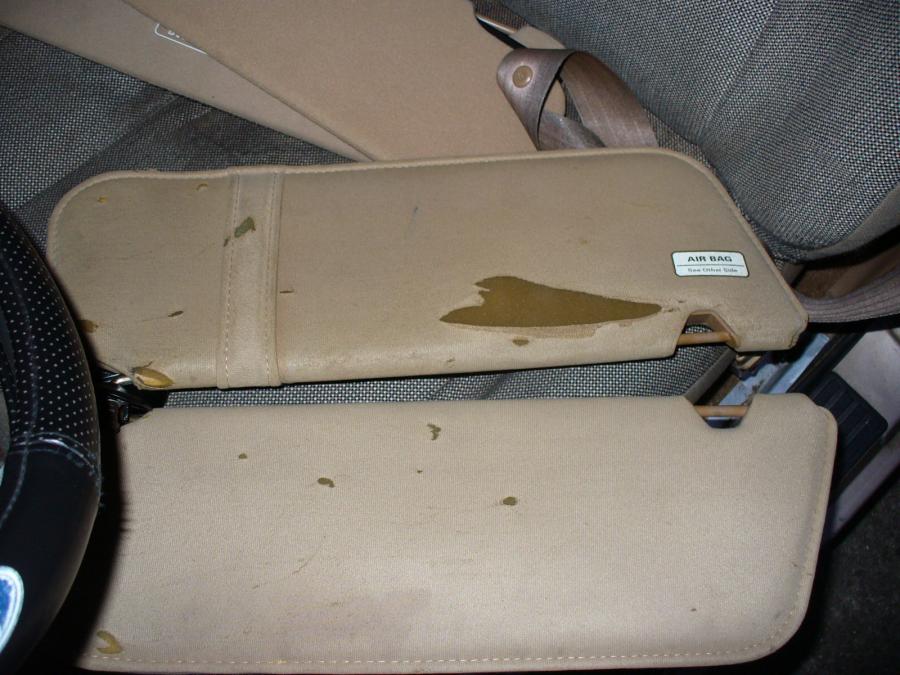
Pretty rough? Also, my parent's 1997 Chevy S10 had cool dual-element visors with lit vanity mirrors... and as I found out on my trip to pull-a-part, the Explorers come with similar visors that are a bolt-on swap! FWIW, this mod is wife approved too!
That said, some modding is needed to make the vanity lights functional, as no Ranger (at least of the 1995-1997 kind) came with these visors.
Anyway, here's what's needed:
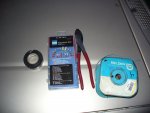
Tools/supplies:
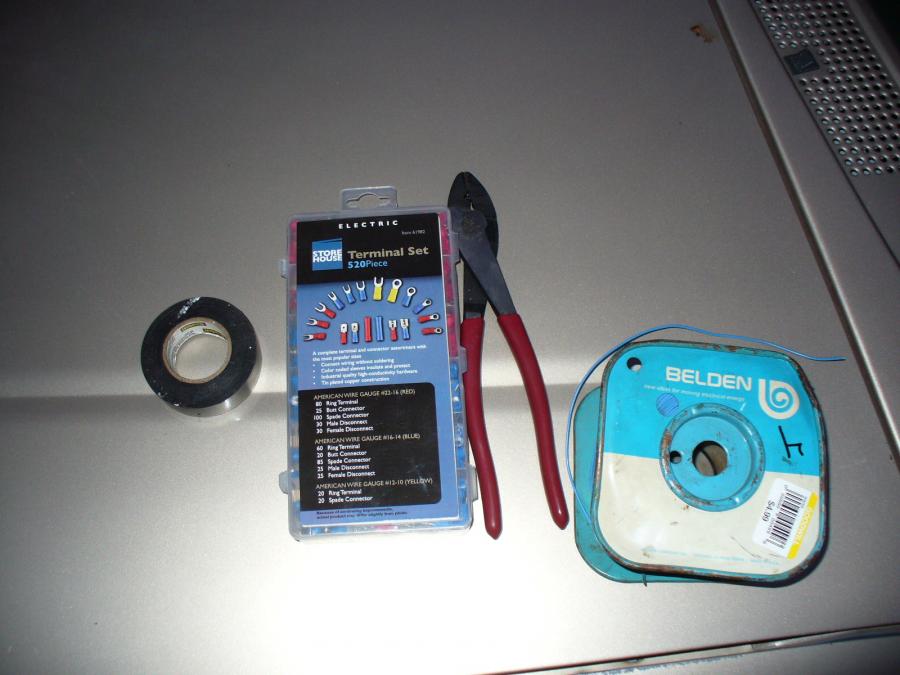
-Scotch electrical tape: it's good stuff, much, much better than the cheap crap. It stretches, which is the main benefit.
-Harbor Freight crimps- they're fine for this job. Never had an issue with them, given the use of the next tool
-Klein Tools 1005 crimping pliers. I LOVE these pliers. I first used a set during my senior year of high school on a FIRST robotics team; they've been, by far, the best tool for crimping these sort of tubular crimps. Just use the tooth for "noninsulated" crimps, they work for insulated ones too.
-Belden 20 gauge hookup wire- it's what I had sitting around. Since I swapped to LED lights, which draw less current, I feel OK using such thin wire; if I were keeping the incandescent bulbs I'd have bought some 18 gauge.
-Not shown (as I didn't know I needed them at the time): Drill, 1/8" drill bit, 1/8" rivets, rivet gun (I literally used a craftsman professional hydralic rivet tool that looks like a pistol). These are needed to address a grounding issue.
-If swapping to LEDs, a fuse puller for glass fuses, as the old bulbs are a PITA to remove otherwise.
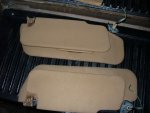
The visors: (don't forget the pigtails!)
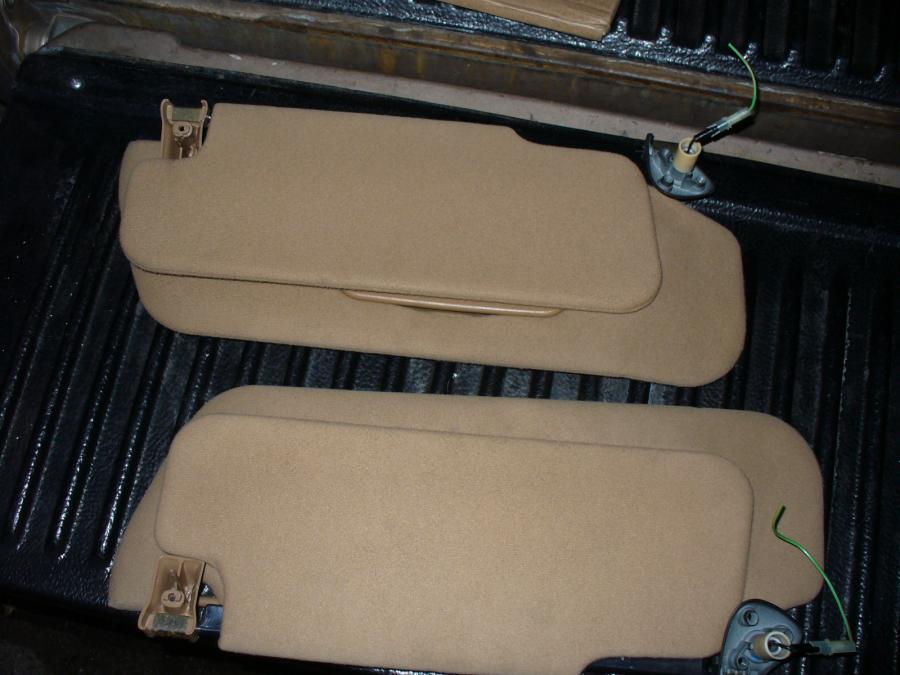
These came from a 1996 Explorer. I am putting them in a 1995 Ranger.
Procedure:
Warning- Be careful with the inner visors! The thin plastic ends (on the metal pivot side) snap in half easily. I had this happen to both. While they still work, I do recommend sliding them out of the pivot bosses and not bothering with them until you're installing the plastic ends for the final time.
1. At some point I determined that I needed to trim down the plastic ends with a pair of flush cutters. The headliner didn't have a big enough hole for the screw hole boss; trimming allowed for a nice, rock-free fit.
2. Remove the headliner, and pull fuse 27 to kill the courtesy light circuit.
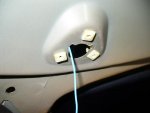
3. Open up the wiring harness going to the dome light connectors, and locate the light green wire with an orange stripe (same color as the new pigtails, Ford used the same color code for the wiring). Cut and splice in some wire, make sure it is long enough to go through the channel and through the driver's visor pivot hole in the roof.
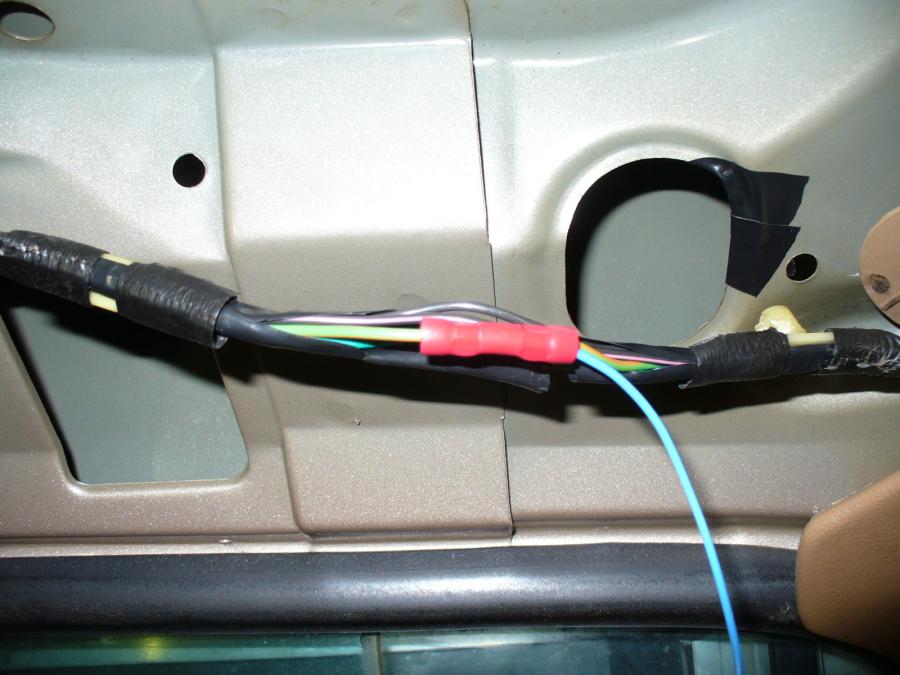
4. Tape over the splice (even if you used an insulated crimp), and then re-tape the harness. Tape the edge of the hole that you will run the wire though to prevent chafing.

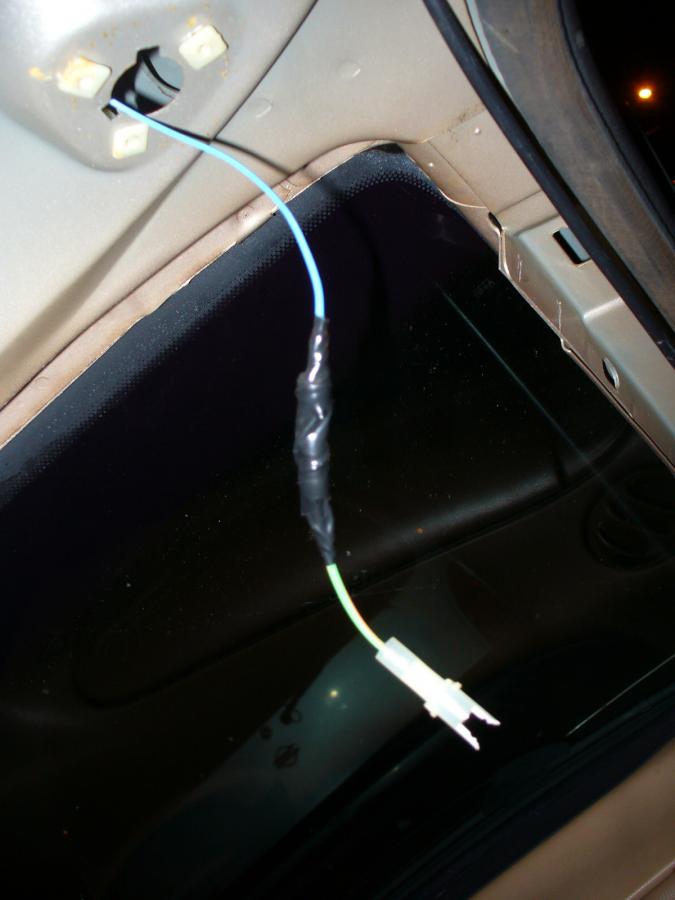
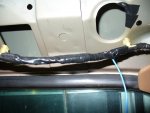
5. Fish the wire though the channel on the side of the roof and through the driver's visor pivot hole. I used a stiff scrap of wire for this, although I bet a fish tape would have been better.

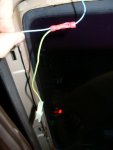
6. Splice one of the pigtails and another bit of wire to the wire fished through the hole. The next wire needs to run to the passenger's visor pivot hole.

7. Fish the last wire through the channel on the leading edge of the roof, exiting through the passenger's visor pivot hole. Splice the other pigtail to the wire.
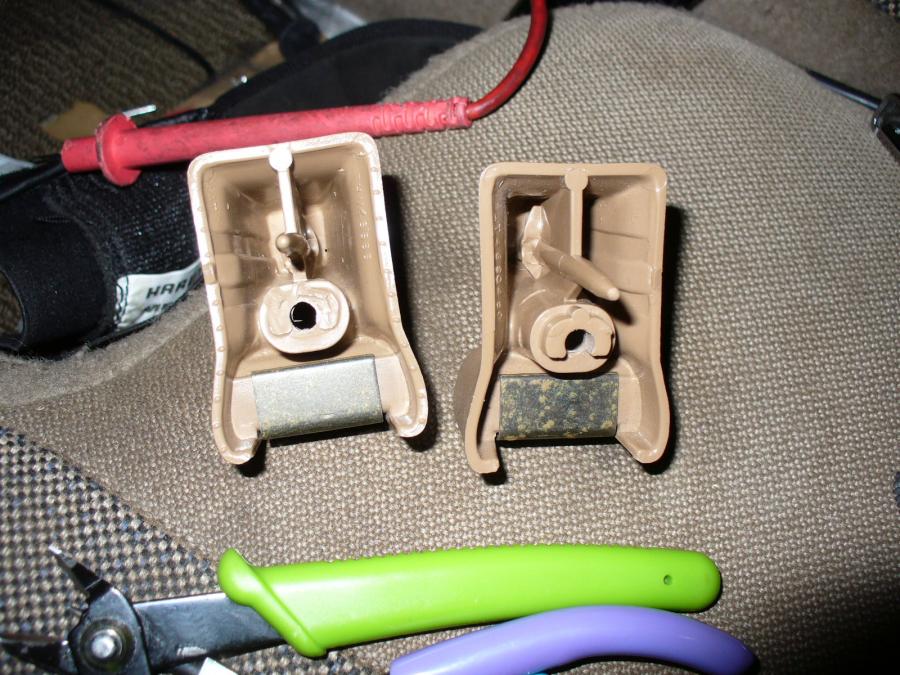
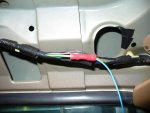
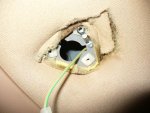
8. Don't install the headliner yet, like I did. As I found out, the plastic clips that are used with the mount screws do not allow the metal pivot boss to ground correctly. I didn't take note of how the Explorers got around this problem; my final successful solution was to crimp together a #4 red ring terminal inside a spread out #8 blue terminal and rivet the #4 end to the chassis, with the #8 end over one of the screw clips:
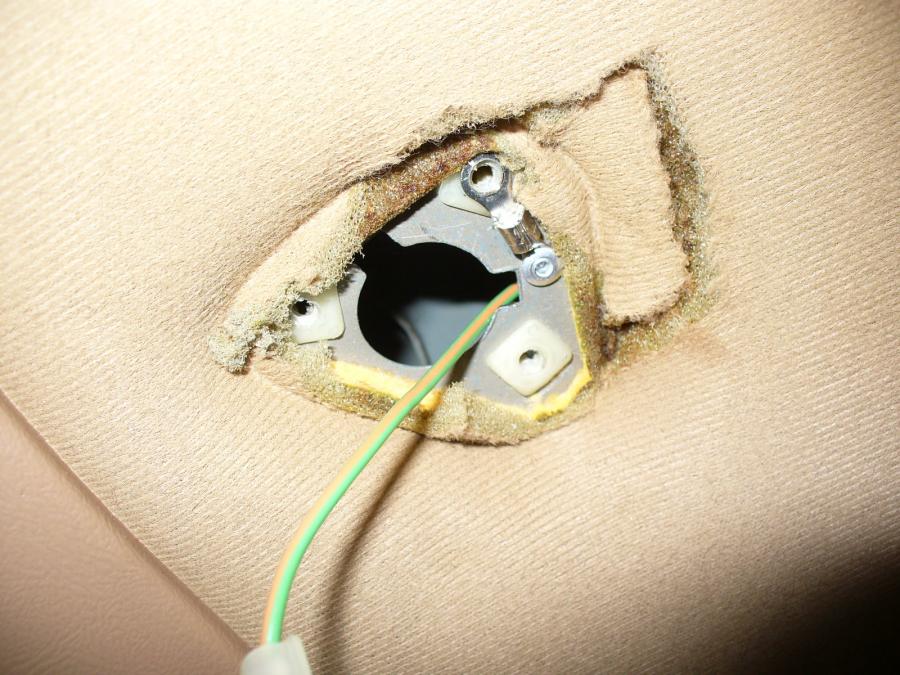
Note the orientation; the other two screw locations are blocked by the internal structure of the pivot boss. This could also have been done with a sufficiently conductive metal strip (brass, etc.), drilled appropriately.
9. Re-install the headliner (make sure the new pigtails hang through the holes!), fuse 27. If not converting to LEDs, you can install the new visors now. Otherwise...
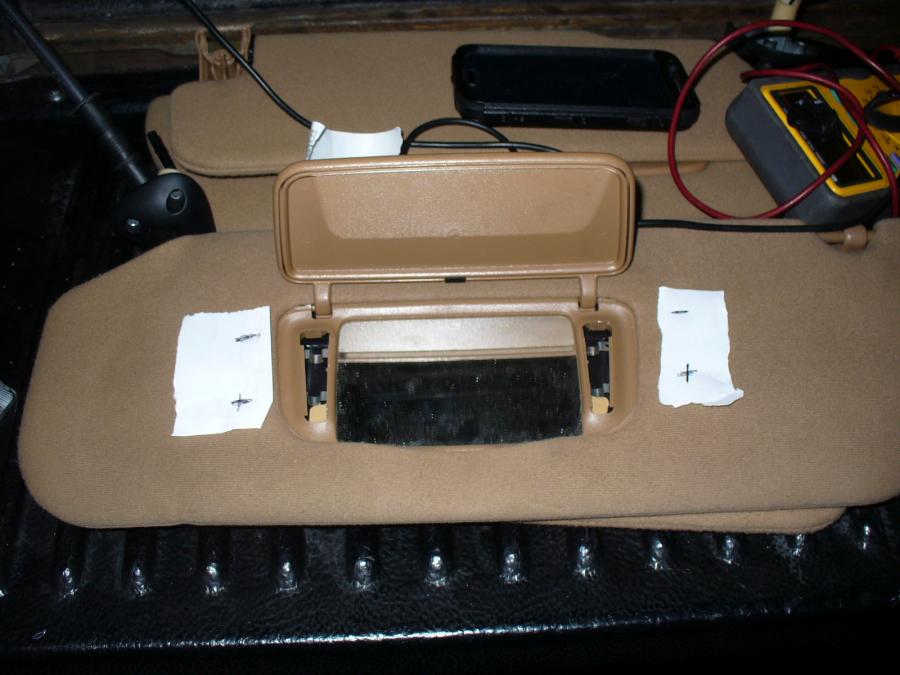
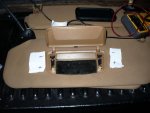
10. ...Swap the bulbs for LEDs if you happen to have them, as it's easier to swap them off the vehicle. These use a "fuse style" 6614f bulb, which is available in LED modules. To access the bulbs, remove the clear covers, which pop out from the top. The bulbs are a PITA to remove without a fuse holder for glass fuses; I broke a couple in the process, which resulted in my driver's visor rattling due to embedded (yet loose) glass shards. Anyway, the polarity of the visors are:
Likewise, on the SMD LEDs used on these modules, the notch IIRC points towards positive (+). If they don't light, try flipping the modules.
Now you may install the visors.
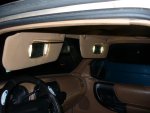
11. Smile as you now have visors with lit vanity mirrors! Ladies love having lit mirrors to do makeup on... at least my wife does. Not to mention having twin element visors can be handy. In my case, they were the only matching set in the yard that wasn't full of ciggy burns (which was my problem in the first place it seems).
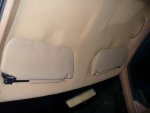
Pics of the final product:


How does my work look?
This isn't meant to be a definitive how-to guide but rather a showing of what I've done and what worked for me. Still, if anybody thinks it's tech-article material, then I'll re-write this in that format and submit it.
First, here's the main reason I'm doing the mod:
Pretty rough? Also, my parent's 1997 Chevy S10 had cool dual-element visors with lit vanity mirrors... and as I found out on my trip to pull-a-part, the Explorers come with similar visors that are a bolt-on swap! FWIW, this mod is wife approved too!
That said, some modding is needed to make the vanity lights functional, as no Ranger (at least of the 1995-1997 kind) came with these visors.
Anyway, here's what's needed:
Tools/supplies:
-Scotch electrical tape: it's good stuff, much, much better than the cheap crap. It stretches, which is the main benefit.
-Harbor Freight crimps- they're fine for this job. Never had an issue with them, given the use of the next tool
-Klein Tools 1005 crimping pliers. I LOVE these pliers. I first used a set during my senior year of high school on a FIRST robotics team; they've been, by far, the best tool for crimping these sort of tubular crimps. Just use the tooth for "noninsulated" crimps, they work for insulated ones too.
-Belden 20 gauge hookup wire- it's what I had sitting around. Since I swapped to LED lights, which draw less current, I feel OK using such thin wire; if I were keeping the incandescent bulbs I'd have bought some 18 gauge.
-Not shown (as I didn't know I needed them at the time): Drill, 1/8" drill bit, 1/8" rivets, rivet gun (I literally used a craftsman professional hydralic rivet tool that looks like a pistol). These are needed to address a grounding issue.
-If swapping to LEDs, a fuse puller for glass fuses, as the old bulbs are a PITA to remove otherwise.
The visors: (don't forget the pigtails!)
These came from a 1996 Explorer. I am putting them in a 1995 Ranger.
Procedure:
Warning- Be careful with the inner visors! The thin plastic ends (on the metal pivot side) snap in half easily. I had this happen to both. While they still work, I do recommend sliding them out of the pivot bosses and not bothering with them until you're installing the plastic ends for the final time.
1. At some point I determined that I needed to trim down the plastic ends with a pair of flush cutters. The headliner didn't have a big enough hole for the screw hole boss; trimming allowed for a nice, rock-free fit.
2. Remove the headliner, and pull fuse 27 to kill the courtesy light circuit.
3. Open up the wiring harness going to the dome light connectors, and locate the light green wire with an orange stripe (same color as the new pigtails, Ford used the same color code for the wiring). Cut and splice in some wire, make sure it is long enough to go through the channel and through the driver's visor pivot hole in the roof.
4. Tape over the splice (even if you used an insulated crimp), and then re-tape the harness. Tape the edge of the hole that you will run the wire though to prevent chafing.
5. Fish the wire though the channel on the side of the roof and through the driver's visor pivot hole. I used a stiff scrap of wire for this, although I bet a fish tape would have been better.
6. Splice one of the pigtails and another bit of wire to the wire fished through the hole. The next wire needs to run to the passenger's visor pivot hole.
7. Fish the last wire through the channel on the leading edge of the roof, exiting through the passenger's visor pivot hole. Splice the other pigtail to the wire.
8. Don't install the headliner yet, like I did. As I found out, the plastic clips that are used with the mount screws do not allow the metal pivot boss to ground correctly. I didn't take note of how the Explorers got around this problem; my final successful solution was to crimp together a #4 red ring terminal inside a spread out #8 blue terminal and rivet the #4 end to the chassis, with the #8 end over one of the screw clips:
Note the orientation; the other two screw locations are blocked by the internal structure of the pivot boss. This could also have been done with a sufficiently conductive metal strip (brass, etc.), drilled appropriately.
9. Re-install the headliner (make sure the new pigtails hang through the holes!), fuse 27. If not converting to LEDs, you can install the new visors now. Otherwise...
10. ...Swap the bulbs for LEDs if you happen to have them, as it's easier to swap them off the vehicle. These use a "fuse style" 6614f bulb, which is available in LED modules. To access the bulbs, remove the clear covers, which pop out from the top. The bulbs are a PITA to remove without a fuse holder for glass fuses; I broke a couple in the process, which resulted in my driver's visor rattling due to embedded (yet loose) glass shards. Anyway, the polarity of the visors are:
Likewise, on the SMD LEDs used on these modules, the notch IIRC points towards positive (+). If they don't light, try flipping the modules.
Now you may install the visors.
11. Smile as you now have visors with lit vanity mirrors! Ladies love having lit mirrors to do makeup on... at least my wife does. Not to mention having twin element visors can be handy. In my case, they were the only matching set in the yard that wasn't full of ciggy burns (which was my problem in the first place it seems).
Pics of the final product:
How does my work look?
Attachments
-
 84.2 KB Views: 1,329
 -
 61.7 KB Views: 1,287
 -
 67.1 KB Views: 1,301
 -
 117.5 KB Views: 1,312
 -
 69.2 KB Views: 1,313
 -
 66.4 KB Views: 1,285
 -
 45.6 KB Views: 1,267
 -
 39.4 KB Views: 1,218
 -
 44.2 KB Views: 1,267
 -
 65.6 KB Views: 1,363
 -
 103.2 KB Views: 1,276
 -
 38.5 KB Views: 1,176
 -
 53.4 KB Views: 1,219


