
- Joined
- Sep 13, 2020
- Messages
- 173
- Reaction score
- 55
- Points
- 28
- Location
- Texas
- Vehicle Year
- 2007
- Make / Model
- Ranger FX4 LVL2
- Engine Type
- 4.0 V6
- Transmission
- Automatic
- 2WD / 4WD
- 4WD
- Total Lift
- 2 inches in the back, not enough in the front
- Tire Size
- 32x11.5x15
Hello Ranger aficionados,
As you all know this dreaded piece of ford engineering is designed to make you buy another truck, that is why we all have THAT one. The one with the bad blender motor and possibly a shredded blender door. (they don't shred, it simply ends up with a broken drive socket. The new ones have a metal coupler so the old style still reigns, but with the steel coupling, life is good. Or so it would seem.....
The symptoms are that the AC only works in the MAX position. Huh. Any other position of the vent selector makes hot air. Also while in the MAX position, the hot water going to the inside (passenger compartment) is turned off with a vacuum operated shutoff valve. Good idea. So many of us have discovered upon further investigation that in fact the valve is operating correctly, not operating at all, & the driving vacuum source has issues such as a weak & leaking supply line. Repair of vacuum leak will make your motor run better hint hint.
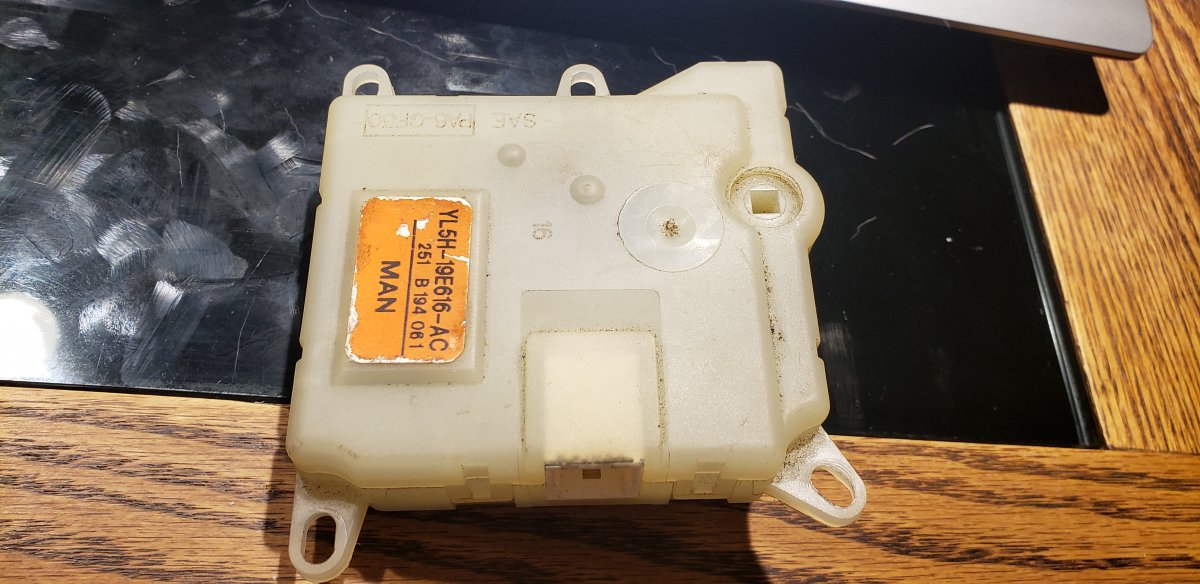
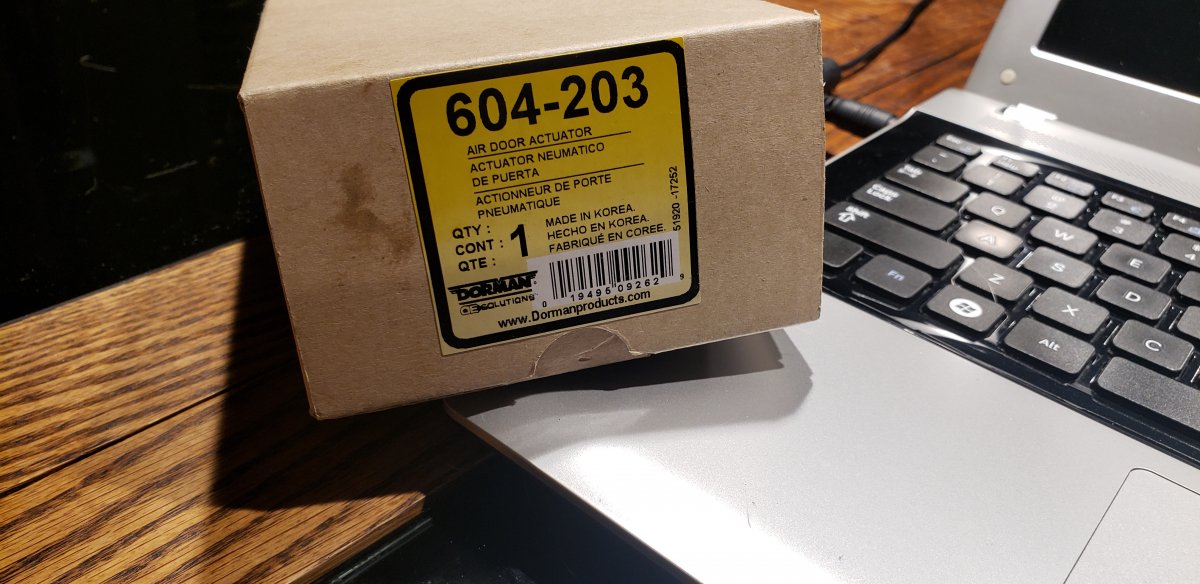
The part number that in stock at my local advanced auto store is a "Dorman" number.....604-203". This is what they had. Using the number"YL5H-19E616-AC" This replacement motor assembly comes with a longer drive tang. So do this.....and take pictures for reference, and not of your skinned hands.
Removal: This is primarily for the screwed in/down version
1) Open the glove compartment, pull the glove box down while pushing the inner sides towards the center with your thumbs then remove with 2ea mounting fasteners remove the entire glove compartment (the GC).
2) Remove the electrical plug by unlocking the housing, and placing aside
3) Find yourself a 1/4" drive ratchet. 1ea 5/16 -12 point socket that will be shortened by apx 5/16" with some sort of grinder, or a belt sander works. Do this safely.
4) Remove the front mounting screws. There is one in the center rear. This is the only thing left in the way of you having AC or not.
5) Practice placing your hand back there. Notice that there is some sort of sharp surface digging into the back of your hand. You may elect to bust that out. Get a hammer & a screwdriver. I used a 5 lb shorty hand sledge and a shorty large slotted screw driver. Took 3 tries. The material is some sort of grey composite, soft actually. Did not have to hit as hard at all as most of the work was accomplished on the first strike. A chisel would also work. Clean up the edges.
6) Tie a string to your ratchet, very small string but strong. 20 lb fishing line is perfect. Because loosing a ratchet inside the ventilation system is a bummer.
7) Using a shortened socket & a 1/4" ratchet works to remove that rear fastener. And don't drop that damned ratchet inside like I did. You may want to have second ratchet & socket nearby. Pull out the old controller. Plug it in, start the truck, see if you can move the shaft while inputting different temperature settings. If it works, I take it apart, clean & re-grease. You then likely have a broken dampener door. Look for pieces on the shaft.
You may want to take the controller apart & verify that a part has failed inside to find additional motivation to drive to the auto store & back. Or send the old lady and get some tacos.
Installation:
1) Get the part (hopefully the correct part, not the one that we have here)
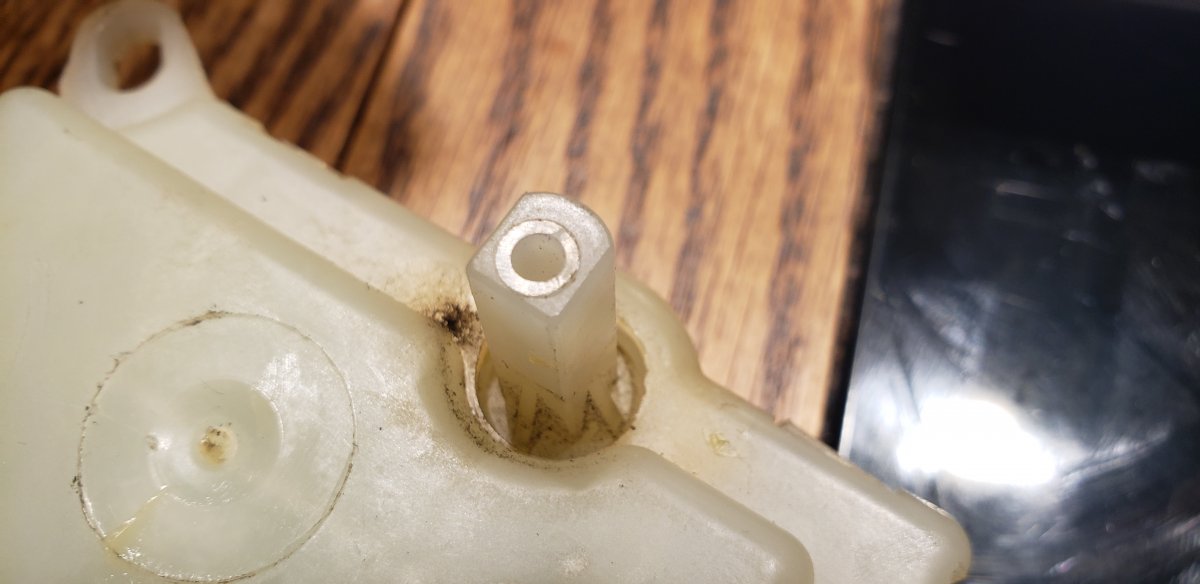
2) Notice that the part has an extended drive tang (with gussets)
3) Find a old shoe box or some combination of 90 degree surface angles to represent the exact new & old drive tang modifications. And then hack it off in a vice.
4) Next step is very important, it won't engage into the blender door yet. Aquire some sort of dremil & sanding drum. Sand off the gussets down to almost the enclosure. Look at what has to be done carefully as you are contouring something by eye because it could be a big difference in system performance.
4b) Reach back inside and retrieve the lost ratchet.
5) Install the new controller with the connection out front and while turning the temperature selector using very light force, let the new controller engage the drive tang into the dampener door. Remember the gussets molded into the lowest section right up to the housing on 3 separate sides right? And you sanded these down real well right? Don't know if the center needs cleaning out but I did anyway. Once the shaft was finish sanded (w/dremil).
5) Re-install the 3 fasteners (or not). I admit, I installed the front 2 and skipped the rear. Maybe one day. I'll tape it to the inside of the glove compartment. Re-install the glove compartment. Enjoy the nicely working climate control. Also, don't forget to top off the Freon if needed.
Here are a couple of pictures also.
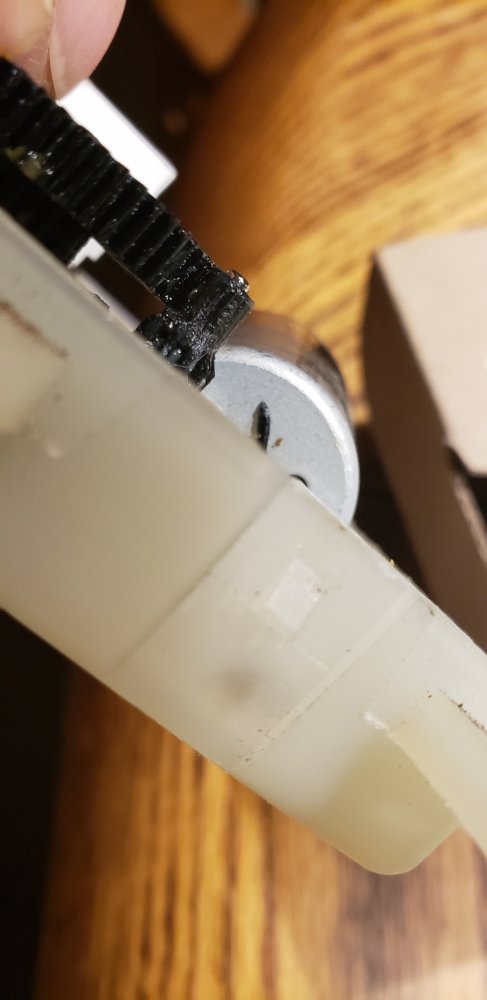
As you all know this dreaded piece of ford engineering is designed to make you buy another truck, that is why we all have THAT one. The one with the bad blender motor and possibly a shredded blender door. (they don't shred, it simply ends up with a broken drive socket. The new ones have a metal coupler so the old style still reigns, but with the steel coupling, life is good. Or so it would seem.....
The symptoms are that the AC only works in the MAX position. Huh. Any other position of the vent selector makes hot air. Also while in the MAX position, the hot water going to the inside (passenger compartment) is turned off with a vacuum operated shutoff valve. Good idea. So many of us have discovered upon further investigation that in fact the valve is operating correctly, not operating at all, & the driving vacuum source has issues such as a weak & leaking supply line. Repair of vacuum leak will make your motor run better hint hint.
The part number that in stock at my local advanced auto store is a "Dorman" number.....604-203". This is what they had. Using the number"YL5H-19E616-AC" This replacement motor assembly comes with a longer drive tang. So do this.....and take pictures for reference, and not of your skinned hands.
Removal: This is primarily for the screwed in/down version
1) Open the glove compartment, pull the glove box down while pushing the inner sides towards the center with your thumbs then remove with 2ea mounting fasteners remove the entire glove compartment (the GC).
2) Remove the electrical plug by unlocking the housing, and placing aside
3) Find yourself a 1/4" drive ratchet. 1ea 5/16 -12 point socket that will be shortened by apx 5/16" with some sort of grinder, or a belt sander works. Do this safely.
4) Remove the front mounting screws. There is one in the center rear. This is the only thing left in the way of you having AC or not.
5) Practice placing your hand back there. Notice that there is some sort of sharp surface digging into the back of your hand. You may elect to bust that out. Get a hammer & a screwdriver. I used a 5 lb shorty hand sledge and a shorty large slotted screw driver. Took 3 tries. The material is some sort of grey composite, soft actually. Did not have to hit as hard at all as most of the work was accomplished on the first strike. A chisel would also work. Clean up the edges.
6) Tie a string to your ratchet, very small string but strong. 20 lb fishing line is perfect. Because loosing a ratchet inside the ventilation system is a bummer.
7) Using a shortened socket & a 1/4" ratchet works to remove that rear fastener. And don't drop that damned ratchet inside like I did. You may want to have second ratchet & socket nearby. Pull out the old controller. Plug it in, start the truck, see if you can move the shaft while inputting different temperature settings. If it works, I take it apart, clean & re-grease. You then likely have a broken dampener door. Look for pieces on the shaft.
You may want to take the controller apart & verify that a part has failed inside to find additional motivation to drive to the auto store & back. Or send the old lady and get some tacos.
Installation:
1) Get the part (hopefully the correct part, not the one that we have here)
2) Notice that the part has an extended drive tang (with gussets)
3) Find a old shoe box or some combination of 90 degree surface angles to represent the exact new & old drive tang modifications. And then hack it off in a vice.
4) Next step is very important, it won't engage into the blender door yet. Aquire some sort of dremil & sanding drum. Sand off the gussets down to almost the enclosure. Look at what has to be done carefully as you are contouring something by eye because it could be a big difference in system performance.
4b) Reach back inside and retrieve the lost ratchet.
5) Install the new controller with the connection out front and while turning the temperature selector using very light force, let the new controller engage the drive tang into the dampener door. Remember the gussets molded into the lowest section right up to the housing on 3 separate sides right? And you sanded these down real well right? Don't know if the center needs cleaning out but I did anyway. Once the shaft was finish sanded (w/dremil).
5) Re-install the 3 fasteners (or not). I admit, I installed the front 2 and skipped the rear. Maybe one day. I'll tape it to the inside of the glove compartment. Re-install the glove compartment. Enjoy the nicely working climate control. Also, don't forget to top off the Freon if needed.
Here are a couple of pictures also.
Last edited:
 , but my '94 has the issue with not only A/C not working (along w/ the CC, which I'll troubleshoot this weekend), but also the inability to adjust where the heated air goes. The fan motor was replaced recently, so I've got that going for me, but I'm assuming I've got the dreaded blend door issue. How do I know for sure? I'm assuming mine is cable operated being a '94.


