- Joined
- Feb 9, 2010
- Messages
- 229
- Reaction score
- 19
- Points
- 18
- Age
- 34
- Location
- Menomonie, WI
- Vehicle Year
- 1997
- Make / Model
- Ford
- Engine Type
- 4.0 V6
- Transmission
- Manual
- 2WD / 4WD
- Solid Axle Swap 4x4
- Total Lift
- 3"
- Tire Size
- 37x12.50 Pitbull Rocker MTs
- My credo
- Custom everything! Purists look out!
So I've been depriving you all of my build for far too long... No more will I horde my pictures so grab your snacks, sit back for a long update and enjoy the huge changes I've done to Ol' Darla...
I'm going to rewind the clock to June 29th. Ive got a few buddies in Denver and we organized a trip to "Holy Cross City Trail." If you all remember back this was the same trail which "The JK Experience" showed up and made the day long and interesting. Well this time is was laid back and a nice wheeling trip. These guys were TOTM vehicles for June and July (I believe).
The Start:
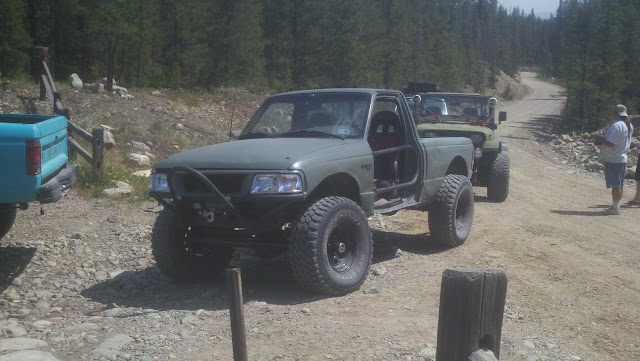
Project Double R (Rock Ranger)
TNT Ranger
Me at Cleveland Rock (I didn't make it up)
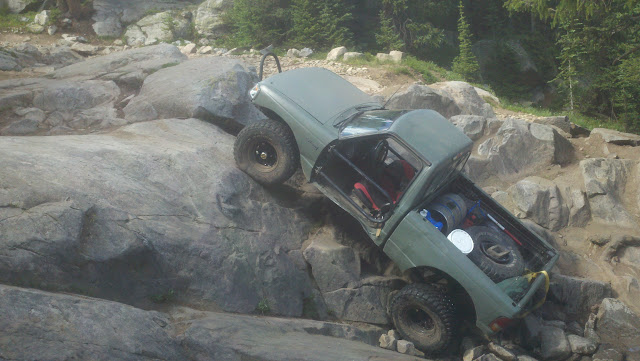
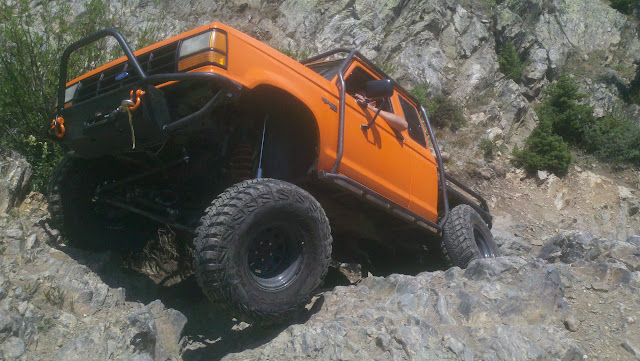
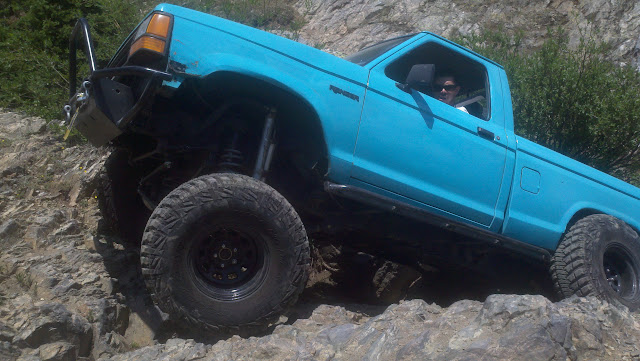
Now lets fast forward a few days... July 8th. I was invited to go and wheel a trail called Carnage Canyon. This trail was the most extreme trail I have ever ran. Trail damage rates it a 9-10 and some consider that a low rating. I was the first one through and I didnt take pictures, assuming the people with nice cameras would take pics but they also didnt take pics SO Ive only got a few to show:
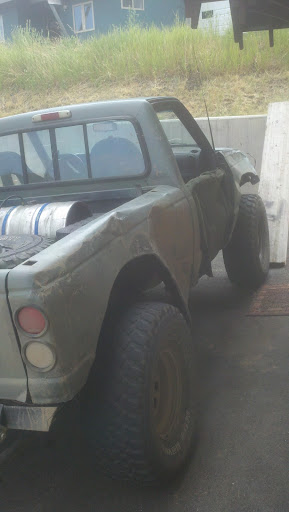
Notice the bed, already smashed...

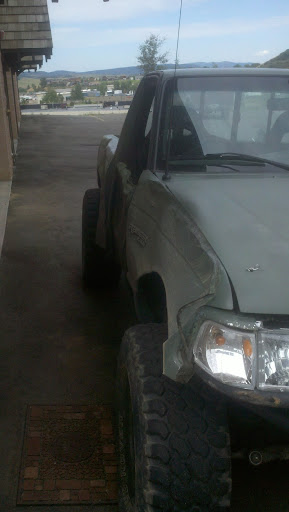
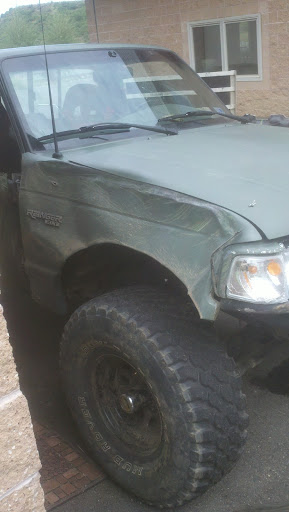
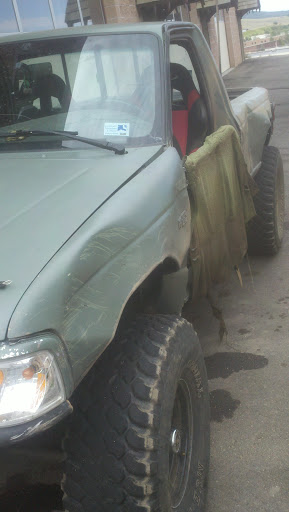
Fender Smashed:

and one of the rigs I was with. Yep those are 42's...

Lets fast forward 12 hours. Im back home after a hellish drive in the rain for 3 hours, tube doors, 11 pm return, and my clutch burned up... Steel on steel through the mountains, boy was that interesting... oh and the trail was only .6 miles long, it took us 6 hours...
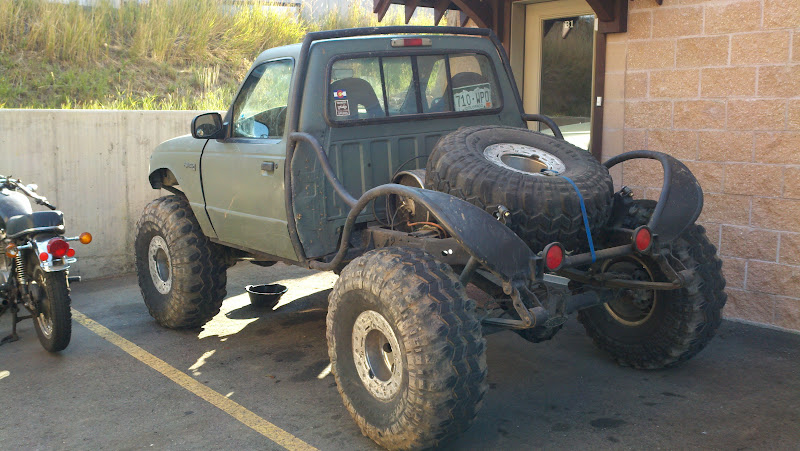
The bed is finished, front fenders smashed, clutch = nonexistent, rocker panels crunched, and the door jams are in U's.

Now I had two routes I could take, Replace the fenders and bed and call'er good or change it all... Which do you think I chose?
TIME FOR THE FIX AND MAKE IT BETTER!
I started by pulling the transmission and getting after the clutch. Once I pulled the tranny out I saw that the clutch had no material on one side (flywheel on clutch metal) and the other was still really healthy 70+ % remaining! Ive heard of this happening before so Im not that surprised.
My truck was built by Ford August 1996 which makes it a 1997 on the title. To the parts store it is still a 1996 because in 1997 the 3rd generation Rangers came out. Well I needed to get a new fly wheel because I had to cut one of the fly wheel bolts off (I rounded the opposite torx style head) and also dickered the flywheel up a bit with the grinder. So over to the parts store to get a 96 clutch, flywheel, and release bearing (I ended up getting a full slave cylinder because the bearing was 66 bucks and the slave was 72?!) So I ordered my parts and when they came the clutch was correct but the flywheel wasnt... Mine was a 8 bolt flywheel and the 96 one is a 6 bolt. No big deal Ill just order the right one... well turns out finding the right one isnt as easy as I thought. Turns out there was only 2 in the country! Looks Ford kinda scrapped my lil Ranger together... Crisis averted, a new one would come in 1.5 weeks I also needed flywheel bolts but the parts store didnt have them in their system! So off to the Ford dealership to get new bolts. The guy said Ford discontinued them and there was only about 30 left in various dealerships in the country. He gave me the list of dealerships and a phone list. Well I decided to search the internet and found a website, something like discontinued ford parts.com... I talked to a guy there who had a bunch in stock, and also the correct measurements (the web listing didnt have a pic.) so I trusted the guy and ordered 8. When those arrived they had the wrong head on them and with 8 bolts the heads wouldnt clearance each other! My fix, use 4 new ones and 4 old so everything plays well together. One thing was clear to me... I need a doubler.
Because I had to wait for my clutch parts I tore the truck apart!
Bed off:
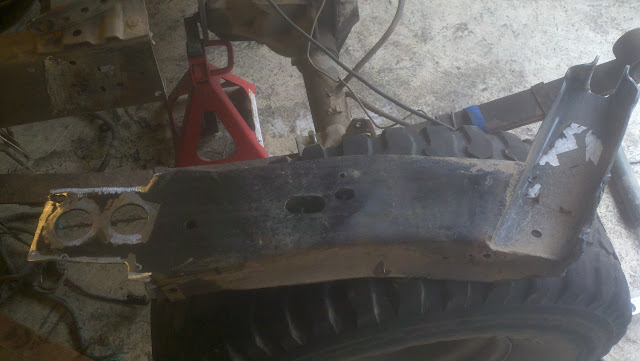
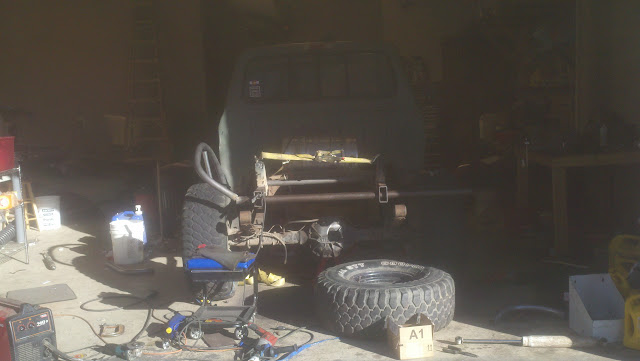
Frame Chopped!... Again!

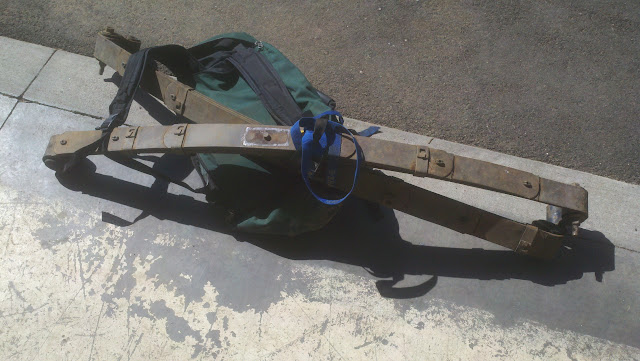
After a motorcycle ride from the junk yard with a pair of Cherokee leafs.
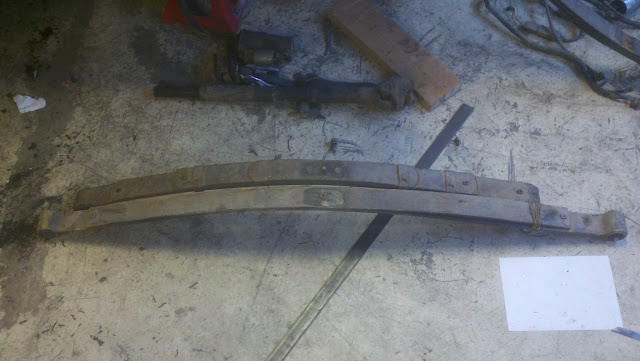
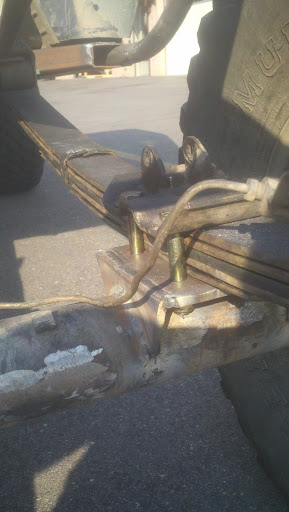
This pic is a comparison of the Cherokee leafs vs the Chevy 63" leafs at their centering pin.
Next came time to reweld the frame.
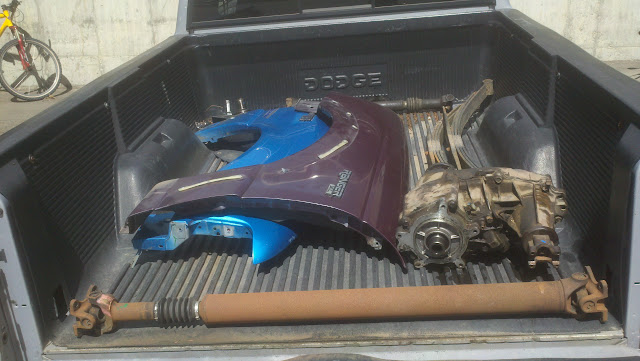
After a trip to the salvage yards in Denver:
Keen eyes will notice the 1350 transfer case, a front and rear drive shaft for spares, new front fenders, and a free pair of explorer leafs from my buddy.
Here you can see how the back half of the frame was done and what I am using for my cross member. The DOM is 2" X 1/4". Also me getting an idea of the tubing style.
I didnt want the standard flat bed and I wanted something unique, one off design. So this is what I came up with:
Its a six foot section of 1 3/4, .120 wall DOM. All the bends were done with a JD2 Model 3 tube bender.
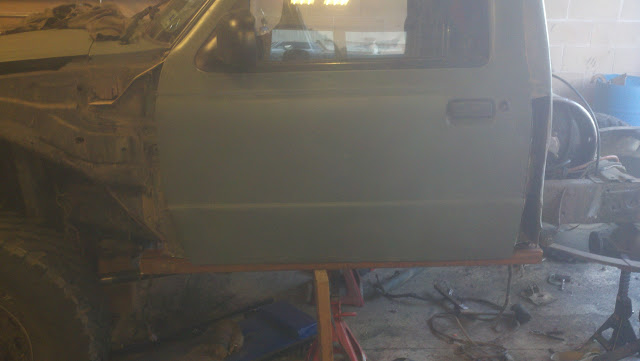
Once I had a tube style in mind it was time to implement an idea for sliders. Im super happy how these sliders perform and how much protection they actually provide.
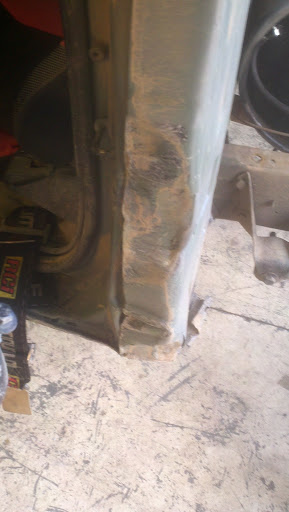
My door jams:
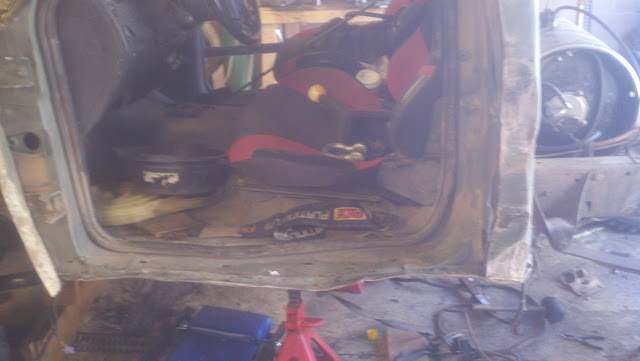
And the chop! Notice the cab corner cut out too.
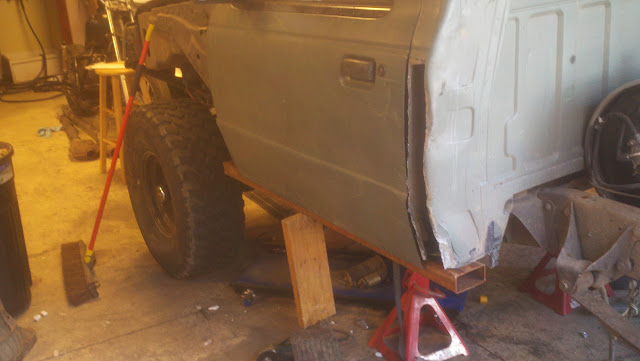
Next a chunk of 2x4 1/8" wall tubing:
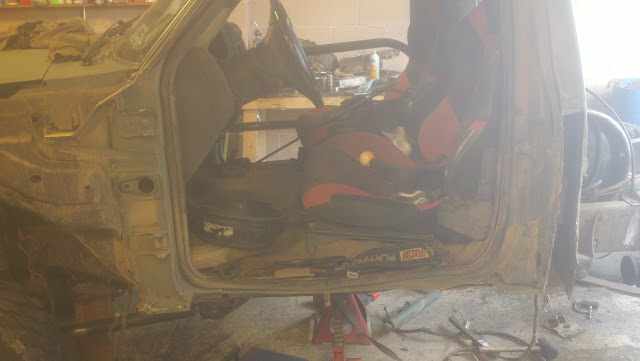
I bolted up the door to see where the slider will sit and once I was happy with how it sat, I welded 2 legs from the tubing to the frame. The legs were of the same 2x4 tubing. Im not worried about this tubing bending because the door jam will be welded to the slider. These baby's work so well too... I couldnt be happier.
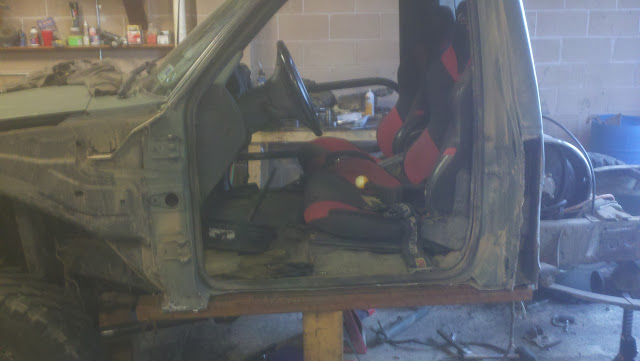
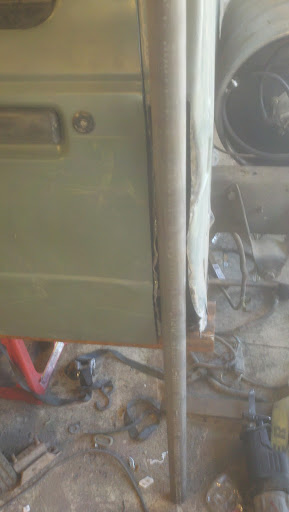
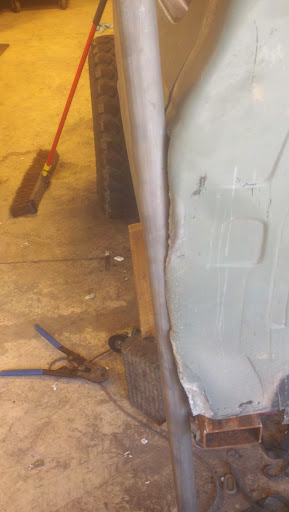
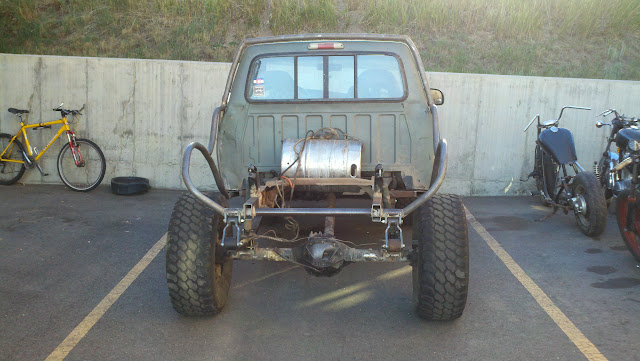
And now, how I will run my exo skeleton. I wanted my exo to be close fitting to my cab and also have subtle curves, not straight tubing with sharp curves tying it to the frame. This tubing will be welded to the sheet metal eventually.
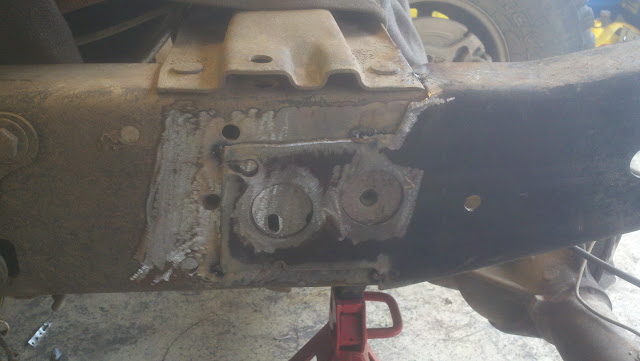
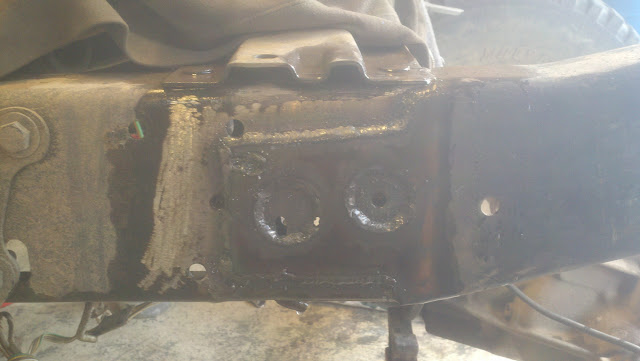
When I pulled the tranny, the cross member mount had stripped the threads out of the aluminum. My fix was to drill out a 1/2" hole and run bolts and nuts. Too bad the bit broke in the soft aluminum... WTF?:

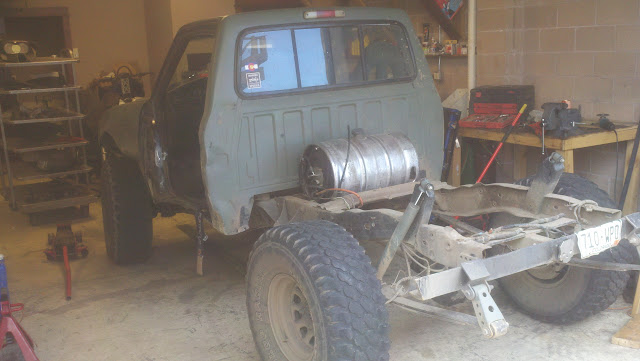
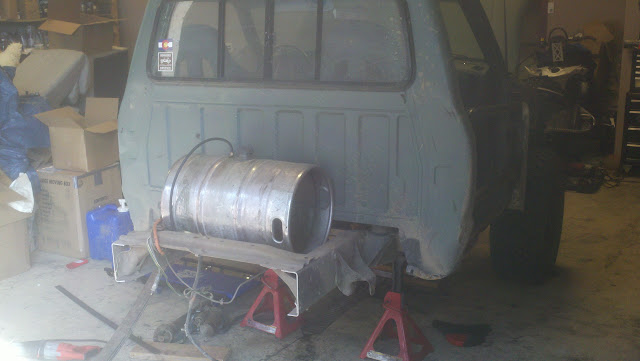
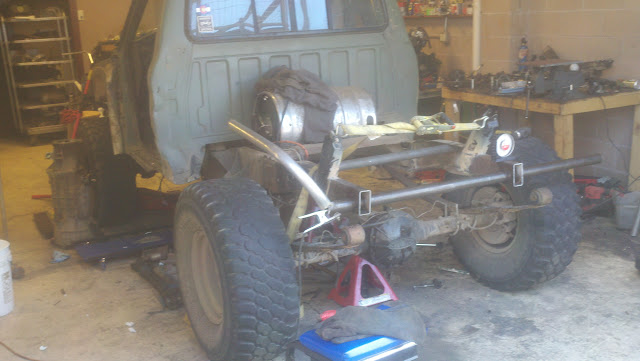
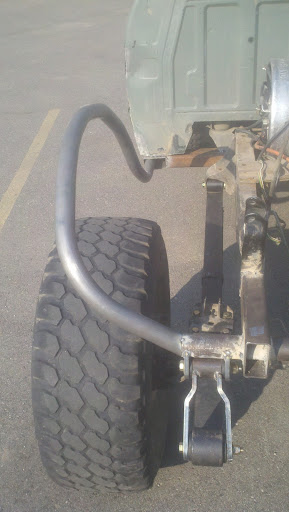
Next on the list was to get the truck on its own weight. I purchased some builder parts from RuffStuffSpecialties. I purchased some bushings, Tacoma 5/8"s offset leafspring shackles and some radius'd hangers. The shackles I cut and radiused one side and welded them to the bushing body:
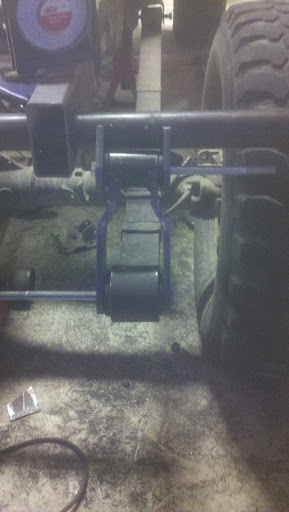
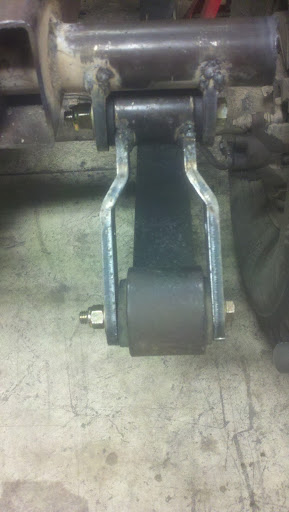
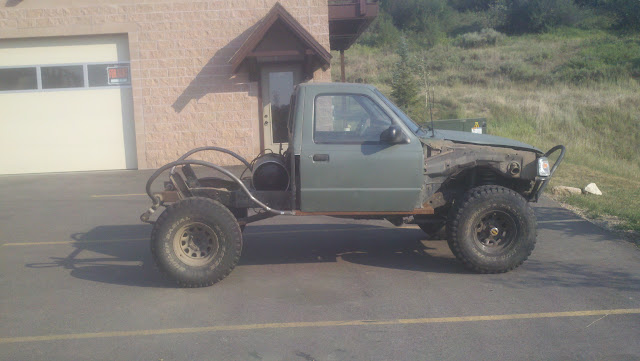
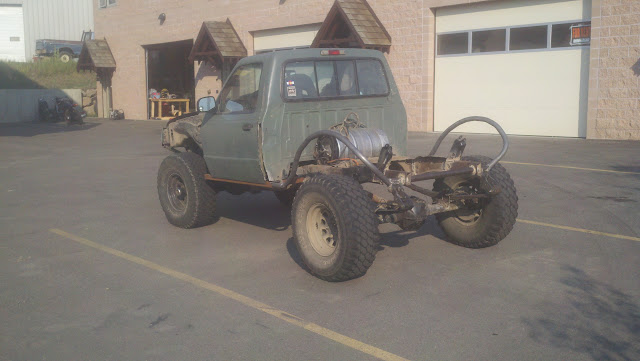
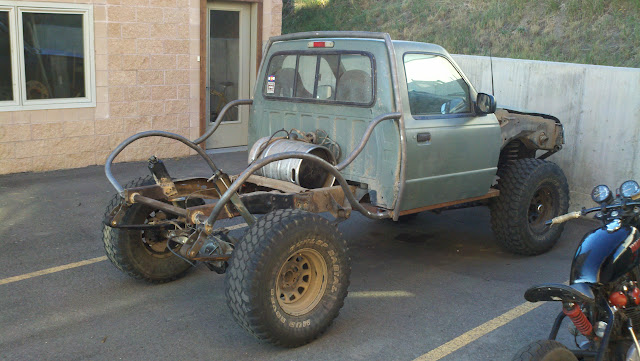
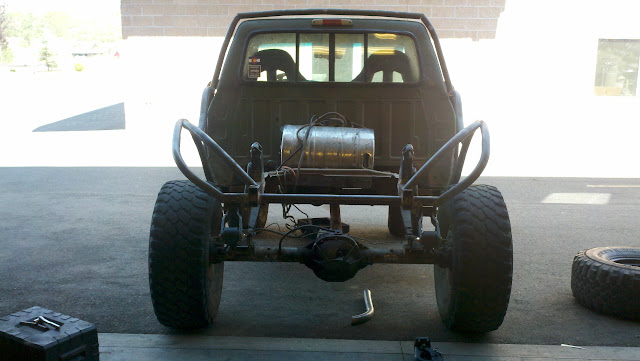
Burned everything in and this babys rolling!
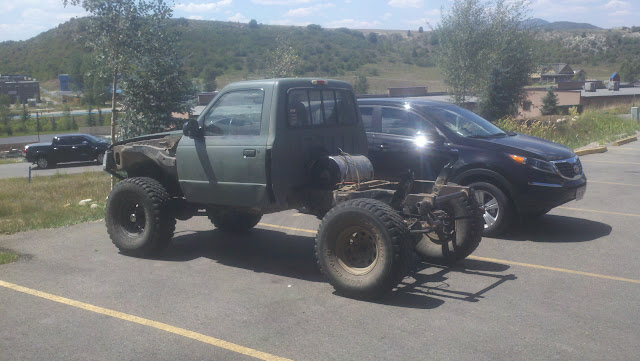
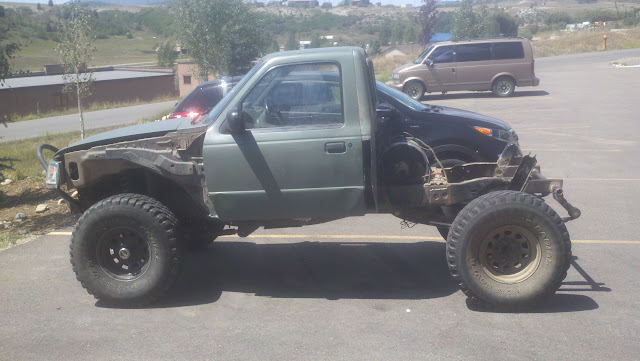
I also cleaned up the axle by removing the original leafspring perches and old shock tabs. I removed the leaf spring perches because the threads on my Ubolts were gummed up and I didnt want to spend the 25 bucks to get new Ubolts and have it happen again so I made a Ubolt eliminator perch. Its made of 5/16"s plate, 5.5" long and 5" wide. I also off set my centering pin by 2". That means my rear axle is 2" farther back than it would be. Im running the cherokee springs backwards so my departure angle is amazing now.
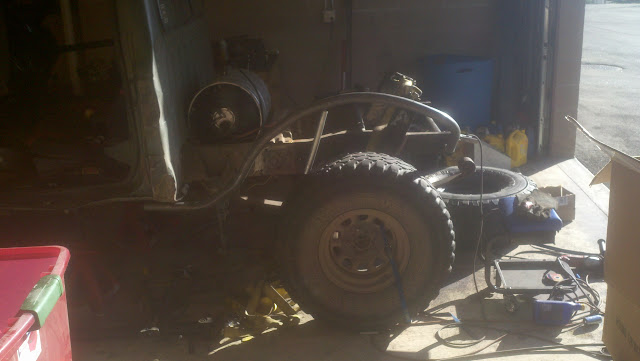
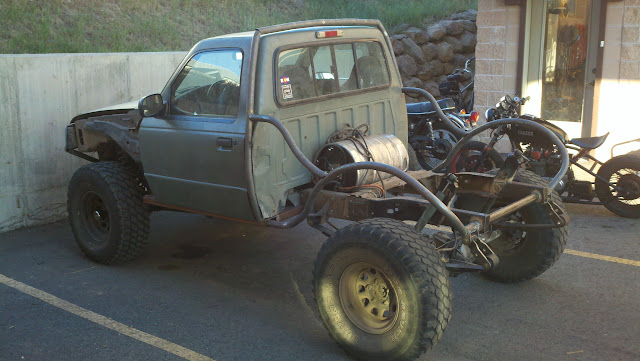
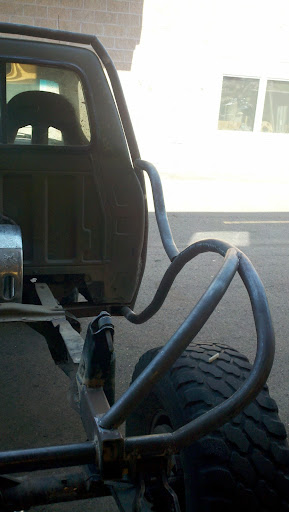
The next thing I did was start on the tubing. The name of the game is curvy. Notice how the slider and exo fit together:
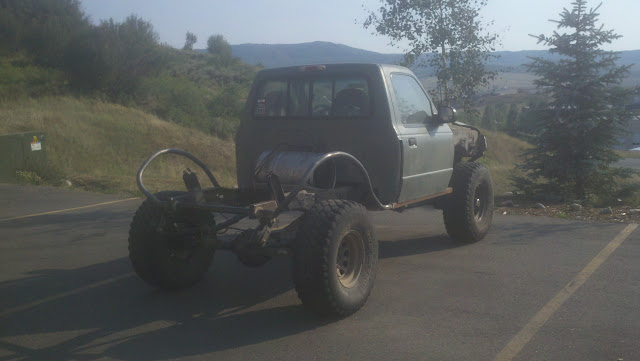
With the first section of tube done I got my inspiration to finish the back half. Notice how snug the exo is to the body:
Next was start on fenders:

I need to upload more photos so...MORE TO COME!
I'm going to rewind the clock to June 29th. Ive got a few buddies in Denver and we organized a trip to "Holy Cross City Trail." If you all remember back this was the same trail which "The JK Experience" showed up and made the day long and interesting. Well this time is was laid back and a nice wheeling trip. These guys were TOTM vehicles for June and July (I believe).
The Start:
Project Double R (Rock Ranger)
TNT Ranger
Me at Cleveland Rock (I didn't make it up)
Now lets fast forward a few days... July 8th. I was invited to go and wheel a trail called Carnage Canyon. This trail was the most extreme trail I have ever ran. Trail damage rates it a 9-10 and some consider that a low rating. I was the first one through and I didnt take pictures, assuming the people with nice cameras would take pics but they also didnt take pics SO Ive only got a few to show:
Notice the bed, already smashed...
Fender Smashed:
and one of the rigs I was with. Yep those are 42's...
Lets fast forward 12 hours. Im back home after a hellish drive in the rain for 3 hours, tube doors, 11 pm return, and my clutch burned up... Steel on steel through the mountains, boy was that interesting... oh and the trail was only .6 miles long, it took us 6 hours...
The bed is finished, front fenders smashed, clutch = nonexistent, rocker panels crunched, and the door jams are in U's.
Now I had two routes I could take, Replace the fenders and bed and call'er good or change it all... Which do you think I chose?
TIME FOR THE FIX AND MAKE IT BETTER!
I started by pulling the transmission and getting after the clutch. Once I pulled the tranny out I saw that the clutch had no material on one side (flywheel on clutch metal) and the other was still really healthy 70+ % remaining! Ive heard of this happening before so Im not that surprised.
My truck was built by Ford August 1996 which makes it a 1997 on the title. To the parts store it is still a 1996 because in 1997 the 3rd generation Rangers came out. Well I needed to get a new fly wheel because I had to cut one of the fly wheel bolts off (I rounded the opposite torx style head) and also dickered the flywheel up a bit with the grinder. So over to the parts store to get a 96 clutch, flywheel, and release bearing (I ended up getting a full slave cylinder because the bearing was 66 bucks and the slave was 72?!) So I ordered my parts and when they came the clutch was correct but the flywheel wasnt... Mine was a 8 bolt flywheel and the 96 one is a 6 bolt. No big deal Ill just order the right one... well turns out finding the right one isnt as easy as I thought. Turns out there was only 2 in the country! Looks Ford kinda scrapped my lil Ranger together... Crisis averted, a new one would come in 1.5 weeks
I also needed flywheel bolts but the parts store didnt have them in their system! So off to the Ford dealership to get new bolts. The guy said Ford discontinued them and there was only about 30 left in various dealerships in the country. He gave me the list of dealerships and a phone list. Well I decided to search the internet and found a website, something like discontinued ford parts.com... I talked to a guy there who had a bunch in stock, and also the correct measurements (the web listing didnt have a pic.) so I trusted the guy and ordered 8. When those arrived they had the wrong head on them and with 8 bolts the heads wouldnt clearance each other! My fix, use 4 new ones and 4 old so everything plays well together. One thing was clear to me... I need a doubler.Because I had to wait for my clutch parts I tore the truck apart!
Bed off:
Frame Chopped!... Again!
After a motorcycle ride from the junk yard with a pair of Cherokee leafs.
This pic is a comparison of the Cherokee leafs vs the Chevy 63" leafs at their centering pin.
Next came time to reweld the frame.
After a trip to the salvage yards in Denver:
Keen eyes will notice the 1350 transfer case, a front and rear drive shaft for spares, new front fenders, and a free pair of explorer leafs from my buddy.
Here you can see how the back half of the frame was done and what I am using for my cross member. The DOM is 2" X 1/4". Also me getting an idea of the tubing style.
I didnt want the standard flat bed and I wanted something unique, one off design. So this is what I came up with:
Its a six foot section of 1 3/4, .120 wall DOM. All the bends were done with a JD2 Model 3 tube bender.
Once I had a tube style in mind it was time to implement an idea for sliders. Im super happy how these sliders perform and how much protection they actually provide.
My door jams:
And the chop! Notice the cab corner cut out too.
Next a chunk of 2x4 1/8" wall tubing:
I bolted up the door to see where the slider will sit and once I was happy with how it sat, I welded 2 legs from the tubing to the frame. The legs were of the same 2x4 tubing. Im not worried about this tubing bending because the door jam will be welded to the slider. These baby's work so well too... I couldnt be happier.
And now, how I will run my exo skeleton. I wanted my exo to be close fitting to my cab and also have subtle curves, not straight tubing with sharp curves tying it to the frame. This tubing will be welded to the sheet metal eventually.
When I pulled the tranny, the cross member mount had stripped the threads out of the aluminum. My fix was to drill out a 1/2" hole and run bolts and nuts. Too bad the bit broke in the soft aluminum... WTF?:
Next on the list was to get the truck on its own weight. I purchased some builder parts from RuffStuffSpecialties. I purchased some bushings, Tacoma 5/8"s offset leafspring shackles and some radius'd hangers. The shackles I cut and radiused one side and welded them to the bushing body:
Burned everything in and this babys rolling!
I also cleaned up the axle by removing the original leafspring perches and old shock tabs. I removed the leaf spring perches because the threads on my Ubolts were gummed up and I didnt want to spend the 25 bucks to get new Ubolts and have it happen again so I made a Ubolt eliminator perch. Its made of 5/16"s plate, 5.5" long and 5" wide. I also off set my centering pin by 2". That means my rear axle is 2" farther back than it would be. Im running the cherokee springs backwards so my departure angle is amazing now.
The next thing I did was start on the tubing. The name of the game is curvy. Notice how the slider and exo fit together:
With the first section of tube done I got my inspiration to finish the back half. Notice how snug the exo is to the body:
Next was start on fenders:
I need to upload more photos so...MORE TO COME!