Thanks for the pics.
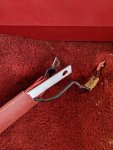
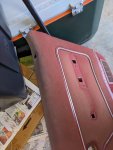
I think that the chromed strip insert was thermal process when the panel skin was manufactured, or even the skin was placed on the cardboard, processed, and then final-wrapped around the edges. In other words, the cover went into an injection press with high enough temp to melt the material into shape for the trim strip, then the strip was chrome-decaled (even the velour fabric is plastic, and it will melt).
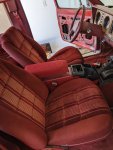
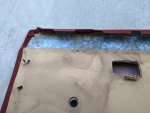
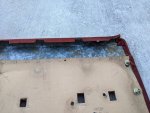
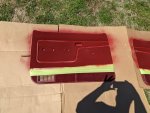
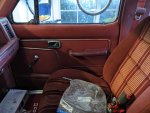
Notice how the original material is stapled to the cardboard at the sides and bottom,
but at the top it's glued to the metal section.
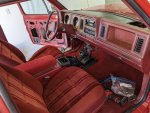
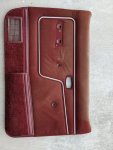
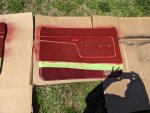
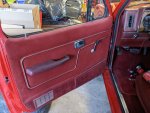
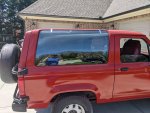
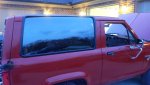
Anyway, here's some food for thought. You have the vent windows (which I really like). The panels you bought with the interior package will work, but they're not near as nice as the deluxe full panels. The smaller ones could even be recovered easier, but they still won't be as nice as the deluxe panels.
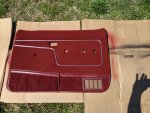
Your original panels are nicer, but for the fabric wear at the top. I think that it may be possible to just recover the top, with decent results. Especially if you'd like a vinyl material and not fabric in the arm rest areas. It will be a lot easier to explain sketched out, so I did this in robbieCAD:
View attachment 74150
First of all, disregard "removing the belt trim". I was thinking that it was attached to the door panel, but it's attached to the door instead. You will need to remove the lock button trim ring; I think that it can be carefully pried out (it should have locking tabs).
Basically, the strip of metal traps the lower edge of the vinyl (or new fabric), it is then covered, or hidden, when the material is pulled up and over to the panel edges, and it creates a clean seam between the original fabric and the new material (i.e.- vinyl or fabric). For the best results it should lay flat when installed, and not be "wavy". I'm thinking along the lines of the heavier metal banding, used in shipping freight, would be a good "scroungeable" source.
The thin foam padding helps in hiding the strip beneath the vinyl, tensions the vinyl which makes for an overall better look, and makes contact in use more comfortable.
On the top and side edges, trim the foam padding only "just over" or flush, and let the vinyl stay longer. Then use a good spray glue applied well to bond the back of the vinyl to the back of the door panel. It may be best to also trim the original material back, so that only the new material is glued directly to the panel back. Cutting slits in the glue-area of the material will help, to both pull it tight and to avoid bunching it up behind the panel. Warm vinyl is easier to work; a heat gun or hair dryer can help a lot.
This is one of those things that hard as hell to explain to somebody, and you have to sort of feel it out as you go along. I did this kind of upholstery when I was doing conversion vans for a while years ago, and with patience it's not hard, and can produce some great results.
Anyway, it's another option for you think about. And if you have some materials laying around, you can also play around with it to get an idea of how it works, before having to actually do any changes to the original panel.