• Welcome Visitor! Please take a few seconds and Register for our forum. Even if you don't want to post, you can still 'Like' and react to posts.

4x4 SAS 5.0 dump truck build


Aeroflex

Member
V8 Engine Swap
Joined
Nov 20, 2020
Messages
25
Reaction score
28
Points
13
Location
Florida
Vehicle Year
1998
Make / Model
Ford Ranger
Engine Type
V8
Engine Size
302
Transmission
Automatic
2WD / 4WD
4WD
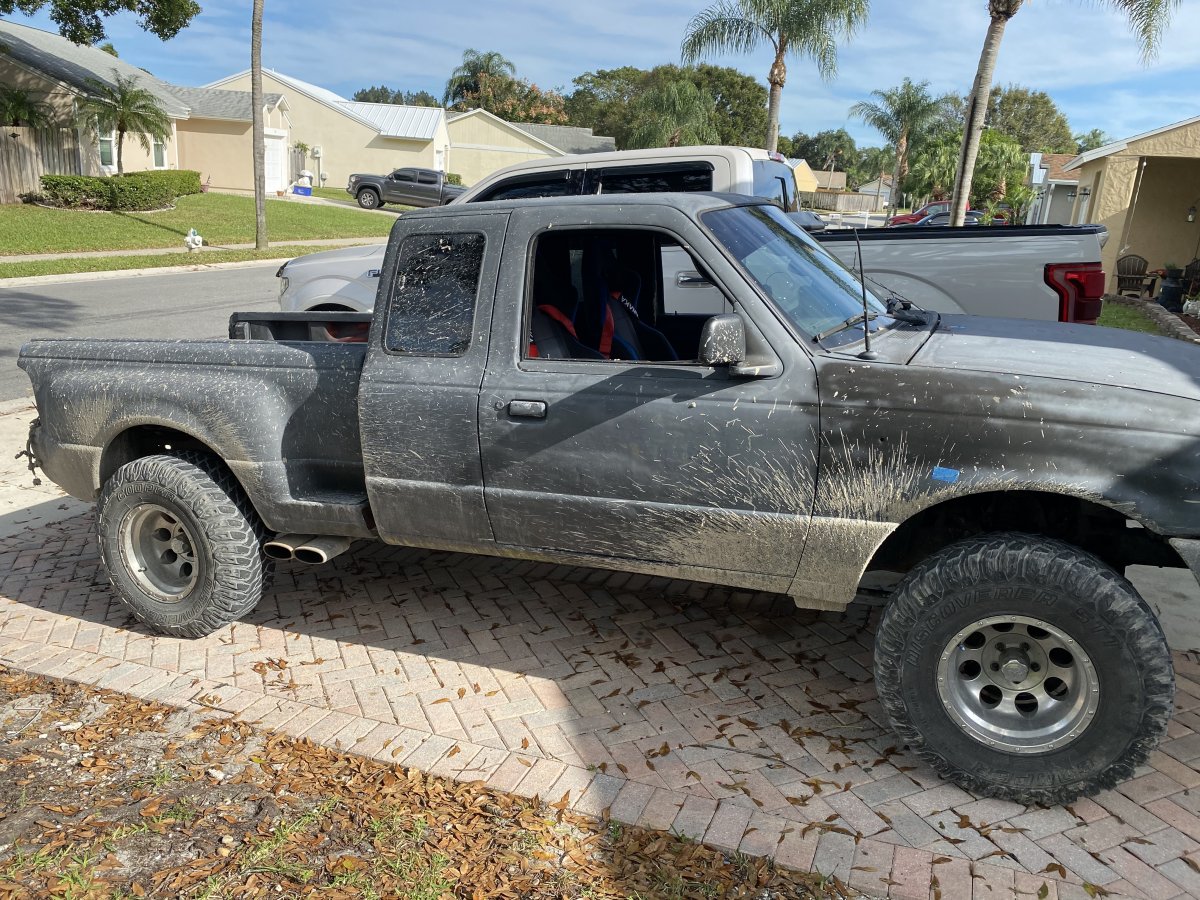
I recently bought a 1998 ranger with a carbureted 5.0/c6 already swapped into it. I bought it to build into a streetable truck (not a daily) that can handle more serious off-roading/mudding. My plan is to do a sas with a Dana 44 up front and a 9 inch rear end. I am currently in the middle of regearing and narrowing the rear diff. I took 6 inches out so the new width will be around 59 inches. Waiting on some 5.14 gears to show up to go with a spool. I’ll post some progress pics when I get a chance.

What makes this build a little different and to my surprise, when I bought the ranger I found out a previous owner installed a hydraulic arm under the bed to use it as a dump bed but the wiring to control the hydraulic was all cut up and broken. After some research and a afternoon wiring things up I now have a mini dump truck with a v8 lol.

I am fairly mechanically inclined and took on this project to learn and improve. I plan on doing all the work myself. I have a pretty good idea of the path i need to go down to complete the build but I am open to suggestions and constructive criticism along the way. I hope logging this build helps others as many of you all’s posts have helped me.
5EEEF826-EBDC-4D1A-9A41-D370A4CF40A9.jpeg


Aeroflex

Member
V8 Engine Swap
Joined
Nov 20, 2020
Messages
25
Reaction score
28
Points
13
Location
Florida
Vehicle Year
1998
Make / Model
Ford Ranger
Engine Type
V8
Engine Size
302
Transmission
Automatic
2WD / 4WD
4WD
Here are some additional photos
The dump bed hydraulic
8459E72F-69C8-4B9E-A1EA-DB12D7B65BD1.jpeg
77277E5B-2EBE-46FC-A5A7-217A554970DF.jpeg


donor rear end out of a 1979 f150 converted into a swamp buggy
F0F0669C-1C72-4278-8823-44DAE4066ACB.jpeg


prepping the housing to be narrowed
8EE1C19E-3B2B-441B-9A9C-888C9E45654F.jpeg
2FC16E5A-B65D-4962-82CE-25A03E84AF53.jpeg


welded on new housing ends
7E1F6636-2DB7-4D02-98AE-DFFE782118E8.jpeg
 

Ramcharger90

Well-Known Member
Article Contributor
V8 Engine Swap
Joined
Feb 11, 2019
Messages
2,953
Reaction score
1,708
Points
113
Location
N/A na
Vehicle Year
1990
Make / Model
Ford Ranger
Engine Type
V8
Engine Size
306, Bcam,
Transmission
Manual
2WD / 4WD
2WD
Looks nice.

You might find the first picture interesting.

One day I will get better pictures....


ericbphoto

Overlander in development
TRS Event Staff
TRS Forum Moderator
Supporting Member
U.S. Military - Veteran
TRS 20th Anniversary
VAGABOND
TRS Event Participant
GMRS Radio License
Joined
Feb 7, 2016
Messages
15,329
Reaction score
16,591
Points
113
Age
59
Location
Wellford, SC
Vehicle Year
1993
Make / Model
Ford Ranger
Engine Type
3.0 V6
Engine Size
3.0L
Transmission
Manual
2WD / 4WD
4WD
Total Lift
6"
Tire Size
35"
My credo
In theory, theory and practice are the same. In practice, they are different.
Wow! Nice find. That will be handy for hauling home some mulch for the flower beds.
 

Aeroflex

Member
V8 Engine Swap
Joined
Nov 20, 2020
Messages
25
Reaction score
28
Points
13
Location
Florida
Vehicle Year
1998
Make / Model
Ford Ranger
Engine Type
V8
Engine Size
302
Transmission
Automatic
2WD / 4WD
4WD
I’ll start by going through some of the issues I have encountered up to this point and the solutions.

When I first bought the truck it would not run because there was water in the gas tank. Since it is a carbureted setup the fuel tank gravity feeds an inline fuel pump made for carbs. The stock fuel injected fuel pump from the truck would of supplied too much pressure to the carburetor. The in line pump is wired to a switch in the cab. I unhooked the fuel supply tube at the carb and turned on the fuel pump. I pumped what came out into a clear jug so I could see the fuel/water separate. The water is heavier so it settles to the bottom. I turned on and off the pump intermittently to allow time for the remaining water in the fuel tank to settle to the bottom and get picked up when I turned on the pump again. I pumped out about 3 gallons of water before I got to good fuel. Later on I ended up replacing the fuel level sensor. The gasket on the old one looked pretty rough so I’m hoping that fixed the source of the leak. The dump bed made for easy access to the fuel tank :).

Once the truck was running I found it periodically had a nasty backfire when accelerating. I checked the sparked plugs and their gaps. Everything came in between 0.040 - 0.045 “ as expected. So I decided to rebuild the Edelbrock carb. This helped the engine run smoother but the backfire was still present. Then I started looking into timing. The truck has a HEI distributor and was setup with 6 degs initial timing. From my understanding that is the correct initial timing for a stock engine but with aftermarket intake and carb the engine needed the time advanced. I bumped it up to about 10 degs initial and haven’t experienced a backfire since. I am still playing around with increasing the timing to find the sweet spot on the butt dyno. I’m currently closer to 14-16 initial and 36 total timing. I plan on trying a lighter set of distributor springs in the future. I have never played with a distributor and timing before. I am amazed at what a difference it made in performance. The engine is a lot more responsive and snappy off the line.
 

Aeroflex

Member
V8 Engine Swap
Joined
Nov 20, 2020
Messages
25
Reaction score
28
Points
13
Location
Florida
Vehicle Year
1998
Make / Model
Ford Ranger
Engine Type
V8
Engine Size
302
Transmission
Automatic
2WD / 4WD
4WD
Future plans in no particular order...

Basic body work
Paint the truck
Frame rust remediation
Dump bed rewire for safety
Latch to lock down the dump bed when driving
Limit straps and bump stops for dump bed
Finish building the narrowed 9 inch
Swap the rear end
Narrow and rebuild the Dana 44
SAS the front end
 

Aeroflex

Member
V8 Engine Swap
Joined
Nov 20, 2020
Messages
25
Reaction score
28
Points
13
Location
Florida
Vehicle Year
1998
Make / Model
Ford Ranger
Engine Type
V8
Engine Size
302
Transmission
Automatic
2WD / 4WD
4WD
Some more photos from when I bought her...
30D1EA90-09C9-4501-B61B-D46A2378AD20.jpeg
68E58FE6-0004-4B97-9E46-723B3F7453F5.jpeg
0DF8E1FB-38A9-49D3-B874-0EA253F9605C.jpeg
2960A154-E7FF-420A-B014-F7CCFEB0A194.jpeg
6CC58666-50BF-4516-A3D4-2E7498ECFD9A.jpeg


Rebuilding the carb
E62D3D00-399A-4574-B57E-15B73562FD94.jpeg
A473E40C-5634-47C4-B29D-0845613208AE.jpeg


My test drive co pilot... Also the notice the B&M floor shifter. I am a fan of it so far!
576EA963-D379-4529-8A93-643045F92AC1.jpeg
 

Aeroflex

Member
V8 Engine Swap
Joined
Nov 20, 2020
Messages
25
Reaction score
28
Points
13
Location
Florida
Vehicle Year
1998
Make / Model
Ford Ranger
Engine Type
V8
Engine Size
302
Transmission
Automatic
2WD / 4WD
4WD
Looks nice.

You might find the first picture interesting.

One day I will get better pictures....

That’s a pretty serious bed! Thanks for sharing
 

Aeroflex

Member
V8 Engine Swap
Joined
Nov 20, 2020
Messages
25
Reaction score
28
Points
13
Location
Florida
Vehicle Year
1998
Make / Model
Ford Ranger
Engine Type
V8
Engine Size
302
Transmission
Automatic
2WD / 4WD
4WD
To narrow the axle housing I bought some alignment pucks for a Ford 9” on eBay. Then I went to a local metal supply and got a 60” long piece of 1.25” diameter solid bar stock (1018 cold rolled steel). After cutting off the desired amount from either end of the housing you put the pucks in the carrier and the housing ends to align everything. The housing was slightly bent which is expected from an older housing. You could tell because the new housing ends on the alignment rod did not line up perfect relative to the housing. It was 1/4” off in some areas. Based on a few YouTube videos I tried heating the housing with an torch and quenching it to get it to bend in the direction I wanted. I can provide more specifics if anyone is interested. I also tried bending it with a bottle jack and chains. In the end I got it to within 1/8” on either side so I was happy with that. Using the alignment rod suggests the axles should line up like they should to function properly even if the housing it’s self is slightly bent.
 

Aeroflex

Member
V8 Engine Swap
Joined
Nov 20, 2020
Messages
25
Reaction score
28
Points
13
Location
Florida
Vehicle Year
1998
Make / Model
Ford Ranger
Engine Type
V8
Engine Size
302
Transmission
Automatic
2WD / 4WD
4WD
I finished up the ring and pinion install on the carrier tonight.

Here’s a pic of the old rig and pinion. You can see chipped pinion teeth and the ring gear wearing away. Some one did a terrible job setting it up. No shims anywhere and they used the pinion pilot bearing retainer as a spacer in the pinion carrier.
CF33098A-E6F7-464E-921F-E021322AC671.jpeg


my final pattern. I think it looks pretty decent compared to what I’ve seen it should look like. This is my first time doing this so if I’m missing something please advise.
8C5BEC7C-CB75-41CF-AE8B-1395ADD2F6A9.jpeg


mocking things up with the new axle shafts
D6526947-82FA-4EAE-B807-63052DAA7FCB.jpeg


Tomorrow I’m hoping to paint the housing and cut the axle shafts to length. I ordered a disc brake conversion kit for the 9 inch and will be installing next week as well.

For reference, I asked a local machine shop about getting the old axle shafts cut and resplined and they wanted to charge me $500 to do one shaft because the axle shafts were heat treated. Two other shops I talked to said they didn’t even do that kind of work. So I opted to buy new shafts with longer splines and will cut them to the length I need.
 
Last edited:

Mightyfordranger

Well-Known Member
V8 Engine Swap
Joined
Apr 22, 2014
Messages
1,029
Reaction score
156
Points
63
Location
Ohio
Vehicle Year
1989
Make / Model
Ford
Engine Type
2.9 V6
Engine Size
2.9
Transmission
Manual
2WD / 4WD
4WD
Total Lift
3in
My credo
Clean your room before you criticise the world.
Document as much as you possibly can. In my experience it's people like you that provide the most help when it comes to other people wanting to do something similar.
Btw I love it it's gonna be sick. You wrench and I'll watch lol
 

Aeroflex

Member
V8 Engine Swap
Joined
Nov 20, 2020
Messages
25
Reaction score
28
Points
13
Location
Florida
Vehicle Year
1998
Make / Model
Ford Ranger
Engine Type
V8
Engine Size
302
Transmission
Automatic
2WD / 4WD
4WD
Document as much as you possibly can. In my experience it's people like you that provide the most help when it comes to other people wanting to do something similar.
Btw I love it it's gonna be sick. You wrench and I'll watch lol
Thanks for the motivation! I have plenty more I’ve learn so far I can share so hopefully future readers will find it helpful
 
Last edited:

Mightyfordranger

Well-Known Member
V8 Engine Swap
Joined
Apr 22, 2014
Messages
1,029
Reaction score
156
Points
63
Location
Ohio
Vehicle Year
1989
Make / Model
Ford
Engine Type
2.9 V6
Engine Size
2.9
Transmission
Manual
2WD / 4WD
4WD
Total Lift
3in
My credo
Clean your room before you criticise the world.
Maybe include some youtube videos? I dodnt think those ever get deleted so the link should never go dead like the great photo bucket purge. Idk just a thought and you seem to know what your doing already!! Lol
 

Aeroflex

Member
V8 Engine Swap
Joined
Nov 20, 2020
Messages
25
Reaction score
28
Points
13
Location
Florida
Vehicle Year
1998
Make / Model
Ford Ranger
Engine Type
V8
Engine Size
302
Transmission
Automatic
2WD / 4WD
4WD
I got the axle shafts cut to length today. I only had to take about an inch or less from each axle shaft. The cut guide tool below has been really useful throughout the whole axle narrowing process to take measurements from.

FAD456CD-B86B-480C-B811-90738C07098C.jpeg


ICT Billet 9" Rear End Axle Tube Narrowing Cut Guide Rearend Pinion Dogbone Tool
6DF1954F-4255-4451-BC83-0570F97A282D.jpeg

AA777461-0886-4811-9172-6C17AB8AAF42.jpeg
 

Aeroflex

Member
V8 Engine Swap
Joined
Nov 20, 2020
Messages
25
Reaction score
28
Points
13
Location
Florida
Vehicle Year
1998
Make / Model
Ford Ranger
Engine Type
V8
Engine Size
302
Transmission
Automatic
2WD / 4WD
4WD
It’s been 2 steps forward 1 step backwards but things are progressing...

The axle shafts I ordered ended up being a different bolt pattern then I thought. They accommodated multiple bolt patterns: 5x4.50/5x4.75/5x5.00. Well when I ordered them I misread that last size for 5x5.50. As such I ordered a 9” disc brake conversion kit with a 5x5.50 rotor. So I was a little mad at myself when I discovered 5.50 was a 5.00 bolt spacing. Ultimately I decided to keep the axle shafts and go with the 5x4.5 pattern and bought a set of front rotors for a 2003 Crown Victoria. I went with these because of the 5x4.5 pattern then other dimensions were close to what I needed except for one... The center register of the axle shafts (I’m not sure if that’s the correct term - the round thing in the middle of the bolt circle?) is 3” in diameter and the crown Vic rotors has a 2.78” inner diameter. So I have been going round and round with a Dremel and die grinder to open up the center of the rotor until it slips on all the way. One side is complete so far.

The dis brake conversion kit has been decent. It’s one of the universal kits from speedway motors. The instructions could be better. And I had to lightly modify the aftermarket bearing retainer and a couple of the caliper bracket spacers to create the clearance I needed around the axle housing flanges to get things to bolt together nicely.

you can see the bearing retainer sticking up past the spacer and the flange here. I ground down some of the excess of the retainer to make it flush with the spacer and flange.
6AD229D6-E68C-48E0-85E3-AB4A9C0E2E2F.jpeg


Here you can see how the caliper spacer wants to over lap with the flange. It’s a little exaggerated from the angle.
18FD15D9-7EE6-4FD2-A184-780DBE786E3C.jpeg


This is a test fit of the spacer after grinding away a little on the side.
80935488-7E5A-413E-85D7-A59299DAA169.jpeg


This shows how much I took away from the side compared to an unmodified one
E416AD64-9E58-4590-9956-20A498A5FE6D.jpeg


This is my rotor work station for opening up the center hole.
74F67F57-9068-4843-B244-E7ED93394AFE.jpeg


the rotor finally sliding on and some shots of the brake setup
B81C4540-4987-4073-BE8C-11AD4DFC7534.jpeg
3192E57D-11BE-4FBF-BE4D-00F853D9BF43.jpeg
D00B2C89-5B12-43AB-B515-0947786DA84D.jpeg
9FF93502-D0EB-4680-9B59-90DAF0BDEE1F.jpeg
 

Sponsored Ad


Sponsored Ad

Today's birthdays

Member & Vendor Upgrades

For a small yearly donation, you can support this forum and receive a 'Supporting Member' banner, or become a 'Supporting Vendor' and promote your products here. Click the banner to find out how.

Truck of The Month


Shran
April Truck of The Month

Recently Featured

Want to see your truck here? Share your photos and details in the forum.

Follow TRS On Instagram

TRS Events

25th Anniversary Sponsors

Check Out The TRS Store


Sponsored Ad


Sponsored Ad

Sponsored Ad


Amazon Deals

Top