• Welcome Visitor! Please take a few seconds and Register for our forum. Even if you don't want to post, you can still 'Like' and react to posts.

2000 Ranger 4.0 to 2.3 EcoBoost Swap


Boost Bucket

Member
Joined
Mar 18, 2022
Messages
36
Reaction score
46
Points
18
Location
Midwest
Engine Type
2.3 EcoBoost
RE: Steering controls

As you likely already know, the Ecoboost 2.3 is based on the older Duratec/MZR family of 4 cylinders. You could get a Duratec 2.3L in Rangers from 2001-2011. I'd bet a six pack that a hydraulic power steering pump from a Duratec Ranger might bolt onto the Ecoboost head, just as it did on a Duratec. Not sure what (if any) other packaging obstacles that might create, but it seems like it might be worth a test fit. Anything that can be used from a Duratec truck should make chassis fitment/integration easier.

Duratec accessory drive in Ranger chassis:
I found myself in the local pick and pull last week for the first time looking for an axle. I didn't find any of these 2.3s to get my hands on test fit parts. It's not looking like the power steering or AC location is viable for the Ecoboost. The belt tensioner being in the upper driver side area and turbo ducting/cooler lines in the upper passenger side area make it pretty impossible I think. I'm just going to have to go with an electric assist such as the Volvo conversion and roll with the punches.


Boost Bucket

Member
Joined
Mar 18, 2022
Messages
36
Reaction score
46
Points
18
Location
Midwest
Engine Type
2.3 EcoBoost
Progress has been slow but steady since I'm not a fabricator. The engine went into its home today. I still need to make a transmission mount and relocate one of the brackets about 1/16" so the bolts fit better. I was going to make a diagram for dimensions of my mounts, but I'm on revision 4 or 5 after a lot of tweaking so they look like franken-brackets that need redone into a final form before I'm comfortable sharing. I don't know what people generally use for brackets, but I made mine purely out of 3"x48" 1/8" steel that I found at Rural King. I have no idea if that will be strong enough but it feels pretty stout. To save myself a lot of headache, I used factory bolt locations through my plates. The actual engine mount holes moved forward considerably and I have some concern about strength, but it should be a good enough start.
1667784717069.jpeg

1667784744226.jpeg

I suppose I should mention that I ended up raising the engine slightly so more of the oil pan cleared the steering rack and I could move the whole unit forward a bit. I saw that I would have firewall/tunnel issues otherwise. After a lot of reading, I found out it is a nightmare to mess with front end geometry when you don't know what you're doing. For that reason my engine brackets currently have the engine sitting with the oil pan no more than 1/16" above the rack in it's stock location to get it as low as possible without making contact. My hope is that I have a little wiggle room with tunnel and hood clearance where it's at now and I can shim it higher to gain clearance later. Maybe it's nothing, but I doubt good things will come of a hot oil pan nearly (or maybe literally) tickling the steering rack constantly.

Next step is the transmission bracket and using the laser to see if this thing has moved and is going to have clearance issues again. The smart move would be to toss the cab back on for a test fit, but without a lift I'm probably in for 12-16 hours of sketchy fiddle work.

I ripped the bandaid off and bought a pricey 4.10 limited slip Explorer axle over the weekend because I can't stand drum brakes and I wanted some extra meat for the rear end anyway. Assuming the engine is OK where it is, in theory the rest is coming down to details. I will need to install a lift kit for the front diff to fit, but that pretty much guarantees I can't get the cab back on because I was barely able to lift it high enough the first time.

Other than the mechanics of getting hoses and components repaired and routed, frame and body repair will probably be the most boring and time consuming part of the build. I'm still on the fence whether I want to have the frame completely blasted and coated or if I want to only fix the rust and settle for whatever "my best attempt" looks like in the garage. If nowhere in town can do it I'm looking at an hour of travel to take it somewhere to have it done.
 

ekrampitzjr

Well-Known Member
Joined
May 28, 2021
Messages
766
Reaction score
1,057
Points
93
Location
Virginia
Vehicle Year
2011
Make / Model
Ford Ranger
Engine Type
4.0 V6
Transmission
Automatic
2WD / 4WD
2WD
Boost Bucket, yes, blast and coat the frame. You'll thank yourself later.
 

Boost Bucket

Member
Joined
Mar 18, 2022
Messages
36
Reaction score
46
Points
18
Location
Midwest
Engine Type
2.3 EcoBoost
Transmission mount is made. I had to cut down about 2 inches off of the crossmember to clear measurements for the tunnel. I wasn't very interested in doing a boatload of cutting and framework to move the entire crossmember so I opted to just make a little extension piece. It looks silly and it's probably not the most sound but we'll see what happens. According to my measurements the drivetrain should be completely set now. I think I want to go ahead and try a cab test fit but it will be a little bit before I can schedule that. In the meantime I'm now ready to start fixing the hoses and broken pieces on the engine itself and get it ready for primetime.
1668046769869.png
 

alwaysFlOoReD

Forum Staff Member
TRS Forum Moderator
TRS Banner 2012-2015
TRS 20th Anniversary
Joined
Apr 13, 2009
Messages
13,933
Reaction score
5,086
Points
113
Location
Calgary, Canada
Vehicle Year
'91, '80, '06
Make / Model
Ford, GMC,Dodge
Engine Size
4.0,4.0,5.7
Transmission
Manual
2WD / 4WD
4WD
Transmission mount is made. I had to cut down about 2 inches off of the crossmember to clear measurements for the tunnel. I wasn't very interested in doing a boatload of cutting and framework to move the entire crossmember so I opted to just make a little extension piece. It looks silly and it's probably not the most sound but we'll see what happens. According to my measurements the drivetrain should be completely set now. I think I want to go ahead and try a cab test fit but it will be a little bit before I can schedule that. In the meantime I'm now ready to start fixing the hoses and broken pieces on the engine itself and get it ready for primetime.
View attachment 85186
I think that will work just fine.
 

Boost Bucket

Member
Joined
Mar 18, 2022
Messages
36
Reaction score
46
Points
18
Location
Midwest
Engine Type
2.3 EcoBoost
Due to some nasty frame rust issues, I've been searching for a replacement frame without much luck. I finally decided to settle on a half frame when I found a really nice one at the local parts yard recently. Since I plan to tow with this build I don't want to risk a poor frame repair would prefer to just replace the whole rear half. The last few inches are almost completely gone.
1672958446916.jpeg
1672959385406.jpeg

It may not look like much from the picture but the frame I found is in nearly perfect condition. I just hope it ends up being a match.
1672959392928.jpeg

Next up is stripping my 2000 frame, replacing the rear half, then shipping it all off to be blasted and coated. It will be nice to have it finally going back together.
 

Boost Bucket

Member
Joined
Mar 18, 2022
Messages
36
Reaction score
46
Points
18
Location
Midwest
Engine Type
2.3 EcoBoost
Working around the weather, I was able to squeeze in another work day. I found that the new frame section was too heavy for me to move around on my own with the rear bumper and hitch attached so those had to go. I wish I had a scale to tell exactly, but the rear frame section is lighter than I thought and I might guesstimate it between 80-100lb with the hitch and bumper off. For anyone curious like I was, with the bumper at hitch attached the best I could do was drag it where I wanted it but with them off it's not a huge deal to deadlift the whole assembly.
1674345328364.jpeg

1674345344147.jpeg

1674345352128.jpeg

I also made a deal this week on the marketplace for some "jeep" wheels and tires. I've been looking high and low for chrome bullet holes but all the ones I found were generally 6 lug, 15", AND as pricey as buying new. I would've preferred to wait until the very end to think about wheels and tires but the clearance issues requiring the lift kit means I had to find some 16" wheels to fit the lift according to the documentation. I must admit I did not know how absurdly large 35s are. These are 5x5 pattern so I'm going to run 1.5" Rough Country adapters to get back to 5x4.5 and hope the spacing works.
1674345563009.jpeg

1674345371251.jpeg
 

Boost Bucket

Member
Joined
Mar 18, 2022
Messages
36
Reaction score
46
Points
18
Location
Midwest
Engine Type
2.3 EcoBoost
Another couple of nicer days and a bit of time away from work and I've got the worst parts of the frame patched and pieced back together and the entire front suspension removed. Since I sawed off the frame at the parts yard I had a good usable piece for patchwork which made life a lot easier.
1676758628729.jpeg

1676758635443.jpeg


Since this area overlaps and a cleaning process won't get to it I sprayed it all down with some off the shelf Rustoleum Rust Reformer before assembly.
1676758654693.jpeg


I'm calling this officially the halfway point for the project since I think the worst of it is over. By my count it took me 107 labor hours to get here. If I had a lift I doubt it would even be half that.
1676758659990.jpeg


At this point I need to figure out whether I want to powder coat or do something else. I'm starting to lean towards POR 15 possibly since travel time to have this coated is 1.5 or 2 hours one way + 3 weeks lead time. I'm concerned about future flexibility if I need to drill, cut, and paint for future upgrades. Once this is solved, going back together should be a simple task.

If any of you have done powder or POR 15, how did it hold up to salt over 2-10 years? I'll keep it as clean as I can but it's a functional build so it will probably only see garage time when it is being worked on.
 

Blmpkn

Toilet enthusiast
Supporting Member
Joined
Feb 15, 2020
Messages
5,503
Reaction score
6,359
Points
113
Location
Southern maine
Vehicle Year
2023
Make / Model
Ford Bronco
Engine Type
2.3 EcoBoost
Engine Size
2.3
Transmission
Automatic
2WD / 4WD
4WD
Total Lift
2.5"
Tire Size
285/75/18
My credo
Its probably better to be self deprecating than self defecating.
I wouldn't bother with por15. Too much prep and hassle.

Corroseal it, then lay some implement paint over the top of the corroseal.
 

Boost Bucket

Member
Joined
Mar 18, 2022
Messages
36
Reaction score
46
Points
18
Location
Midwest
Engine Type
2.3 EcoBoost
I decided then that I'm going to apply the KBS battery of products (Klean, Blast, Seal, and Blacktop) and after a lot of prep work I plan to paint in the next couple of days when it gets a little warmer and then put it all back together. I found out that the misuse of a bed extender and a dolly was exactly what I needed to move a frame around myself. We will see how the end result goes but I can say after fooling with the prep work for hours I would've rather driven two hours to have it blasted. Someone who actually enjoys painting might think otherwise.
BoostBuild81.jpg

BoostBuild82.jpg
 

bobbywalter

TRS Technical Staff
TRS Event Staff
V8 Engine Swap
TRS Technical Advisor
TRS Banner 2012-2015
TRS 20th Anniversary
Ugly Truck of Month
TRS Event Participant
Joined
Aug 9, 2007
Messages
23,470
Reaction score
4,668
Points
113
Location
woodhaven mi
Vehicle Year
1988
Make / Model
FORD mostly
Engine Type
V8
Engine Size
BIGGER
Transmission
Automatic
2WD / 4WD
4WD
Total Lift
sawzall?
Tire Size
33-44
My credo
it is easier to fix and understand than "her"
hmmm..... how did i miss this?


easy button is jeep dana 30.....and a 2wd chassis.


i see your in corrosion helll.....

ahhhh yes.....

corrosion helll....

it warms me heart and fills the air with curse words..

my b2 is setup with a sas....so that is cheating. i dropped the ecoboob swap due to my son distracting me with a......uhhhh....errr...a different project....


where are you located?
 

Boost Bucket

Member
Joined
Mar 18, 2022
Messages
36
Reaction score
46
Points
18
Location
Midwest
Engine Type
2.3 EcoBoost
It's been cold recently but I snuck in a day of painting last weekend. Not pictured - 5 plastic drop cloths, a full body paint suit, respirator, and eye protection. Make no mistake - it gets everywhere and definitely smells very strong so don't play around with it. Once cracking the can, be prepared to go until you're done.

We are now KBS coated and blacktopped. I underestimated the amount of KBS Seal I would need and was only able to squeeze one coat out of the can. Once you start there is no going back unless you like doing prep work a second time. I overestimated on the amount of top coat cans I would need so I compromised and put 4 layers of top coat on top of the one undercoat. We'll see what happens.

1679186852256.jpeg


The 5 inch lift kit arrived this week so I'm ready to start putting it back together. Rough Country says an upgrade to 12" brakes is required so I pulled two knuckles from an '03 Explorer with everything attached to compare. Explorer knuckles next to the Rough Country ones make me think that if someone was inclined, they may be able to flip their tie rods and gain the same amount of lift as this kit. The diff drop hardware was really the only thing I care about in the kit. May be worth a try some day since I have the whole assembly now anyway. Both knuckles with all parts attached ran me $160 at the parts yard so it would be a dirt cheap lift option if so. Considering there were three Explorers next to the one I pulled with knuckles intact, availability seems high. Below is the RC +5" on top of stock 03 Explorer. They are offset in the picture for better visibility, but with the ball joint holes lined up they are very very similar.
1679186979289.jpeg


Lastly - I've always been curious how much an extended cab frame weighs. Knowing this ahead of time would've helped me adjust my expectations for moving it around without suspension. It may not have been born this way but after lots of rust removal it sits right at 325lb. Uncomfortable, but not the end of the world to pick up one end at a time if necessary, especially if you have an engine crane.
1679187122948.jpeg
 

Boost Bucket

Member
Joined
Mar 18, 2022
Messages
36
Reaction score
46
Points
18
Location
Midwest
Engine Type
2.3 EcoBoost
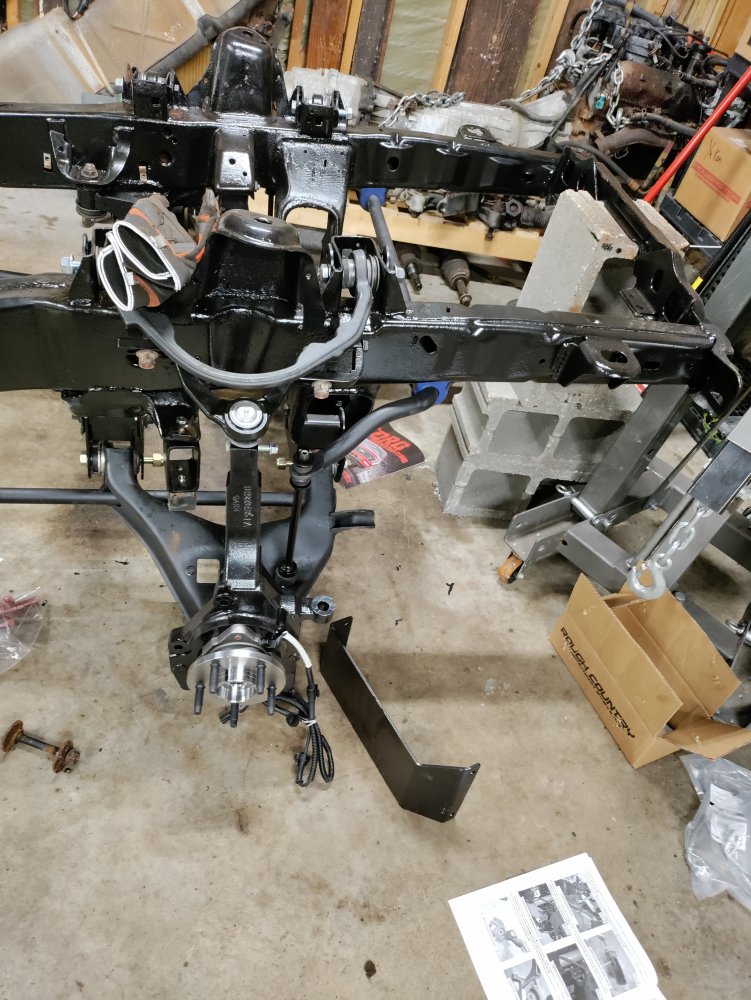
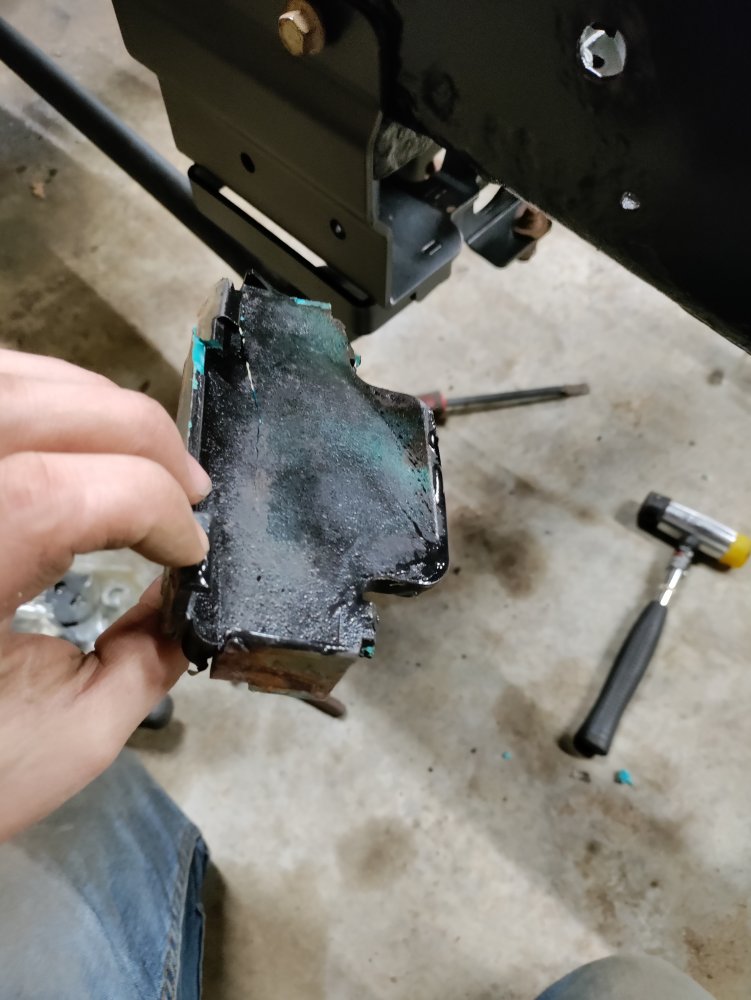
I've been taking advantage of the nicer days as much as I can and pushing forward. I have most of the front end pieces for the Rough Country 5" kit installed but unfortunately it took some time because there was hardware missing where I had to improvise. I'm not very impressed with that considering the cost of the kit. At least it was only nuts and bolts and not something more critical. In putting together the torsion keys though I noticed that my dampers or isolators or whatever they are called were toast so I had to stop and get some ordered. They seem to be a bit difficult to find but they're out there.

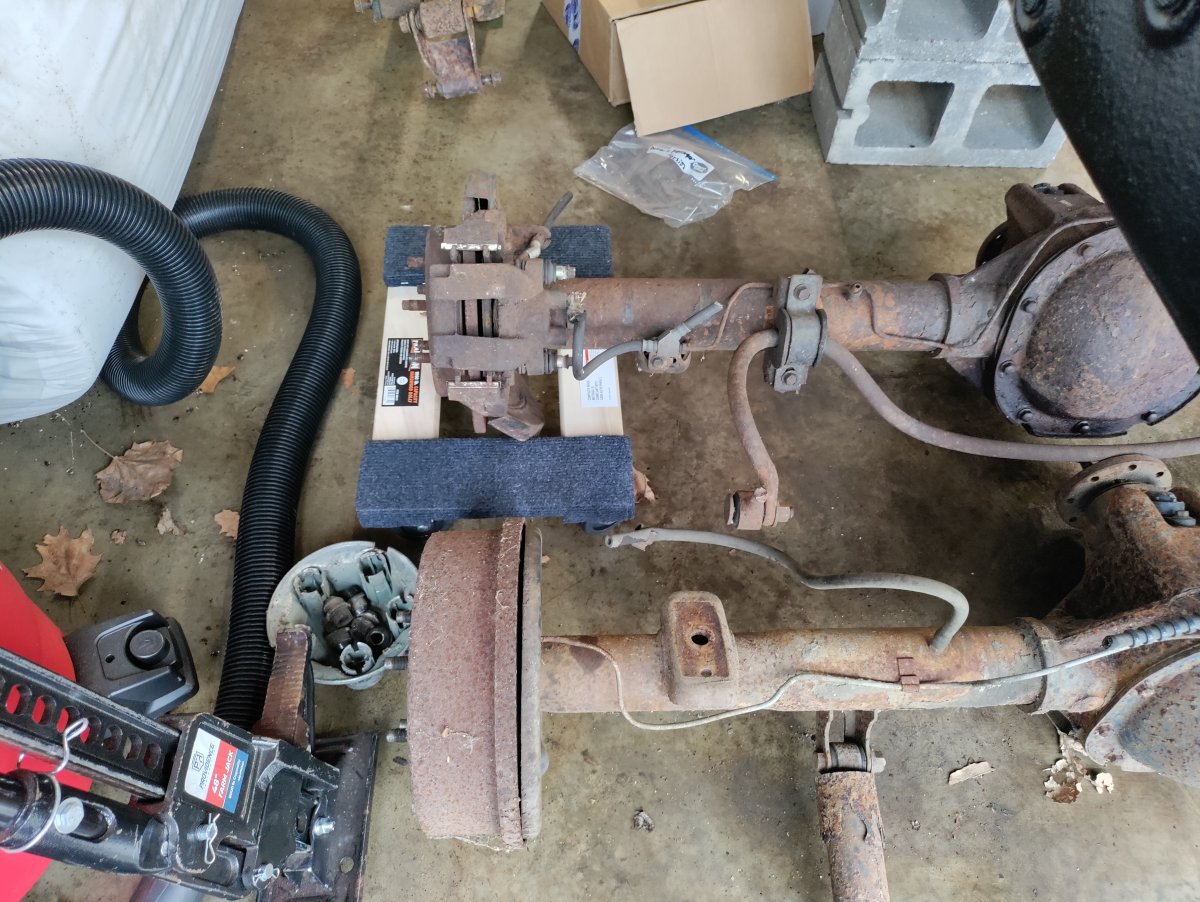
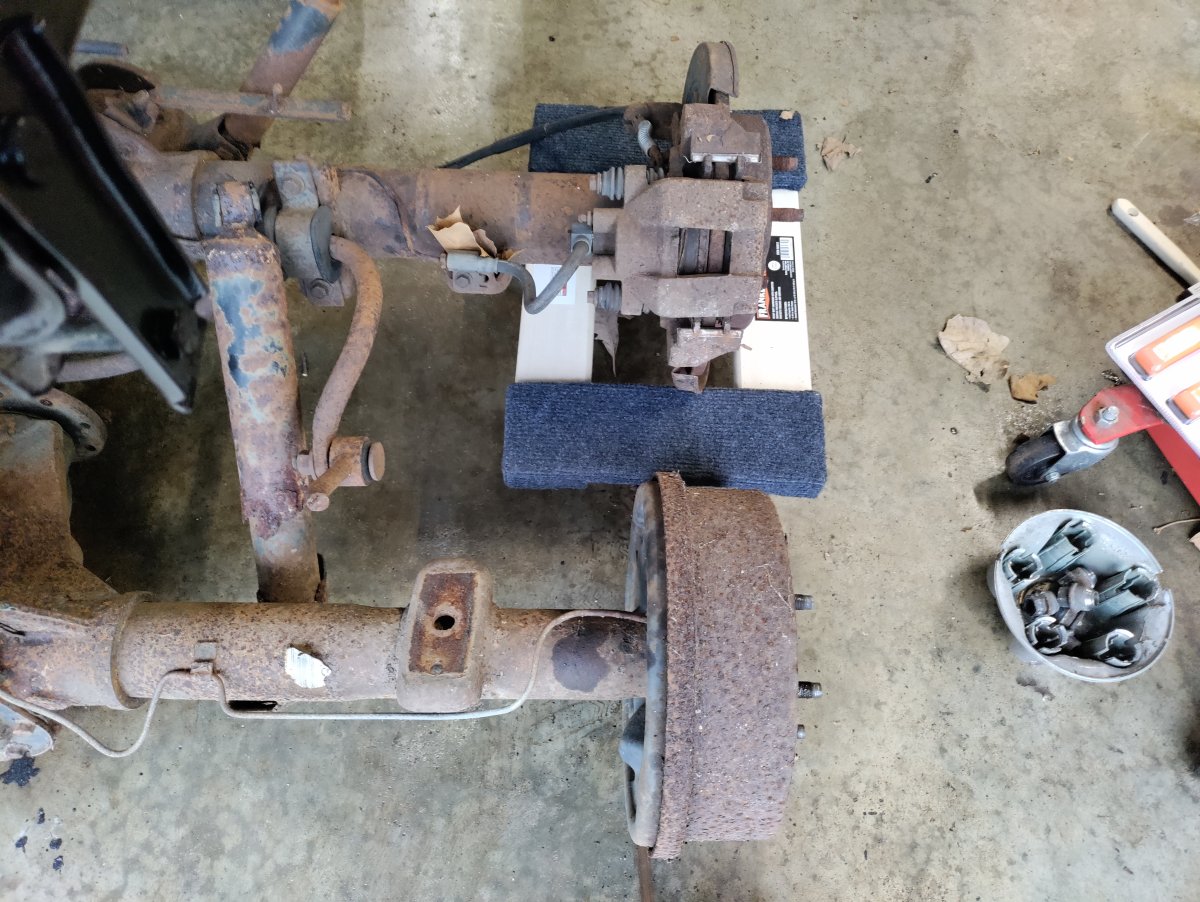
Pressing the bushings out of the lower control arms gave me all sorts of grief. I am lucky that the new bushings are fairly durable because I had to misuse my ball joint press pretty bad to get them replaced. I'm also lucky Harbor Freight released a ball joint expansion kit because without it I would've been lost with my standard pieces. To save money I am reusing as much original equipment as I can get away with so many items in the picture below are actually old but have been wire wheeled and painted. Rustoleum Hammered black is a pretty solid choice IMO. It's cheap and it dries extremely quick. As someone who really hates painting, I use it for just about everything.
IMG_20230401_195507.jpg

IMG_20230401_195259.jpg

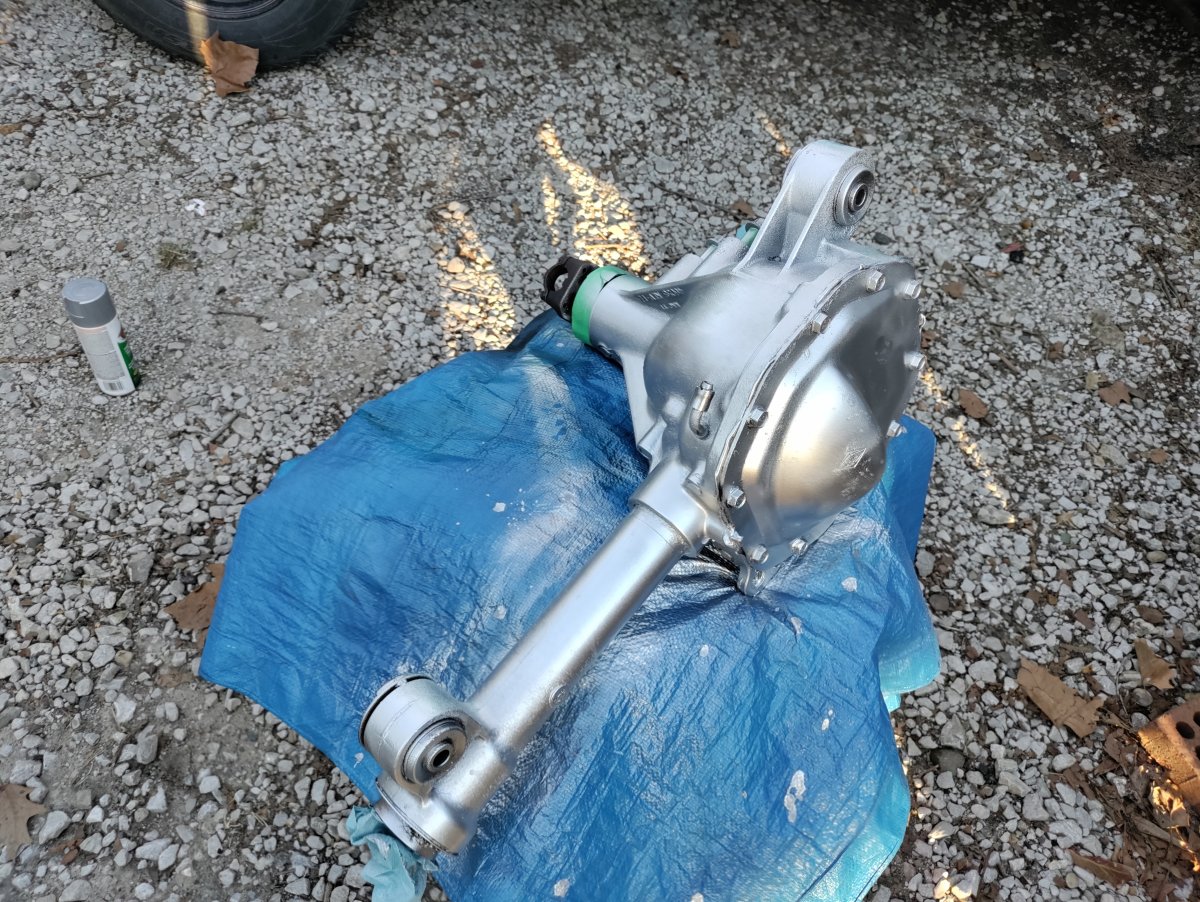
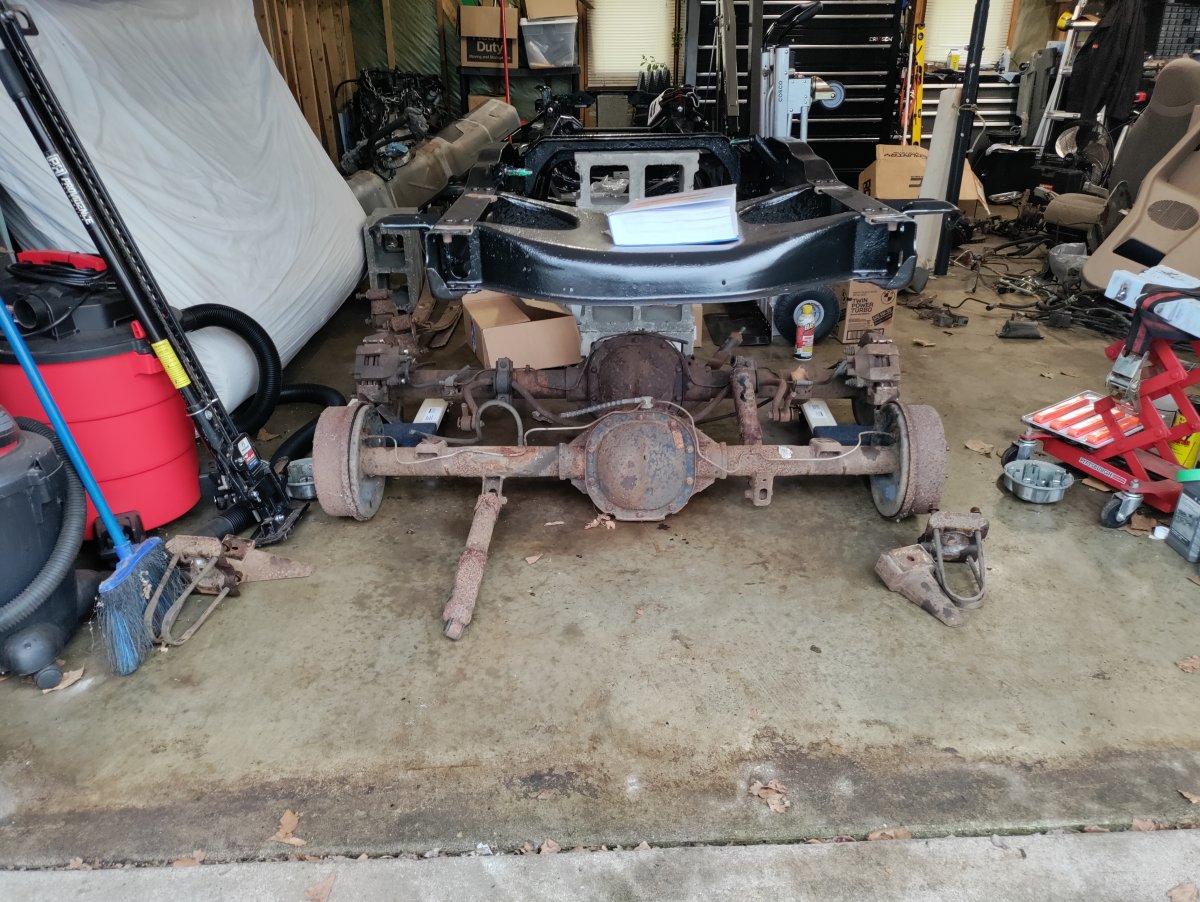
Two of the biggest items left for me were cleaning up the front differential and getting the rear axle converted to bolt up to a Ranger instead of Explorer. After an hour or so of scrubbing and degreasing I got the front diff "good enough" and slapped it with some paint. I tried to get some aluminum colored high-heat paint from the local Menards but it was the only spray paint that was sold out that day. I ended up with some silver extreme heat and didn't realize that it was metallic. Unintentionally I now have a glitter diff. Too late to go back now. There are extremely few results on google for "painting a front diff" and most people opt not to do it or just do the cover. I decided to full send and paint the whole thing and we'll see what sticks. Is there a reason nobody seems to paint aluminum? We're going to find out. Did I mention I hate painting? As a side note: I've googled as hard as I can and haven't found anyone local who does blasting and powdercoating to make it worth my while to drive to. I would love to have these pieces done for me and I hate painting enough to pay for it. When I was calling around for the frame to be powder coated, the most likely place to do it said they were on a 3 week waiting period that started when I dropped it off and I can't get in line before then. I hate waiting more than I hate painting and since that left a bad taste in my mouth here we are with a glitter diff. From here on out I'm going to say it was on purpose. I'd also like to point out that while I intend to baby it while in 4wd, if I ever decide to give it the beans I imagine I may blow up the front diff which is why I'm not being very kind to it, just like I imagine the first 200k on it weren't.
IMG_20230403_185533.jpg

IMG_20230403_191639.jpg

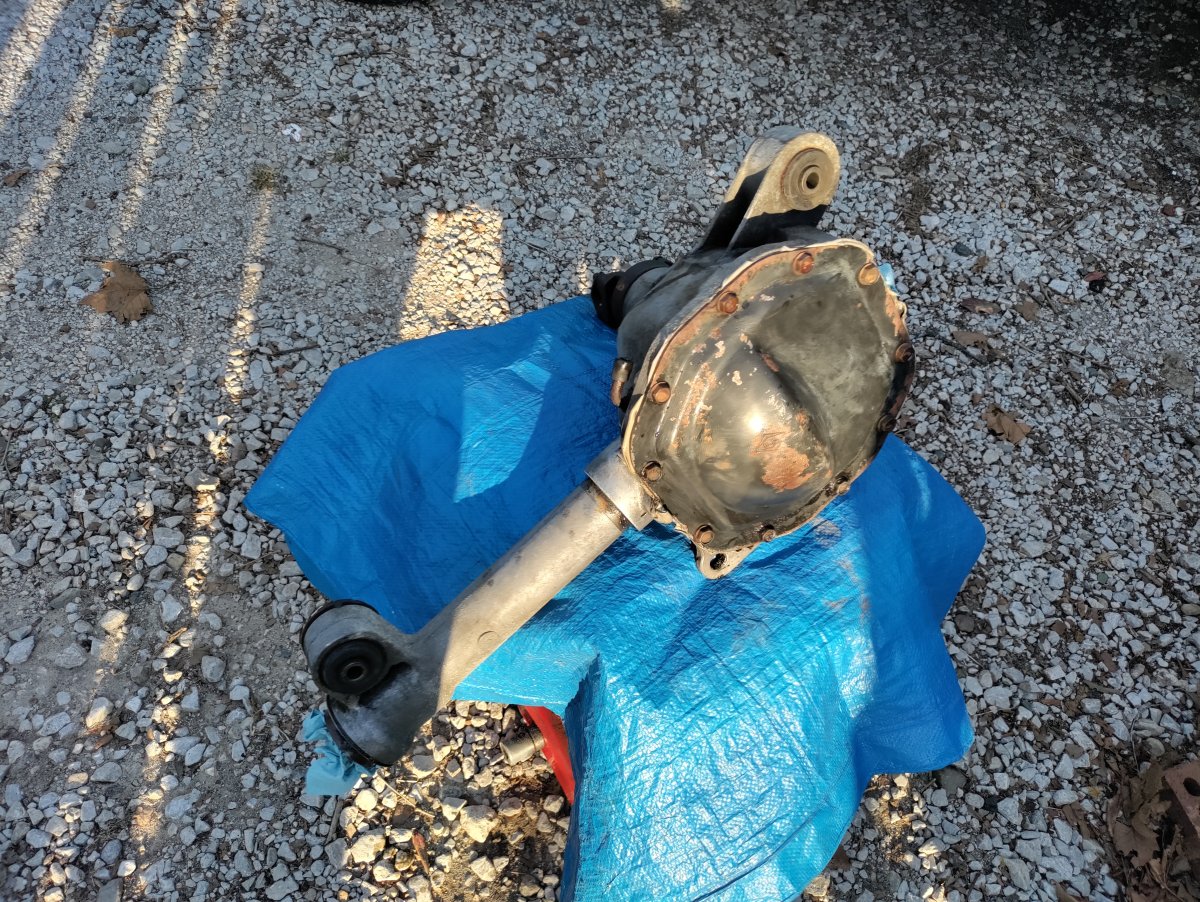
While I wait for parts to come in I'm going to work on the Explorer axle and get that prepped and welded with new perches. To help anyone in the future, I've pictured the two right next to each other to compare. I got mine off the Facebook Marketplace and I believe the guy said it was a '99 Explorer 4.10 (on dollys) vs my original (on the floor). I was worried the Explorer would be a little wider but that doesn't seem to be the case. I am extremely excited to finish up the suspension and get this sitting back on the ground. Once that's done I can place the drivetrain again. Since I've already made the mounts it should go in quickly. Since pretty much the whole interior and exterior of the truck is laying in parts on the garage floor at the moment, the more I can complete, the less time I spend tripping on things and carefully maneuvering the tools I need around it all.
IMG_20230404_190451.jpg

IMG_20230404_190459.jpg

IMG_20230404_190506.jpg

Lastly, I'd like like to remind everyone to stay safe out there. I ran into one of my best buds at the Harbor Freight today I haven't seen in a while. He told me he had just got out of the hospital after being crushed by a car that rolled off the ramps while he was working under it. If you're going to do something sketchy, remember to take safety super serious. Never place any part of yourself under something that can crush you, and make sure to wear your ear, eye, and hand protection. Buy an automotive fire extinguisher and have it near. Keep your phone on you instead of on the work bench, even if it keeps falling out of your pocket while crawling on the ground.

Whatever you need to do to take one more precaution you didn't think you needed, DO IT. I've spent a good amount of my tool money on safety equipment and it pays dividends when something goes wrong and you don't have a hospital or funeral bill to deal with. No joke there is probably at least one thing per week that flies into my face shield or gloves at high speed that would certainly be a hospital run without them. There was actually debris when cleaning my diff that flew under my face shield and was only stopped by my glasses. In my travels I've had two vehicles fall off jackstands myself that could've caused "issues" had I not been elsewhere at the time. It can happen to anyone. No Ranger project is worth anything if you're not around to complete it. Rant over and looking forward to finishing this up!
 

ekrampitzjr

Well-Known Member
Joined
May 28, 2021
Messages
766
Reaction score
1,057
Points
93
Location
Virginia
Vehicle Year
2011
Make / Model
Ford Ranger
Engine Type
4.0 V6
Transmission
Automatic
2WD / 4WD
2WD
Boost Bucket, has anyone told you that glitter diff looks fabulous? :LOL:

Seriously, people paint aluminum, but they tend to use a color that looks like aluminum (silver or silver-white). Any color will work. Aluminum should not be left uncoated or unpainted. It isn't the corrosion-proof lightweight miracle metal some people seem to think it is.
 

Boost Bucket

Member
Joined
Mar 18, 2022
Messages
36
Reaction score
46
Points
18
Location
Midwest
Engine Type
2.3 EcoBoost
It took much longer than I anticipated but I finally completed the front suspension.
1681000439868.jpeg

I was going to let it go but after several more issues with the Rough Country 5" kit, I have to say not impressed is putting it mildly. While I appreciate the kit being on the market still, the ease of installation is trash. Case in point is the custom front diff cover they include in the kit which I was excited to have. The bolts for this go into threaded holes on the front crossmember and the holes were gored so bad that trying to run the screws in stripped the screws of their threads. I actually had to run one in backwards to attempt to clear the threads since neither of them can be started from the other side. I've never seen anything like it. Since it's the first piece of the kit that goes on I can't really get to it anymore to drill it out without removing the axles and diff.
1681000845545.jpeg

Putting in the steering rack it became clear that there is no access to install the nuts that hold it on through the new crossmember. The original crossmember had specific access holes for these. If my hands were any bigger at all I wouldn't have been able to get my fingers past the control arm bushing to start the nut onto the threads. Had this been totally impossible I would've had to take the entire front end apart to get to it....or more likely got out the sawzall to make my own access point.

I'm not sure if it's something I've done but I'm going to also blame the kit for having misplaced offsets on the spindles for caliper brackets. Since the kit specifically calls for 12" brakes up front from an Explorer, I was surprised to find that the caliper brackets did not fit. Neither did the originals. By my count, the spacing was off by 10.5mm which is not an insignificant amount. I had to buy longer bolts and stack washers 5 or 6 deep to make up the difference. In the end I got it to work but I couldn't believe how far off it was. Other than that though the Explorer brakes went right on. Time will tell if a hard stop shears off my whole front end.
1681001449241.jpeg

My last complaint so far is back to the lack of hardware. My kit was missing some nuts and bolts and I think I am up to trip number 4 or 5 going to the store to get them. One of my hardware bags was ripped which might indicate that items were lost in transit, except that the boxes were very much sealed. These items were never boxed. Additionally, after making my way through the instructions I feel that in several cases where they say to "reuse factory hardware" is good in theory, but many of my factory bolts broke in half on me or were otherwise rusted to death where it would've been nice to have some included in the kit.

With all that said it is complete and I'm over it. It was a $1000 kit and honestly if I did it again I'd feel bad paying more then $400 due to quality. The last kick in the pants after hours of struggling and multiple trips to the Rural King was that the factory Ford lug nuts were too large to fit the holes on the wheels I bought. Despite this I put one on anyway to see some much needed visual progress.
1681002142688.jpeg

After all that, I am back to waiting on parts. I cleaned up the rear axle and it seems that in my haste to find one I didn't notice that while the gears seem ok, pretty much the entire rest of it needs reworked. At least three studs are broken off, brake lines and hoses are toast, the brakes themselves need completely replaced, and I've got to place new spring and shock mounts to go from the Explorer config to Ranger.
1681002487230.jpeg

I am taking a break on this for the next week or two due to another project car being placed at my feet. I doubt it will take long and my hope is that I can use a few side jobs to claw back some Ranger money. In 2-3 weeks I hope to have this axle welded up, placed, and the engine in place.
 

Sponsored Ad


Sponsored Ad

Members online

Today's birthdays

Member & Vendor Upgrades

For a small yearly donation, you can support this forum and receive a 'Supporting Member' banner, or become a 'Supporting Vendor' and promote your products here. Click the banner to find out how.

Truck of The Month


Shran
April Truck of The Month

Recently Featured

Want to see your truck here? Share your photos and details in the forum.

Follow TRS On Instagram

TRS Events

25th Anniversary Sponsors

Check Out The TRS Store


Sponsored Ad


Sponsored Ad

Sponsored Ad


Amazon Deals

Top