
- Joined
- Apr 28, 2008
- Messages
- 387
- Reaction score
- 7
- Points
- 18
- Location
- Fresno CA
- Engine Size
- 4.0
- Transmission
- Manual
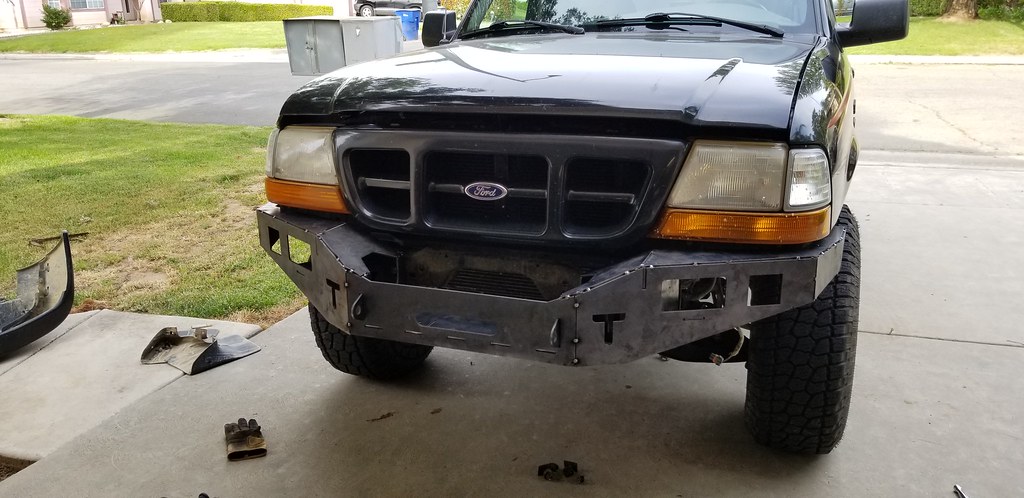
I built this bumper for the newer rangers and figured a few of you might want to see it. This bumper bolts to the factory bumper mounts.
I start with a tape measure paper pencil and bunch of head scratching. Then I transfer it all to the computer into a cad program and eventually cut it my cnc plasma table.
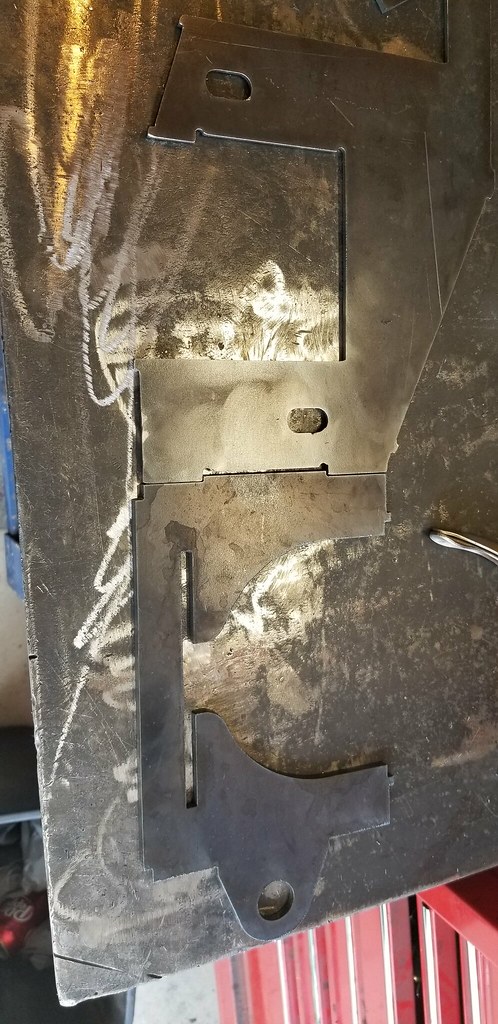
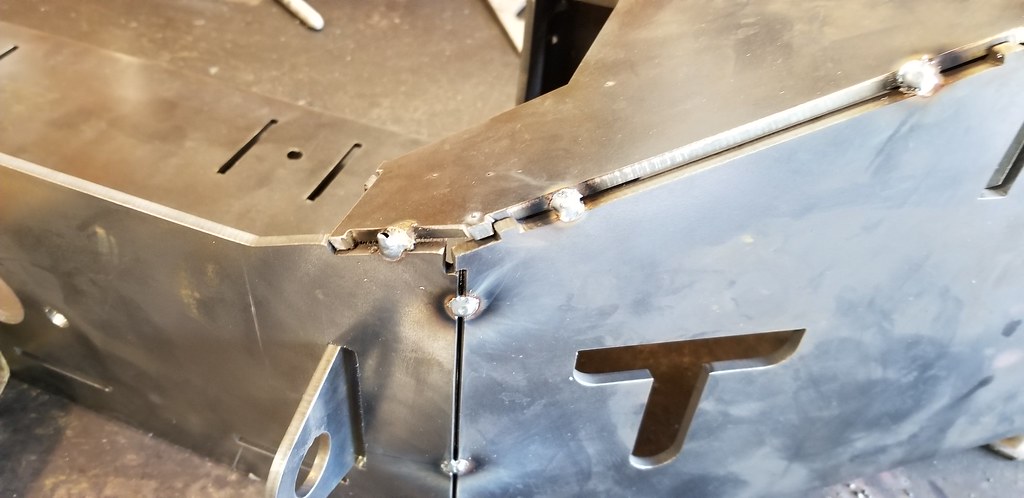
First pieces are the pieces the mount to the frame and the sides that hold the winch plate. Notice how they are keyed together and are welded at a 90 degree angle. two sides are built as mirror images of each other.
 20180501_122013 by Matthew Dresselhaus, on Flickr
Then the center winch piece is added.
 20180501_125825 by Matthew Dresselhaus, on Flickr
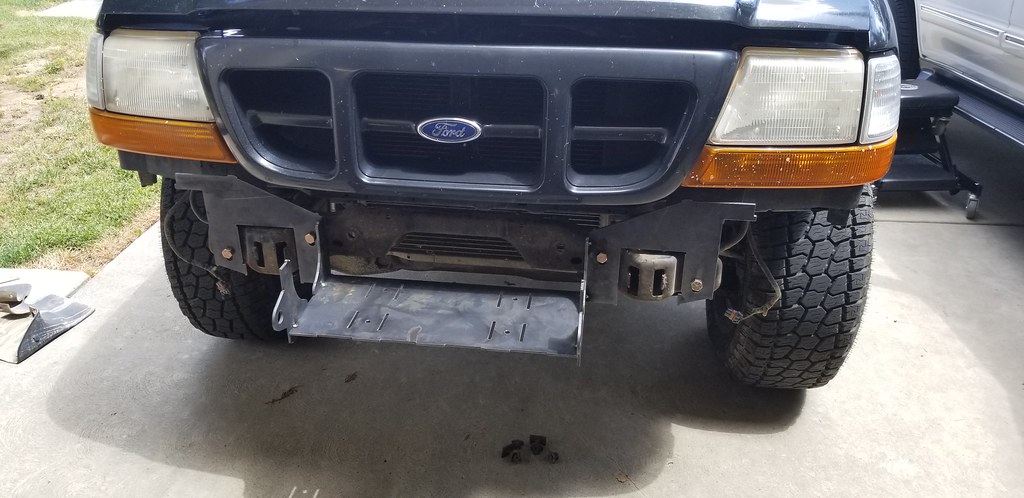
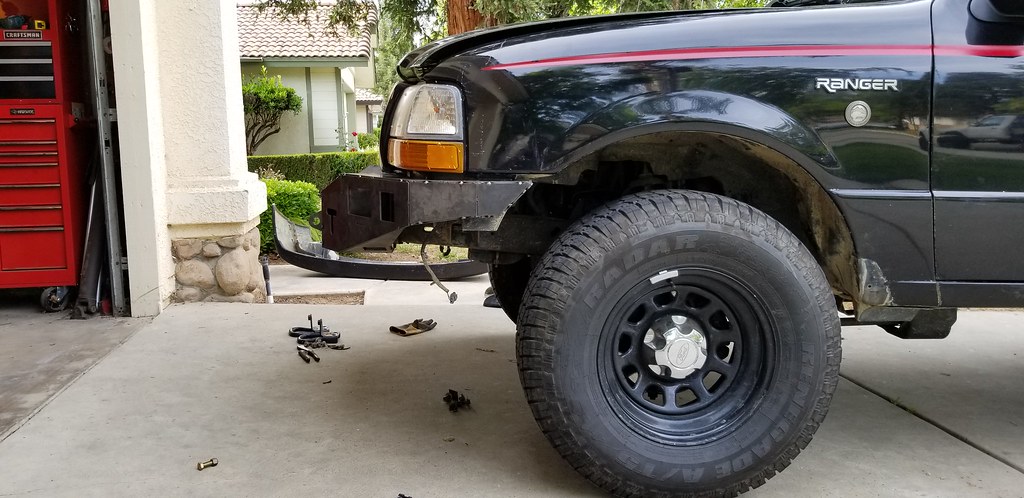
A test fit on the truck to make sure all my measurements were right.
 20180501_130843 by Matthew Dresselhaus, on Flickr
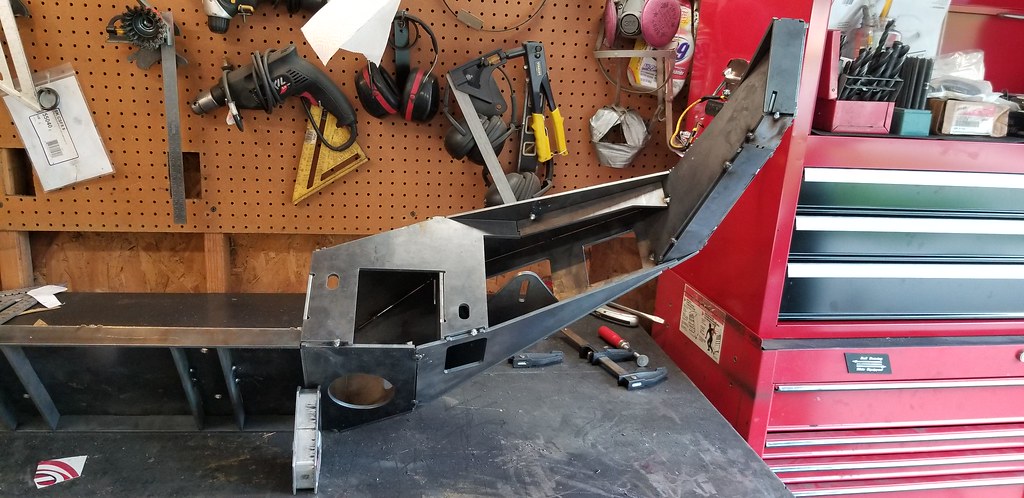
Next I built out the side to double check all my measurements.
 20180501_160130 by Matthew Dresselhaus, on Flickr
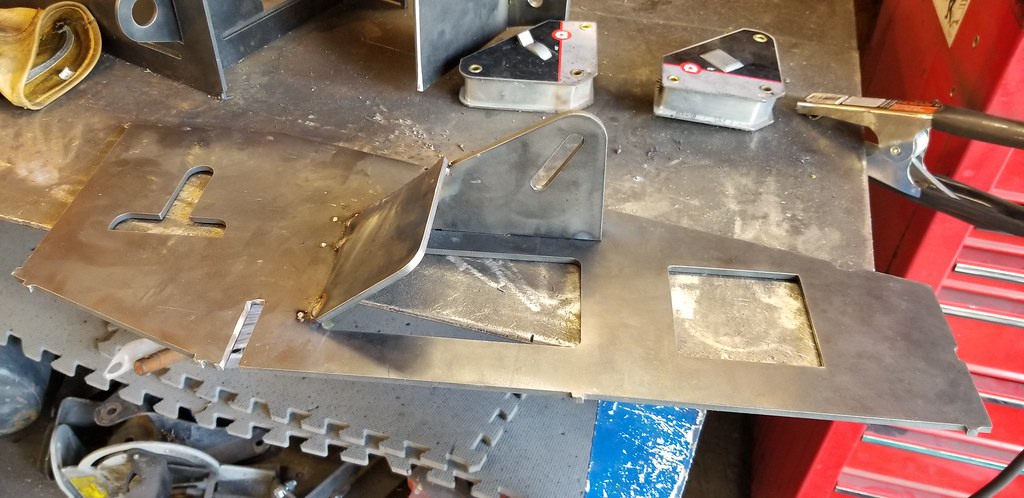
Once I verified that everything was good. I cut all the remaining pieces and started assembly. I added the inner tabs for the pod lights.
 20180501_164446 by Matthew Dresselhaus, on Flickr
Then tacked the remaining pieces together. I added all the supports for the winch and outer wings.
 20180501_164802 by Matthew Dresselhaus, on Flickr
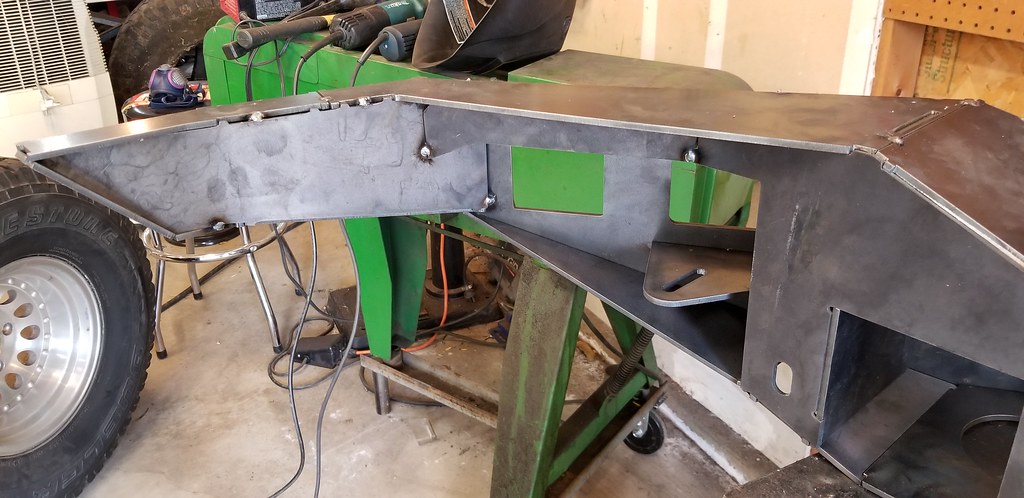 20180501_174300 by Matthew Dresselhaus, on Flickr
 20180501_174328 by Matthew Dresselhaus, on Flickr
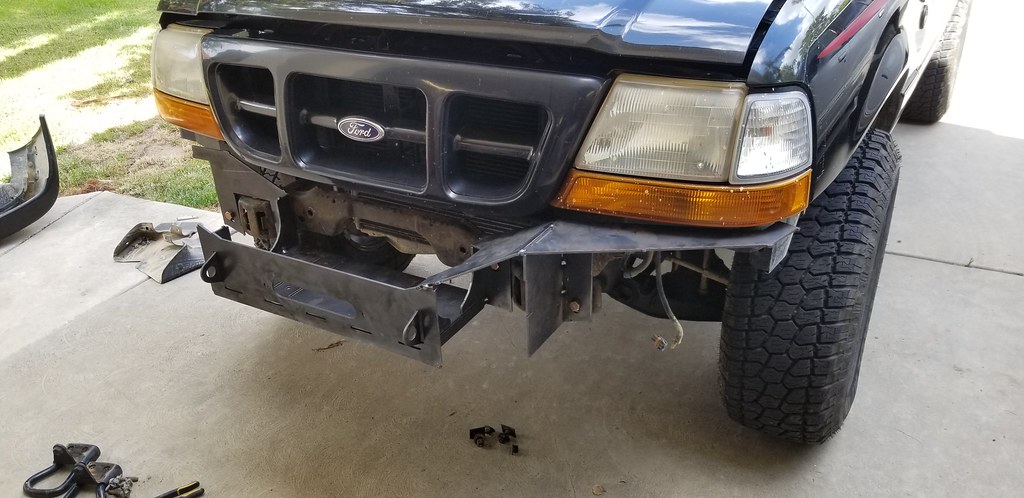
Then test fit it on the truck. Fit like a glove.
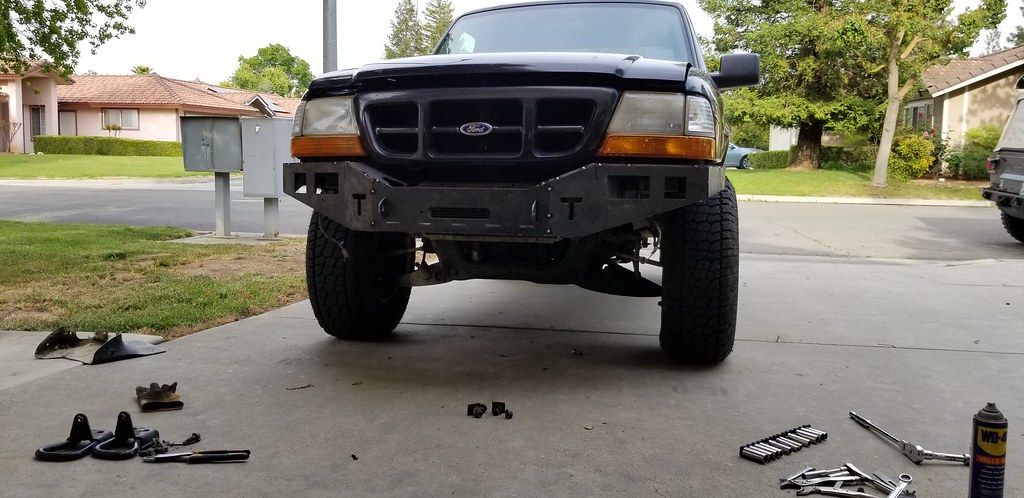 20180501_173556 by Matthew Dresselhaus, on Flickr
 20180501_173456 by Matthew Dresselhaus, on Flickr
 20180501_173514 by Matthew Dresselhaus, on Flickr
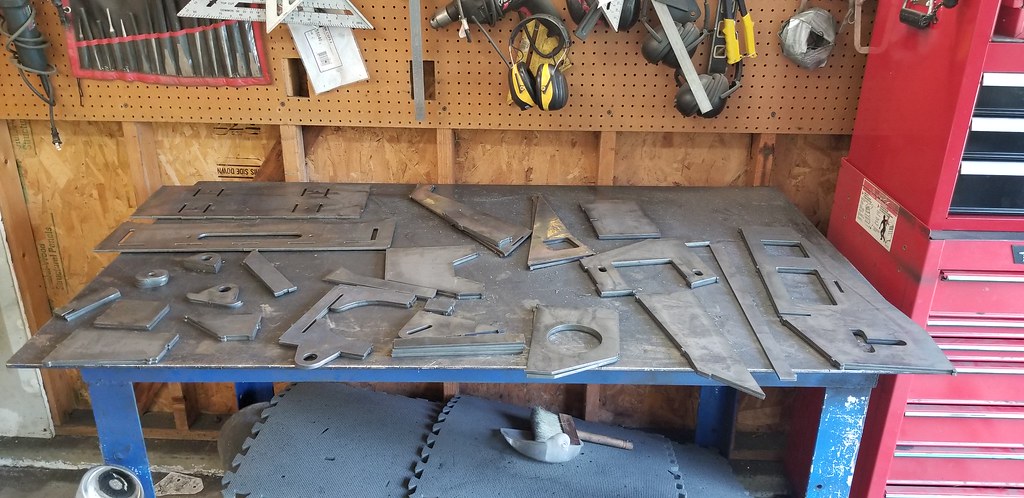
Here are all the pieces that make up the bumper.
 20180505_143718 by Matthew Dresselhaus, on Flickr
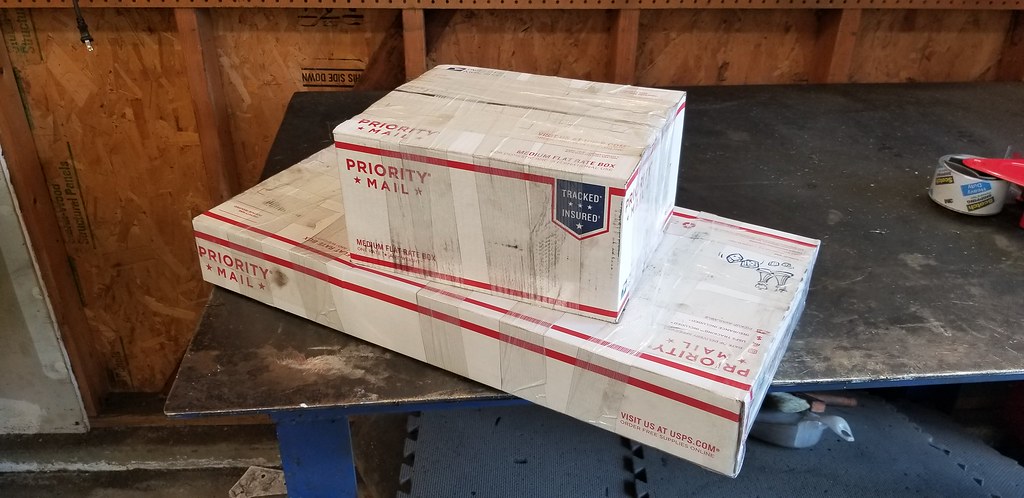
They all happen to fit in two flat rate boxes as well......
 20180505_151117 by Matthew Dresselhaus, on Flickr
I start with a tape measure paper pencil and bunch of head scratching. Then I transfer it all to the computer into a cad program and eventually cut it my cnc plasma table.
First pieces are the pieces the mount to the frame and the sides that hold the winch plate. Notice how they are keyed together and are welded at a 90 degree angle. two sides are built as mirror images of each other.
20180501_122013 by Matthew Dresselhaus, on FlickrThen the center winch piece is added.
20180501_125825 by Matthew Dresselhaus, on FlickrA test fit on the truck to make sure all my measurements were right.
20180501_130843 by Matthew Dresselhaus, on FlickrNext I built out the side to double check all my measurements.
20180501_160130 by Matthew Dresselhaus, on FlickrOnce I verified that everything was good. I cut all the remaining pieces and started assembly. I added the inner tabs for the pod lights.
20180501_164446 by Matthew Dresselhaus, on FlickrThen tacked the remaining pieces together. I added all the supports for the winch and outer wings.
20180501_164802 by Matthew Dresselhaus, on Flickr20180501_174300 by Matthew Dresselhaus, on Flickr20180501_174328 by Matthew Dresselhaus, on FlickrThen test fit it on the truck. Fit like a glove.
20180501_173556 by Matthew Dresselhaus, on Flickr20180501_173456 by Matthew Dresselhaus, on Flickr20180501_173514 by Matthew Dresselhaus, on FlickrHere are all the pieces that make up the bumper.
20180505_143718 by Matthew Dresselhaus, on FlickrThey all happen to fit in two flat rate boxes as well......
20180505_151117 by Matthew Dresselhaus, on Flickr


