85_Ranger4x4
Forum Staff Member
TRS Event Staff
TRS Forum Moderator
Article Contributor
V8 Engine Swap
OTOTM Winner
TRS Banner 2010-2011
TRS 20th Anniversary
VAGABOND
TRS Event Participant
- Joined
- Aug 7, 2007
- Messages
- 32,318
- Reaction score
- 17,774
- Points
- 113
- Location
- SW Iowa
- Vehicle Year
- 1985
- Make / Model
- Ford
- Engine Type
- V8
- Engine Size
- 5.0
- Transmission
- Manual
On facebook a guy shared a writeup on how to fix this style of lift system (HECO) Somebody gave it to him so he didn't write it and nobody really knows where it came from. Sounds pretty plausible though:
To repair the rear backboard, leaving the roof mounted to the camper, the first thing to do is raise the roof and remove the tension of the torsion bars. The torsion lift system uses a rear “set” bracket to provide the twist to the torsion bars to help raise the roof. In the neutral position (off the camper) the set is usually about 7 degrees. This means the roof bar’s 2 drop legs will tilt out at 7 degrees if the roof was off and sat upside down.
When the roof is raised, place blocks under the sides of the roof for support to keep it up. You can either cut 2x4’s and jam them up off the lower body to the bulb seal or use full length boards off the ground.
Then the lift bars will need to be disconnected from the front rack crank mechanism and the rear pivot support. Remove the bolt from the pivot in the rear and then the one in the front lift bar. This will free the lower support “U” bar. That’s the you need to support the roof being up with 2x4 blocks.
The next step is to release the tension of the torsion bars in the upper part of the system. This usually takes 2 people. The front straight bar that is slid over the roof drop leg is bolted to the front rack at the foot of the bed, Remove the ¼ hex screw that sets the height of that bar to the drop leg because it will need to be pulled off. Once that screw is removed and the front lower bolt is removed from the front rack, a second person needs to grab the drop bar in the rear of the camper and use it as a lever to pull in enough to provide the angle to slide the long front bar off the upper drop leg. Once that long tube is slid off, the back bar can return to is neutral position. The bottom part of the leg with angle out towards the tent. Now all tension is off the rear corner set bracket in the back of the roof.
This must be done on both sides if the back board is so rotted the entire back needs to be replaced. If it is just one corner, the opposite side can be left as is.
Now, the deconstruction can begin to get to the rotted plywood. The canvas tent will need to be dropped in the corner. Some of the older campers stapled and screwed the tent to the interior of the roof, some used a plastic extrusion to clip the tent in with a tab sewn to the top of the tent. Once the tent is dropped to expose the interior corner, the rear steel set bracket can be removed. The cast corners on each side needs to be removed next. There may be a screw set straight up from the inside to hold the very top lip of the corner in place, some manufacturers only used the rivets in the exterior extrusion and silicone to hold the corners.
To remove the “h” extrusion, the bulb seal needs to be pulled out of the track and the screws holding it in place need to be removed. I have left the clearance light wires hold the extrusion while I repair the plywood, but it is much more convenient to get it out of the way by disconnecting the wires from the side markers. The R.O.L lights use a brass finger to hold the wire pushed in from the backside. If you pop the lens off, you can use a screwdriver to lift the brass finger holding the wires and pull it out of the back of the light.
There may be a small steel angle bracket in the corner also that will need to be removed too!
Now the entire back corner should be exposed. This is when I determine which repair method is needed.
If the plywood is dry and hard across the back except right in the very corner, you can just splice in new plywood. If the rot extends towards the center or if bother corners show rot, the entire back section needs to be replaced.
Replacing just the corner will involve cutting the back board where the rot stops to remove all the soft material. Then cut though one layer of the plywood back board about a foot from the end of the previous cut. This will give the replacement board support for slicing it back into place.
Once all the soft, rotted plywood is removed from the repair area, sand away as much of the epoxy left on the inside of the roof metal.
If the entire back plywood back board is going to be replaced, just get the metal as smooth as possible to hold the adhesive to the new back board.
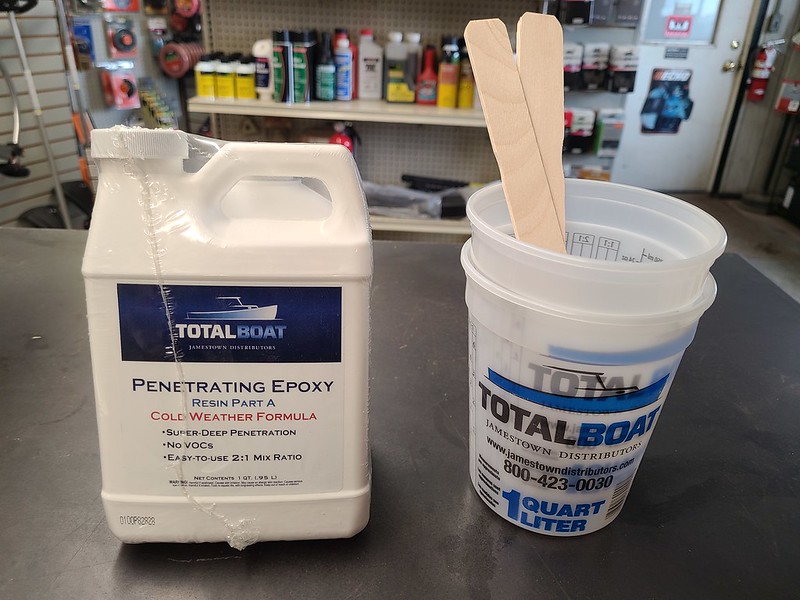
The replacement wood needs to be 1” thick and it is usually 2 pieces of 1’2” plywood glued and fastened together. The replacement piece on the single corner fix will need to have 2 different length ½” boards. One the length of the original cut to the corner and the second, longer piece to reach the cut of the second one layer of plywood. That longer tongue provides the bonding area to keep the repair board straight and strong. Using high strength adhesive like Sika Flex , bond the new replacement piece to the existing back board and roof metal. Clamp in place until dry.
Screws can help hold the plywood splice also.
Now the roof can be reassembled in the reverse steps. The rear corner set bracket needs to be installed horizontal to the back wall. This will allow the torsion bar to provide the correct lift pressure. On some of the older campers, I noticed that only ¼” bolts where used to hold the bracket to the back wall. I replace those with 5/16” bolts.
There have been a couple roofs that had very little rot in the corners, but the mounting bolts were beginning to twist under pressure. With that little damage, I could use thin steel plate the width of the corner set bracket for the repair. I bent the plate at a 90-degree angle with legs long enough to bite into solid wood on both the side and rear. I used a multi hole pattern of 3/16” holes to mount the plate into place and used the corner bracket to mark the holes needed to mount that. That gave the rear corner enough reinforcement to hold for many years
And of course since nobody else has done it I hope to make a pictorial thing as I go on how I do it...
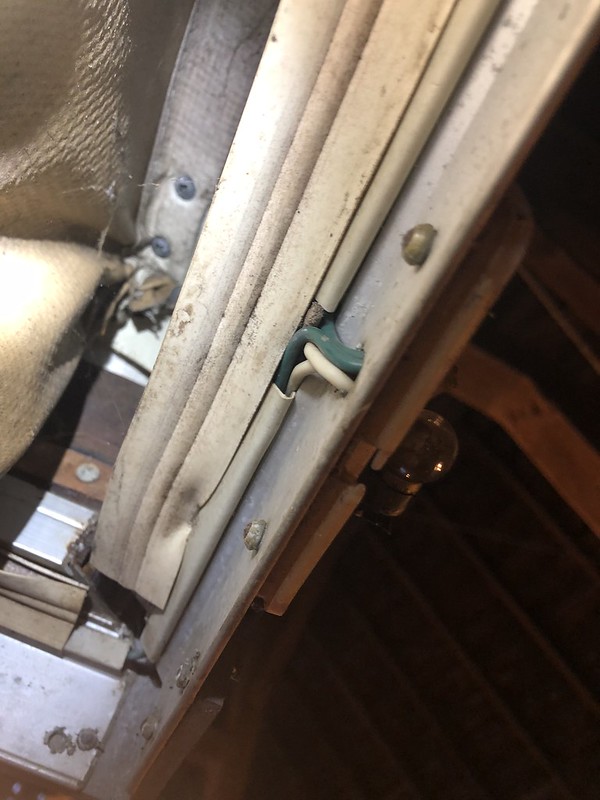
This is what I have going on (roof is up so you don't see as much of the bracket as you do when it is down)

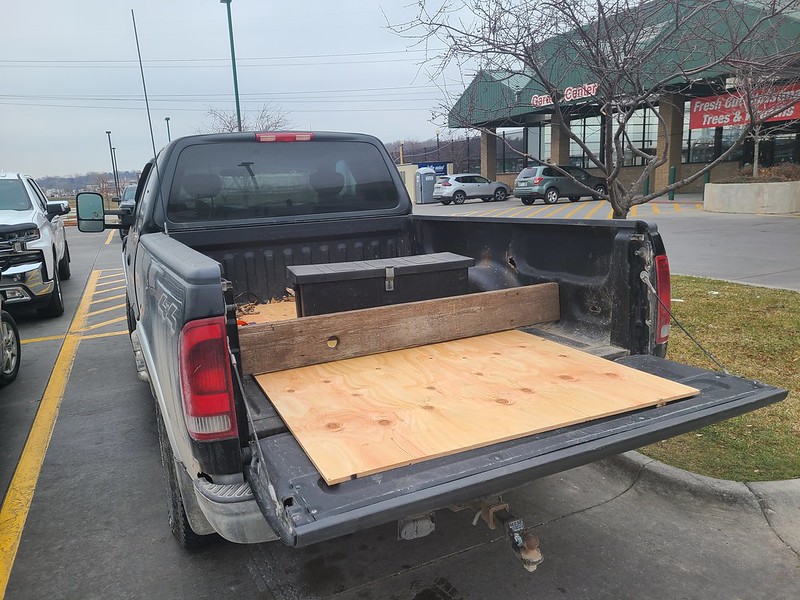
This was my temporary solution to keep it dry until I got it inside. The whole roof needs resealed too, I goobered here and there with clear silicone where it was really bad, I didn't clean anything so it would be easier to remove when I actually resealed it.

To repair the rear backboard, leaving the roof mounted to the camper, the first thing to do is raise the roof and remove the tension of the torsion bars. The torsion lift system uses a rear “set” bracket to provide the twist to the torsion bars to help raise the roof. In the neutral position (off the camper) the set is usually about 7 degrees. This means the roof bar’s 2 drop legs will tilt out at 7 degrees if the roof was off and sat upside down.
When the roof is raised, place blocks under the sides of the roof for support to keep it up. You can either cut 2x4’s and jam them up off the lower body to the bulb seal or use full length boards off the ground.
Then the lift bars will need to be disconnected from the front rack crank mechanism and the rear pivot support. Remove the bolt from the pivot in the rear and then the one in the front lift bar. This will free the lower support “U” bar. That’s the you need to support the roof being up with 2x4 blocks.
The next step is to release the tension of the torsion bars in the upper part of the system. This usually takes 2 people. The front straight bar that is slid over the roof drop leg is bolted to the front rack at the foot of the bed, Remove the ¼ hex screw that sets the height of that bar to the drop leg because it will need to be pulled off. Once that screw is removed and the front lower bolt is removed from the front rack, a second person needs to grab the drop bar in the rear of the camper and use it as a lever to pull in enough to provide the angle to slide the long front bar off the upper drop leg. Once that long tube is slid off, the back bar can return to is neutral position. The bottom part of the leg with angle out towards the tent. Now all tension is off the rear corner set bracket in the back of the roof.
This must be done on both sides if the back board is so rotted the entire back needs to be replaced. If it is just one corner, the opposite side can be left as is.
Now, the deconstruction can begin to get to the rotted plywood. The canvas tent will need to be dropped in the corner. Some of the older campers stapled and screwed the tent to the interior of the roof, some used a plastic extrusion to clip the tent in with a tab sewn to the top of the tent. Once the tent is dropped to expose the interior corner, the rear steel set bracket can be removed. The cast corners on each side needs to be removed next. There may be a screw set straight up from the inside to hold the very top lip of the corner in place, some manufacturers only used the rivets in the exterior extrusion and silicone to hold the corners.
To remove the “h” extrusion, the bulb seal needs to be pulled out of the track and the screws holding it in place need to be removed. I have left the clearance light wires hold the extrusion while I repair the plywood, but it is much more convenient to get it out of the way by disconnecting the wires from the side markers. The R.O.L lights use a brass finger to hold the wire pushed in from the backside. If you pop the lens off, you can use a screwdriver to lift the brass finger holding the wires and pull it out of the back of the light.
There may be a small steel angle bracket in the corner also that will need to be removed too!
Now the entire back corner should be exposed. This is when I determine which repair method is needed.
If the plywood is dry and hard across the back except right in the very corner, you can just splice in new plywood. If the rot extends towards the center or if bother corners show rot, the entire back section needs to be replaced.
Replacing just the corner will involve cutting the back board where the rot stops to remove all the soft material. Then cut though one layer of the plywood back board about a foot from the end of the previous cut. This will give the replacement board support for slicing it back into place.
Once all the soft, rotted plywood is removed from the repair area, sand away as much of the epoxy left on the inside of the roof metal.
If the entire back plywood back board is going to be replaced, just get the metal as smooth as possible to hold the adhesive to the new back board.
The replacement wood needs to be 1” thick and it is usually 2 pieces of 1’2” plywood glued and fastened together. The replacement piece on the single corner fix will need to have 2 different length ½” boards. One the length of the original cut to the corner and the second, longer piece to reach the cut of the second one layer of plywood. That longer tongue provides the bonding area to keep the repair board straight and strong. Using high strength adhesive like Sika Flex , bond the new replacement piece to the existing back board and roof metal. Clamp in place until dry.
Screws can help hold the plywood splice also.
Now the roof can be reassembled in the reverse steps. The rear corner set bracket needs to be installed horizontal to the back wall. This will allow the torsion bar to provide the correct lift pressure. On some of the older campers, I noticed that only ¼” bolts where used to hold the bracket to the back wall. I replace those with 5/16” bolts.
There have been a couple roofs that had very little rot in the corners, but the mounting bolts were beginning to twist under pressure. With that little damage, I could use thin steel plate the width of the corner set bracket for the repair. I bent the plate at a 90-degree angle with legs long enough to bite into solid wood on both the side and rear. I used a multi hole pattern of 3/16” holes to mount the plate into place and used the corner bracket to mark the holes needed to mount that. That gave the rear corner enough reinforcement to hold for many years
And of course since nobody else has done it I hope to make a pictorial thing as I go on how I do it...
This is what I have going on (roof is up so you don't see as much of the bracket as you do when it is down)
This was my temporary solution to keep it dry until I got it inside. The whole roof needs resealed too, I goobered here and there with clear silicone where it was really bad, I didn't clean anything so it would be easier to remove when I actually resealed it.