|
|
||||||||||||||
|
|
||||||||||||||
|
|
|
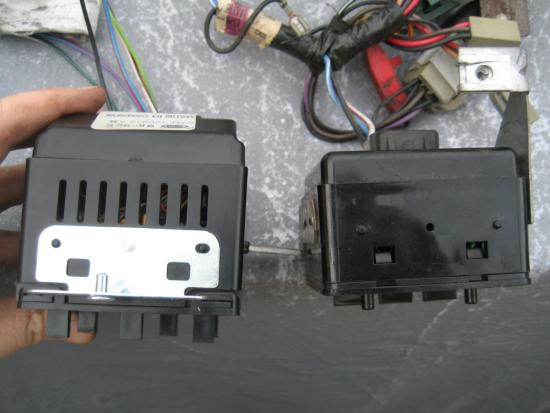
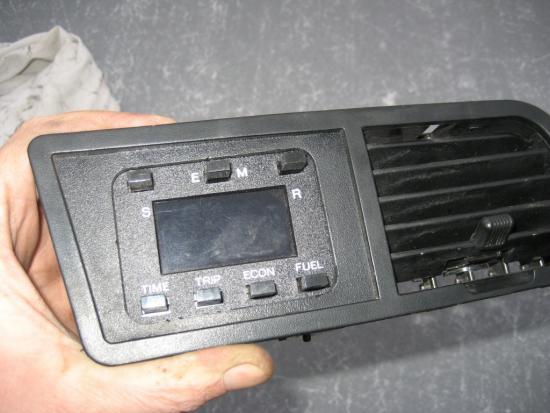
Original Poster: Philc Disclaimer: Activities and vehicle modifications appearing or described at The Ranger Station and it's pages may be potentially dangerous. We do not endorse any such activity for others or recommend it to any particular person - we simply describe the experiences and opinions of other Ranger/Bronco II owners. If you choose to engage in these activities it is by your own free will and at your own risk. Any and all modifications will likely cause a vehicle to behave differently than stock. Some modifications may significantly increase your risk when driving the vehicle or be dangerous in some driving situations. Use good judgment when engaging in any activity or making any modifications. Do not take unwise risks. Consult a certified professional if you are not sure of something. The Ranger Station and the authors of these articles assume no liability for how any particular individual chooses to use the information presented here. Some of these modifications may void your vehicles warranty. Please also read our Legal notice HERE. Tripminder (MPG meter) install in a '93 Ranger A Tripminder is a small computer offered as an option in the '80s to show Time/Date, MPG, average speed, gallons used, etc. It wasn't an option for the Ranger, but this document will cover the install steps. I installed it where my 4wd and hi/low buttons were, and I relocated those to below the dash. I know driving economically isn't for every ranger owner, but the more you save on fuel, the more you can spend on your truck. Most of the tripminder specific stuff can be found from http://www.coolcats.net/tech/advanced/tripminder.html including pinouts and getting your tripminder to work. Please refer to this for non-ranger specific info. It also lists what cars you can find them in. Mine cost me a heafty $12.50 from the local junkyard, you may get it cheaper. The tripminder is very similar to the regular clock found in other fords, including this one from my '86 mustang SVO (I'll be doing a tripminder in that car next)
The unit even has similar mounting points to the clock
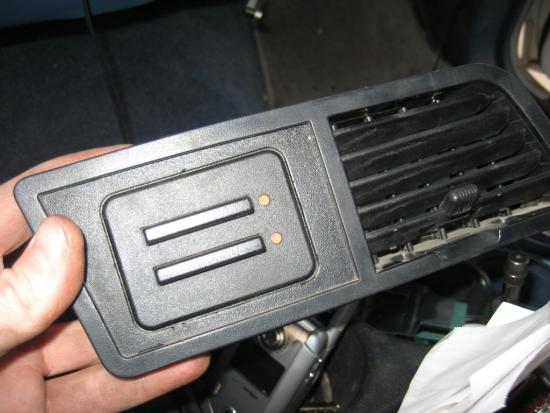
For the '93 ranger install, I installed it here the 4wd and hi/lo buttons are. To remove the console, you'll need to use a putty knife and push in the tabs that are holding it in place top and bottom (see later pics to see what the tabs look like)
Remove the button assembly from the housing
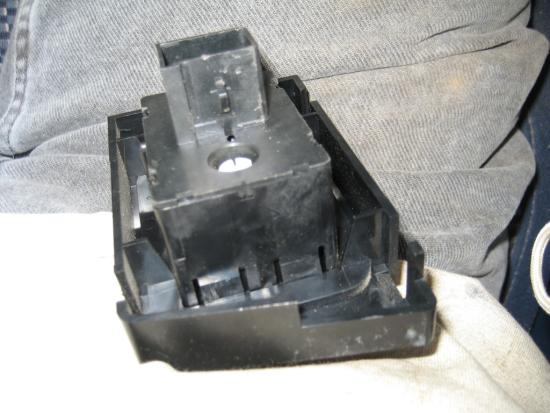
This is done with a screwdriver inserted between the switch and housing
The small frame will separate from the vent easily. You'll need a Dremel for this part. I removed a lot of plastic from the bezel, including a section from the bottom so the tripminder is centered in the opening. I also removed the recessed part of the face.
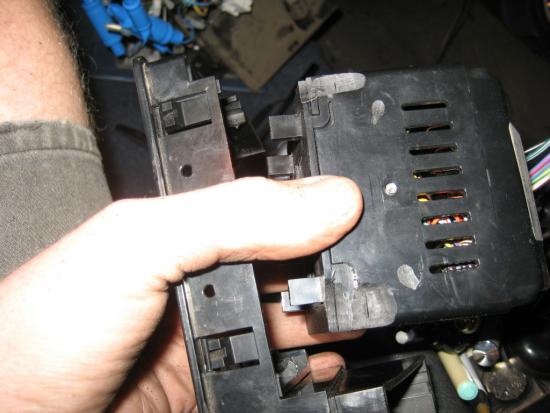
*NOTE* the tabs on the bracket need to move in for installing and removing the console. I ground the tripmeter so the tabs have someplace to move.
You'll notice in this pic the tripminder sits lower than the bezel. you'll need to remove the plastic from the larger bezel to get it to fit
The tripminder must be secured to the bezel w/ epoxy. this is what a mounted tripminder will look like
A section of the dash will need to be removed. I did this with a Dremel cutting wheel. I also relocated the 4x4 switch by extending the harness and mounting it under the dash.
To wire up the tripminder I pulled most of the needed connections from the back of the radio. I have an aftermarket stereo, so the wires for the stereo were already labeled +12v, ignition, ground, dash illumination, etc. I needed to run 2 additional wires for the tripminder, one that goes to the VSS (pin 3 on the EEC-IV computer), and one for fuel data (pin 34 on the EEC-IV computer). Wiring: Wiring up the tripminder to the computer- The
EEC-IV engine EFI processor is located on the drivers side of
the engine bay. I needed to remove the cruise control module to
get to it.
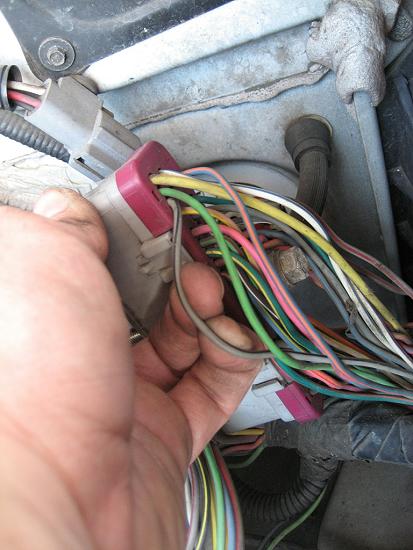
The harness is removed from the computer w/ a 10mm ratchet. I also removed the large round connector and the ground wire to make it easier. The Vehicle speed sensor (VSS) is on pin 3. On the connector, you'll see the ends of the row of pins numbered, so pin 3 is easy to find. On my '93 4.0L ranger, it was gray w/ a black stripe.
The VSS from the Tripminder (pin 8) connects to this. The Data output line (DOL) or Fuel Flow Input is a little trickier. This goes to pin34 of the computer, but pin 34 isn't used on a ranger so you'll need to add it. I marked pin 34 w/ a sharpie so I'd know where to drill.
Open up the connector with a small screwdriver-
And pull the purple piece from the connector. You'll notice that the purple piece has "dummy plugs" that go into unused holes on the computer. you'll need to reach in w/ a screwdriver and snap these off for pin 34. Drill a small hole where pin 34 should go on the purple piece. Remove the red pin securing bracket from the connector w/ a small flathead screwdriver. Pry it out carefully.
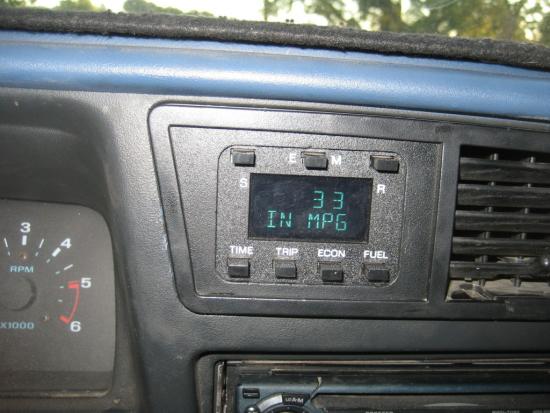
The red piece should lift out. Using a spare pin obtained from a junk harness or from a junkyard, push the pin into the position for pin 34 and replace the red piece. Connect the newly added pin34 to the data connection from the tripminder (pin 6 on the tripminder), and re-connect the computer and anything else removed to get to the harness. Here is a pic of me coasting down a hill. No, my ranger does not get 33 mpg normally.
|
|
|