|
Serving Ranger, Bronco II, Explorer & Mazda B-Series Owners Since 1999 |
|
| Home | Forums | Tech Library | Magazine | Video Gallery | Truck Gallery | Shirts & Decals | TRS Fab & Off-Road |
|
Front Mount Receiver Install |
|
|||||||
|
Original Poster: -Nathan- Difficulty: 4 out of 10 Time to install: 0.5-1 hrs. Disclaimer: Activities and vehicle modifications appearing or described at The Ranger Station and it's pages may be potentially dangerous. We do not endorse any such activity for others or recommend it to any particular person - we simply describe the experiences and opinions of other Ranger/Bronco II owners. If you choose to engage in these activities it is by your own free will and at your own risk. Any and all modifications will likely cause a vehicle to behave differently than stock. Some modifications may significantly increase your risk when driving the vehicle or be dangerous in some driving situations. Use good judgment when engaging in any activity or making any modifications. Do not take unwise risks. Consult a certified professional if you are not sure of something. The Ranger Station and the authors of these articles assume no liability for how any particular individual chooses to use the information presented here. Some of these modifications may void your vehicles warranty. Please also read our Legal notice HERE. Brief Explanation: For those of us without tow hooks, this is a great alternative for a place to pull on. The Hidden Hitch receiver is no longer in production, but this Drawtite one is readily available.
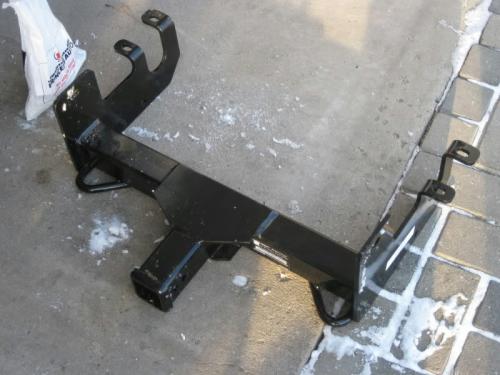
Tools Needed: 1. First you need to get your front mount hitch, I purchased this Drawtite 65017 from hitchesonline.com
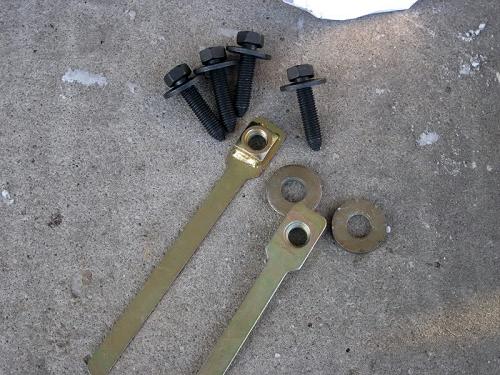
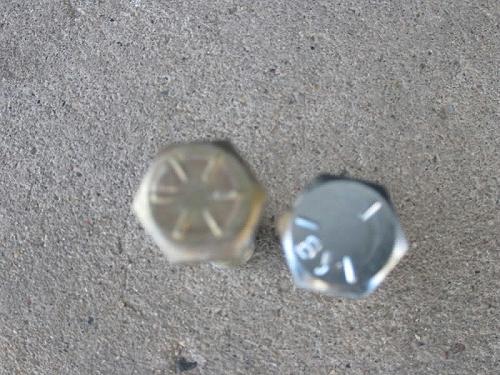
2. This is the hardware that comes with the hitch, I opted to exchange the grade 5 bolts that pass through the frame rails with grade 8 bolts.
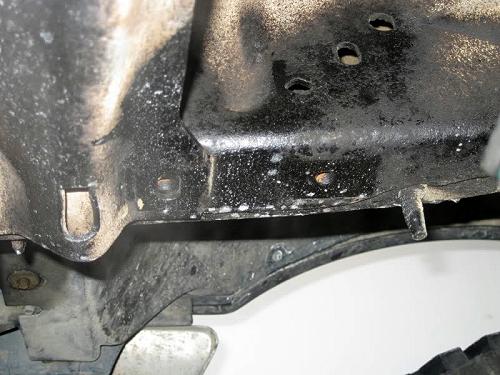
3. The rearmost bolts pass through the frame rails, utilizing the existing sway bar mount holes. There are nuts welded inside the frame rails. I removed my sway bar previously, but if you still have your sway bar, remove the bolts these bolts.
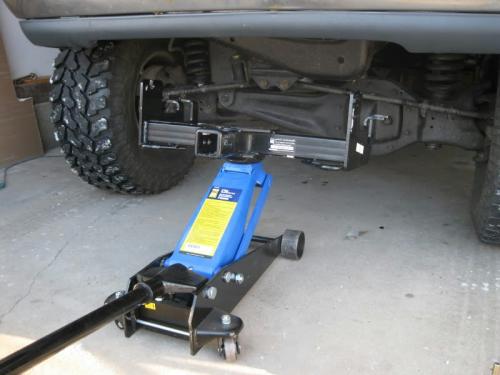
4. Now if you’re doing this yourself, as I did, balance the hitch on a jack, and raise it into position.
5. It is easiest to start the rear bolts, just to align it, as the nuts are already there in the frame rail. This is where those washers come into play…the hitch is designed to be place over the sway bar mounts, but if you no longer have your sway bar (like me) just place 2 – 0.5” washers in between the hitch and the frame to make up for the difference. *Note – the washers aren’t in place yet in the picture.
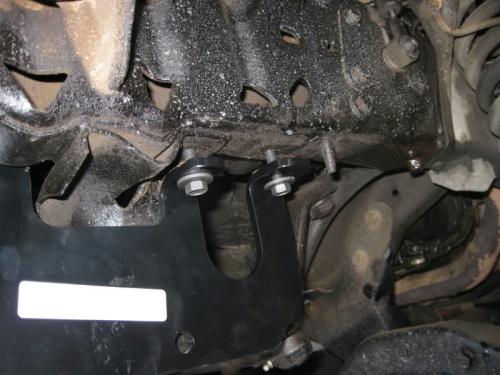
6. Next pass the bolts ( I used grade 8 instead) from the inside, towards the side of the truck. I used a washer in between the hitch and side of the frame to make sure it fit snug.
7. Now pass those “nuts on a stick” up into the frame, and thread the bolt into them. They are the middle holes, just for reference.
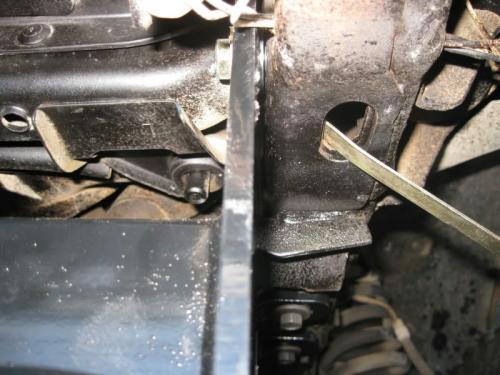
Below is a picture from the front, you can see the bolt passing from the inside – the hitch – washer – frame – and nut.
8. Now tighten everything up, and happy towing…or getting towed
|