|
|
||||||||||||||
|
|
||||||||||||||
|
|
|
Replacing 4-inch lift coils with 6-inch lift coils By Forest Ranger This
subject is a Ford Ranger, extended cab 4.0L, 5 speed, 4x4, with the TTB front
axle. Most 4.0L’s sag the lift coils on most kits because of the
weight of the truck. The manufactures supply only one coil rate that way the
one part number for the lift can be used from the 2.3L I4 to the 5.0L V8's
that some people install. With the current 4-inch lift there was still more
height to be added. 6-inch Skyjacker coils were ordered to replace the old
4-inch spring and spacers that were on the truck.
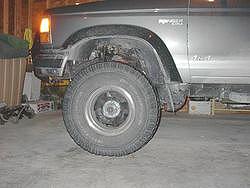
Rear of truck with lift
The new coils would replace the old springs and spacers and give the truck a bit more height, to level it off. With the new coils on hand it was time to start. The truck was pulled into the garage. It can also be done outside if a garage is not available. Start by jacking the truck up by the beams to get jack stands under the frame. Extra tall ones were used in this case because of the already installed 4-inch lift. Shorter ones can be used just behind the radius arm cross-member if taller ones are not available. If you have access to a hoist then it makes the job go a lot faster. This is done to allow the axle beam to droop so that the coil comes out with ease. 4-inch coil with spacers under the coil to get the desired ride height. This is what is going to be eliminated.
Using Chalks, block the rear wheels so that the truck doesn’t roll around. With the truck safe up on the jack stands, remove both front tires. With the jacks still under the beam, disconnect the sway bar links from the axle beam and swing the sway bar out of the way. Now pull the pins that hold the caliper to the spindle. Move the caliper out of the way. Disconnect the top of the shock by unbolting it from the coil bucket. Caliper pins out and caliper moved out of the way.
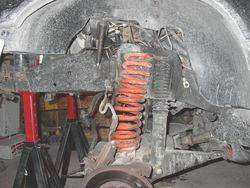
Lower the jacks so as to get more room between the coils. Drop a 1-1/8 inch socket down the coil from the top. (With the spacers a shallow socket is used but when there is no spacer a deep socket is needed to clear the remaining threads of the stud). Position the socket on the retaining nut. Slide the end of the breaker bar through the coil and attach it to the socket and proceed to remove the nut. Doing this, will allow more torque to be applied to remove those rusted on nuts. The nuts were soaked in penetrating oil the day before to ease removal. Breaker bar shown through coil with 1-1/8 inch shallow socket on the coil-retaining nut.
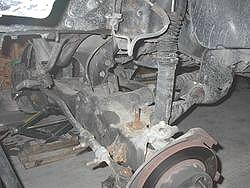
Coil spring removed and ready for the new coil.
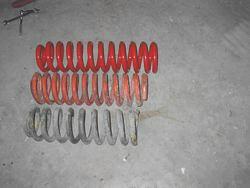
Differences in coil size. The black coil is from a 3-inch Rough Country lift. The orange coil is from a 4-inch Trail-master lift. The red coil is the new 6-inch lift coil from Skyjacker, which will be installed.
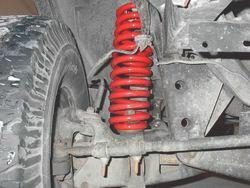
Once the nut and coil retaining washer are removed, lower the jack under the beam to the point that the beam is not being supported by the jack. Rotate the coil so that the top end of the coil comes out of the retaining tab. Once out, remove the coil by pushing the beam down so that the top of the coil comes out of the top bucket. Slide the old coil off of the stud. Remove the coil isolator and centering washer. Now the spacers can be removed. Clean any rust around the area with a wire brush and penetrating oil. Reinstall the coil centering washer and isolator. Insert new coil over lower stud, and rotate the coil into the top retaining tabs. Locate lower isolator so that it is seated properly. Reinstall everything else in the reverse order. Jack the truck back up and put the wheels back on. Now it can be taken to the alignment shop, to get the front back to factory specks. New coil installed ready to put wheels back on.
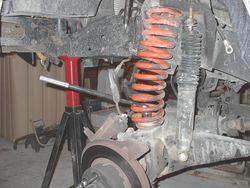
Front view with new 6-inch lifted coils.
Before with 4-inch coils and spacers.
After the new 6-inch coils and tires were reinstalled.
|
|
|