|
|
|
|
Floppy Sun Visor Mod - 1983-1998 Ford Ranger |
|
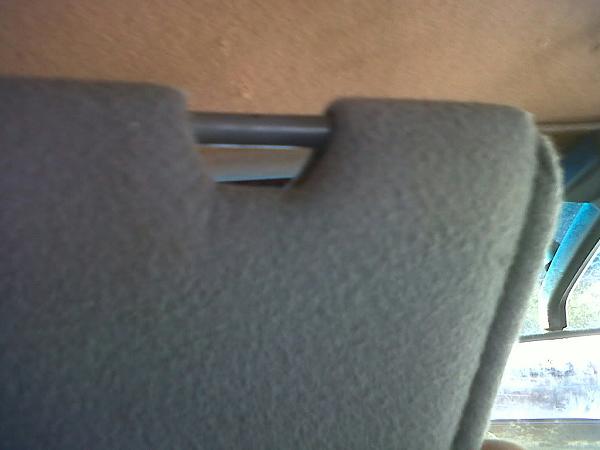
Original Poster: Mark_88 Difficulty: 1 out of 10 Time to install: About 30 Minutes Disclaimer: The Ranger Station.com, The Ranger Station.com Staff, nor the original poster are responsible for you doing this modification to your vehicle. By doing this modification and following this how-to you, the installer, take full responsibility if anything is damaged or messed up. If you have questions, feel free to PM the original poster or ask in the appropriate section of The Ranger Station.com forums. Brief Explanation: The stock sun visors on a Ranger tend to flop around after a few years and this will stop that from happening. I found a set of sun visors in a 91 or 92 Ford Explorer while looking for my seat brackets. I liked them so I decided to try the upgrade. This would be useful to Gen I and maybe some Gen II models that are not equipped with visor clips. Tools Needed: - Drill - 1/8” drill bit - Screw driver bit to fit the screws (depends on what you buy) Parts Needed: - Sun Visors from a model that used clips to secure the inside end to the roof panel - The clips from the donor vehicle - Self tapping or self drilling screws (2) This image shows the part on the inside end where the visor clips to the head liner clip.
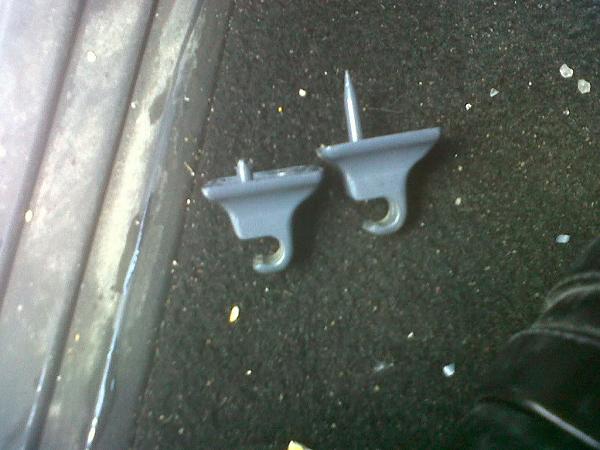
This image shows the clips and the alignment peg. I cut the one on the left so that just a stub will be sticking into the hole to stop it from moving around. As you can see, the original pegs are quite long and I could not get them to mount in my Ranger due to how close the top of the cab is to the roof liner.
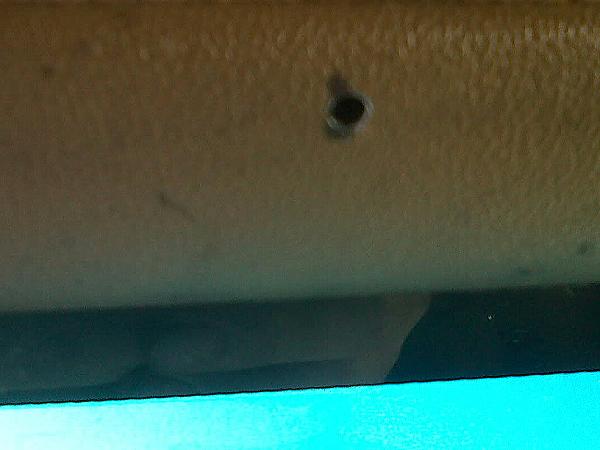
Steps 1: Remove the old visors and install the new visors using the existing mount holes (requires Ford style visors). Steps 2: Hold the end of the new visor up to the head liner strip or suitable position and mark where the clip needs to go. Steps 3: Drill the pilot hole for the screws and the alignment peg and attach the clip to the head liner strip. This image shows the first hole. I used a self drilling screw to drill the second holes for the screws and did this using the actual clip as a guide.
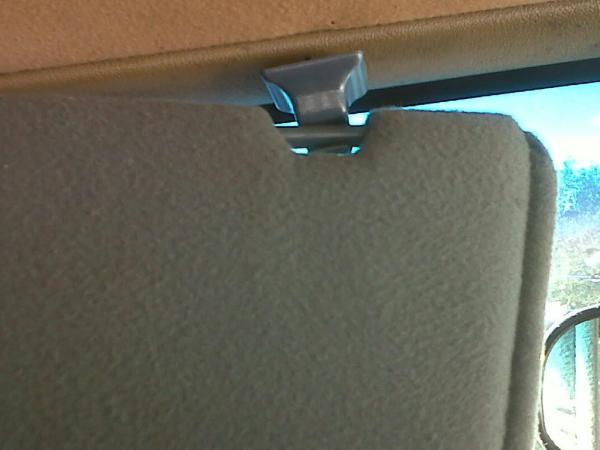
This image shows the clip installed
This image shows the finished product.
See this submission HERE.
|
|
|