
I have seen a few questions pop up recently about Odometers not working. I too had that problem and decided to fix the darn thing. So here is my “How To Article” entitled – Odometer Worm Gear Replacement.
Disclaimer: This article is not guaranteed to fix all issues with the odometer only the replacement of the motor or the gear.
Of course we have to begin by removing all necessary interior panels that will give us access to the instrument panel.
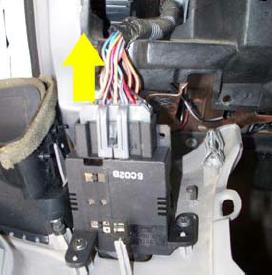
Step 1: I began by removing the two (four screws for those who have not modified their hood open latch, see photo (1) screws on the panel under the steering column. Be careful when pulling the panel out because you can break the spring clips that hold the panel in at the top.
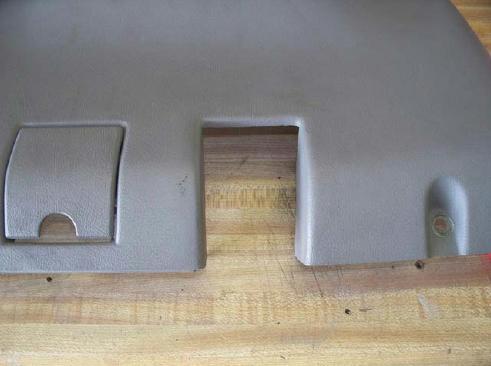
Photo 1: Hood Latch Section Removed.
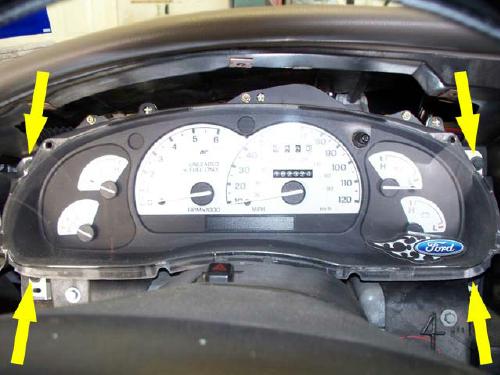
Step 2: Now that the lower panel is off I removed the Lower Dash Trim Panel Screws and the Radio Bezel Screws indicated by yellow arrows. Also take note in the picture the blue arrow indicating the Hood Latch still in place – no need to remove those P.I.A. screws.
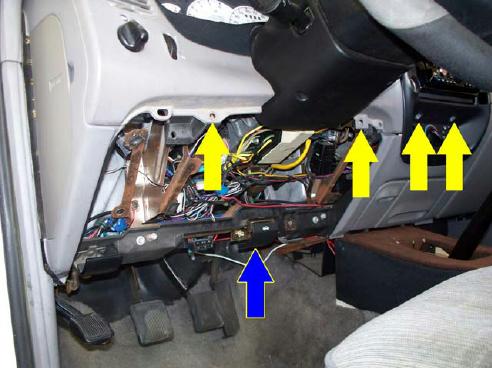
Photo 2: Screws
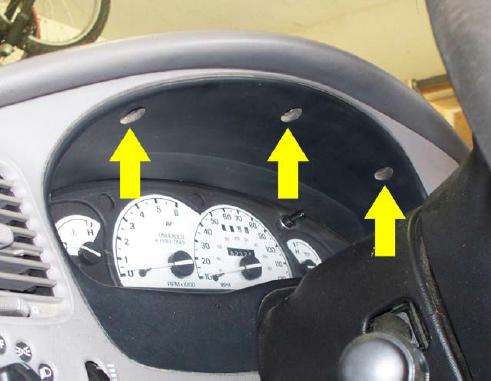
Step 3: Now I removed the Dash Trim Panel Upper Screws as indicated by the yellow arrows.
Step 4: Next I carefully removed the radio bezel first and then gently squeezed the Dash Trim Panel out over the column. The only way to make that easier is to loosen the steering column bolts and lower the column a little. When you get it out you need to unplug the Headlight and Dimmer Switches as shown.
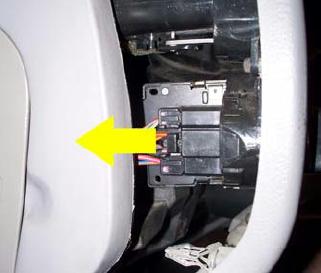
Headlight Switch
Dimmer Switch
Step 5: Now I removed the 4 screws holding the Instrument Panel in place.
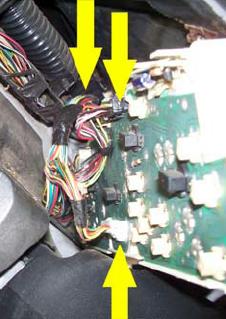
Step 6: Now slide the Instrument Panel (IP) forward, pulling the left side out first. This will give you access to the back side so you can remove the plugs from the back of the IP – on my 95 there are three, two white and one black – see the photo.
Step 7: Now that the IP is out of the truck you need to remove the IP Bezel. This requires the removal of (7) torx drive screws as indicated in the photo.

Screws
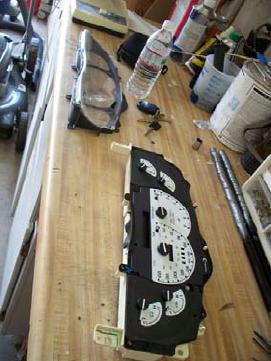
Bezel Off
Step 8: Now we have access to the gauges. To remove the Speedometer you need to gently pry up and remove the gauges on either side of the Speedometer. Then gently pry up and remove the Speedometer. Here is the Speedo out . . .
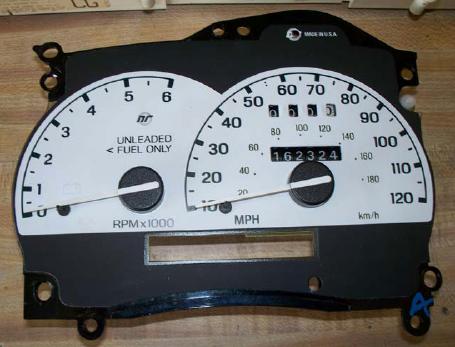
Step 9: Now turn the speedo over and place it face down on a soft towel or rag to protect the gauge face and needles. You will notice I did not do this as I took my time and was careful not to damage anything on the front.
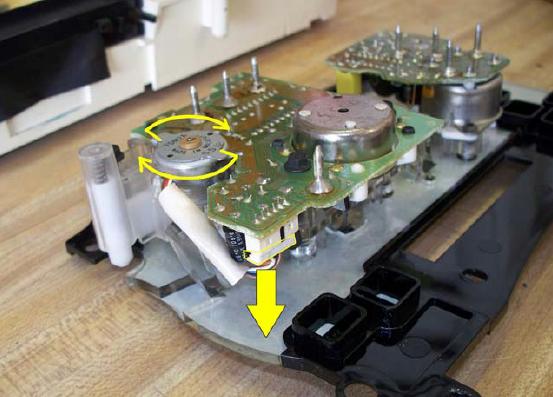
This photo shows you the Odometer/Trip Meter Motor installed in the back of the Speedo. TO remove the motor gently twist it in a clockwise fashion and it will lift out of the socket. Then unplug the leads as shown in this picture.
The following photos show the old motor without a gear and the replacement from an Explorer Dash (Year and Model ???).
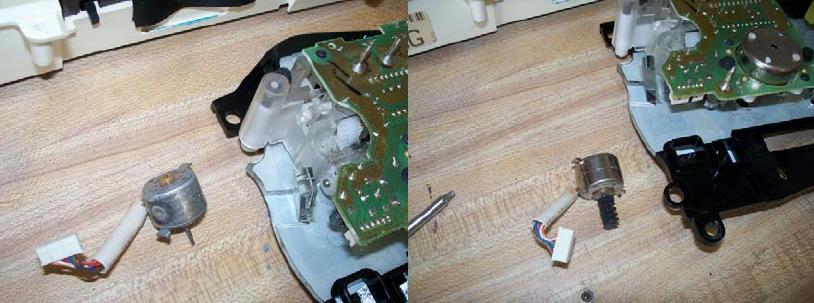
Now just insert the motor WITH a gear on it into the socket, twist counter-clockwise, and plug in the leads. Installation is the reverse of the above procedures, just make sure to take your time and carefully reinstall the panels and ALL screws.
Hope this helps anyone needing to replace the odometer gear/motor.
Tom – Hazmat Ranger