Original Poster: -Nathan-
Difficulty: 8 out of 10 (depending on skill level)
Time to install: hours-days (depending on skill level)
Disclaimer: The Ranger Station.com, The Ranger Station.com Staff, nor the original poster are responsible for you doing this modification to your vehicle. By doing this modification and following this how-to you, the installer, take full responsibility if anything is damaged or messed up. If you have questions, feel free to PM the original poster or ask in the appropriate section of The Ranger Station.com forums.
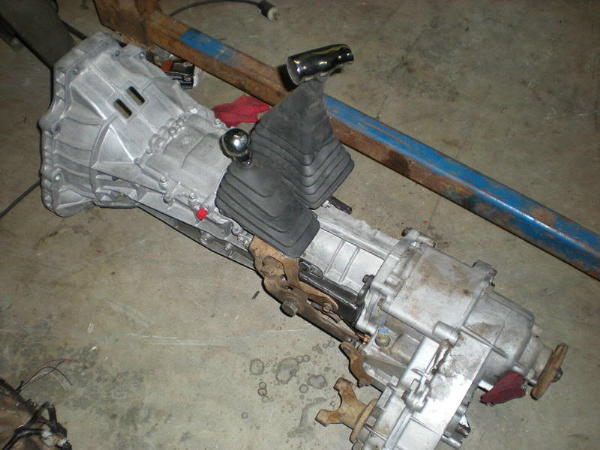
Brief Explanation: The input, output bearings, and syncros were shot in the M5OD-R1 in my 1994 Ford Ranger 4.0 4×4. The M5OD-R1 was replaced by the M5OD-R1 HD in the Ford Ranger from 2001-present, and in the Ford Explorer from 1997-2002. The HD version has a different 1st and 2nd gear, with different syncros. It was almost as cheap to buy a used HD transmission as it was to buy parts to rebuild my R1. It is an EXCELLENT upgrade for the old R1 transmission.

Tools Needed:
-floor jack
-sockets
-wrenches
-various other hand tools
Parts Needed:
-M5OD-R1 transmission from a 2001-present Ranger
-clutch slave cylinder from an R1 transmission (NOT HD)
-shifter from a 2001-present Ranger (or cut and weld your old one, as I did, if possible)
———————————————————
Step 1: This is an optional step, however I highly recommend it. The M5OD transmissions are notorious for leaking fluid from the shift rail plugs. So, I removed my plugs, cleaned them with brake cleaner, and RTV’d them back into place.


Step 2: Remove transfer case and transmission.
Step 3: Install an OHV 4.0 R1 clutch slave into the new transmission. The reason for this is that the hydraulic quick connect lines are different sizes, so to avoid changing lines and bleed ing the system, use an older slave. It bolts up exactly the same in the new tranny.

Step 4: Install transmission. Below are some pictures. There is an extra bolt hole in the HD tranny, and thus mates up to older OHV engines.

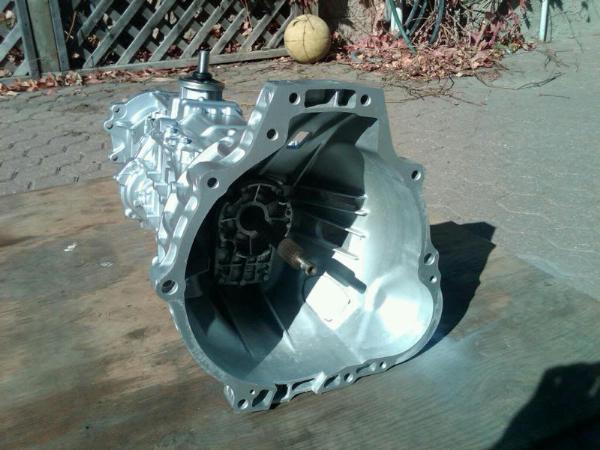
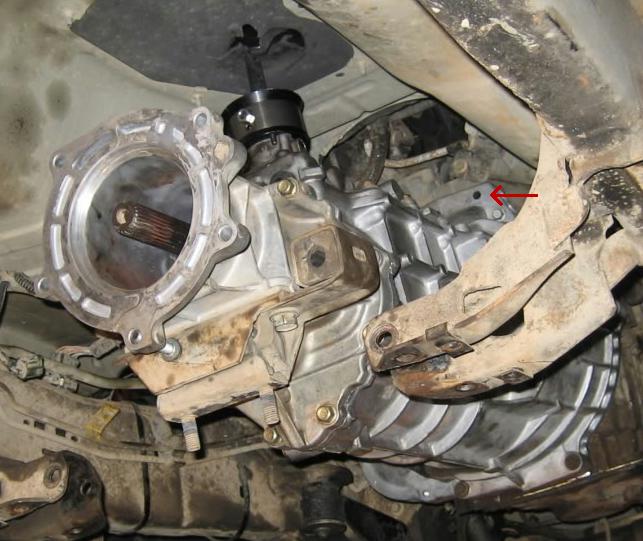
The M50D-R1HD can be bolted to the OHV 4.0L V-6 (M50D-R1HD came with the SOHC 4.0L). There is an extra bolt hole (see red arrow below) on the M50D-R1HD that allows it to be bolted to either engine (at the 2 O’clock position).
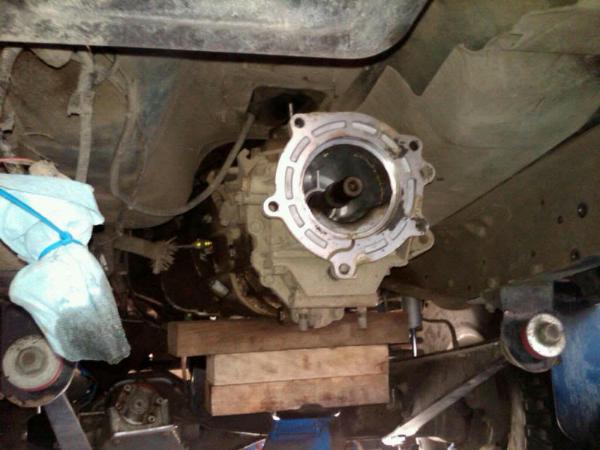
The tail housing extensions bolt patterns are also the same, so you will have no problem bolting up your BW 1354. NOTE* there are no bosses for manual transfer case linkages on the HD tranny, if you have an electronic case like me, than it is not an issue.
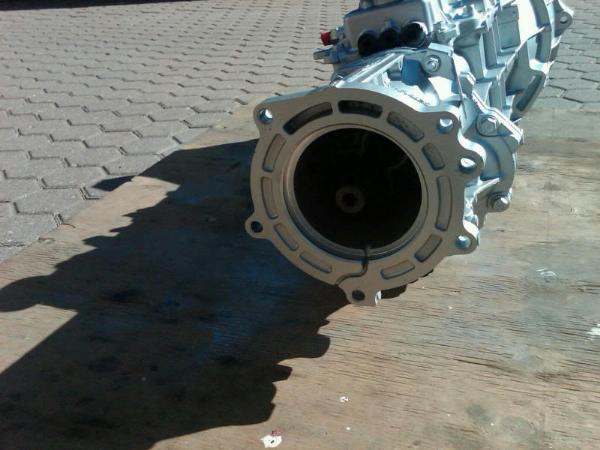
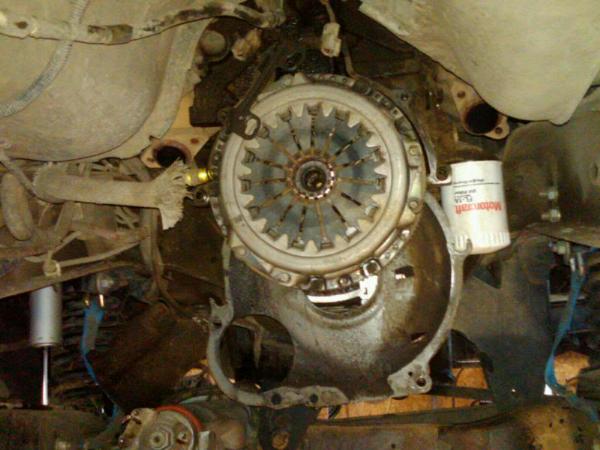
Also for those wondering, the input shafts are identical, both 23 spline 1” OD, and so the old clutch can be used.
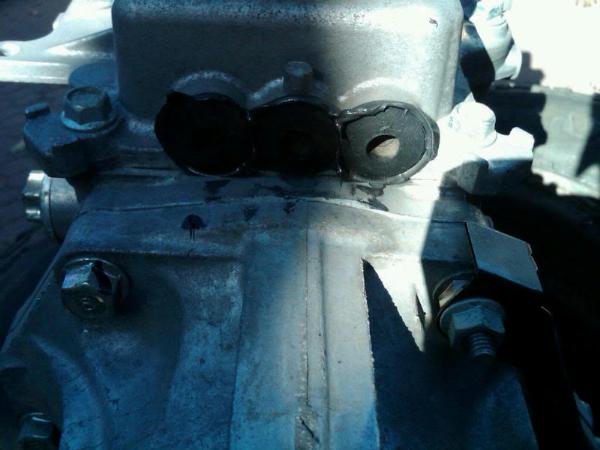
You will notice that there is no NSS (neutral sense switch) connection on the HD transmission, as there was on the R1 tranny. You DO NOT need to connect it to anything. You can leave the plug unconnected, it works perfectly fine without it.
This is the NSS connector on the R1 tranny.
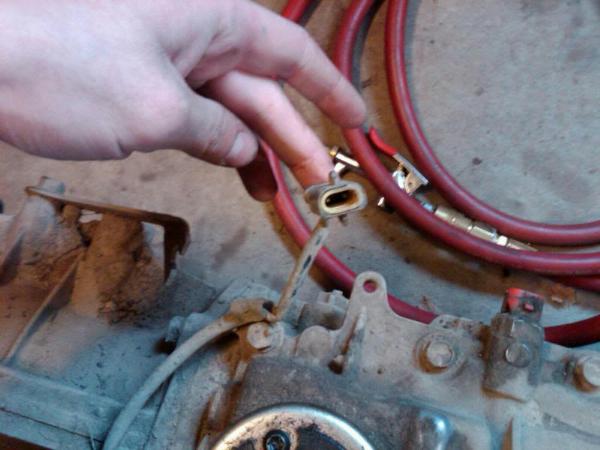
And here is the connector under the truck.
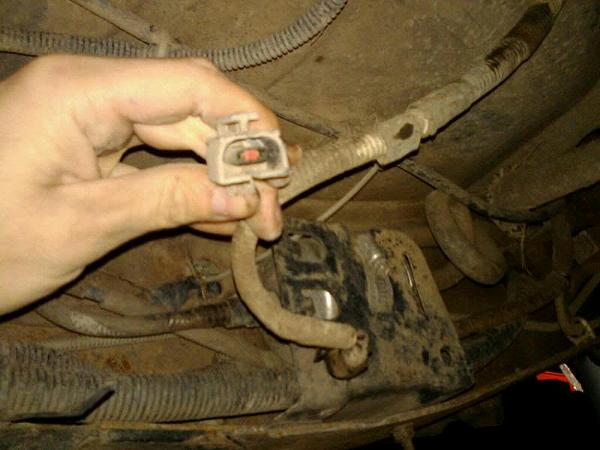
The only electrical connection you need to make is to connect the reverse light sensor, it is the exact same as the old tranny, and is plug and play (not connector in red, on left side of shift stub).

Step 5: Connect and bleed the hydraulic clutch, if you do not know how it is in the tech library.
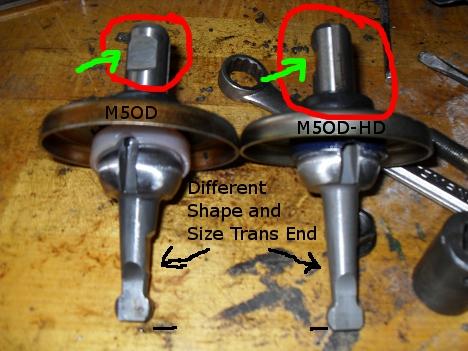
Step 6: Once the tranny, t-case, and everything else is bolted back into position, turn your attention to the shift stub. The shift stub is DIFFERENT on the HD tranny. For one the notch for the shifter has been rotated 90 degrees, and the trans end is different. So, you HAVE to use the shift stub from the HD tranny.
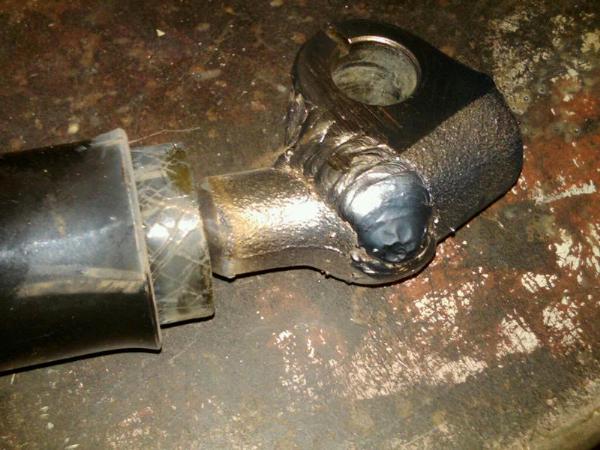
You could use a shifter from a newer truck, but I couldn’t get my hands on one. So to fix the problem, I simply cut the attachment point off of my stock R1 shifter, turned it 90 degrees, and re-welded it.

Step 7: Make sure the tranny is full of fluid, all your bolts are tightened, and take it for a drive! I found the HD transmission to shift MUCH smoother, and the gear placement so much crisper than the old R1 transmission. First and second gear feel more stout, and everything seems to work better in general. I am EXTREMELY happy with the swap, and highly recommend it for anyone who either wants an upgrade, or needs to replace a worn out transmission. Enjoy.
-Nathan-
Note About The Shift Stub:
From rboyer –
As far as the shifter stubs, there is a longer shifter stub with the groove machined into it facing the passenger side which can be used with the older shifters so some people won’t have to even worry about the shifter issue at all. There also exists a longer stub with both grooves in it which will accept both the older and newer shifters. I only ever saw one of them and it was on a 1997 Explorer which I’m assuming means that they were manufactured to get Ford through a transition period of phasing out the older shifters. On the other hand, welding it the way you did can also give you the benefit of putting the shifter to a “customized” position if you were to want it farther back, or off to the side, and you don’t spend any money in doing so.
Notes For Manual Transfer Cases:
The M5OD-R1HD DOES NOT have the bosses on the side for the manual transfer case shifter. The bosses on your old tailhousing most likely will not work. Ford stopped putting the mounting bosses on all extension housings around 2001. The FX4 got a special batch of older-style extensions, they are extremely rare. Some people have made their own mounts.
Forum member RacinNdrummin made the bracket shown below out of 1/4-inch steel plate.