• Welcome Visitor! Please take a few seconds and Register for our forum. Even if you don't want to post, you can still 'Like' and react to posts.

Aligning the The camshaft syncro shaft


98v70dad

Active Member
Joined
Oct 8, 2017
Messages
325
Reaction score
38
Points
28
Location
GA
Vehicle Year
1996
Make / Model
Ford
Engine Size
3.0L
Transmission
Automatic
2WD / 4WD
2WD
The flag on my synchro shaft is sheared off and rolled up in little ball wrapped around the position sensor magnet that fell off. All the instructions here in the archive basically tell me to put the shaft back the way I found it by noting the position of the flag. With the flag cleanly sheared off how do I note the position without that as a reference? It sheared off socleanly that I cant even feel a ridge where it used to be.

I bought the alignment tool but according to the application guide that came with it there is no tool for my vehicle (probably a typo). Also, now that I have it the tool seems like a useless piece of garbage. The tool came with no instructions.

Anyhow, I have all the parts I need to fix the problem but I have no idea how to align the shaft. I replaced a similar shaft on my 96 Crown Vic and it was no problem. I just put it back the way I took it off. With the flag sheared off I don't see how I can do that.

Can anyone tell me how to do this? It ain't obvious.


adsm08

Senior Master Grease Monkey
Supporting Member
Article Contributor
Ford Technician
TRS 20th Anniversary
Joined
Sep 20, 2009
Messages
34,623
Reaction score
3,613
Points
113
Location
Dillsburg PA
Vehicle Year
1987
Make / Model
Ford
Engine Type
4.0 V6
Engine Size
4.0
Transmission
Manual
2WD / 4WD
4WD
Tire Size
31X10.50X15
You need to start by finding TDC for cylinder 1 compression stroke. Not all that hard to do, just take out the #1 plug, hold your finger over it, and bump the engine. You will know when you hit compression. Then use the timing marks on the crank damper to line up with 0* TDC.

The tool sits on top of the syncro as if it were the sensor, and holds the vane in the window, which is 0*. Then you just install the syncro and put the sensor back on.
 

98v70dad

Active Member
Joined
Oct 8, 2017
Messages
325
Reaction score
38
Points
28
Location
GA
Vehicle Year
1996
Make / Model
Ford
Engine Size
3.0L
Transmission
Automatic
2WD / 4WD
2WD
Thanks. I've watched that video and others. They all say to put the engine at TDC on #1.

The shop manual says 10 degrees AFTER TDC. The manual section is posted on this website ... here's the note below. I have to pass smog testing in Atlanta, Georgia. Don't know but I would guess that the car has to be right on the money to pass. It runs fine without fixing it but I'm sure it won't pass emissions. My dad drove it like this for 19 years.

NOTE: Prior to removing the camshaft position sensor, set the No. 1 cylinder to 10°After Top Dead Center (ATDC) of the
compression stroke. Note the position of the sensor electrical connection. When installing the sensor, the connection must be in
the exact same position.
 

98v70dad

Active Member
Joined
Oct 8, 2017
Messages
325
Reaction score
38
Points
28
Location
GA
Vehicle Year
1996
Make / Model
Ford
Engine Size
3.0L
Transmission
Automatic
2WD / 4WD
2WD
You need to start by finding TDC for cylinder 1 compression stroke. Not all that hard to do, just take out the #1 plug, hold your finger over it, and bump the engine. You will know when you hit compression. Then use the timing marks on the crank damper to line up with 0* TDC.

The tool sits on top of the syncro as if it were the sensor, and holds the vane in the window, which is 0*. Then you just install the syncro and put the sensor back on.
Thanks. I won't have any help - have to do this myself. Not sure how to "bump" the engine without help. I figured out the "tool". According to the box its for a 1996 3.8L. No 3.8L Ranger available in 1996. I test fit it last night and it fits the synchronizer shaft so that is just a typo. That said, it was a waste of money - it actually doesn't do much. Anyhow it didn't cost that much, so - whatever.

I was out at the truck looking for timing marks during lunch here at work. I could barely see what looks like the crankshaft sensor and I think the timing marks are to the right of that but have no idea how you're supposed to see those marks - there are many things in the way - fan shaft, serpentine belt, hoses - lots of stuff directly in the way. It would make more sense to put the marks on the bottom. Maybe that's where they are - I'll look when I get home.
 

adsm08

Senior Master Grease Monkey
Supporting Member
Article Contributor
Ford Technician
TRS 20th Anniversary
Joined
Sep 20, 2009
Messages
34,623
Reaction score
3,613
Points
113
Location
Dillsburg PA
Vehicle Year
1987
Make / Model
Ford
Engine Type
4.0 V6
Engine Size
4.0
Transmission
Manual
2WD / 4WD
4WD
Tire Size
31X10.50X15
Marks are always at the top. The idea was so you could see them while adjusting the distributor.

There is a bit of a cheat to get around not being able to see the timing marks. You may have to take the fan shroud and fan off to make it work though.

Once you are on your compression stroke take a 6 inch long 1/4 inch extension and stick it in the spark plug hole, socket end down. Then crank the engine by hand, there will be a very short spot at the top of the stroke where you can move the crank and the extension will not move up or down, that is TDC.


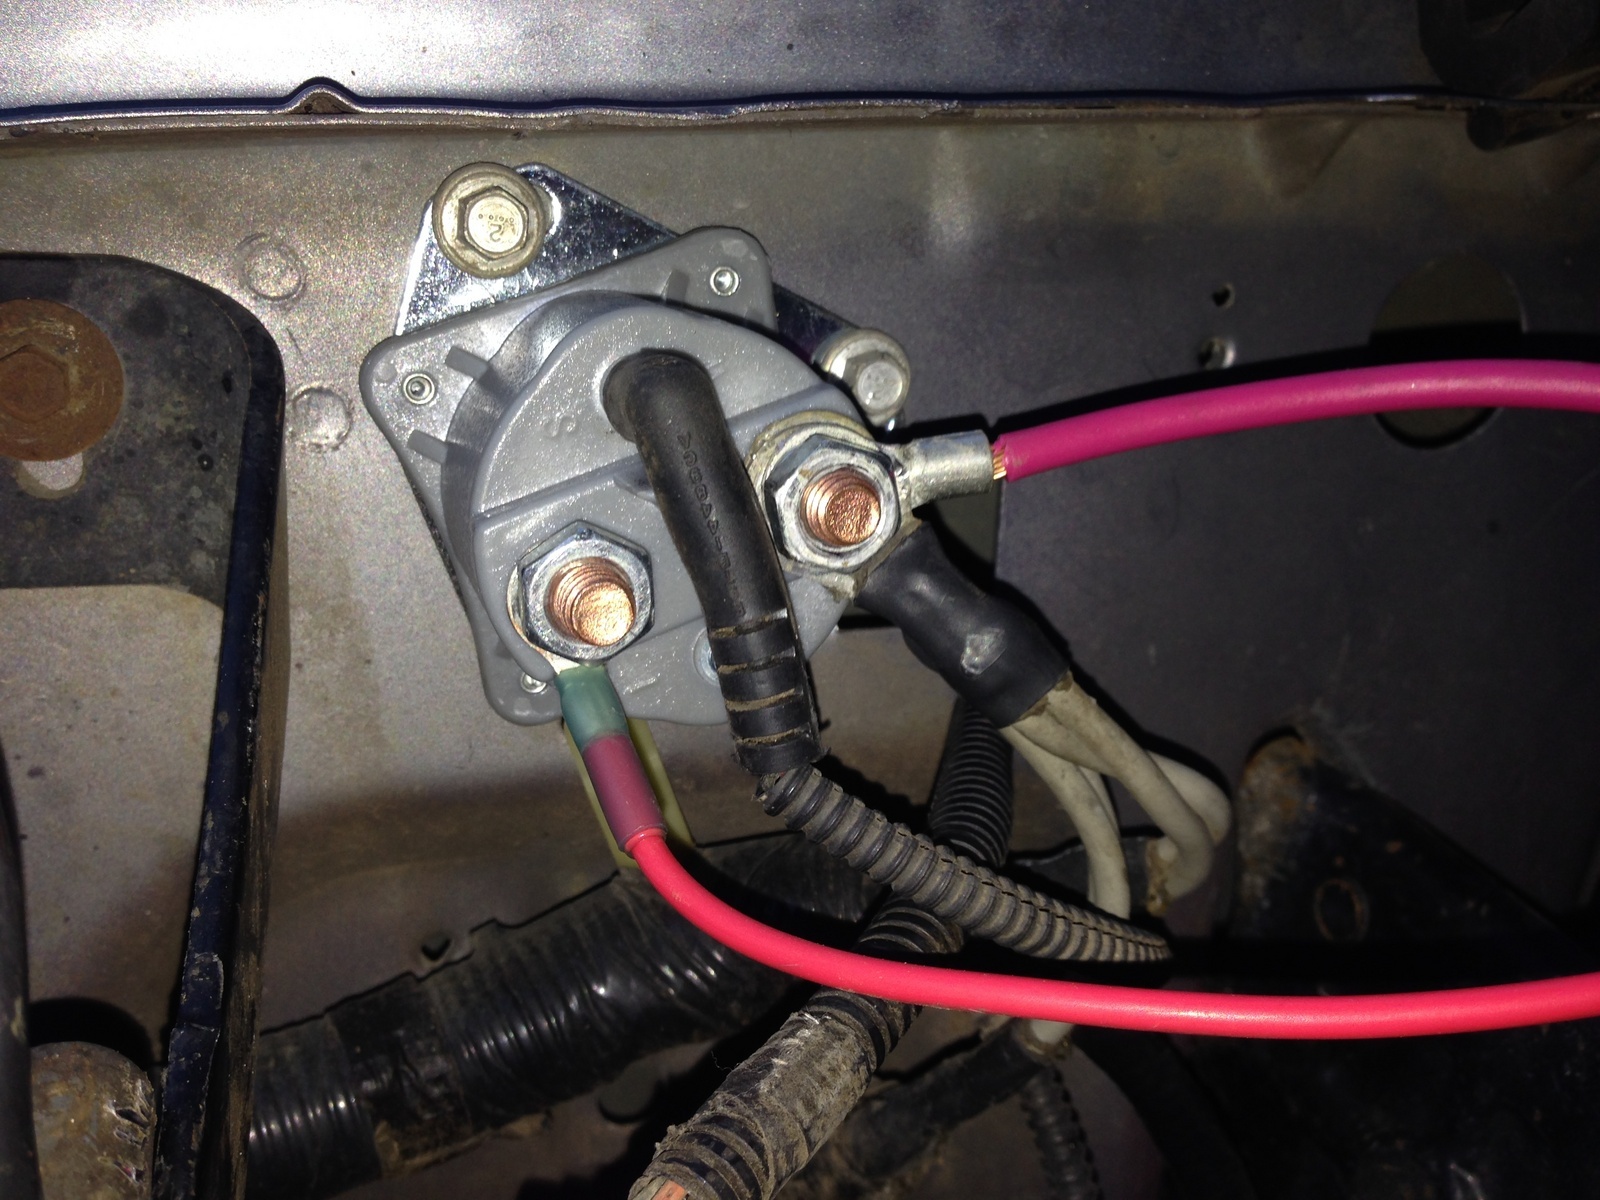
As for bumping the starter, find this thing:
and touch a screw driver to the big posts. It will be near the battery.
 

98v70dad

Active Member
Joined
Oct 8, 2017
Messages
325
Reaction score
38
Points
28
Location
GA
Vehicle Year
1996
Make / Model
Ford
Engine Size
3.0L
Transmission
Automatic
2WD / 4WD
2WD
Marks are always at the top. The idea was so you could see them while adjusting the distributor.

There is a bit of a cheat to get around not being able to see the timing marks. You may have to take the fan shroud and fan off to make it work though.

Once you are on your compression stroke take a 6 inch long 1/4 inch extension and stick it in the spark plug hole, socket end down. Then crank the engine by hand, there will be a very short spot at the top of the stroke where you can move the crank and the extension will not move up or down, that is TDC.


As for bumping the starter, find this thing: and touch a screw driver to the big posts. It will be near the battery.

Hey thanks for your help. What about the bit about putting it on 10 ATBC per the manual. All the pics I've seen online of timing marks only show them for BTDC - none after.

There is conflicting info online. Most of it says to line up 0 degree TDC on #1, but the manual (you can find it on this website) says 10 degrees ATDC.

I got no idea, but I'm doing this so I can pass emissions tests. They check codes AND stick something up the tail pipe to measure different emissions.
 

adsm08

Senior Master Grease Monkey
Supporting Member
Article Contributor
Ford Technician
TRS 20th Anniversary
Joined
Sep 20, 2009
Messages
34,623
Reaction score
3,613
Points
113
Location
Dillsburg PA
Vehicle Year
1987
Make / Model
Ford
Engine Type
4.0 V6
Engine Size
4.0
Transmission
Manual
2WD / 4WD
4WD
Tire Size
31X10.50X15
Honestly, I have never done one with the tool. I have always just got her to 0 TDC and eyeballed my alignment to the window. I have never had a problem doing it that way.

I have also never read the manual on this particular issue.

Also, never let anyone stick anything up your tail pipe. At the very best it is unsanitary.
 

98v70dad

Active Member
Joined
Oct 8, 2017
Messages
325
Reaction score
38
Points
28
Location
GA
Vehicle Year
1996
Make / Model
Ford
Engine Size
3.0L
Transmission
Automatic
2WD / 4WD
2WD
Honestly, I have never done one with the tool. I have always just got her to 0 TDC and eyeballed my alignment to the window. I have never had a problem doing it that way.

I have also never read the manual on this particular issue.

Also, never let anyone stick anything up your tail pipe. At the very best it is unsanitary.
Good point about the tailpipe - I'll be more carefull. What I found out about the tool is that it is basically for aiming the electrical connector on the sensor at the right angle so the wire harness doesn't have any stress on it. I can do that by eye. It also keeps the synchronizer from rotating when you install it. The tool has nothing at all to do with the timing - almost useless. I replaced the cam sensor on my 98 Volvo and it took 5 minutes. This is way too much work to Ccomplish something simple. I'm going to try to figure out a way to put the new one on in the same position the old one was in and not mess with the timing. Maybe I can figure something out. If I do I'll post it. If I don't I'll use the 0 of of TDC method.
 

adsm08

Senior Master Grease Monkey
Supporting Member
Article Contributor
Ford Technician
TRS 20th Anniversary
Joined
Sep 20, 2009
Messages
34,623
Reaction score
3,613
Points
113
Location
Dillsburg PA
Vehicle Year
1987
Make / Model
Ford
Engine Type
4.0 V6
Engine Size
4.0
Transmission
Manual
2WD / 4WD
4WD
Tire Size
31X10.50X15
Well it isn't normally this much work. You have extra steps because your vane is torn off, and so you have nothing to use as a reference mark, so you have to find a known engine position, that corresponds to a set spot on the syncro.
 

Rearanger

Active Member
Joined
Feb 4, 2008
Messages
1,429
Reaction score
23
Points
38
Location
Southeast USA
Vehicle Year
2003
Make / Model
Ford
Transmission
Manual
Thanks. I've watched that video and others. They all say to put the engine at TDC on #1.
Did you watch the followup video?

"After reading the comments from the first video, I can see some confusion on how precise the 15 degrees needs to be.
This video should clear things up."
 

98v70dad

Active Member
Joined
Oct 8, 2017
Messages
325
Reaction score
38
Points
28
Location
GA
Vehicle Year
1996
Make / Model
Ford
Engine Size
3.0L
Transmission
Automatic
2WD / 4WD
2WD
Did you watch the followup video?

"After reading the comments from the first video, I can see some confusion on how precise the 15 degrees needs to be.
This video should clear things up."
Yes I did. The 15 degree aiming tool has nothing at all to do with the correct position of the crankshaft. Have you read the ford shop manual procedure?
 

Rearanger

Active Member
Joined
Feb 4, 2008
Messages
1,429
Reaction score
23
Points
38
Location
Southeast USA
Vehicle Year
2003
Make / Model
Ford
Transmission
Manual
Have you read the ford shop manual procedure?
Yes, I have the Ford factory manual. It says to put the #1 piston at TDCC. Then it says to use the camshaft sync tool to align the arrow on the tool to 38 degrees to the left of the engine centerline. It's a pain because the synchronizer rotates as you install it, much like a distributor would when installing that.
 

98v70dad

Active Member
Joined
Oct 8, 2017
Messages
325
Reaction score
38
Points
28
Location
GA
Vehicle Year
1996
Make / Model
Ford
Engine Size
3.0L
Transmission
Automatic
2WD / 4WD
2WD
Yes, I have the Ford factory manual. It says to put the #1 piston at TDCC. Then it says to use the camshaft sync tool to align the arrow on the tool to 38 degrees to the left of the engine centerline. It's a pain because the synchronizer rotates as you install it, much like a distributor would when installing that.
The '95 (I have a '96) shop manual for the 3.0L says 10 degrees ATDC and use the alignment tool to orient the synchronizer 30 degrees off the engine center line. I did it today using those instructions and the check engine light cleared and hasn't come back after a 10 mile test drive. The truck runs fine. They probably changed the procedure at some point. At this point with the truck running OK I'm not going to worry about it anymore unless I can't pass emissions in a few months.

Finding 10 degrees ATDC was a real pain. I did it from below with a flashlight and a mirror. Once I got that accomplished dropping the synchro shaft in was easy. There are no timing marks after TDC so I used a gear tooth for reference. The teeth are about 10 degrees apart.

To make the tool work better I took the old sensor and beat it with a hammer until the bolts fell out. With the bolts you can bolt the tool in so it doesn't move or fall off. It worked well and only took a minute....without the bolts the tool falls off easily as you say.
 

Sponsored Ad


Sponsored Ad

Staff online

Member & Vendor Upgrades

For a small yearly donation, you can support this forum and receive a 'Supporting Member' banner, or become a 'Supporting Vendor' and promote your products here. Click the banner to find out how.

Truck of The Month


Shran
April Truck of The Month

Recently Featured

Want to see your truck here? Share your photos and details in the forum.

Follow TRS On Instagram

TRS Events

25th Anniversary Sponsors

Check Out The TRS Store


Sponsored Ad


Sponsored Ad

Sponsored Ad


Amazon Deals

Top