• Welcome Visitor! Please take a few seconds and Register for our forum. Even if you don't want to post, you can still 'Like' and react to posts.

'85 Ranger Restomod


85_Ranger4x4

Forum Staff Member
TRS Event Staff
TRS Forum Moderator
Article Contributor
V8 Engine Swap
OTOTM Winner
TRS Banner 2010-2011
TRS 20th Anniversary
VAGABOND
TRS Event Participant
Joined
Aug 7, 2007
Messages
32,338
Reaction score
17,827
Points
113
Location
SW Iowa
Vehicle Year
1985
Make / Model
Ford
Engine Type
V8
Engine Size
5.0
Transmission
Manual
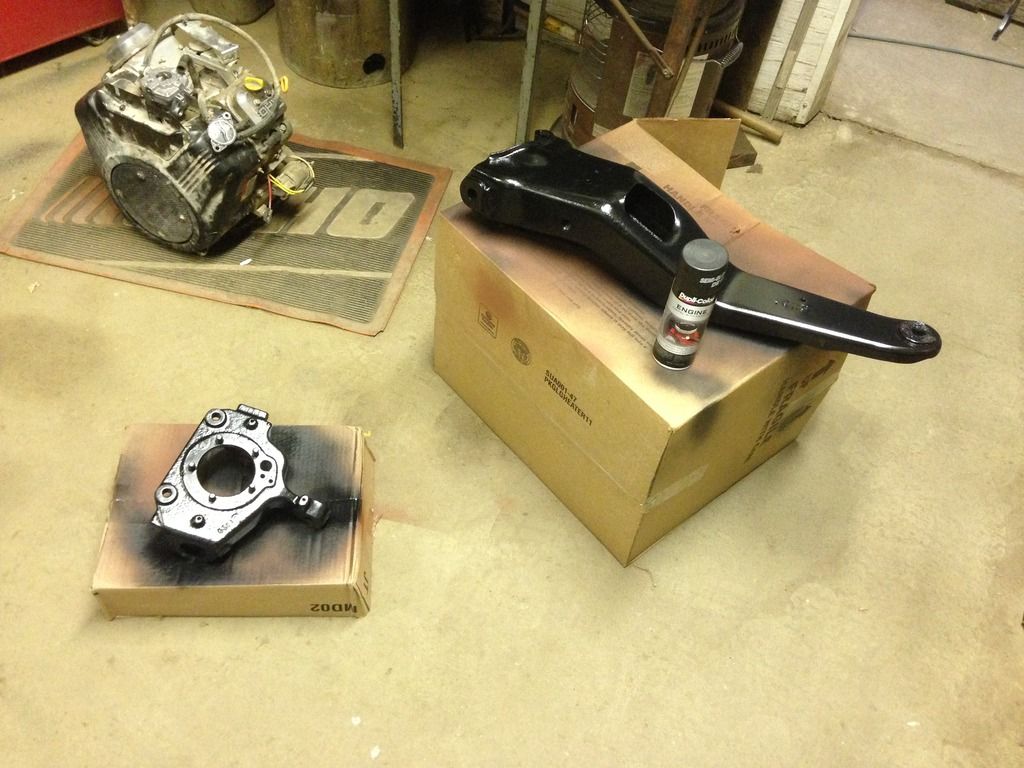
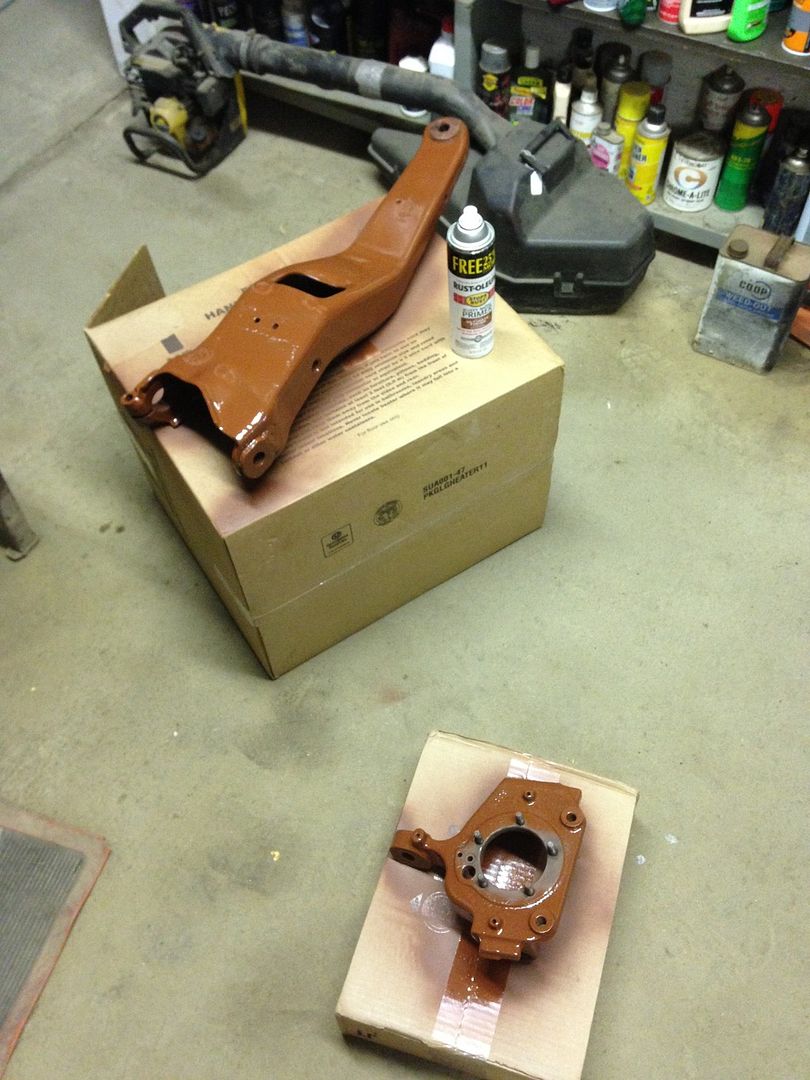
Got the axle and knuckle wire wheeled and ready for paint.
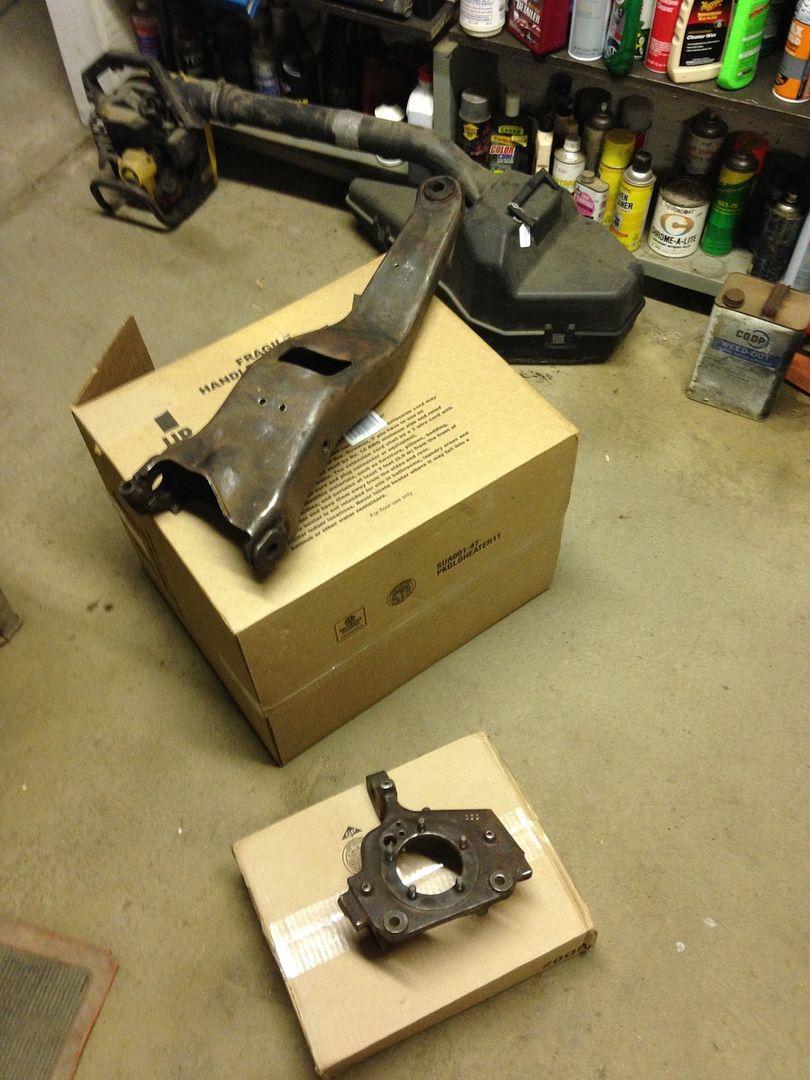


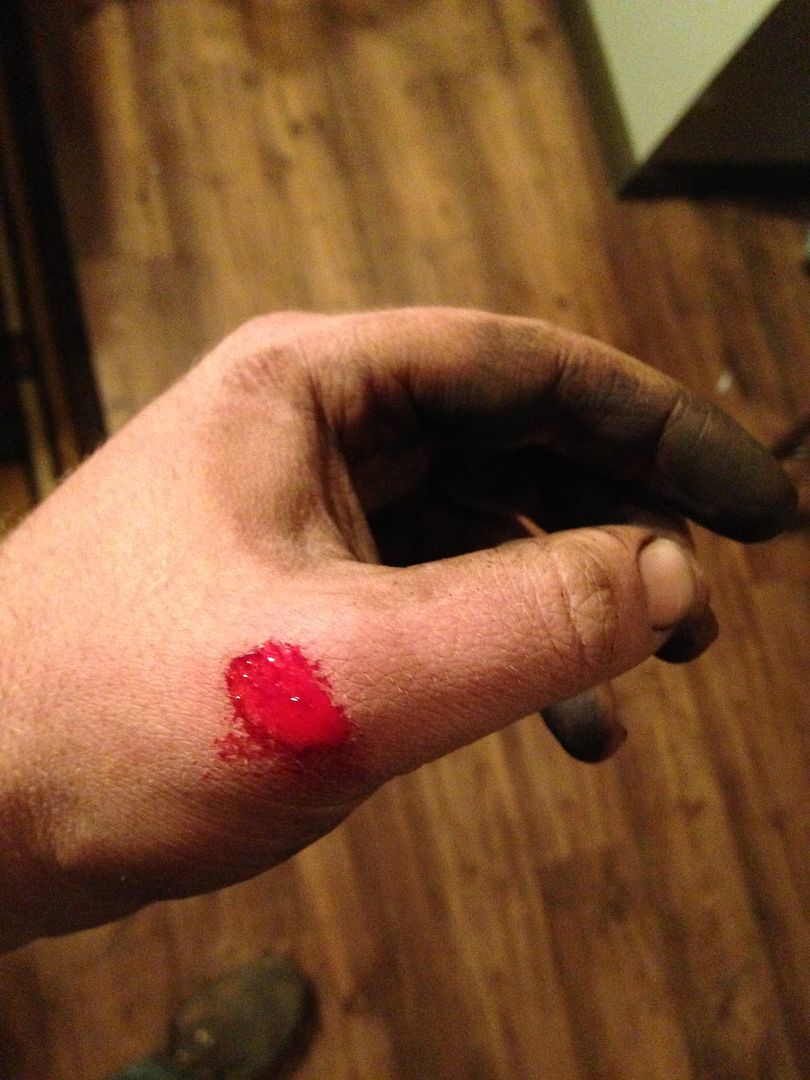
Apparently my hand grinder heard "knuckle" and got confused. :annoyed: Didn't hurt at all and I finished it without it dripping, just a slow ooze. Didn't hurt until a week later. Looking a lot better by week 2 (almost week 3)


PS is primed and painted. Haven't done anything more to the shaft yet.


BlackBII

Ranger Custom
Article Contributor
OTOTM Winner
TRS Banner 2010-2011
Truck of Month
Joined
Aug 14, 2007
Messages
7,896
Reaction score
982
Points
113
Location
UT
Vehicle Year
1989
Make / Model
Ford
Engine Type
4.0 V6
Transmission
Manual
2WD / 4WD
4WD
Total Lift
5
Tire Size
33
This is like deja vu; I just went through all this.

Looks good mang! Are you putting new axle pivot bushings in? Those look trashed.
 

85_Ranger4x4

Forum Staff Member
TRS Event Staff
TRS Forum Moderator
Article Contributor
V8 Engine Swap
OTOTM Winner
TRS Banner 2010-2011
TRS 20th Anniversary
VAGABOND
TRS Event Participant
Joined
Aug 7, 2007
Messages
32,338
Reaction score
17,827
Points
113
Location
SW Iowa
Vehicle Year
1985
Make / Model
Ford
Engine Type
V8
Engine Size
5.0
Transmission
Manual
My brother (who is going to align it) asked me that. I said "nah, they don't look too bad" To which I got "I ain't touching it until you do"

The steel centers ripped out with the bolts, one was melted some when it was cut out of the donar... yeah, getting new ones. :icon_twisted:

Don't know what ones yet though.
 

85_Ranger4x4

Forum Staff Member
TRS Event Staff
TRS Forum Moderator
Article Contributor
V8 Engine Swap
OTOTM Winner
TRS Banner 2010-2011
TRS 20th Anniversary
VAGABOND
TRS Event Participant
Joined
Aug 7, 2007
Messages
32,338
Reaction score
17,827
Points
113
Location
SW Iowa
Vehicle Year
1985
Make / Model
Ford
Engine Type
V8
Engine Size
5.0
Transmission
Manual
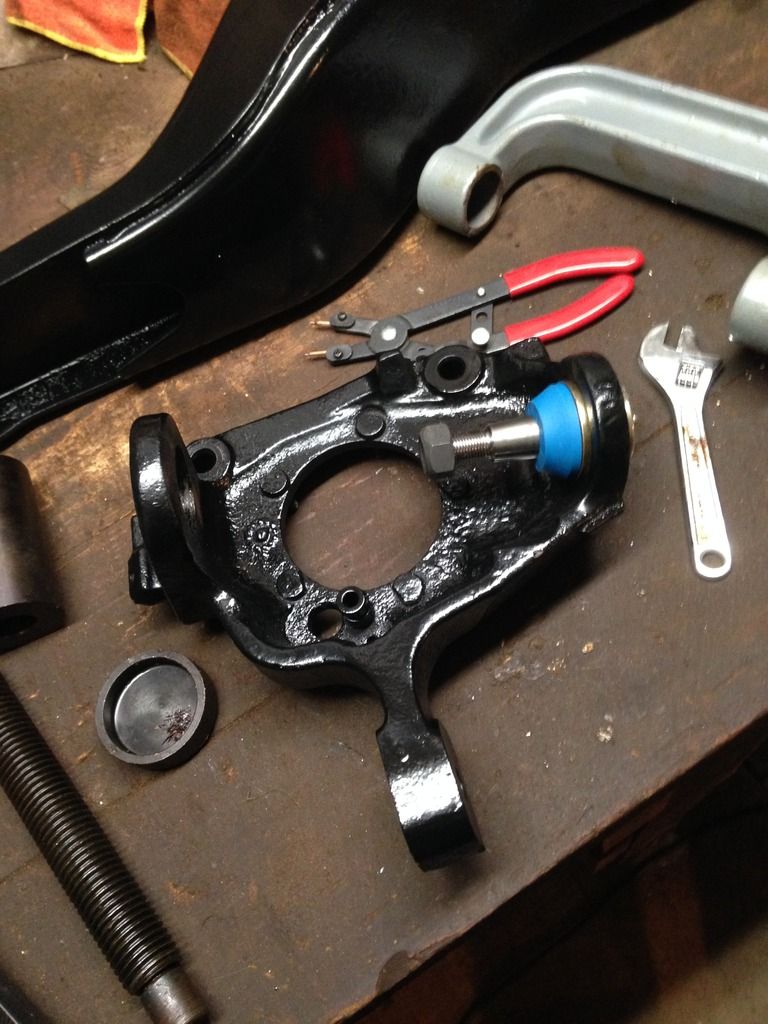
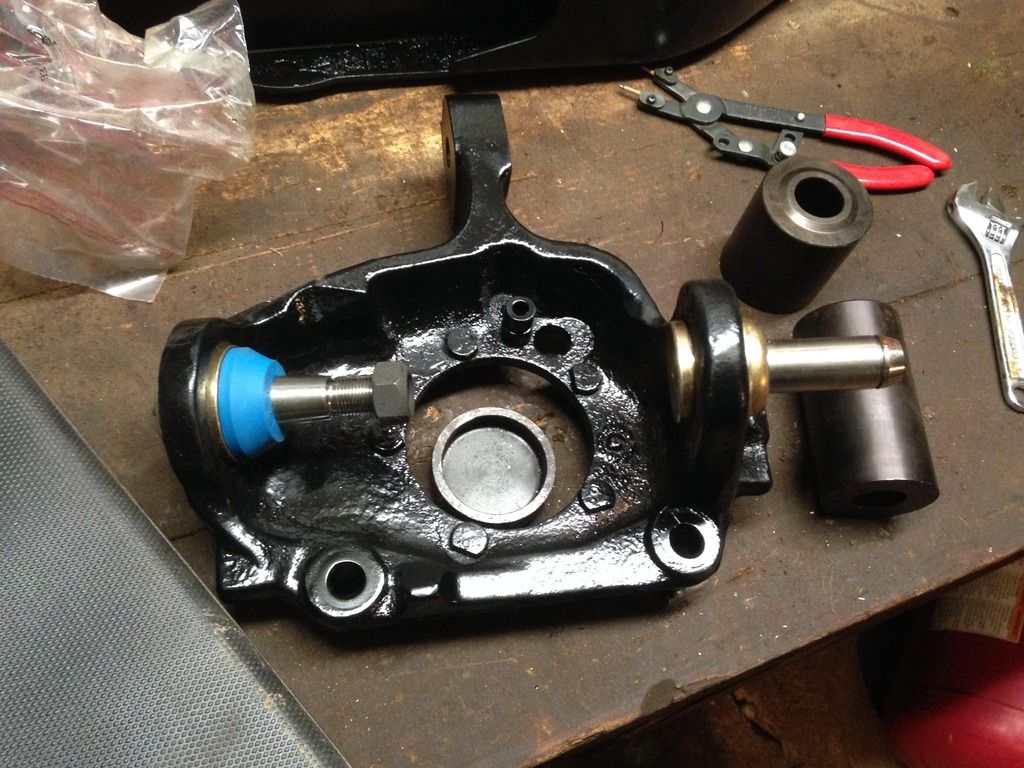
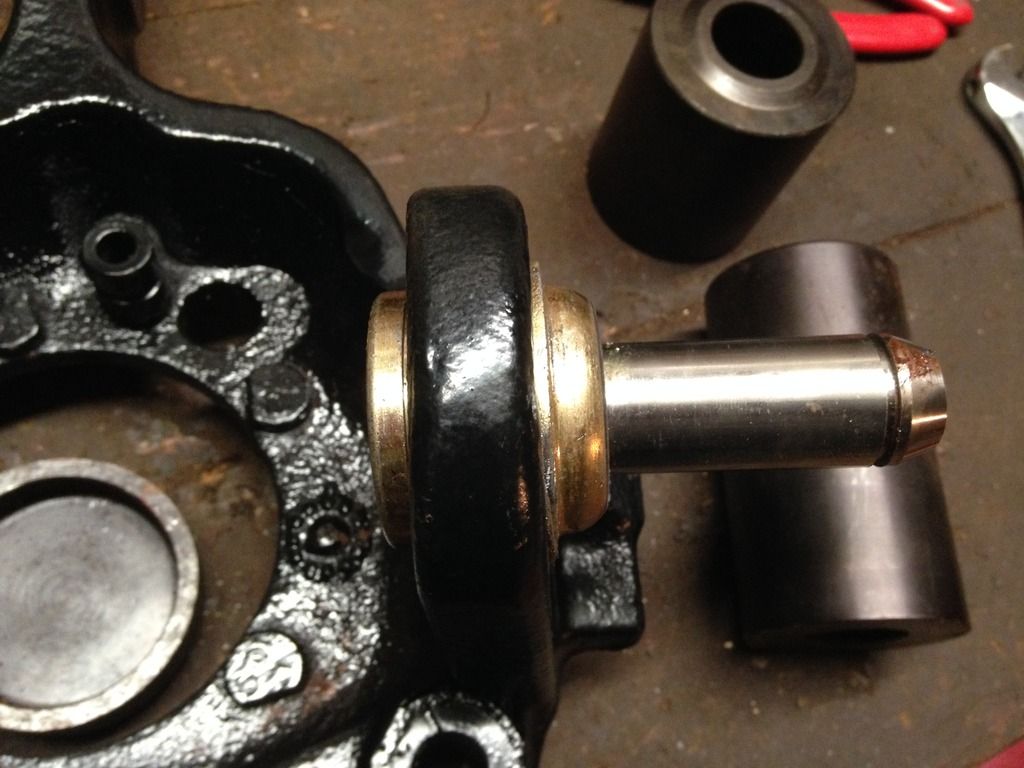
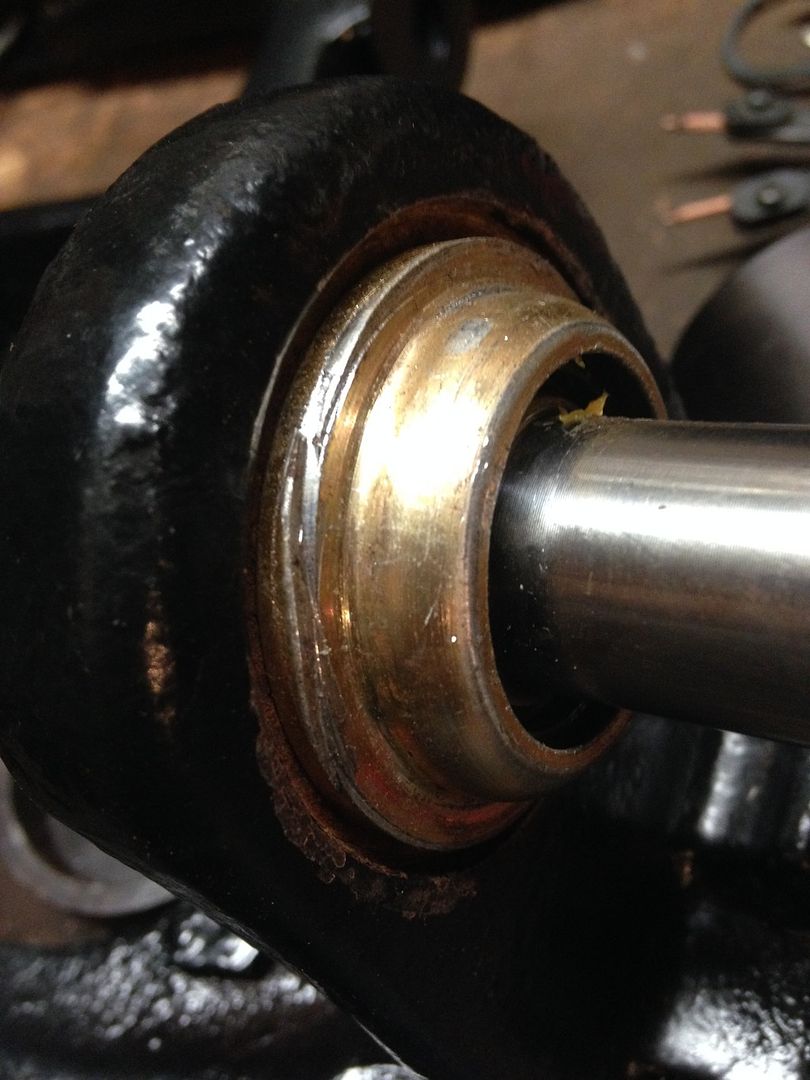
Last night I went to put the balljoints in.

Bottom went in slick.


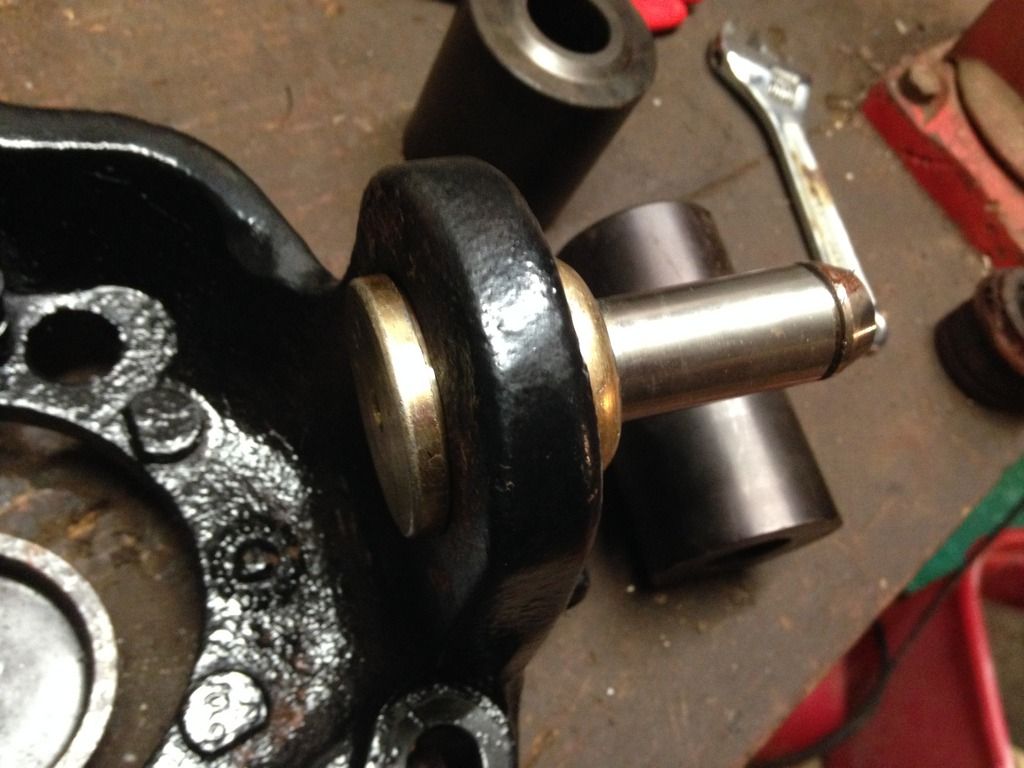
Top not so much:


So I take it all apart, makes sure that grove is clean (it was) press the old one (which measures the same) back in and there is no way I could get a snap ring in that one either. Then I get to thinking the lower is kind of baggy between the snap ring and knuckle which says "you got them backwards dummy" but the other beam (which I haven't touched for just this reason) has the steering arm higher rather than lower, the mounting boss for the ABS harness on the top and even the little steering stop tab lines up with the bolt on the beam as I have it. And it lines up how I assembled it with all the pictures I have taken thus far. :icon_confused:

Ideas?
 
Last edited:

85_Ranger4x4

Forum Staff Member
TRS Event Staff
TRS Forum Moderator
Article Contributor
V8 Engine Swap
OTOTM Winner
TRS Banner 2010-2011
TRS 20th Anniversary
VAGABOND
TRS Event Participant
Joined
Aug 7, 2007
Messages
32,338
Reaction score
17,827
Points
113
Location
SW Iowa
Vehicle Year
1985
Make / Model
Ford
Engine Type
V8
Engine Size
5.0
Transmission
Manual
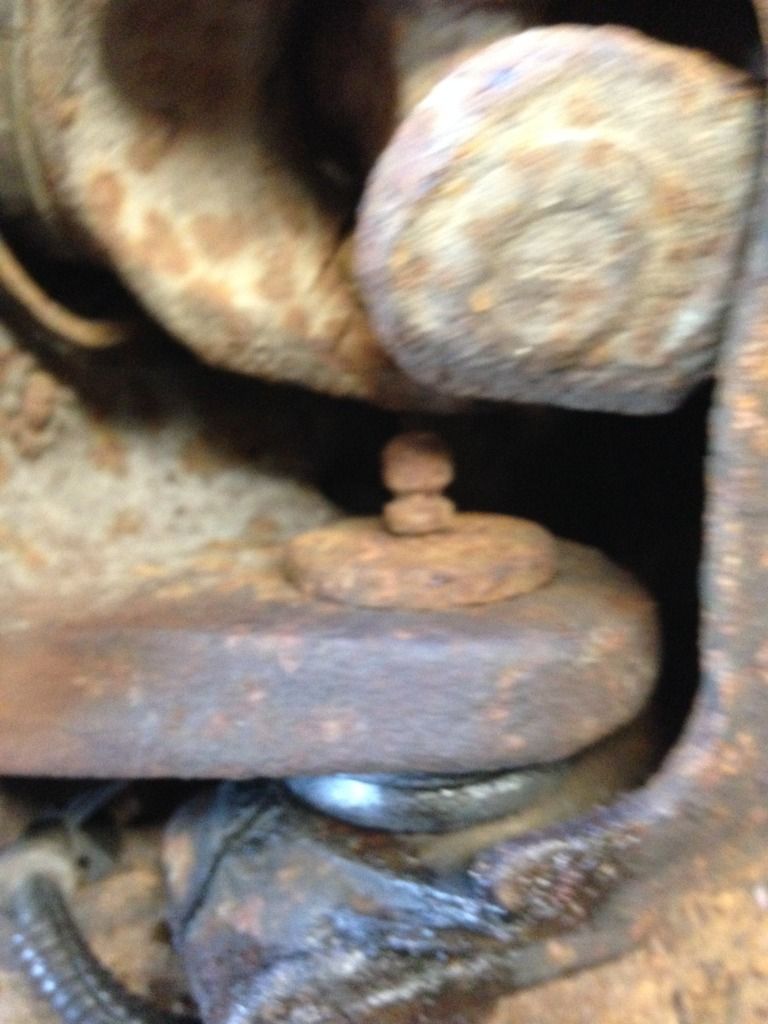
Or does the upper even have a snap ring and they just put a groove in it and include a snap ring to screw with people?

:mad: :black_eye:
Going back through pics from before I tore it apart:

 
Last edited:

BlackBII

Ranger Custom
Article Contributor
OTOTM Winner
TRS Banner 2010-2011
Truck of Month
Joined
Aug 14, 2007
Messages
7,896
Reaction score
982
Points
113
Location
UT
Vehicle Year
1989
Make / Model
Ford
Engine Type
4.0 V6
Transmission
Manual
2WD / 4WD
4WD
Total Lift
5
Tire Size
33
I was able to get the snap rings on mine.

Judging by the mark on the ball joint it looks like you used the press piece that fits over the entire ball joint and pushes on the rim? I tried that one as well, and had the same issue; the ball joint wouldn't go in all the way because the cylinder edges were hitting the knuckle. I ended up using the ball joint press piece that fits just over the ball joint shaft, and presses against the raised base and then was able to get it all the way in and get the snap ring on.

I did the top ones first, as the threaded shaft on the press had to go through the lower ball joints hole in order to do this.

Hard to explain, I know. I don't have a picture, but here is a picture of the kit and the one I used to press it in. The one in the red square. This piece fits snug in the non threaded end of the press, and the ball joint shaft goes up through the hole. The bottom of the ball joint where the snap ring goes will need one of the shorter cylinder pieces around it so it has somewhere to go and so the threaded rod presses against the knuckle.


Edit:

Photoshopped how I did mine! The piece in the red square in the above image fits over the ball joint shaft and fits into the non-threaded hole of the press.

 
Last edited:

dangerranger83

5.0 HO under the hood!!!
Supporting Member
V8 Engine Swap
Solid Axle Swap
Joined
Apr 26, 2009
Messages
7,738
Reaction score
54
Points
0
Location
Lafayette, IN
Vehicle Year
1983
Make / Model
Ford
Engine Size
5.0 HO carbed with an np435 and np208
Transmission
Manual
I've never done ball joints but have no idea why I fear doing them either. I've never had any fear when working on my ranger either.
 

85_Ranger4x4

Forum Staff Member
TRS Event Staff
TRS Forum Moderator
Article Contributor
V8 Engine Swap
OTOTM Winner
TRS Banner 2010-2011
TRS 20th Anniversary
VAGABOND
TRS Event Participant
Joined
Aug 7, 2007
Messages
32,338
Reaction score
17,827
Points
113
Location
SW Iowa
Vehicle Year
1985
Make / Model
Ford
Engine Type
V8
Engine Size
5.0
Transmission
Manual
I was able to get the snap rings on mine.

Judging by the mark on the ball joint it looks like you used the press piece that fits over the entire ball joint and pushes on the rim? I tried that one as well, and had the same issue; the ball joint wouldn't go in all the way because the cylinder edges were hitting the knuckle. I ended up using the ball joint press piece that fits just over the ball joint shaft, and presses against the raised base and then was able to get it all the way in and get the snap ring on.

I did the top ones first, as the threaded shaft on the press had to go through the lower ball joints hole in order to do this.

Hard to explain, I know. I don't have a picture, but here is a picture of the kit and the one I used to press it in. The one in the red square. This piece fits snug in the non threaded end of the press, and the ball joint shaft goes up through the hole. The bottom of the ball joint where the snap ring goes will need one of the shorter cylinder pieces around it so it has somewhere to go and so the threaded rod presses against the knuckle.

Edit:

Photoshopped how I did mine! The piece in the red square in the above image fits over the ball joint shaft and fits into the non-threaded hole of the press.
I asked my brother about it since he is a Ford tech, he said sometimes depending on the vehicle they only need one. Thinking about it both balljoints would have to come out for the upper to come out, and the lower has a snap ring on it.

Looking at it at the time the BJ was fully seated, there isn't any more for it to go. I did mine opposite of you with the tool going through the hole for the upper when I did the lower and vice versa. Which means to take the upper out I have to take the lower out too.

Also looked at the other side last night and it had no snap ring on the upper like my blurry pic showed.

Thanks a ton for your work, still deciding what to do. Did yours look seated before using the other piece? Of course my kit doesn't have it...

I've never done ball joints but have no idea why I fear doing them either. I've never had any fear when working on my ranger either.
Watched my brother do the lowers on my F-150, would be kinda fun if things worked. The tool is fun to use, worked like a dream on the u-joints and pressing in/out balljoints.
 
Last edited:

BlackBII

Ranger Custom
Article Contributor
OTOTM Winner
TRS Banner 2010-2011
Truck of Month
Joined
Aug 14, 2007
Messages
7,896
Reaction score
982
Points
113
Location
UT
Vehicle Year
1989
Make / Model
Ford
Engine Type
4.0 V6
Transmission
Manual
2WD / 4WD
4WD
Total Lift
5
Tire Size
33
I asked my brother about it since he is a Ford tech, he said sometimes they only need one. Thinking about it both balljoints would have to come out for the upper to come out, and the lower has a snap ring on it.

Looking at it at the time the BJ was fully seated, there isn't any more for it to go. I did mine opposite of you with the tool going through the hole for the upper when I did the lower and vice versa. Which means to take the upper out I have to take the lower out too.

Also looked at the other side last night and it had no snap ring on the upper like my blurry pic showed.

Thanks a ton for your work, still deciding what to do. Did yours look seated before using the other piece? Of course my kit doesn't have it...

When I did mine, I ended up having to remove the lower balljoint in order to install the upper because I did the same thing as you and tried to do the lower first. So it sucked having to do the work twice, but it's always better to do the job right so that you're not fixing something 3 months down the road. :icon_thumby:

My uppers looked seated, but they weren't because there was still about 1-2 millimeters left to go before I could get the snap ring on.

Your old ball joints; were they on the Dana 28? Because those are normally threaded and have no need for a snap ring.
 
Last edited:

85_Ranger4x4

Forum Staff Member
TRS Event Staff
TRS Forum Moderator
Article Contributor
V8 Engine Swap
OTOTM Winner
TRS Banner 2010-2011
TRS 20th Anniversary
VAGABOND
TRS Event Participant
Joined
Aug 7, 2007
Messages
32,338
Reaction score
17,827
Points
113
Location
SW Iowa
Vehicle Year
1985
Make / Model
Ford
Engine Type
V8
Engine Size
5.0
Transmission
Manual
When I did mine, I ended up having to remove the lower balljoint in order to install the upper because I did the same thing as you and tried to do the lower first. So it sucked having to do the work twice, but it's always better to do the job right so that you're not fixing something 3 months down the road. :icon_thumby:

My uppers looked seated, but they weren't because there was still about 1-2 millimeters left to go before I could get the snap ring on.

Your old ball joints; were they on the Dana 28? Because those are normally threaded and have no need for a snap ring.
The rusty/blurry pic was of this very beam as I was taking it apart. The "other side" I referenced last night was the drivers side beam of this axle that is lurking in the corner of the garage that I haven't taken apart yet. Both sides have zerks in the ball joints so maybe the last guy screwed it up too. D28 is still in the truck, I know they are different.
 
Last edited:

BlackBII

Ranger Custom
Article Contributor
OTOTM Winner
TRS Banner 2010-2011
Truck of Month
Joined
Aug 14, 2007
Messages
7,896
Reaction score
982
Points
113
Location
UT
Vehicle Year
1989
Make / Model
Ford
Engine Type
4.0 V6
Transmission
Manual
2WD / 4WD
4WD
Total Lift
5
Tire Size
33
The rusty/blurry pic was of this very beam as I was taking it apart. The "other side" I referenced last night was the drivers side beam of this axle that is lurking in the corner of the garage that I haven't taken apart yet. Both sides have zerks in the ball joints so maybe the last guy screwed it up too. D28 is still in the truck, I know they are different.
Hmm... Well then I don't know man. :icon_confused:

My balljoints look the same as yours, and I was able to get the snap rings on eventually.
 

Lariat

Member
Joined
Dec 11, 2013
Messages
127
Reaction score
2
Points
18
Location
Iowa, in the boonies
Vehicle Year
2002
Make / Model
Ford
Engine Size
4.0
Transmission
Automatic
My credo
When life is passing you by, downshift!
Glad to see you're making headway!
 

85_Ranger4x4

Forum Staff Member
TRS Event Staff
TRS Forum Moderator
Article Contributor
V8 Engine Swap
OTOTM Winner
TRS Banner 2010-2011
TRS 20th Anniversary
VAGABOND
TRS Event Participant
Joined
Aug 7, 2007
Messages
32,338
Reaction score
17,827
Points
113
Location
SW Iowa
Vehicle Year
1985
Make / Model
Ford
Engine Type
V8
Engine Size
5.0
Transmission
Manual
I haven't done any more to it yet, the BJ thing kinda has me baffled and I am trying to get a tractor together so I can kick it out of the garage and can get my Ranger back inside for the winter. Hoping to get the tractor mobile this weekend so I can get back to my axle.
 
Last edited:

Lariat

Member
Joined
Dec 11, 2013
Messages
127
Reaction score
2
Points
18
Location
Iowa, in the boonies
Vehicle Year
2002
Make / Model
Ford
Engine Size
4.0
Transmission
Automatic
My credo
When life is passing you by, downshift!
Iirc it's just the lowers that need the clip. Did em on dad's 97 and only the lower got the clip.
 

SenorNoob

Well-Known Member
TRS Event Participant
Joined
Oct 24, 2012
Messages
2,404
Reaction score
567
Points
113
Location
Middle Tennessee
Vehicle Year
1988
Make / Model
Ford
Engine Type
4.0 V6
Engine Size
4.0
Transmission
Manual
2WD / 4WD
4WD
Total Lift
1.5" Front + 4" Rear
Tire Size
245-70-R16
Could it be that you have a THICK layer of paint getting in the way? I mean it is a machined part...
 

Sponsored Ad


Sponsored Ad

Staff online

Member & Vendor Upgrades

For a small yearly donation, you can support this forum and receive a 'Supporting Member' banner, or become a 'Supporting Vendor' and promote your products here. Click the banner to find out how.

Truck of The Month


Shran
April Truck of The Month

Recently Featured

Want to see your truck here? Share your photos and details in the forum.

Follow TRS On Instagram

TRS Events

25th Anniversary Sponsors

Check Out The TRS Store


Sponsored Ad


Sponsored Ad

Sponsored Ad


Amazon Deals

Top