• Welcome Visitor! Please take a few seconds and Register for our forum. Even if you don't want to post, you can still 'Like' and react to posts.

One more 2wd 98 coil spring 5.0 swap.


RangerSVT

Oct 09 OTOTM
Article Contributor
V8 Engine Swap
OTOTM Winner
Solid Axle Swap
RBV's on Boost
ASE Certified Tech
TRS Banner 2010-2011
TRS Banner 2012-2015
Joined
Mar 15, 2009
Messages
7,883
Reaction score
53
Points
48
Location
TRS since 2002 - NW KY
Vehicle Year
19962002
Make / Model
Ford
Engine Size
GT-40 5.0L EFI W/AC
Transmission
Automatic
My guess is he had about half that...just in ARP hardware for the motor...

SVT


Jbrown1238

Member
Joined
Sep 3, 2010
Messages
691
Reaction score
6
Points
18
Location
Largo, Fl
Vehicle Year
2003
Make / Model
Ford
Engine Size
306
Transmission
Manual
My credo
None
My guess is he had about half that...just in ARP hardware for the motor...

SVT
LOL!!! That was pretty good Rick.

I have been meaning to drop you a PM, my vents are stuck on defrost. I know the electric blend air motor drives a different door and I am pretty sure the defrost/ center vent gate runs on vaccuum. Can you point me in the right direction? Where under dash is the door for the defrost and center vents?
 

RangerSVT

Oct 09 OTOTM
Article Contributor
V8 Engine Swap
OTOTM Winner
Solid Axle Swap
RBV's on Boost
ASE Certified Tech
TRS Banner 2010-2011
TRS Banner 2012-2015
Joined
Mar 15, 2009
Messages
7,883
Reaction score
53
Points
48
Location
TRS since 2002 - NW KY
Vehicle Year
19962002
Make / Model
Ford
Engine Size
GT-40 5.0L EFI W/AC
Transmission
Automatic
The blend door is electric, but the flow direction is vacuum operated. Make sure you have vacuum going into the firewall, and make sure your control panel vacuum plug assembly is plugged in...

SVT
 

Jbrown1238

Member
Joined
Sep 3, 2010
Messages
691
Reaction score
6
Points
18
Location
Largo, Fl
Vehicle Year
2003
Make / Model
Ford
Engine Size
306
Transmission
Manual
My credo
None
The blend door is electric, but the flow direction is vacuum operated. Make sure you have vacuum going into the firewall, and make sure your control panel vacuum plug assembly is plugged in...

SVT
Thanks Rick. I am sure it is something I did as it was working properly before I removed the V6 engine. I checked the vaccuum connection at the resevior, the fire wall, and the control panel but will go back and double check each of them again.
 

Jbrown1238

Member
Joined
Sep 3, 2010
Messages
691
Reaction score
6
Points
18
Location
Largo, Fl
Vehicle Year
2003
Make / Model
Ford
Engine Size
306
Transmission
Manual
My credo
None
I removed the last few pieces of the interior and started pulling the Stinger audio cable for the rear speakers and the Pioneer Amp that will be going behind the driver seat. I decided to leave the OEM speaker wire in place for now but may, or may not; remove it before the interior goes back in.


At the last minute I made the final decision to leave the 99 dash in place and spray it with the windshield installed. I considered two other options, removing the windshield and spraying the dash installed, or removing the 99 dash and swapping it with the one from my 98 Ranger.


First I swept the recessed/reversed areas of the defrost surround and the side vent surround with a sponge coated with SEM Landau Black color as these areas would not be hit well with the paint gun. Then I went ahead and sprayed two medium coats followed by a “light” dust coat on the entire dashboard. The "light" dust coat helped dull the shine and made the finished product look a little more authentic.


The new carpet has been sitting on the floor “relaxing” to help smooth out some of the wrinkles from the shipping process.


When I shot the dash I also went ahead and wrapped the armrest and top section of the door panel with the same Katzkins Leather that covered the seats. Then I sprayed the door panels to match the dash.


Last edited:

Jbrown1238

Member
Joined
Sep 3, 2010
Messages
691
Reaction score
6
Points
18
Location
Largo, Fl
Vehicle Year
2003
Make / Model
Ford
Engine Size
306
Transmission
Manual
My credo
None
The interior is moving along fairly well and I should have an update with some photos in another four or five days. I insured the truck and picked up the plate earlier this week so I could start sorting out any issues that pop up during normal driving cycles. I took the truck out to rack up the first few real road miles at speed. After filling the tank completely full with premium I went ahead a clocked the first five miles.


Here are a few things I noticed during the drive that I will be working on while the interior is going in over the next week or so.


Known Issues on 06-24-15 after (5) mile test drive.

Fuel gauge reads 1/2 on full tank.
Solution: Monitor through two tanks of fuel to see if problem resolves itself.

Factory Volt Gauge reads low:
Solution: Charge battery and monitor for possible issue with Alternator.

Speedometer reads 70 MPH at approx. 50 MPH.
Solution: Adjust Speedometer needle as needed.

Truck runs at 200 degrees with AC off.
Solution: Swap out 195 thermostat for 180 thermostat.

Blend Air Door won't close the defrost vents and open the center dash vents.
Solution: Continue to work on vacuum system to resolve issue.

AC compressor will not cycle.
Solution: Wiring issue, no power to compressor. Correct as needed.

Turn signals blink rapidly.
Solution: Wiring issue, 99 Ranger has (1) pair of extra Park light bulbs on front harness that are not used with the 2011 Ranger Park lights. Remove unused Park light plugs and close loop as needed.

Rear turn signal bulbs are temporary placed in the reverse light chamber on the 2011 tail lenses.
Solution: Cut opening in unused third chamber of 2011 tail lenses to allow proper placement of turn signal bulbs.
 

Jbrown1238

Member
Joined
Sep 3, 2010
Messages
691
Reaction score
6
Points
18
Location
Largo, Fl
Vehicle Year
2003
Make / Model
Ford
Engine Size
306
Transmission
Manual
My credo
None
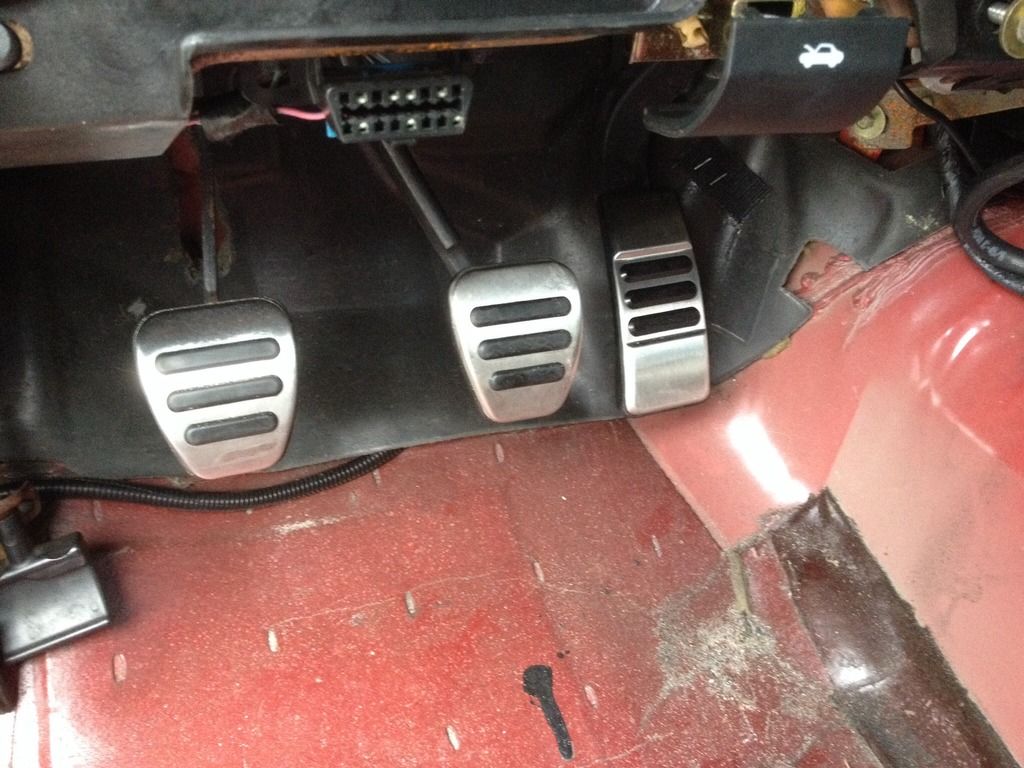
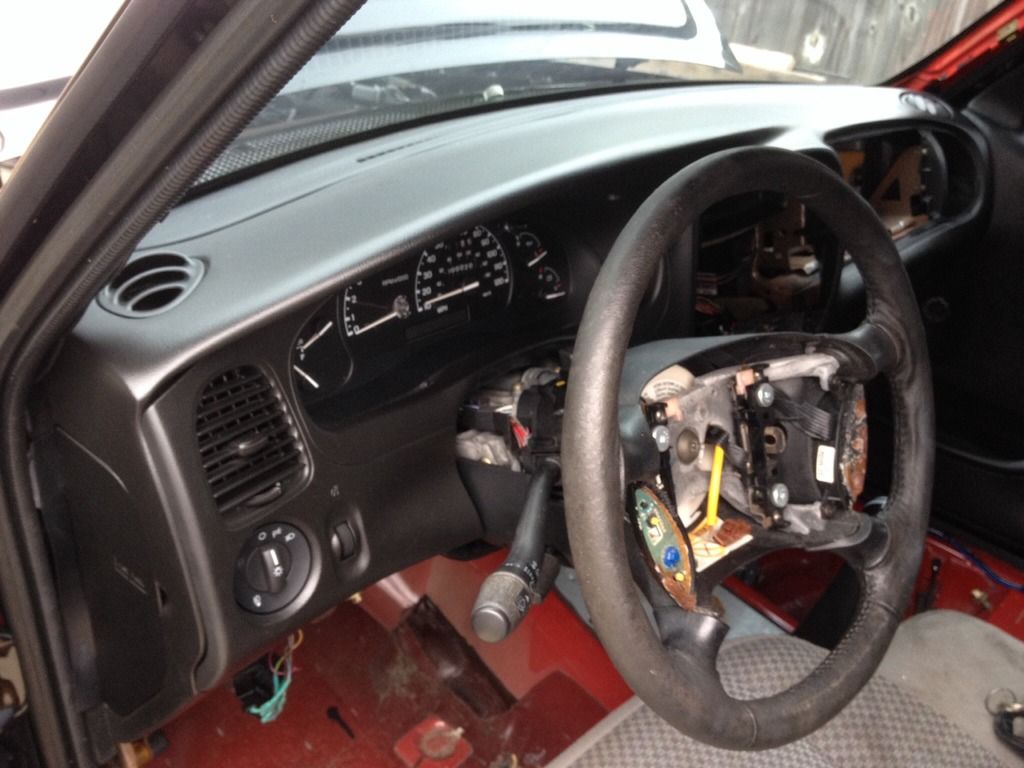
I removed and reinstalled the rear solid window as it had developed a small leak at the top. I had thought it was coming from the high mount brake light but it did turn out to be the window. I tested the new install after it had set for 24 hours and the leak has been corrected. I also installed the OEM Mustang Premium Pedal Covers and pulled the Steering Wheel to test the fit the new piece.


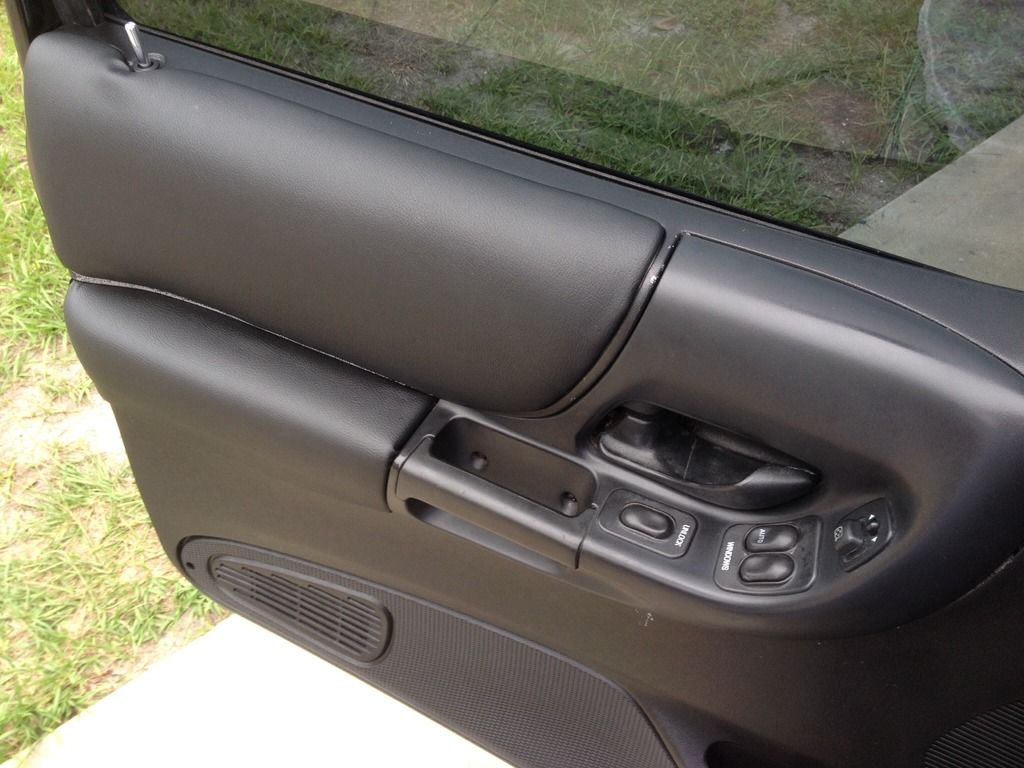
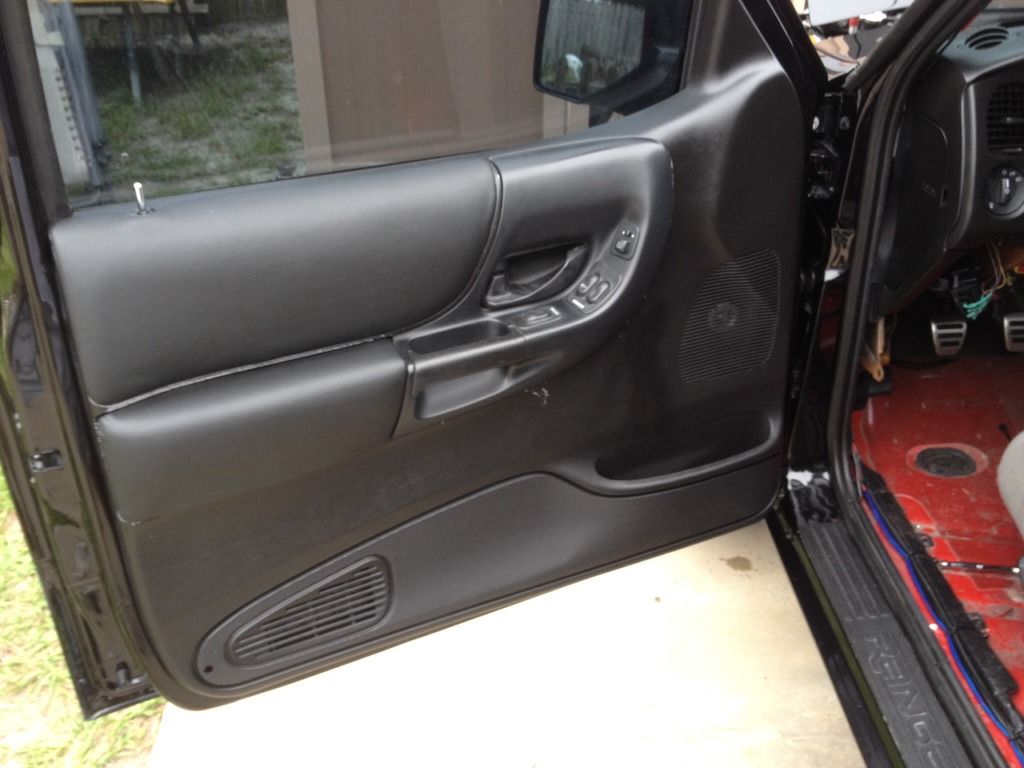
While installing the leather on the arm rest I scratched the door panel in a few places so it will need to be touched up. I am really starting to like the new black interior color. I am getting pretty stoked about moving forward with the rest of the interior work. I just need a little more time away from my job to finish it up. Next week will be balls to the wall on the inside of the truck.


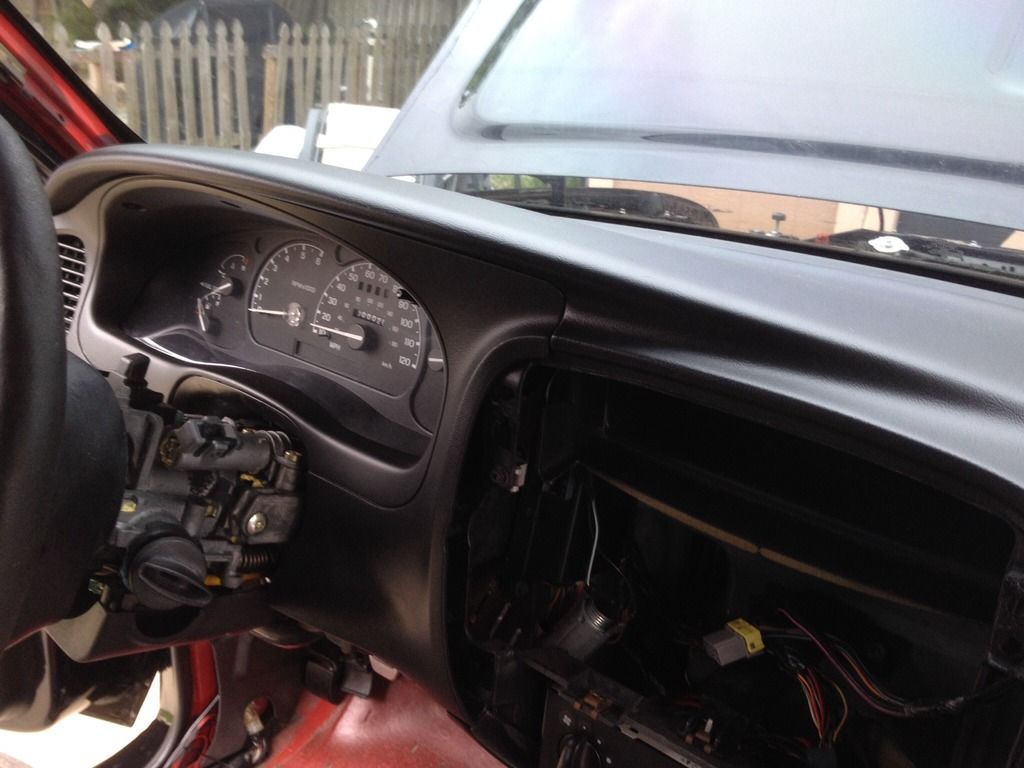
Just minor clean up today along with a 15 mile test drive in an attempt to discover potential issues. I want to feel a certain level of confidence before the truck starts to settle in to short trips around town. The miles are starting to build on the odometer now!


Known Issues on 06-25-15 after (15) mile test drive.

Fuel gauge reads 1/2 on full tank.
Solution: Monitor through two tanks of fuel to see if problem resolves itself.
06-25-15, problem still unresolved.

Factory Volt Gauge reads low:
SOLVED: Factory gauge is incorrect. Charging system is working properly.

Speedometer reads 70 MPH at approx. 50 MPH.
Solution: Adjust Speedometer needle as needed.

Truck runs at 200 degrees with AC off.
Solution: Swap out 195 thermostat for 180 thermostat.

Blend Air Door won't close the defrost vents and open the center dash vents.
SOLVED: Issue corrected itself during test drive. Vents work properly now.

AC compressor will not cycle.
Solution: Wiring issue, no power to compressor. Correct as needed.

Turn signals blink rapidly.
Solution: Wiring issue, 99 Ranger has (1) pair of extra Park light bulbs on front harness that are not used with the 2011 Ranger Park lights. Remove unused Park light plugs and close loop as needed.

Rear turn signal bulbs are temporary placed in the reverse light chamber on the 2011 tail lenses.
Solution: Cut opening in unused third chamber of 2011 tail lenses to allow proper placement of turn signal bulbs.
 

Jbrown1238

Member
Joined
Sep 3, 2010
Messages
691
Reaction score
6
Points
18
Location
Largo, Fl
Vehicle Year
2003
Make / Model
Ford
Engine Size
306
Transmission
Manual
My credo
None
I wanted a flush mount bed cover for the Ranger but the options are limited for the obsolete Flareside bed. I even considered at one point switching to a regular bed just to open the door for more options. I have always liked the Flareside version and just couldn’t bring myself to let it go. After searching high and low I found basically the only option was the Extang Solid Fold Hard Cover. It isn’t flush mount but it will serve the purpose for work and can be removed very easily if needed.


It unlatches easily and folds pretty nice. After a few days it is starting to grow on me and I don’t mind the raised edge as much as I did at first.


I finished pulling the rest of the Audio cable (RCA cables and start up wire) and the wiring harness for the seat warmers. I also went back and fixed the power feed for the Amp that I had installed incorrectly. After today’s photos were taken I removed the driver seat and started disassembling it for the bucket seat conversion. I also assembled the passenger seat and seat track preparing it for final installation. Wednesday I will try to vacuum up the floor pan and lay down the carpet. I am still undecided about sound deadening and will revisit that further down the line.


oddball101

New Member
Joined
Jun 8, 2010
Messages
138
Reaction score
0
Points
0
Location
Columbia SC
Vehicle Year
01
Make / Model
Ranger
Engine Size
5.0
Transmission
Automatic
I just did a bit of sound deadening of my own. I took some advice from thread I found a while back and the difference is night and day.

Food for thought..
http://www.toyota-4runner.org/3rd-gen-t4rs/152455-shhhhh-quiet-please-3rd-gen-sound-deadening-project-4.html

A lot of people get caught up in dynomat but don't really get that there are other levels of frequencies that need to be paid attention to, not just converting highs into lows. Anyhow, what is recommend is using a layer that functions as dynomat (CLD), an 1/8th" layer of Closed Cell Foam (CCF), and a layer of Mass Loaded Vinyl (MLV).

I used "peel n seal" on the floorboards and all other metal areas I could find with the interior stripped out, including hte rear side panels (ext cab). Just install it with a heat gun and you will have no problems. Issues only arise out of this when it isn't properly applied. I used peel n seal because it is cheap and quite effective for the amount you get compared to that of dynomat or the gator-skin stuff. I also doubled up on the back wall and and floor boards along with the doors, but only a single layer on the roof. Don't forget the tranny tunnel.

I used about 6 layers of just the CCF in the roof and combined with the CLD, it did a really good job. I used 4 layers of CCF between the doors and the door panels, and then 2 layers of CCF for the floor boards, back wall and rear side panels. I should have anticipated it but I had to reinstall the interior roof a couple of times because the added thicknesses of the CCF interfered with the mounting points of the dome light (just get longer screws) and clothes hangar, but otherwise it went flawlessly.

Lastly, I used a single layer of the MLV (even the .75 stuff is heavier than you'd first think). on the back wall and floor boards. The roll comes about 4ft wide and was a perfect fit to cut into 2ft halves and then just run on each side individually in line with each seat, covering the outer areas next to where the doors would meet and then use a third overlapping piece that covers the middle all the way up to the front of the tranny cover. I used a separate piece for the back wall and used hte door panels as a mold to trace and cute the MLV for that application as well. As tedious and heavy as it all was to work with, stuffing the 3 layers in every nook and cranny, it was well worth it.

She is no beamer but the sound deadening is literally night and day like I said. I know you don't have rear side panels, but I ended up spray gluing the MLV to the 4 layered CCF in two 2x2 ft sections and with on cut in the bottom for the fold, they fit perfectly and snug along with the stock juke padding. I used it to stop the rattling of miscellaneous tire jack parts and such back there as well. I will be replacing my speakers at some point but something funny to think about is that after I was done.. LOL.. the stock ranger speakers, they actually seemed to hit a little. Haha, the cute lil things, like puppies trying to act all hard core and tough.

All things aside, regardless of the materials you chose to use, if you do it the right way and use each of the layers in whatever proportion you want, you will be extremely satisfied, I know I am.

Hope this helps..

These are the links to the materials I am talking about.

CLD
http://www.lowes.com/pd_154017-81326-PS625_0__?productId=1018733

CCF
http://www.homedepot.com/p/Gladon-75-ft-Roll-Above-Ground-Pool-Wall-Foam-NL111/203414550#.Ul-GzVCfjDM

MLV
http://www.homedepot.com/p/Unbranded-4-ft-x-8-ft-Acoustical-Barrier-DB348X96BX/100663624#.Ul-HCFCfjDM
 
Last edited:

Jbrown1238

Member
Joined
Sep 3, 2010
Messages
691
Reaction score
6
Points
18
Location
Largo, Fl
Vehicle Year
2003
Make / Model
Ford
Engine Size
306
Transmission
Manual
My credo
None
Thank you for the detailed response. I am still doing some research and put your notes in my file for future reference.
 

Jbrown1238

Member
Joined
Sep 3, 2010
Messages
691
Reaction score
6
Points
18
Location
Largo, Fl
Vehicle Year
2003
Make / Model
Ford
Engine Size
306
Transmission
Manual
My credo
None
I set the carpet out in the sun for 90 minutes so it would relax a bit before I started forming it to the floor pan of the Ranger. Once it had warmed up I set it in place and started cutting holes for the shifter and the seats.


I decided to wait to cut the front, back, and sides of the carpet until the seats and shifter are installed. I wanted to have a little wiggle room to work with if the carpet gets pulled one way or the other while attaching various pieces.

I am still assembling the driver seat but let's see how the passenger seat looks in the truck.


With a little luck I will finish putting the driver seat together tomorrow and get both of the seats in place permanently.
 

oddball101

New Member
Joined
Jun 8, 2010
Messages
138
Reaction score
0
Points
0
Location
Columbia SC
Vehicle Year
01
Make / Model
Ranger
Engine Size
5.0
Transmission
Automatic
Those seats are amazing.
 

Jbrown1238

Member
Joined
Sep 3, 2010
Messages
691
Reaction score
6
Points
18
Location
Largo, Fl
Vehicle Year
2003
Make / Model
Ford
Engine Size
306
Transmission
Manual
My credo
None
I pulled the passenger seat out of the 98 Ranger, which is not only the daily driver but has also become the daily donor for the 99 Ranger. I have swiped more parts from it lately then the salvage yard. Every time I need a fastener, a light, a switch, etc, it comes from the 98 Ranger. That thing is starting to feel like Swiss cheese!
Ok back to the story, once the seat was removed I quickly pulled the bottom seat pan and the seat foam.


Then I stretched the new Katzkin Leather over the seat pan and seat foam and secured it in place.


Once the leather was in place I went ahead and attached the driver side seat frame from the 99 Ranger.


After the seat frame was attached I assembled the rest of the new driver seat using the 99 Ranger driver side upper frame and foam. Once comfortable with the fit I installed it in the vehicle.


These last two photos were taken today after I installed the new 2004 Lightning Steering Wheel. I had planned to do that last but I wanted to check the cruise control on the next test drive.


Stangman92

New Member
V8 Engine Swap
Solid Axle Swap
Joined
May 5, 2012
Messages
166
Reaction score
1
Points
0
Location
NW Chicago
Vehicle Year
1994
Make / Model
Ford
Engine Size
5.0
Transmission
Manual
Those seats are pure awesome! Your project has really turned out great.
 

Jbrown1238

Member
Joined
Sep 3, 2010
Messages
691
Reaction score
6
Points
18
Location
Largo, Fl
Vehicle Year
2003
Make / Model
Ford
Engine Size
306
Transmission
Manual
My credo
None
Those seats are pure awesome! Your project has really turned out great.
Thanks! The seats, the carpet, and the steering wheel all made the inside smell like a new car. Now that it has sat all close up a few days in the hot sun you can really notice it. The seat leather softened in the heat and a lot of the wriggles smoothed out and are gone.
 

Sponsored Ad


Sponsored Ad

Staff online

Today's birthdays

Member & Vendor Upgrades

For a small yearly donation, you can support this forum and receive a 'Supporting Member' banner, or become a 'Supporting Vendor' and promote your products here. Click the banner to find out how.

Truck of The Month


Shran
April Truck of The Month

Recently Featured

Want to see your truck here? Share your photos and details in the forum.

Follow TRS On Instagram

TRS Events

25th Anniversary Sponsors

Check Out The TRS Store


Sponsored Ad


Sponsored Ad

Sponsored Ad


Amazon Deals

Top