• Welcome Visitor! Please take a few seconds and Register for our forum. Even if you don't want to post, you can still 'Like' and react to posts.

Proz07's Black Pearl build


proz07

Member
V8 Engine Swap
Joined
Jul 16, 2016
Messages
150
Reaction score
11
Points
18
Location
TX
Vehicle Year
1988
Make / Model
Ford
Engine Type
V8
Engine Size
5.3l
Transmission
Manual
2WD / 4WD
2WD
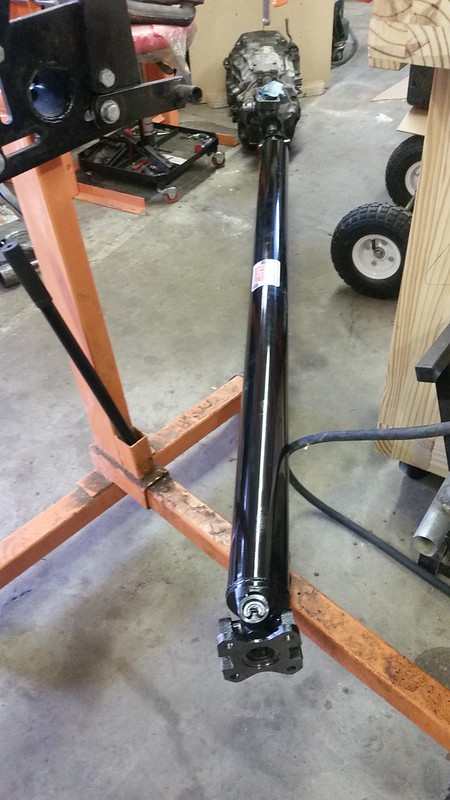
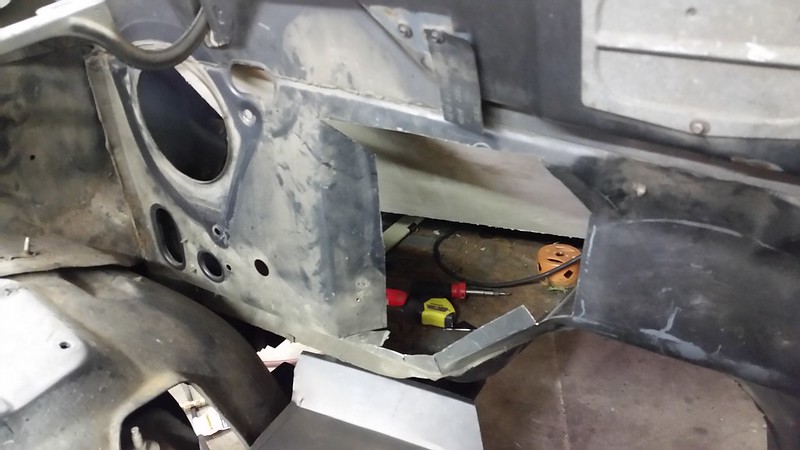
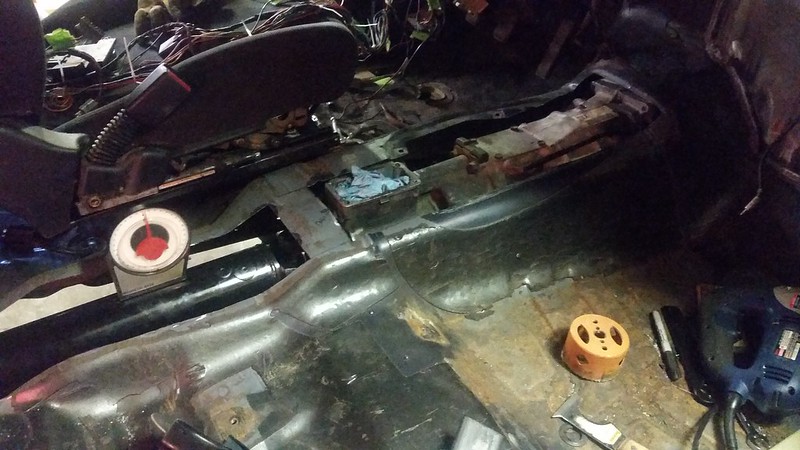
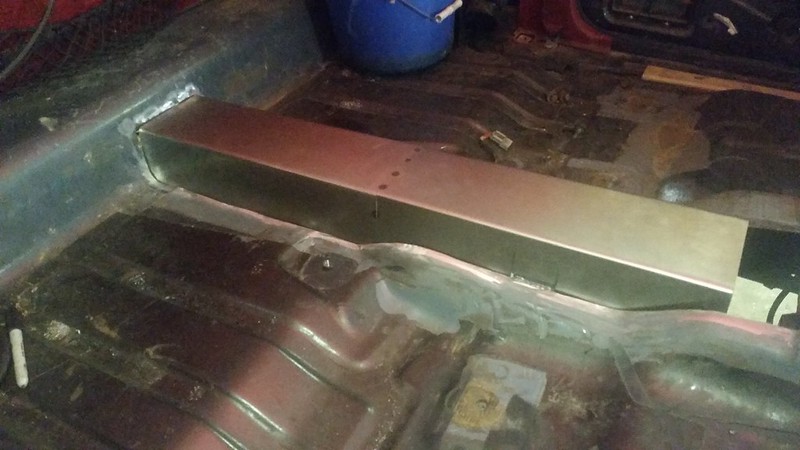
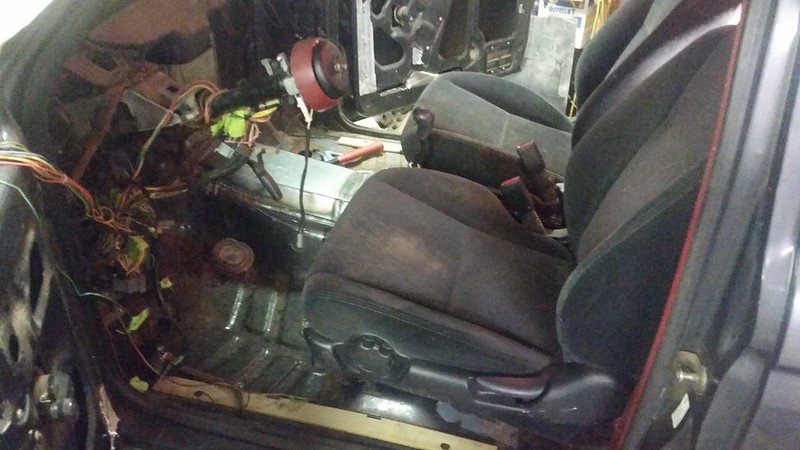
Also while I was waiting for my driveshaft to be made i went to the local pick-n-pull 50% off day and picked up some decent Civic seats and have those tacked into the stock mounts.

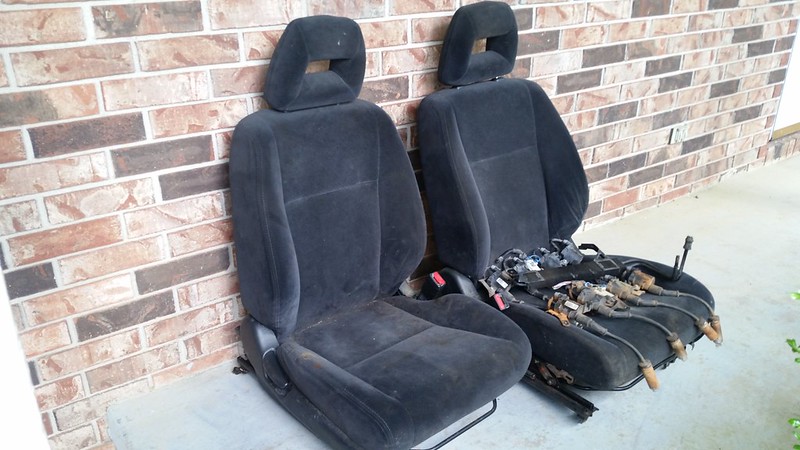
20170415_154720 by Z S, on Flickr
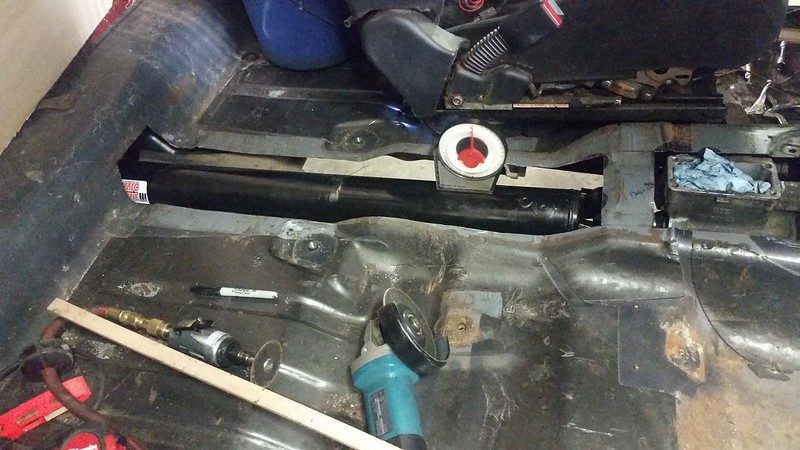
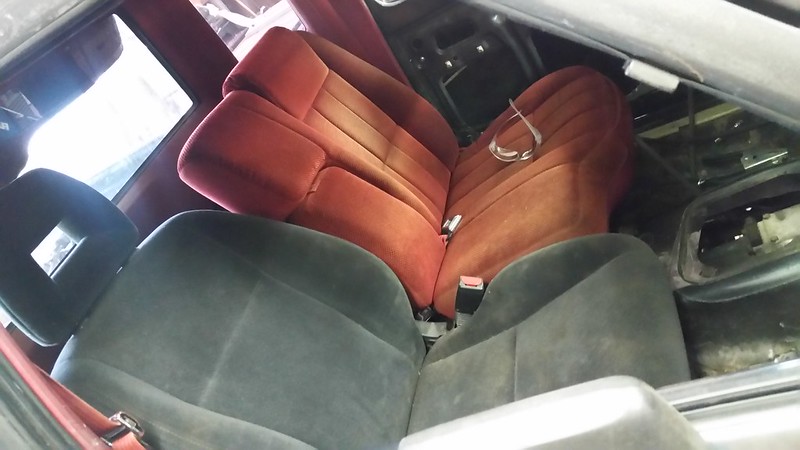
20170423_161006 by Z S, on Flickr

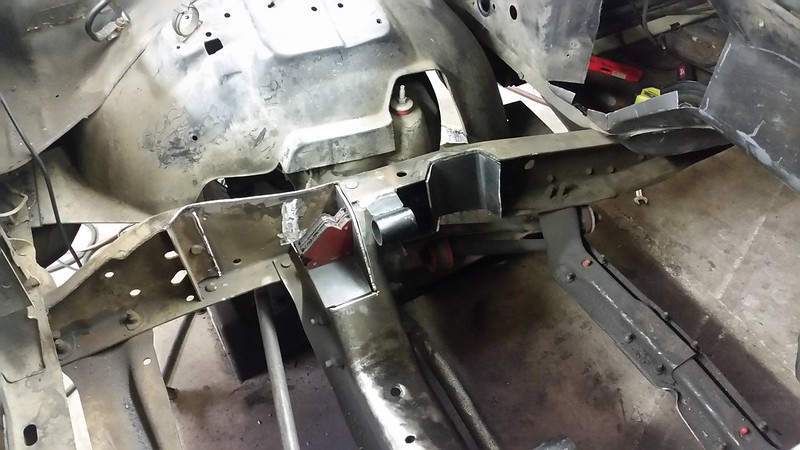
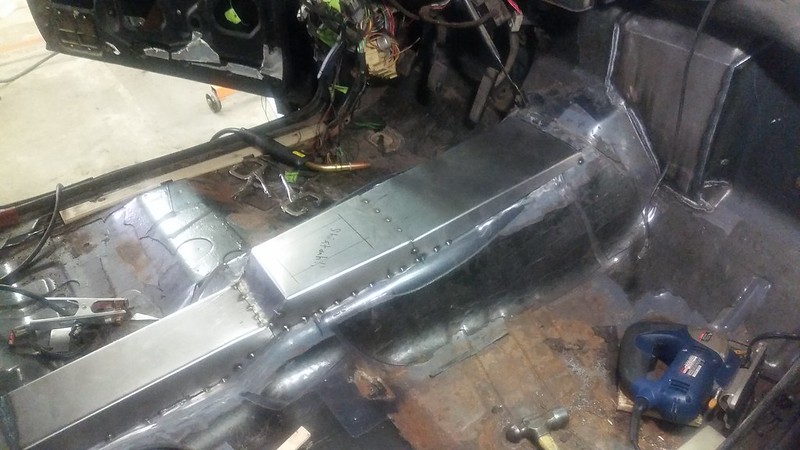
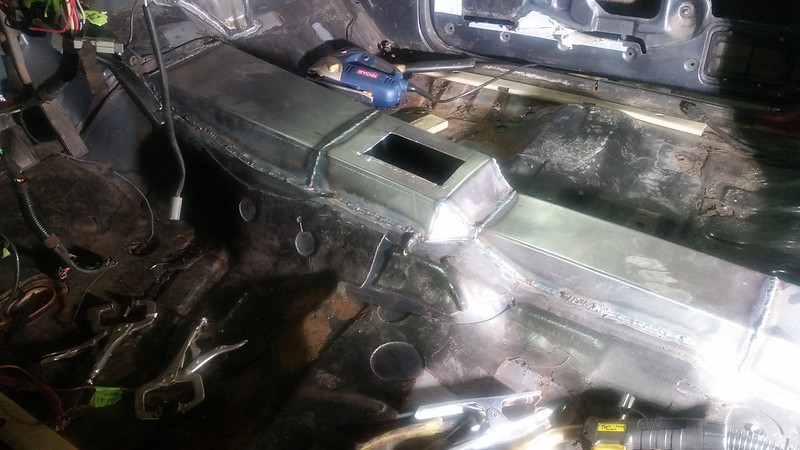
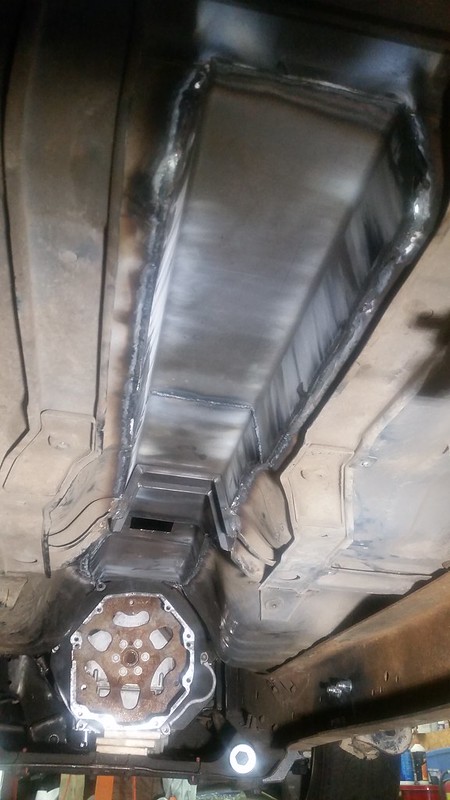
and gettting it all ligned up etc. it is of note the driver rails sit up about 1 1/2" higher than the passengers so different mount and tack proceddures needed to be done.

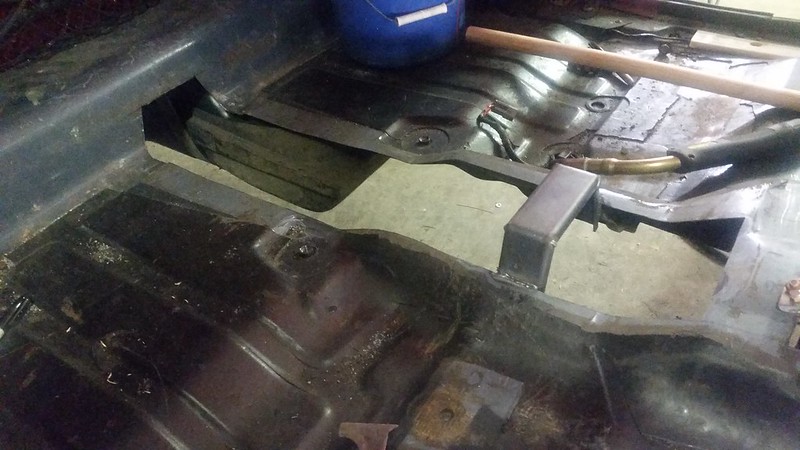
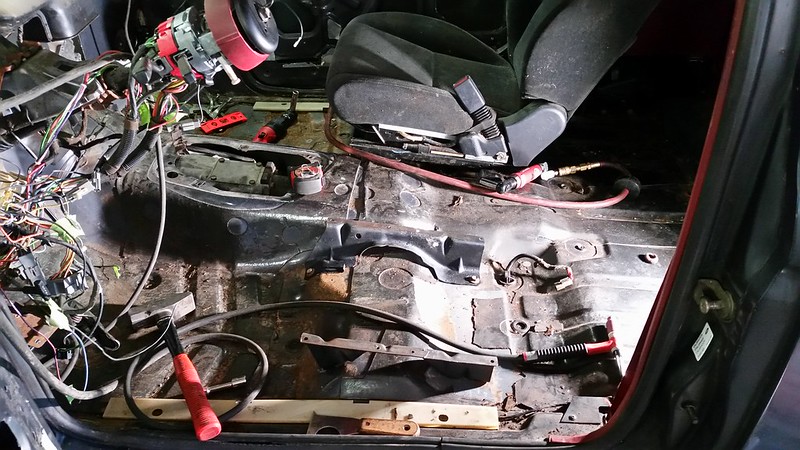
20170423_170140 by Z S, on Flickr

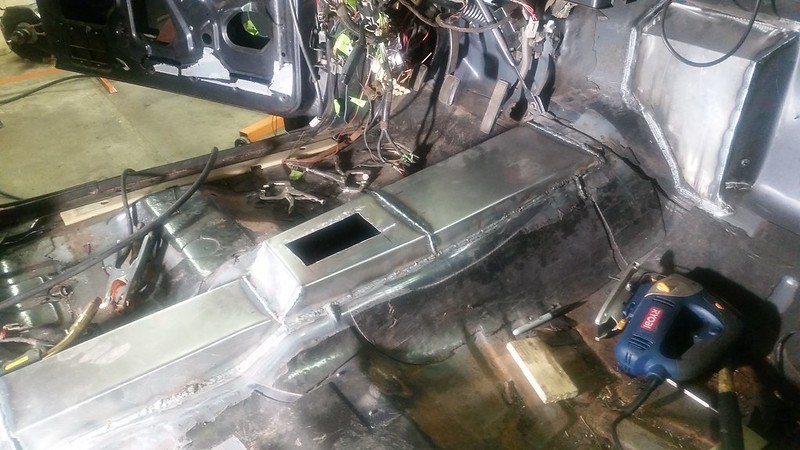
and tacked in, I think this will work amazing once I figure out a center council setup. Since I will not be relocating the shifter it will be right between the seats towards the front. I think it'll be great once its all in there as this is more of a "sport" truck than anything now. Not to mention they actuall plant you in the truck rather than clapped out 29yr old benches.

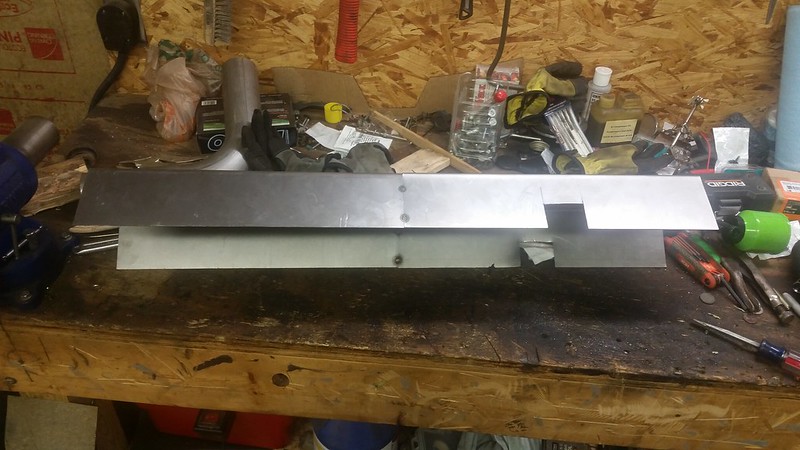
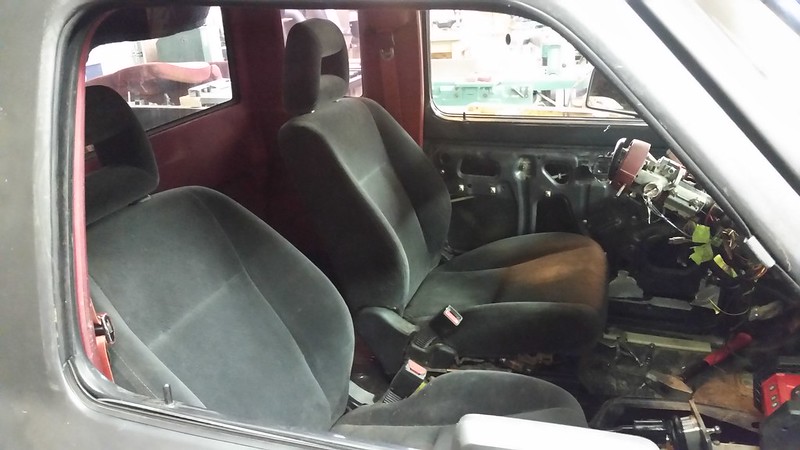
20170423_190855 by Z S, on Flickr


proz07

Member
V8 Engine Swap
Joined
Jul 16, 2016
Messages
150
Reaction score
11
Points
18
Location
TX
Vehicle Year
1988
Make / Model
Ford
Engine Type
V8
Engine Size
5.3l
Transmission
Manual
2WD / 4WD
2WD
Ok at this point i had some life stuff i had to take care of for a month so not a whole lot of time to work on the truck but ordered most of my parts ill be using. at least the big stuff. the little things will still add up another grand i project.

Got my 3 1/2" cro-mo driveshaft with solid U-joints made to fit the t56 to ford 8.8" Havent fit it yet but measuring it out looks perfect to what i needed. Only other issue with this will be cab clearance as the original 2 piece eliminated that issue i may (probably most definitely) need to cut a drive shaft tunnel in the cab of the truck.
20170518_175318 by Z S, on Flickr

And since the OEM guages are junk and wont work for me anyway the simplest way for me to re obtain data readouts was to get a RacePak Dash and harness to interact dirrectly with the efi Source gold box ECU. Pretty sweet setup, fully programmable to all the engine readout data over CANBUS so that should be a quick plug and setup. way less wires and sensors than aftermarket individual gauges.

20170420_234122 by Z S, on Flickr

20170427_115136 by Z S, on Flickr

ANd then picked up some 3/4" aluminum plate to use as a back purge and chill block for the turbo manifold when i get to make that.

20170430_172621 by Z S, on Flickr
20170430_200211 by Z S, on Flickr
20170430_200233 by Z S, on Flickr
20170430_200415 by Z S, on Flickr
20170430_200404 by Z S, on Flickr
 

WiscoRanger

New Member
Joined
Feb 9, 2013
Messages
23
Reaction score
0
Points
0
Vehicle Year
1991
Make / Model
ford
Transmission
Manual
You have the standard truck pan on the motor yet? That may be the one fall back to mine. It's close to the rear beam

Sent from my SM-G920R4 using Tapatalk
 

proz07

Member
V8 Engine Swap
Joined
Jul 16, 2016
Messages
150
Reaction score
11
Points
18
Location
TX
Vehicle Year
1988
Make / Model
Ford
Engine Type
V8
Engine Size
5.3l
Transmission
Manual
2WD / 4WD
2WD
You have the standard truck pan on the motor yet? That may be the one fall back to mine. It's close to the rear beam

Sent from my SM-G920R4 using Tapatalk
Yes I have the standard rear sump truck pan. goes in and out of the truck like butter. its not terribly close on mine. I dont want to put numbers out there but i can get you pics next time the motor is in for mock up. Ill see if i already have pics but i dont think so yet. if you have 2" from top of arm to bottom of pan you should be good with stock bump stops honestly.

let me know what you want to see ill get some pics.

Z
 

WiscoRanger

New Member
Joined
Feb 9, 2013
Messages
23
Reaction score
0
Points
0
Vehicle Year
1991
Make / Model
ford
Transmission
Manual
Yes I have the standard rear sump truck pan. goes in and out of the truck like butter. its not terribly close on mine. I dont want to put numbers out there but i can get you pics next time the motor is in for mock up. Ill see if i already have pics but i dont think so yet. if you have 2" from top of arm to bottom of pan you should be good with stock bump stops honestly.

let me know what you want to see ill get some pics.

Z
I'll get mine in and see if it works. I can tell you mine sits farther forward than what yours does

Sent from my SM-G920R4 using Tapatalk
 

proz07

Member
V8 Engine Swap
Joined
Jul 16, 2016
Messages
150
Reaction score
11
Points
18
Location
TX
Vehicle Year
1988
Make / Model
Ford
Engine Type
V8
Engine Size
5.3l
Transmission
Manual
2WD / 4WD
2WD
I'll get mine in and see if it works. I can tell you mine sits farther forward than what yours does

Sent from my SM-G920R4 using Tapatalk
Yeah the few other conversions I've seen sit farther forward and higher from what i can tell which unless its in a lifted or even OEM height vehicle I dont think the drive line angle is anywhere near acceptable. The other issue is clearance in the front. Since Im putting A/C back in that adds another 1 1/4" of space up front. so fitting a 3" intercooler, 1" condenser, 2 1/2" radiator and then the 3-4" thick E-fans you run out of room real quick. So I picked up all the vette accessories and intake to have the smallest form factor LSX and still need to find room elsewhere.

Heres one if you havent seen it before. https://ls1tech.com/forums/conversions-hybrids/1744879-94-ranger-l33-th350-2wd.html Also for reference how far forward that one is compared to mine is if you look at the adjustment screw/nut for the steering, my pullies are in line with that where his is like 8-10" forward of that.


Z
 
Last edited:

proz07

Member
V8 Engine Swap
Joined
Jul 16, 2016
Messages
150
Reaction score
11
Points
18
Location
TX
Vehicle Year
1988
Make / Model
Ford
Engine Type
V8
Engine Size
5.3l
Transmission
Manual
2WD / 4WD
2WD
OK, after redoing all the picture links on this thread and normal day stuff I didnt have too much time on the truck yesterday. But threw the engine in the mounts again to verify the clearance for the A/C Compressor. And its there but there isnt much room to play with. Ill need to cut and modify the distribution block to re-clock the fittings straight up, and use flex A/C lines since you will have to pull the motor to pull the compressor. But its gonna work.

20170703_171648 by Z S, on Flickr

Theres about 1/8" between the frame rail and housing. Ill have to either notch or cut a hole for the clutch wiring/plug.

20170703_171724 by Z S, on Flickr


And then the motor came back out and I started cutting out the 3/16" plate to re-box the frame and K-member. I'm shooting to get it all welded back in and get the firewall closed up today. Updates to come!

20170703_202932 by Z S, on Flickr

And I now have a new shop helper... meet chicken little.

20170408_114621 by Z S, on Flickr
I think shes gonna be my tuner, lol
20170408_114642 by Z S, on Flickr
 

WiscoRanger

New Member
Joined
Feb 9, 2013
Messages
23
Reaction score
0
Points
0
Vehicle Year
1991
Make / Model
ford
Transmission
Manual
Yeah the few other conversions I've seen sit farther forward and higher from what i can tell which unless its in a lifted or even OEM height vehicle I dont think the drive line angle is anywhere near acceptable. The other issue is clearance in the front. Since Im putting A/C back in that adds another 1 1/4" of space up front. so fitting a 3" intercooler, 1" condenser, 2 1/2" radiator and then the 3-4" thick E-fans you run out of room real quick. So I picked up all the vette accessories and intake to have the smallest form factor LSX and still need to find room elsewhere.

Heres one if you havent seen it before. https://ls1tech.com/forums/conversions-hybrids/1744879-94-ranger-l33-th350-2wd.html Also for reference how far forward that one is compared to mine is if you look at the adjustment screw/nut for the steering, my pullies are in line with that where his is like 8-10" forward of that.


Z
Ya I think mine is about where his is. I have the factory 2.3 radiator in mine yet. There's about an inch from the crank pulley to the radiator. Mine will fit under the stock hood if I trim the tabs off the truck intake. I've thought about getting an ls1 just for the clean look.

Sent from my SM-G920R4 using Tapatalk
 

proz07

Member
V8 Engine Swap
Joined
Jul 16, 2016
Messages
150
Reaction score
11
Points
18
Location
TX
Vehicle Year
1988
Make / Model
Ford
Engine Type
V8
Engine Size
5.3l
Transmission
Manual
2WD / 4WD
2WD
Ok got the frame and K-member boxed in and good to go as well as the driver mount welded in.

20170704_170047 by Z S, on Flickr

Then i moved on to the firewall and with the help of my press brake came out pretty good i think. ill just clean it up with a flap disk and tac the back side as well. after that itll get a coat of seam sealer around the edges and painted. I will block off the far right as well but that will be seam sealed and riveted in over the existing holes.

20170704_140847 by Z S, on Flickr
20170704_140824 by Z S, on Flickr
20170704_140057 by Z S, on Flickr
20170704_140145 by Z S, on Flickr
20170704_140247 by Z S, on Flickr
20170704_170308 by Z S, on Flickr
20170704_174157 by Z S, on Flickr

and since its a short week im hoping to get that finished up and start mocking up the turbo hot side piping this coming weekend.

z
 

proz07

Member
V8 Engine Swap
Joined
Jul 16, 2016
Messages
150
Reaction score
11
Points
18
Location
TX
Vehicle Year
1988
Make / Model
Ford
Engine Type
V8
Engine Size
5.3l
Transmission
Manual
2WD / 4WD
2WD
Finally got the trans tunnel and driveshaft tunnel bent and welded in. thought my angles were going to be good without doing this but once i was able to install the driveshaft it was a no go so im raising the trans by about 1 3/4-2" to get me back into the right angles. and this is how much of the floor pan that had to be modded.

20170709_105152 by Z S, on Flickr
20170709_105507 by Z S, on Flickr

And reinstalling a modded seat support to give the floor regidity once the sheetmetal is replaced.

20170710_193139 by Z S, on Flickr

And starting the sheetmetal fab for the driveshaft hump.

20170715_174223 by Z S, on Flickr

Test fitting and trimming excess

20170715_174117 by Z S, on Flickr

Trans tunnel area, really does make it look cleaner. It wasnt too bad either so hoping new carpet will still cover it.

20170716_120333 by Z S, on Flickr

And welded in and shifter hole recut.

20170716_150316 by Z S, on Flickr
20170716_141100 by Z S, on Flickr

20170716_150405 by Z S, on Flickr

This photo its kinda hard to tell but i ground down the excess sheetmetal and was going to tig the corners up but since the mig added so much i dont think i really need too and may just clean it up and seam seal everything from here.

20170716_150656 by Z S, on Flickr

Hoping to get the trans spacer mount made this week after work and then it will be time to lift the body so i can mode the frame cross brace for the driveshaft as well.... maybe some new cab mounts too they look a little collapsed. after all that and a 2-3 deg axle shim my angles should be less than 1 degree off. lots of work but i suspect a better result in the end. maybe i can start getting the dash back in this weekend and mount the new heat/AC setup.

Z
 

proz07

Member
V8 Engine Swap
Joined
Jul 16, 2016
Messages
150
Reaction score
11
Points
18
Location
TX
Vehicle Year
1988
Make / Model
Ford
Engine Type
V8
Engine Size
5.3l
Transmission
Manual
2WD / 4WD
2WD
OK, finally feel its getting somewhere. removed the cab and replaced the body mounts and braced the mid frame upper cross brace to clear the driveshaft through suspension travel and got it all back on the ground saturday.

20170722_114719 by Z S, on Flickr

And up with enough room to work.

20170722_125449 by Z S, on Flickr

SOme were fighters and others rotted away but all in all not too bad.

20170723_201945 by Z S, on Flickr

20170723_201953 by Z S, on Flickr
20170723_202030 by Z S, on Flickr

ANd cross member cut and braced with a 1/4" plate bent up for rigidity and tigged in.

20170722_154749 by Z S, on Flickr
20170722_154647 by Z S, on Flickr
20170722_154834 by Z S, on Flickr


ANd bent up a quick 3/16" plate for the trans mount spacer. came out to 1 7/8" tall. works perfect and simple from what i was envisioning in prep.

20170722_114705 by Z S, on Flickr

With all that I now have good clearance for the driveshaft and trans. Hell the body mounts gave me an easy 1/2" additional cause they were just clapped out rubber. Then i slapped all the parts in i need to fab stuff around and looks like i actually made progress now.

20170723_200832 by Z S, on Flickr

20170723_200909 by Z S, on Flickr

Oil pan clearance using the stock rear sump truck pan.

20170723_200945 by Z S, on Flickr

firewall clearance for wiring and hoses.

20170723_201024 by Z S, on Flickr

Driver clearance with ac compressor in so i can make sure i have turbo manifold clearance and drain line room.

20170723_201035 by Z S, on Flickr

And driver side. Almost started mocking up the V-band for the crossover. but that will wait till next weekend.

20170723_201048 by Z S, on Flickr

This week if i get the time ill finish welding my seat brackets, firewall blockoff plate needs more fitment and holes in prep, still need to pull my leafsprings back out and flip the sandwich bolt so its long enough to engage the axle with the new 2.5 deg shims i added to help the driveline angle.

Heres the end result for my driveline angles.

2.5 deg engine and pinion, 3.75 deg driveshaft at static weight. so its within 1.25 deg statically and when under load it should come right into alignment to minimize vibe. still need to add either caltraks or probably some cheap craigslist trac bars for 30$ will do nicely and prevent spring wrap at the power levels im shooting for.

IMG_20170723_212913 by Z S, on Flickr


And then since i need more seat time with my tig a little extra practice.... think i might make it a shifter handle or E-brake handle if i relocate the ebrake to a hand brake like i would like to do.

20170723_210959 by Z S, on Flickr

not enough hours in the weekend i tell ya!!!
 

ksack

Active Member
U.S. Military - Active
V8 Engine Swap
Joined
Jun 11, 2016
Messages
161
Reaction score
65
Points
28
Location
NC
Vehicle Year
1986
Make / Model
Ford
Engine Type
V8
Transmission
Automatic
2WD / 4WD
2WD
If you're looking for something adjustable, Assassin Bars by Smith Racecraft are a really nice piece. I just got mine about 2 weeks ago and they are a quality product
 

proz07

Member
V8 Engine Swap
Joined
Jul 16, 2016
Messages
150
Reaction score
11
Points
18
Location
TX
Vehicle Year
1988
Make / Model
Ford
Engine Type
V8
Engine Size
5.3l
Transmission
Manual
2WD / 4WD
2WD
Holy pic size! thought those were 4 links when i took a look through your build before. I gotcha now, but as nice as im sure they are i dont know if i want to go that pricey yet. my tune may change once its ripping up stuff though. ill keep em in mind as this build progresses. thanks

z
 

proz07

Member
V8 Engine Swap
Joined
Jul 16, 2016
Messages
150
Reaction score
11
Points
18
Location
TX
Vehicle Year
1988
Make / Model
Ford
Engine Type
V8
Engine Size
5.3l
Transmission
Manual
2WD / 4WD
2WD
Finished up a little welding on the seat brackets and slapped em back in. doing a bit more tig welding. That way I have less fabric burns and more practice.

20170725_194442 by Z S, on Flickr
20170725_204405 by Z S, on Flickr

And seats are back in! you can see the new location of the shifter so the ergonomics should be closer to that of a compact car.

20170726_062428 by Z S, on Flickr
 

proz07

Member
V8 Engine Swap
Joined
Jul 16, 2016
Messages
150
Reaction score
11
Points
18
Location
TX
Vehicle Year
1988
Make / Model
Ford
Engine Type
V8
Engine Size
5.3l
Transmission
Manual
2WD / 4WD
2WD
OK well wanted to get more into the fab stuff so i can get most of it out of the way. Busted out the plasma and started fabbing my log manifold for the turbo.

20170729_172412 by Z S, on Flickr

Verifying fitment and placement.

20170729_184007 by Z S, on Flickr

Couple pics from fabbing it up. if i do it again eventually ill definitely start different to make it easier but turned out pretty decent.

20170729_191841 by Z S, on Flickr
20170729_203340 by Z S, on Flickr
20170729_203351 by Z S, on Flickr
20170729_204856 by Z S, on Flickr

And then all tacked up and ready to purge and weld.... still need to add the wastegate flange and run but i think ill ponder that one a little more before it place it.

20170729_224357 by Z S, on Flickr
 

Sponsored Ad


Sponsored Ad

Staff online

Members online

Today's birthdays

Member & Vendor Upgrades

For a small yearly donation, you can support this forum and receive a 'Supporting Member' banner, or become a 'Supporting Vendor' and promote your products here. Click the banner to find out how.

Latest posts

Truck of The Month


Shran
April Truck of The Month

Recently Featured

Want to see your truck here? Share your photos and details in the forum.

Follow TRS On Instagram

TRS Events

25th Anniversary Sponsors

Check Out The TRS Store


Sponsored Ad


Sponsored Ad

Sponsored Ad


Amazon Deals

Top