
lancer6x
New Member
- Joined
- Jan 13, 2015
- Messages
- 4
- Reaction score
- 0
- Points
- 0
- Vehicle Year
- 1999
- Make / Model
- Ranger
- Engine Size
- 3.0L
- Transmission
- Automatic
Hey all, I'm brand new at the forums, but a month back I did my first winch install on my ranger. It takes an interesting approach from the installs I've seen before on here so I figured I would share it!
First of all, I did use a welder for this build. My buddy picked up a Hobart 140 so we decided to break it in by taking a trip to Harbor Freight and picking myself up a $50 2500 lb winch on sale!
To start, we took the included winch bracket and picked up a piece of angle iron to fit as a bracket to the front end of the truck. My truck comes with the tow hooks in the front, so we decided to conveniently use those as mounting places. We were even able to reuse their mounting hardware and keep them in place, with the angle iron secured between them and the frame.
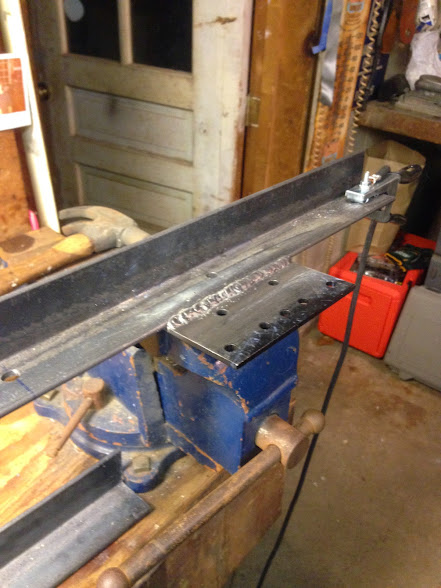
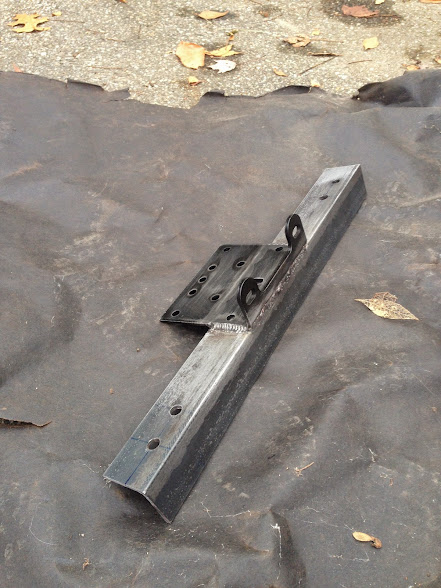
The angle iron was cut to 21 inches, and the tow hooks were removed. Lying under the truck i used a center punch to mark the two holes for each tow hook on the angle iron. This was done with the other surface of the 90 degree angle pressed firmly against the frame, so any pulling forces would be distributed to the frame, rather than solely on the bolts themselves. Then we took our angle iron to the welding bench, and started attaching the winch bracket.
Action shots:

With our fancy new bracket fabricated, we used the included mounting hardware with the winch to secure the fairlead and winch to the bracket.
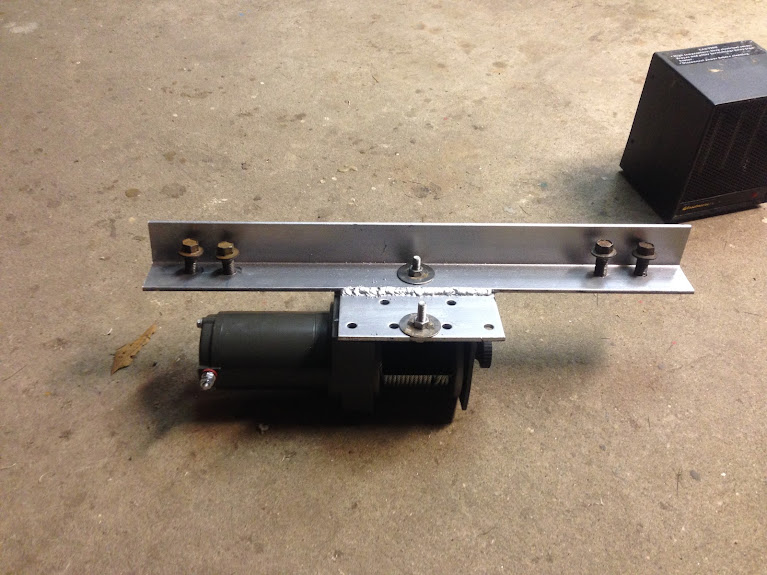
(note the high quality rattle can chrome coat)

And then it was as easy as placing the angle iron bracket on the frame over the holes for the tow hooks (tow hook bolts can be seen in the above pictures) and tightening the bolts back down in to the tow hooks! This sandwiched the angle iron bracket between the frame and the tow hooks, with the vertical part of the angle iron butted firmly against the front portion of the frame to distribute pulling loads effectively.

Slapped that bumper back on and did a little ugly chopping on the plastic to make the winch fit happy and tada!


We figured the angle iron may look a little weak for this application, but considering its attaching a harbor freight $50 winch to an old rusty ford, I think it would be the last thing to fail..
The control box for the winch was screwed in place underneath the plastic air guides behind the grill to keep it from the weather as much as possible and keep it nice and hidden. The winch came with a crappy wireless remote control so we didn't have to worry about routing any cables for the controller. Just hoping I don't lose the remote...
Let me know what you think! So far it has done it's job just fine, and we had a lot of fun with the build.
First of all, I did use a welder for this build. My buddy picked up a Hobart 140 so we decided to break it in by taking a trip to Harbor Freight and picking myself up a $50 2500 lb winch on sale!
To start, we took the included winch bracket and picked up a piece of angle iron to fit as a bracket to the front end of the truck. My truck comes with the tow hooks in the front, so we decided to conveniently use those as mounting places. We were even able to reuse their mounting hardware and keep them in place, with the angle iron secured between them and the frame.
The angle iron was cut to 21 inches, and the tow hooks were removed. Lying under the truck i used a center punch to mark the two holes for each tow hook on the angle iron. This was done with the other surface of the 90 degree angle pressed firmly against the frame, so any pulling forces would be distributed to the frame, rather than solely on the bolts themselves. Then we took our angle iron to the welding bench, and started attaching the winch bracket.
Action shots:
With our fancy new bracket fabricated, we used the included mounting hardware with the winch to secure the fairlead and winch to the bracket.
(note the high quality rattle can chrome coat)
And then it was as easy as placing the angle iron bracket on the frame over the holes for the tow hooks (tow hook bolts can be seen in the above pictures) and tightening the bolts back down in to the tow hooks! This sandwiched the angle iron bracket between the frame and the tow hooks, with the vertical part of the angle iron butted firmly against the front portion of the frame to distribute pulling loads effectively.
Slapped that bumper back on and did a little ugly chopping on the plastic to make the winch fit happy and tada!
We figured the angle iron may look a little weak for this application, but considering its attaching a harbor freight $50 winch to an old rusty ford, I think it would be the last thing to fail..
The control box for the winch was screwed in place underneath the plastic air guides behind the grill to keep it from the weather as much as possible and keep it nice and hidden. The winch came with a crappy wireless remote control so we didn't have to worry about routing any cables for the controller. Just hoping I don't lose the remote...
Let me know what you think! So far it has done it's job just fine, and we had a lot of fun with the build.


