|
|
||||||||||||||
|
|
||||||||||||||
|
|
|
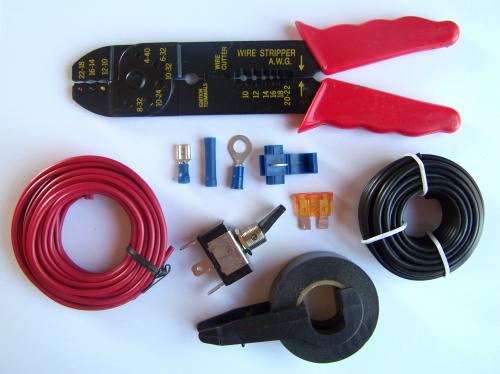
One of the first things that most enthusiasts will add to their vehicle is add accessories such as off-road lights, fans, radios, etc. One of the fastest ways to burn up your vehicle is from an electrical fire caused by improperly wiring those accessories. Generally everything I need are items in this picture below. I only showed one of each style connector. I use whatever amount is needed.
(crimpers, connectors, switch, fuse, wire and electrical tape)
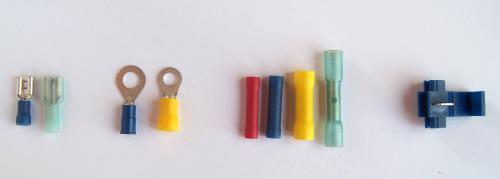
(female connector, shielded female connector, terminal rings, butt end connectors, quick splice) Above is some various wire connectors. Note that the female connector is available with a plastic shield over it. The butt connector on the far right has a heat-shrink on it to weather-proof it. Also note that the connectors are different colors. The red is for 22-18 gauge wires, the blue for 16-14 gauge wires, and the yellow for 12-10 gauge wires. You'll need a bunch of female connectors to attach wires to the switch and make a fuse holder if needed. You can see more about making a fuse holder below. You can use the butt end connectors to attach your wires to the wires on your lights. Some lights come with a male connector on the power wire. In that case, you can use a female connector on your wire to attach it.
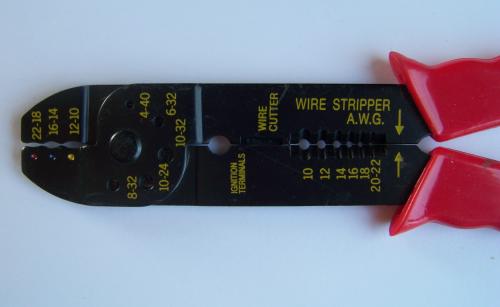
You'll need a wire crimper to do any wiring. You can get them from an automotive parts store, or hardware store fairly cheap. Note how the crimper at the end is color coded to match the wire connectors you'll be using. The crimpers will also have a wire stripping tool to make stripping the insulating off of wires much easier.
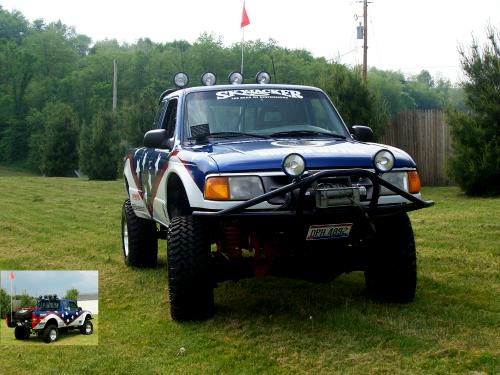
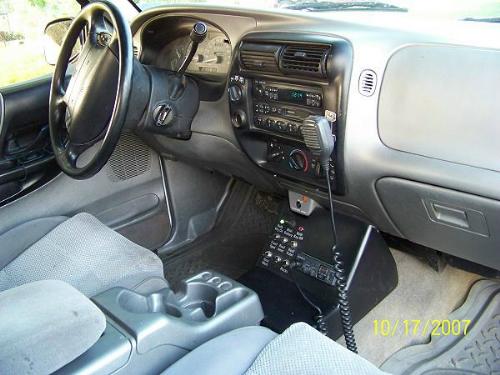
The truck in the photo above is my 1996 Ford Ranger (TRS-2). It features four 100-watt off-road lights on a cage behind the cab, and two 100-watt off-road lights on the front bumper. In addition, I've added a dual battery solenoid and batteries in the bed, and a CB radio in the cab.
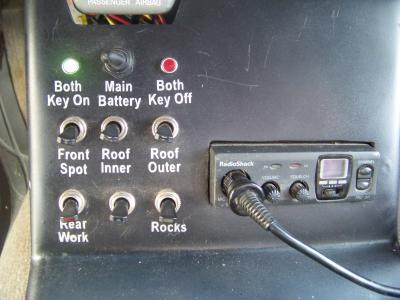
The photo above shows the fiberglass center switch console I built for my Ranger. It houses the switches for my battery solenoid, off-road lights, and my CB radio.
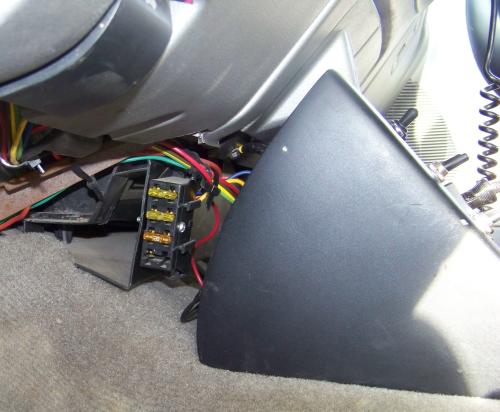
(Closer View) In order to power the switches and CB radio in my console, I added a secondary fuse block behind the console.
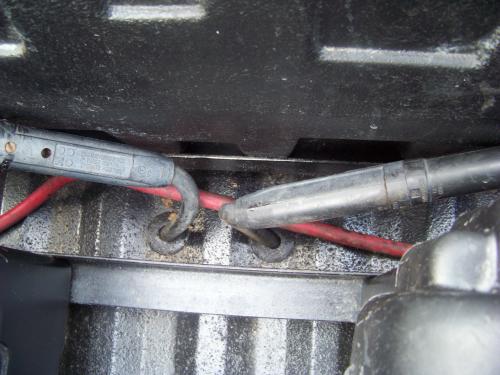
You can find aftermarket fuse blocks at most auto parts stores. I stay away from the buss (cylinder shaped) fuses and stick to the traditional blade type of fuses. The best fuses are the ones that light up when they blow out. There is no guessing which fuse is bad. Just replace the one that's lit up. Where To Put Fuses: As a rule of thumb, you always want a fuse as close to the 12-volt power source as possible. If the wire shorts out between the power source and fuse, there is a good chance that it will start an electrical fire. Keeping the fuse as close to the power source as possible reduces that risk of a fire from a short. Powering The Fuse Block: I know some people will find a way to wire things in to their existing fuse block. I've seen people wrap wire around a fuse and stick it in the fuse block. I've seen some people tap in to an existing wire that already has 12-volts running through it. I think it's best to wire your accessories to a separate fuse block and not mess with existing circuits in your truck. You don't want to short out something vital to your truck when wiring accessories to it. Yes, people have lost 4WD because they shorted out the connection to their electronically shifted transfer cases. No, it wasn't me. The power for my fuse block comes from a terminal on the starter solenoid. I have a fuse close to the terminal on the solenoid.
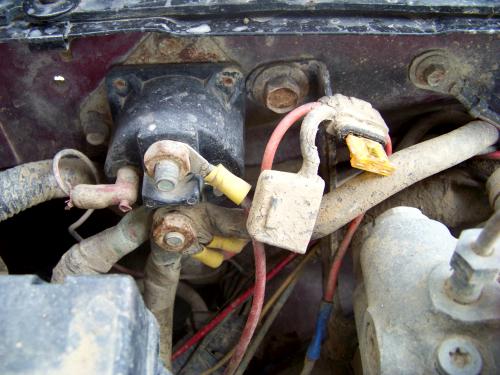
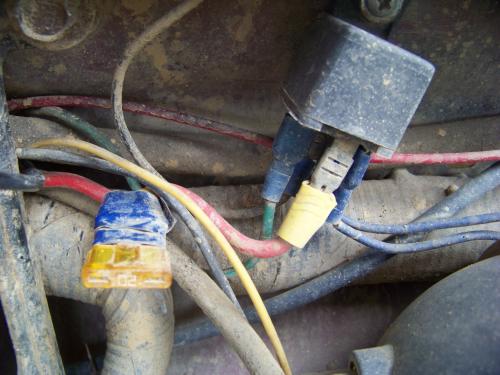
Above you can see the wire coming off of my starter solenoid. It is attached where the batter cable attaches to the solenoid. You can see the fuse in the line. I have the rubber protective cover pulled off so you can see the fuse.
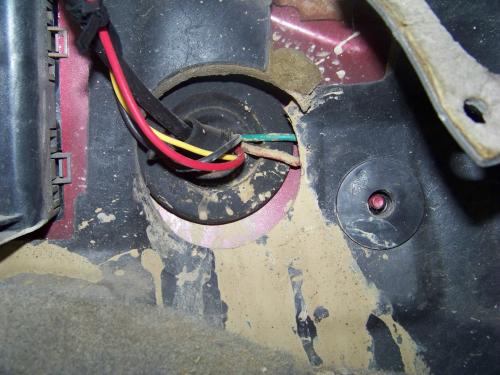
The power wire that I ran from the solenoid runs through a rubber grommet in the firewall and is secured with plastic zip ties to keep it up out of harms way.
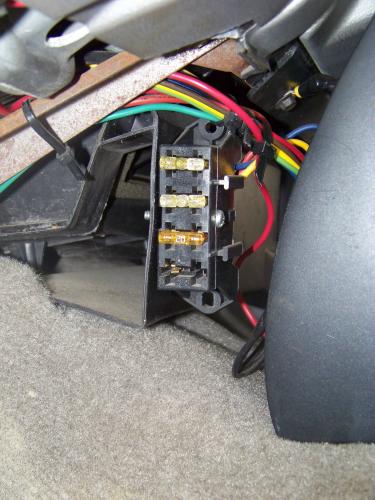
The wire works its way in to the fuse block behind my switch console to power the four fuse terminals. I use three of the four fuse terminals. One of the fuse terminals powers my CB radio and the other two powers the switches in the console. When I flip on the switch for my off-road lights, the power travels from the battery connection on the starter relay through a fuse, continues down the wire through a rubber grommet in the firewall, in to my secondary fuse block, through a fuse, to the switch, and out to the fused relay.
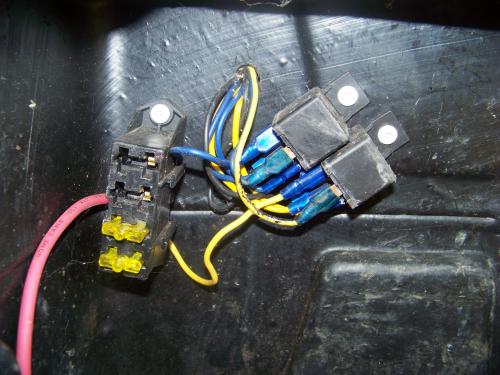
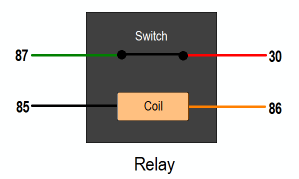
Above is the fuse block and relays for the four off-road lights on the cage in my bed. These relays and fuse block are mounted inside the plastic bed box that's mounted on the cage behind the cab. The heavy gauge red wire is fused off the battery which is mounted outside of the box. Each fuse and relay operates two lights. I use fuses that glow when they burn out, so if the lights blow out, I just open the box and look for the fuse that's glowing. Note that there are blue wires and yellow wires. The two outboard lights and two inboard lights on the cage are wired so each pair has their own relay. I used different color wires for each so I can tell which wires are associated with which lights. This makes it easier to diagnose a problem later. The switch for these relays is on the switch console in the cab. When the switch is turned on, power is sent to the relay where it turns on and powers the lights from the battery in the bed. Initially I had trouble occasionally blowing the fuse to these lights. The problem was solved by using a heavier gauge wire from the battery to the fuse block. Relays: This brings us to the relays. Accessories that draw a lot of power need to be powered by a relay. I'm not going to get in to the technical stuff. The important thing to know is that parts such as fans and off-road lights can pull a lot of amps. Running power through your aftermarket toggle switch to power the lights, fan, etc could eventually overload and melt the switch. The relay itself acts as a switch. The relay has two power feeds coming in to it. One running from a fused connection at the battery, and one coming from the toggle switch in your truck. When you turn on the switch in your truck, the power goes to the relay, activates an electromagnetic switch, which in turn allows the fused power from the battery to go to the off-road lights.
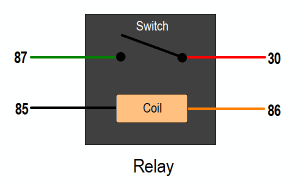
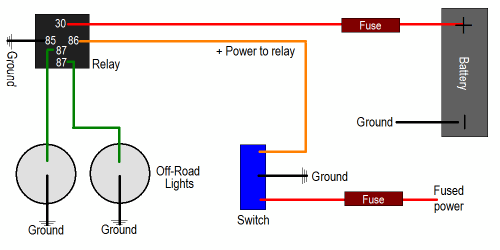
You can find relays at most automotive part stores. Wiring Diagram: Here is how a typical off-road light setup should be wired up.
The diagram above uses a KC 3300 relay. It is a special 5-prong relay that uses (2) #87 prongs. Most other 5-prong relays do not turn on both of these prongs. Generally one is always hot and then the power is switched to the other one when you turn on the relay. Most relays you'll find in a parts store will be 4-prong. Both lights would be wired to #87. Grommets:
Above is a photo of the battery cables I use. They are made from wire I bought at a welding supply store and use welding quick disconnects. You can see in the photo that the wires run through a rubber grommet in the bed:
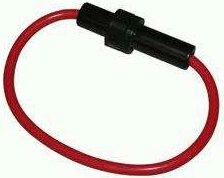
These grommets keep your wires from rubbing against the metal edges and shorting out. I found these larger grommets at a shop for semi trucks. Never run your wire through metal without protecting it with a rubber grommet. You can find them in automotive parts stores and stores like Radio Shack. Fuse Holders: Fuses are a critical part to any electrical system. They'll keep your vehicle from burning up if you have a short - as long as you have them in the right places. As mentioned above, always have them as close to the power source as possible. Basically, there should be a fuse wherever you tap in to the power at. If you ran a wire off of the batter then the fuse should be at the battery. If it's a wire inside the vehicle (example = power wire for cigarette lighter jack) it should already be protected by a fuse in the vehicles fuse block, but it's always best to add a fuse anyways. This way if you have a short, you're just losing power to the item you added, not everything on that circuit. I personally hate the round style fuses & fuse holders:
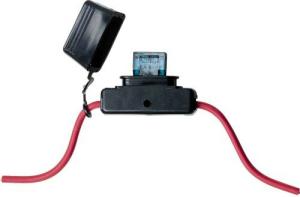
I only use the traditional blade type of fuses and holders:
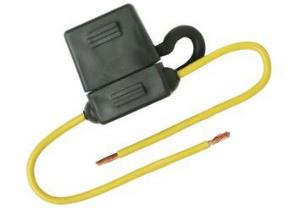
Note that these holders have rubber covers over them to protect them from the elements.
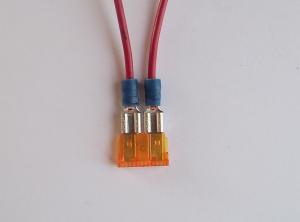
The fuse holder on the left is a quick wire splice style. You put a wire in each end, snap it shut, and stick a fuse in it. The advantage to the blade type of fuses is that your vehicle is already equipped with them and it will be much easier to find a replacement if one blows out on the trail. Making Your Own Inline Fuse Holder: I don't buy inline fuse holders. I generally just make one with some wire and (2) female connectors.
As you can see, two wires with a female connector will slide on to a blade type fuse.
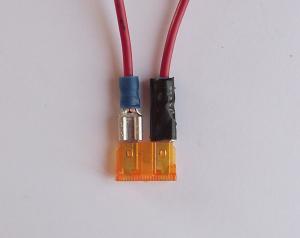
I wrap each connector with electrical tape to isolate it.
Both wires wrapped.
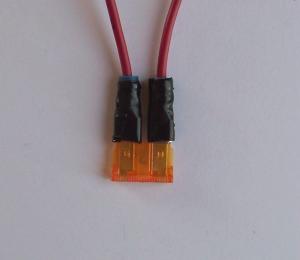
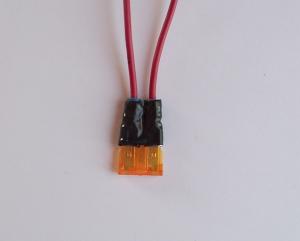
And finally, I wrap electrical tape around both connectors to keep them together.
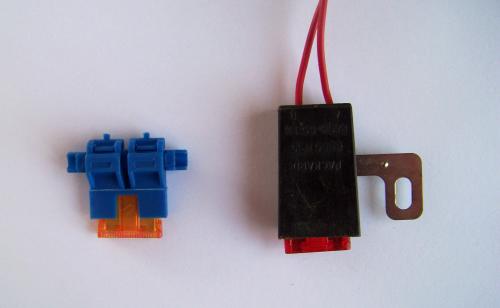
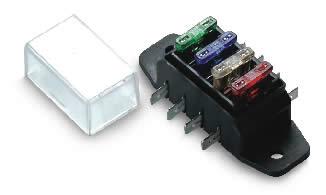
Fuse Blocks: Below are some fuse blocks. I'm using the one to the left. They can be found at automotive parts stores.
Wiring Harnesses:
Remember that most off-road lighting companies offer wiring harnesses to simplify your installation. Conclusion: It's not difficult wiring accessories in to your vehicle. Just make sure to use fuses and keep your wires from rubbing against anything that can create a short. Preventing shorts and protecting your vehicle from an electrical fire should be your primary concern when wiring up accessories. Links: The fuse blocks and holders above were found at: http://www.painlessperformance.com/ http://www.wiringproducts.com/ Wiring harness is from:
|
|
|